
Related Manuals for Phonic ICON300


Summary of Contents for Phonic ICON300
-
Page 1: Manual Del Usuario
ICON300/ICON700 CONTRACTOR POWER AMPLIFIER AMPLIFICADOR DE POTENCIA PARA CONTRATISTA 功率放大器 ICON300 ICON700 User’s Manual Manual del Usuario 使用手册... -
Page 2: Table Of Contents
Diagrama de Bloque......21 线路图......21 Phonic preserves the right to improve or alter any information within this document without prior notice Phonic se reserva el derecho de mejorar o alterar cualquier información provista dentro de este documento sin previo aviso PHONIC保留不预先通知即可更新本文件的权利 V1.0 11/13/2008... -
Page 3: Important Safety Instructions
IMPOrTaNT SafETY INSTruCTIONS The apparatus shall not be exposed to dripping or splashing and that no objects with liquids, such as vases, shall be placed on the apparatus. The MAINS plug is used as the disconnect device, the disconnect device shall remain readily operable. -
Page 4: Introduction
INTrODuCTION PrECauTIONS Congratulations on your purchase of the Phonic Icon 300 or 700 1. When first powering up the amp, keep the amplifier gain power amplifier. The Icon Series is a line of professional power controls all the off, in order to block potentially damaging or amplifiers specifically designed for contracting application. -
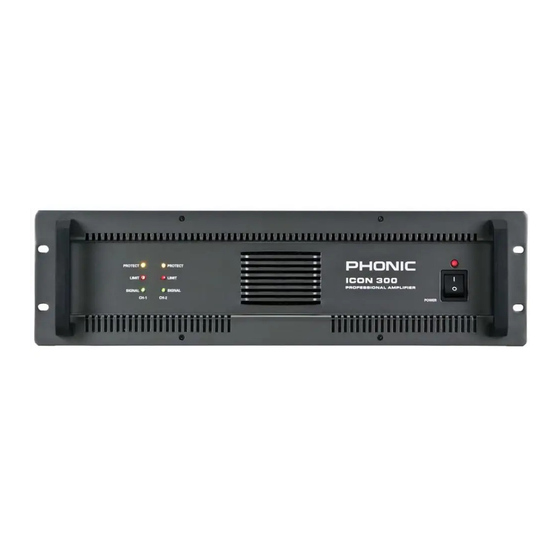
Page 5: Front Panel
rear Panel DescriPtion Front Panel DescriPtion 6. Gain controls 1. Power switch These two knobs and the level controls for channels one and The power ON/OFF switch with an LED indicator. two respectively. Turning clockwise will increase its gain and counter clockwise will decrease its gain. -
Page 6: Connections
banlance barrier Strip Input Con- Direct low impedance: nections Balanced connection - Attach as shown. Connect the (+) wire and ground wire to terminal pins as marked. Output connection for Icon 300/700, bridge mono mode Unbalanced connection - Attach input signal wires as shown. Use the non-inverting (+) input and the ground terminals of the header, and also connect a wire jumper between the inverting (-) input and the ground terminal. -
Page 7: Configuration
Parallel Mono Configuration The "Parallel mode" ties the two channel inputs together so that both are driven by the same signal, without the need for external jumpers or wiring. After the inputs, both channels operate independently. Though they carry the same signal, their gain controls affect only their respective channels, which must be used separately. -
Page 8: Specifications
Specifications ICON 300 ICON 700 Direct Power Out Max.average power at 45Hz-20kHz With 0.1% THD 8 ohm 120W×2 240W×2 4 ohm 200W×2 400W×2 2 ohm,1kHz,1%THD 300W×2 550W×2 Bridged mono 8 ohm,1kHz,1%THD 420W 850W Bridged mono 4 ohm,1kHz,1%THD 540W 1100W Isolated Constant Voltage Out 200V or 140V Bridege 300W 700W... -
Page 10: Introducción
Felicidades por tu compra de los amplificadores de potencia los controles de ganancia completamente hacia abajo, esto Icon 300 o 700 de Phonic. La serie Icon es una línea para evitar posibles daños o sonidos molestos causados por de amplificadores de potencia profesionales diseñados cables defectuosos u otros factores. -
Page 11: Panel Frontal
Panel Trasero 6. Controles de Ganancia Estas dos perillas y los controles de nivel para los canales uno y dos respectivamente. Girar en sentido de las manecillas Panel frontal del reloj incrementara su ganancia, y en sentido contrario la 1. Interruptor de Encendido reducirá. -
Page 12: Conexiones De Entrada Balanceada De
Sensibilidades de Entrada – Las señales de audio de estos tres niveles, producirá una potencia de salida a 8 ohms. Salidas del Transformador de audio ICON300 - 1.02Volts (+2.4dbu) Asegúrate de que la suma de la configuración de potencia de ICON700 - 1.02Volts (+2.4dbu) todos los altavoces no exceda la capacidad de potencia del amplificador. -
Page 13: Audio
Configuración Mono Paralelo La ´´Modalida Paralelo´´, une a dos canales de entrada juntos de tal manera que ambos llevan la misma señal, sin necesidad de jumpers externos o cableados. A pesar de la entrada, ambos canales operar independientemente. Aunque tienen la misma señal, sus controles de ganancia afectan solamente a sus canales respectivos, lo que deberá... -
Page 14: Especificaciones
Especificaciones ICON300 ICON700 Salida de Potencia Directa Potencia Máxima Promedio a 45Hz-20kHz con 0.1% THD 8 ohms 120Wx2 240Wx2 4 ohms 200Wx2 400Wx2 2 ohms, 1kHz, 1%THD 300Wx2 550Wx2 Mono Bridge 8 ohms, 1kHz, 1%THD 420W 850W Mono Bridge 4 ohms, 1kHz, 1%THD... - Page 15 CAUTION RISK OF ELECTRIC SHOCK DO NOT OPEN PHONIC CORPORATION...
-
Page 16: 使用手册
警示 简介 恭喜您购买Phonic Icon 300/700功率放大器.Icon系列是具有 1. 当功率放大器出现过载时,为防止损坏的接线或连接装置对 音质产生影响,增益控制应调至最小.再将增益设置逐渐调 专业高水平的小型功率放大器.这两款各有独立的声道,可驱 至适于正常效果位置上.该提示对于强大功率的放大器来说 动200v,140v,100v,50v或25v的稳压电平.每声道带有的 是必不可少的,因为在任何不留意的情况下都可能损坏音 电源变压器辅助用作两声道之间的音频隔离,使用同一幻象电 箱. 源时,声道之间的影响度能最小化. 2. 连接AC插座时请先确保电压是否符合 3. 音箱输出的触电危险.Icon 300/700带有危险输出电压,为 功能 避免电击,请勿打开前后面板,或在放大器运作时触摸外露的 音箱. 自动高转速散热风散 背板测定增益控制,指示正常与重设状态 立体,桥接或并联运行模式 使用手册说明 XLR和端子台输入 特此向您提醒功率放大器为高电流,强大功率输出的设备,使 用于各种讯号快速便捷的XLR输入和输出 用机器前请仔细阅读产口说明书,并妥善保管;操作此机时请 完全的高温, 短路和DC偏移保护 勿必小心谨慎.... -
Page 17: 前面板
前面板 背板 6.增益控制 1.电源开关 这两个旋钮分别控制声道1和2的电平.向右旋转削减增益,功 电源ON/OFF开关带有LED指示灯. 率过大时音量应打至右端,再逐渐增加音量至理想状态. 2.保护LED指示灯 Icon300/700为确保电路的安全提供了多种保护途径.如果指示 7.声道1/声道2输入(XLR连接端子) 灯照亮,放大器的不正常运作传达警示讯号,此时用户应立即 此输入接受平衡式讯号,连接至混音器,前置放大器等.XLR输 入按以下图标连接. 切断电源输出,直至安全为止. 扬声器保护:继电器可有效防止电源开启后瞬间内过强电源 8.平衡端子台输入 的冲击.打开机器后,保护指示灯照亮几秒钟后自动熄灭, 此连接端子为永久性或长期性安装提供了最佳选择.连接端应 指示续电器已关闭. 旋紧以避免电线松弛而引起短路. 过热保护:放大器过热时,此功能会自动保护电路不被损 坏,直至温度降至安全范围内. 9.声道1/声道2并联送入XLR连接端口 短路保护:音箱输出终端出现短路或阻抗过低,此种情况下 此XLR输出连接端并联至另一ICON或放大器 保护指示灯持续照亮直至安全为止. 10.立体/并联/桥接开关 部分放大器的保护功能需关闭开关,再重新开启设定为安全运 立体模式时,放大器声道1和声道2的讯号分别处理. 作状态. 并行模式时,一路讯号可由声道1和声道2共同处理.讯号送 3.削减指示灯(ICON 300) 入输入声道1或声道2,再送至输出声道1和输出声道2. 消减讯号时即为非线性状态,如空载或波形失真.Icon 300/700 进入或退出削减状态带有可视显示,指示灯闪亮你可能听不到 桥接模式,两声道都可发送一路讯号至声道1(声道2必须是空 有任何失真,如果偶尔闪动并无大碍,持续闪动就应适当地削... -
Page 18: 音频变压器输出
1. 设定为桥接单声道模式 2. 仅连接声道1输入讯号. 3. 运用声道1的增益控制设定电平,指示灯同时显示声道讯号 输入灵敏度:音频讯号电平产生8ohms的最大输出功率. 和削减状态. ICON300 - 1.02Volts (+2.4dbu) ICON700 - 1.02Volts (+2.4dbu) 音频变压器输出 端子台输出连接 请确保使用的音箱功率总和不超过放大器最大功率值.保留 20% 安 全 余 留 指 数 为 最 佳 运 行 状 态 . 例 如 , 放 大 器 功 率 为... - Page 19 并联mono设置 并联单声道模式就是将一AMP内两声道并联成单声道,无需 外接跳线或接线传输同一讯号.虽然这两声道传输同一讯号, 其增益控制只影响各自声道,可单独设定.切勿并联音箱输出 低阻抗和icon放大器的分布式音箱 如 果 您 需 80hms音 箱 和 分 布 接 线 连 至 同 一 放 大 器 声 道 , icon300/700是最适合不过了.多数音频电源都是直接连接音箱 的,因此必须减少分布的接线,通常其总和功率承载不超过放 大器分布接线的1/4. 100 volt高电平输出连接 由已知阻抗计算最大分布线承载量公式 音频变压器输出的桥接单声道设置 MaxTop=[MaxRatedPL-((2×MaxRatedPL)/Impedance)]/2 1. 驱动140或200v线性讯号,放大器应设定为桥接单声道模 式. MaxTop是连接至变压器输出的音箱分接功率的总和 2. 仅连接至声道1输入讯号....
- Page 20 规格 ICON300 ICON700 直接功率输出 最大平均功率 8 ohm 120W×2 240W×2 4 ohm 200W×2 400W×2 2 ohm,1kHz,1%THD 300W×2 550W×2 桥接mono8ohm,1kHZ, 1%THD 420W 850W 桥接mono4ohm,1kHZ, 1%THD 540W 1100W 隔离持续电压输出 200V or 140V桥接 300W 700W 100V or 70V 150W×2 350W×2 120W 280W×2 频率响应 隔离输出...
-
Page 21: Block Diagrams
blOCK DIaGraM DIaGraMa DE blOQuE 线路图 ICON 300 ICON 300/700... - Page 22 ICON 700 ICON 300/700...
- Page 23 Phonic visite nuestra página Phonic distributor. For a list of Phonic web en www.phonic.com y entre a la sección Get www.phonic.com Get Gear distributors please visit our website at Gear. También, puede ponerse en contacto directa- www.phonic.com and click on Get Gear.
Need help?
Do you have a question about the ICON300 and is the answer not in the manual?
Questions and answers