
Subscribe to Our Youtube Channel
Related Manuals for Makita DOUBLE INSULATION 4320


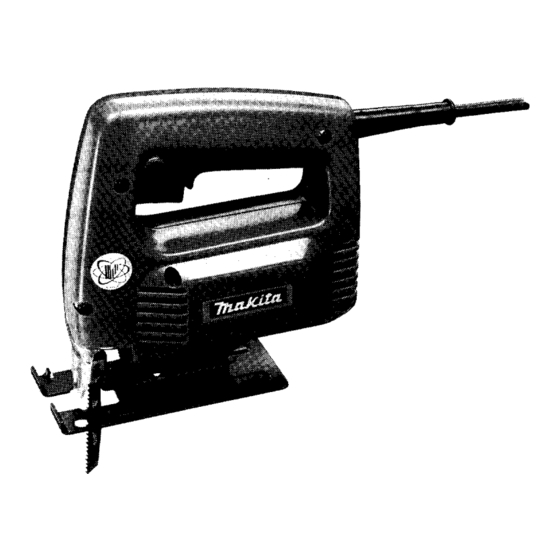
Summary of Contents for Makita DOUBLE INSULATION 4320
- Page 1 MODEL 4320 INSTRUCTION MANUAL DOUBLE INSULA1 'ION SPEC IF I CAT IONS Max. cutting capacities Length of Strokes Overall stroke per minute length weight Steel 1.3 k g 3,200 1/16',) 12") 14") 16-718") 12.9 Ibs)
-
Page 2: Important Safety Instructions
USE RIGHT TOOL. Don't force small tool or attachment t o do the job of a heavy-duty tool. Don't use tool for purpose not intended; for example, don't use circular saw for cutting tree limbs or logs. DRESS PROPERLY. Don't wear loose clothing or jewelry. They can be caught in moving parts. - Page 3 14. REMOVE ADJUSTING KEYS AND WRENCHES. Form habit of checking t o see that keys and adjusting wrenches are removed from tool before turning 15. AVOID UNINTENTIONAL STARTING. Don’t carry tool with finger on switch. Be sure switch is OFF when plugging in. EXTENSION CORDS.
-
Page 4: Additional Safety Rules
VOLTAGE WARNING: Before connecting the tool t o a power source (receptacle, outlet, etc.) be sure the voltage supplied is the same as that specified on the nameplate of the tool. A power source with voltage greater than that specified for the tool can result in SERIOUS INJURY t o the user the tool. - Page 5 The blade installing position varies depending upon the type of blade being used. Install the blade in the proper position as shown in the figures below. Installing position for Makita blades To install the blade, loosen the bolt with the hex wrench. With the blade teeth...
- Page 6 Keep the blade shank flush with the installing position so that it does not ride up on the shoulder of the blade holder. Tighten the bolt securely with the hex wrench. Correct remove the blade, follow the installation procedures in reverse. Using roller With the hex wrench, loosen the bolt which holds the base and retainer.
- Page 7 Switch action Tool speed increased sure on the trigger. To start the tool, simply pull the trigger. Release the trigger t o stop. For continuous operation, pull and then push in the lock button. To stop the tool from the locked position, pull the then trigger fully, release it.
- Page 8 Switch the tool on and lower the back end of the tool slowly, gradually allowing the blade to saw through the workpiece until the base is able to flat on the workpiece. You may then pro- ceed forward with the cut in a normal manner.
- Page 9 Using guide rule (Rip fence) When cutting widths of under 150mm repeatedly, use of the guide rule will assure fast, clean, straight cuts. To attach the guide rule (rip fence), secure the rule holder to the base with the screw (do not tighten).
- Page 10 To attach the circular guide, use the pin, inserting it in the center hole (arrow) and secure it with the threaded knob. Then slide the base of the tool forwards. The circular guide attaches to the base of the tool in the same manner as the guide rule (rip fence).
-
Page 11: Maintenance
Always be sure that the tool i s switched off and unplugged before attempting to perform inspection or maintenance. To maintain product SAFETY and RELIABILITY, repairs, carbon brush inspection and replacement, any other maintenance or adjustment should performed by Makita Authorized or Factory Service Centers, always using Makita replacement parts. - Page 12 ACCESSOR I ES CAUTION: These accessories or attachments are recommended for use with your Makita tool specified in this manual. The use of any other accessories or attachments might present a risk of injury t o persons. The accessories or attachments should be used only in the proper and intended manner.
- Page 13 Blade type Wood and plywood 5 - 6 llllti, thick 1118'' 2-1/8"1 1118" mm thick 1118" 1/8'') (1/8" - 2 - 1 / 8 " ) 5 - 6 N o . 5 ( 1 1 1 6 ' - 1/4 3 - 5 5 "...
- Page 14 Oec.-07-'93 JIG SAW Model 4320 Note: The switch and other part configurations may differ from country to country.
- Page 15 MODEL 4320 ' E M DESCRIPTION Bearing Plane Slider Sleeve Gear Pin 6 Switch Set (With Item 281 Housing Cord Name Plate Ball Beating 607LLB Carbon Brush Complete 55C Terminal Base Field ARMATURE ASSEMBLY IWith Item 12 & Note' The switch and other part specifications ' L LM DESCRIPTION...
-
Page 16: One Year Warranty
MAKITA LIMITED Warranty Policy Every Makita tool is thoroughly inspected and tested before leaving the factory. It is warranted t o be free of defects from workmanship and materials for the period of ONE YEAR from the date of original purchase. Should any trouble develop during this one-year period, return the COMPLETE tool, freight prepaid, t o one of Makita’s Factory or Authorized Service Centers.
Need help?
Do you have a question about the DOUBLE INSULATION 4320 and is the answer not in the manual?
Questions and answers