Advertisement
Quick Links
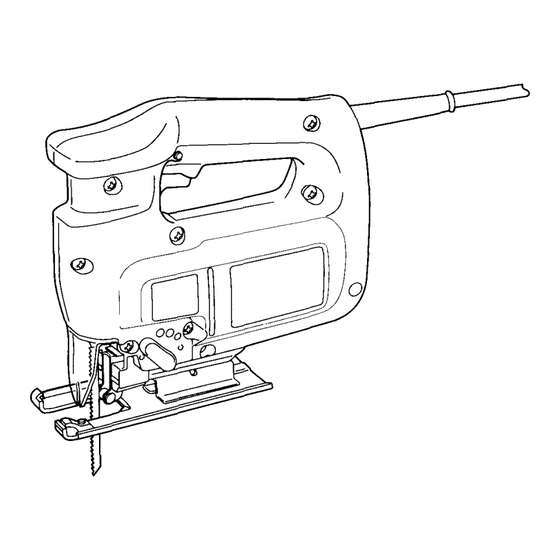
Electronic Jig Saw
Length of
stroke
MODEL 4303C
weight
I
Net
Strokes
Overall
per
minute
length
Max. cutting capacities
Wood
Steel
INSTRUCTION MANUAL
SPECIFICATIONS
2.5 kg
'Omm
I
I ! $ :
1
1,000
-
3,000
I
2 1 9 m m
(1")
1
(2.318")
(8-518")
1
(5.5
Ibs)
26
mm
Manufacturer reserves the right
to
change specifications w i t h o u t notice.
Note: Specifications may differ from country t o country.
WARNING: For your personal safety, READ and UNDERSTAND before using.
SAVE THESE INSTRUCTIONS
FOR
FUTURE REFERENCE.
Advertisement

Related Manuals for Makita 4303C


Summary of Contents for Makita 4303C
- Page 1 WARNING: For your personal safety, READ and UNDERSTAND before using. SAVE THESE INSTRUCTIONS Strokes minute Steel I ! $ : 1,000 3,000 change specifications w i t h o u t notice. FUTURE REFERENCE. MODEL 4303C Overall length weight 2.5 kg 2 1 9 m m (8-518") (5.5 Ibs)
-
Page 2: Important Safety Instructions
USE RIGHT TOOL. Don't force small tool or attachment t o do the job of a heavy-duty tool. Don't use tool for purpose not intended; for example, don't use circular saw for cutting tree limbs or logs. DRESS PROPERLY. Don't wear loose clothing or jewelry. They can be caught in moving parts. - Page 3 REMOVE ADJUSTING KEYS AND WRENCHES. Form habit of checking t o see that keys and adjusting wrenches are removed from tool before turning it on. AVOID UNINTENTIONAL STARTING. Don’t carry tool with finger on switch. Be sure s w i t c h is OFF when plugging EXTENSION CORDS.
-
Page 4: Additional Safety Rules
VOLTAGE WARNING: Before connecting the tool to a power source (receptacle, outlet, etc.) be sure the voltage supplied is the same as that specified on the nameplate of the tool. A power source with voltage greater than that specified for the tool can result in SERIOUS INJURY to the user the tool. - Page 5 Installing Makita jig saw blade CAUTION : Always be sure that the tool is switched off and unplugged before installing or removing the blade. Use the hex wrench to loosen the bolt. With the blade teeth facing forward, insert the blade into the blade holder as far as will go.
- Page 6 Installing universal shank jig saw blade CAUTION : Always be sure that the tool is switched off and unplugged before installing or removing the blade. If the universal blade clamp i s used, you can use blades of other makes which have a universal shank like the one shown in the figure, with a blade width of 6.35 mm...
- Page 7 Straight line or orbital cutting action Conventional jig saws cut with line action, that is, the blade moves only up and down in a straight line. Your saw also cuts in this manner but, for softer workpieces, an orbital cutting action can be selected.
- Page 8 Speed change To adjust the tool speed, turn the speed change dial. The tool speed can be adjusted between 1,000 and 3,000 strokes per minute. The reference table on the right denotes the relationship between the number tings on the speed change dial and the approximate strokes per minute a t that setting.
- Page 9 Operation Turn the tool on and wait until the blade attains full speed. Then rest the base flat on the workpiece and gently move the tool forward along the previously marked cut- ting line. When cutting curves, advance the tool very slowly. CAUTION Failure to hold the tool base flush with the workpiece may cause blade breakage.
- Page 10 Switch the tool on and lower the back end of the tool slowly, gradually allowing the blade to saw through the workpiece until the base i s able to s i t flat on the workpiece. You may then pro- ceed forward with the cut in a normal manner.
- Page 11 Using guide rule (Rip fence) When cutting widths of under 150 repeatedly, use of the guide rule will assure fast, clean, straight cuts. To attach the guide rule (rip fence), secure the rule holder to the base with the screw (do not tighten).
- Page 12 To attach the circular guide, use the pin, inserting in the center hole (arrow) and secure it with the threaded knob. Then slide the base of the tool forwards. The circular guide attaches to the base of the tool in the same manner as the guide rule (rip fence).
-
Page 13: Maintenance
ACC ESSO R I ES C A U T I O N : These accessories o r attachments are recommended f o r use w i t h y o u r Makita tool specified in this manual. The use any other accessories o r attachments m i g h t present a risk o f injury accessories o r attachments should be used o n l y in the proper and intended manner. - Page 14 Jig saw blade 11/16’ - 60 thick 15/32’’ 30 mm thick 15/32’’ ll/8” 30 mm thick 8-11 l1/8” 1-1/8”1 113/64” 2-3/8”) 60 mm thick 6-13 15/32” 2-3/8‘) 15/32” 30 mm thick 6-14 15/64‘’ 1-1/8”1 15/64‘’ 8-15 11/8” l-l/8”) 11/8‘ 60 mm thick (13/64“...
- Page 15 May-19--'94 ELECTRONIC JIG SAW Model 4303C Note: The switch and other part configurations differ from country to country.
- Page 16 The tool has been abused, misused or improperly maintained; alterations have been made to the tool. IN NO EVENT SHALL MAKITA BE LIABLE FOR ANY INDIRECT, INCIDENTAL SEQUENTIAL DAMAGES FROM THE SALE APPLIES BOTH DURING AND AFTER THE TERM O F THIS WARRANTY.
Need help?
Do you have a question about the 4303C and is the answer not in the manual?
Questions and answers