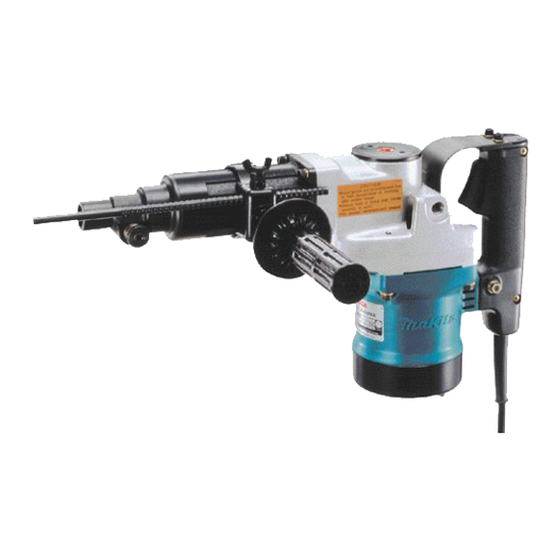
Makita HR3851 Instruction Manual
38 mm (1 - 1/2”) rotary hammer
Hide thumbs
Also See for HR3851:
- Parts breakdown (4 pages) ,
- Instruction manual (29 pages) ,
- Instruction manual (16 pages)
Summary of Contents for Makita HR3851
- Page 1 Rotary Hammer 38 mm (1 - 1/2”) MODEL HR3851 003098 I N S T R U C T I O N M A N U A L WARNING: For your personal safety, READ and UNDERSTAND before using. SAVE THESE INSTRUCTIONS FOR FUTURE REFERENCE.
-
Page 2: Specifications
Never remove the grounding prong or modify the plug in any way. Do not use any adaptor plugs. Check with a qualified electrician if you are in doubt as HR3851 38 mm (1-1/2”) 118 mm (4-5/8”) 240/min. 2,900 445 mm (17-1/2”) -
Page 3: Personal Safety
whether outlet grounded. If the tools should electrically mal- function or break down, grounding provides a low resistance path to carry electricity away from the user. 5. Avoid body contact with grounded sur- faces such as pipes, radiators, ranges and refrigerators. - Page 4 model. Accessories that may be suitable for one tool, may become hazardous when used on another tool. SERVICE 23. Tool service must be performed only by qualified repair personnel. Service or main- USE PROPER EXTENSION CORD: Use only three-wire extension cords that have three- prong grounding-type plugs and three-pole receptacles that accept the tool's plug.
-
Page 5: Specific Safety Rules
An adapter Fig. “B” and “C” is available for connecting Fig. “A” type plugs to two-prong receptacles. The green-colored rigid ear, lug, etc., extending from the adapter must be con- nected to a permanent ground, such as a properly grounded outlet box. Grounding Blade Fig. - Page 6 8. Hold the tool firmly with both hands. 9. Keep hands away from moving parts. 10. Do not leave the tool running. Operate the tool only when hand-held. 11. Do not point the tool at any one in the area when operating.
-
Page 7: Functional Description
FUNCTIONAL DESCRIPTION 003111 1. Switch trigger 003127 1. Change lever 2. For hammering only 3. For rotation with hammering CAUTION: • Always be sure that the tool is switched off and unplugged before adjusting or checking function on the tool. Switch action CAUTION: •... - Page 8 ASSEMBLY 003146 1. Side grip 2. Grip base 003149 003153 1. Red dot (Tool holder) 2. Rde dot (Tool retainer) 003154 1. Tool retainer 2. Turn 180° 3. Press in CAUTION: • Always be sure that the tool is switched off and unplugged before carrying out any work on the tool.
-
Page 9: Depth Gauge
003183 1. Clamp screw 2. Depth gauge 3. Grip base OPERATION 003199 002449 1. Blow-out bulb Depth gauge The depth gauge is convenient for drilling holes of uniform depth. Insert the depth gauge into the hole in the grip base. Adjust the depth gauge to the desired depth and then tighten the clamp screw to secure the depth gauge. - Page 10 003205 003209 1. Core bit 2. Adapter 003210 1. Center bit 003211 Chipping/Scaling/Demolition Set the change lever to the Hold the tool firmly with both hands. Turn the tool on and apply slight pressure on the tool so that the tool will not bounce around, uncontrolled.
-
Page 11: Maintenance
003213 003215 1. Rod 003216 1. Core bit 2. Adapter 003211 MAINTENANCE To remove the core bit, follow the procedures 1 or 2. 1. Rotate the change lever to the the core bit on the concrete and turn the tool on. The core bit will come loose from the hammering action. -
Page 12: Replacing Carbon Brushes
Run the tool for several minutes to warm it up. Switch off and unplug the tool. Remove the crank cap using a Makita lock nut wrench 35 (optional accessory). Rest the tool on the table with the bit end pointing upwards. This will allow the old grease to collect... - Page 13 ACCESSORIES Wipe out the old grease inside and replace with a fresh grease (60 g; 2 oz). Use only Makita genuine hammer grease (optional accessory). Filling with more than the spec- ified amount of grease (approx. 60 g; 2 oz) can cause faulty hammering action or tool failure.
- Page 14 Memo...
- Page 15 Memo...
- Page 16 Memo...
- Page 17 First-Class Postage Required Post Office will not deliver without proper postage. Makita U.S.A., Inc. 14930 Northam Street La Mirada, CA 90638-5753 Fold...
- Page 18 Paste 3. How did you learn about this product: Magazine From Dealer Newspaper Store Display Catalog 4. Most favored points are: Design Features Size Price Makita Brand MODEL NO. YEAR SERIAL NO. PHONE 20-29 30-39 40-49 Paste Paste Radio Exhibition...
-
Page 19: Factory Service Centers
Date Purchased When you need service: Send complete tool (prepaid) to one Dealer’s Name & Address of the Makita Factory Service Centers listed, or to an Authorized Makita Service Center. Be sure to attach a letter to the outside of Model No. - Page 20 MAKITA LIMITED ONE YEAR WARRANTY Warranty Policy Every Makita tool is thoroughly inspected and tested before leaving the factory. It is warranted to be free of defects from workmanship and materials for the period of ONE YEAR from the date of original purchase.


Need help?
Do you have a question about the HR3851 and is the answer not in the manual?
Questions and answers