
Related Manuals for Elumen8 Liberty 1T36 Battery Uplighter


Summary of Contents for Elumen8 Liberty 1T36 Battery Uplighter
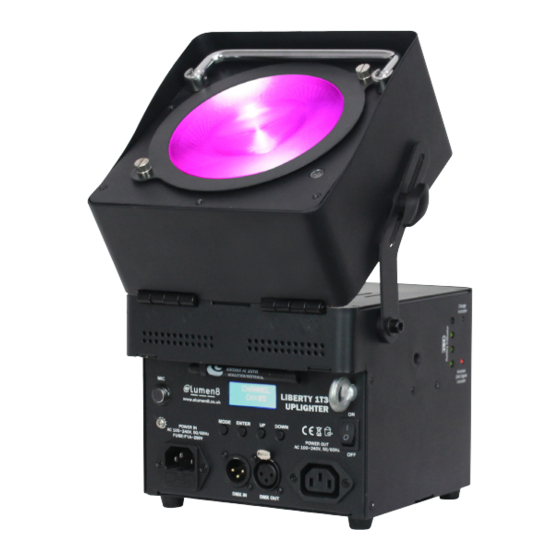
- Page 1 Liberty 1T36 Battery Uplighter 1 x 36W COB tri-colour LED (RGB) User Manual Convection Optional cooled, IR remote no fan! Order ref: LEDJ90B Order codes: ELUM117 - Black housing ELUM117A - White housing...
-
Page 2: Safety Advice
• Do not expose to flammable sources, liquids or gases. immediately. Pack the unit securely (preferably in the original packing material), and return it to your Pro Light • Always disconnect the power from the mains when dealer for service. equipment is not in use or before cleaning! Only handle the power-cable by the plug. Never pull out the plug by • Only use fuses of same type and rating. pulling the power-cable. • Repairs, servicing and power connection must only be • Make sure that the available voltage is between carried out by a qualified technician. THIS UNIT CONTAINS 100~240V, 50/60Hz. NO USER SERVICEABLE PARTS. • Make sure that the power cable is never crimped or • WARRANTY: Two years from date of purchase. damaged. Check the equipment and the power cable • NOTE: Batteries are classed as consumable items which periodically. are covered for 90 days from date of purchase. OPERATING DETERMINATIONS If this equipment is operated in any other way, than those described in this manual, the product may suffer damage and the warranty becomes void. Incorrect operation may lead to danger e.g: short-circuit, burns and electric shocks etc. Do not endanger your own safety and the safety of others! Incorrect installation or use can cause serious damage to people and/or property. www.elumen8.co.uk Liberty 1T36 Battery Uplighter User Manual... - Page 3 1688 Battery recharge time 5 hours 110° - Lux Power supply 100~240V, 50/60Hz Dimensions 265 x 220 x 190mm 20° 110° Weight 5.8kg Order code ELUM117 - Black housing Order code ELUM117A - White housing *battery life subject to usage and the environment where the fixture is situated. 220mm 190mm www.elumen8.co.uk Liberty 1T36 Battery Uplighter User Manual...
-
Page 4: Technical Specifications
09 - On/off buttons 14 - Charge Indicator 04 - Fuse F2A 250V 10 - LCD display 15 - Wireless DMX signal indicator 05 - DMX in socket 11 - Wireless DMX antenna 06 - DMX out socket In the box: 1 x fixture, 1 x IEC mains cable & 1 x user manual Operating instructions Please note: This fixture is not supplied in a fully charged state, and must be charged for up to 24 hours before operation. Angle adjustment: Use the tightening knobs on either side of the fixture to adjust the angle from 0 - 90°. www.elumen8.co.uk Liberty 1T36 Battery Uplighter User Manual... - Page 5 000-255 Green 000-255 Green (0-100%) 000-255 Blue 000-255 Blue (0-100%) 000-255 Master dimmer (0-100%) 000-000 ON 001-005 Sound control (7 colours) 006-010 Dimmer 011-255 Strobe DMX address examples: To set the DMX address, press the “MENU” button on the rear of the unit to show “DMX MODE” on the LCD display. Now press the “ENTER” button and use the “UP” and “DOWN” buttons to choose between the adresses 000-512. Press the “ENTER” button to confirm the setting. To exit out of any of the above options, press the “MODE” button. Colour mode: To access the static colour mode, press the “MODE” button on the rear of the unit to show “1. STATIC” on the LCD display. Then press the “ENTER” button and use the “UP” and “DOWN” buttons to change between static colour, colour change (7 colour), colour change (3 colour) and colour fade modes. Press the “ENTER” button to confirm the setting. Now use the “UP” and “DOWN” buttons to select the RGB brightness and F (flash) speed. Press the “ENTER” button to confirm the setting. To exit out of any of the above options, press the “MODE” button. www.elumen8.co.uk Liberty 1T36 Battery Uplighter User Manual...
-
Page 6: Master/Slave Mode
Master/slave mode: To set the master unit, press the “MODE” button on the rear of the master unit then select your desired program (sound active, auto, static colour, colour fade or one of the built-in programs). To set the other units in slave mode, press the “MODE” button on the rear of the unit to show “SLAVE MODE” on the LED display and press the “ENTER” button to confirm the setting. The unit will now run in sequence with the master unit. To exit out of any of the above options, press the “MODE” button. Please ensure that all slave units are set to the same DMX channel mode as the master unit. Sound active mode: To access the sound active mode, press the “MODE” button on the rear of the unit to show “SOUND SENS” on the LCD display. Now press the “ENTER” button and use the “UP” and “DOWN” buttons to set the sound sensitivity level from 00 - 31. Press the “ENTER” button to confirm the setting. To exit out of any of the above options, press the “MODE” button. Dimmer response: To access dimmer response, press the “MODE” button on the rear of the unit to show “DIMMER RESPON” on the LCD display. Now press the “ENTER” button and use the “UP” and “DOWN” buttons to select between “DIMMER RESPON01” (LED dimming), or “DIMMER RESPON02” (halogen dimming). Press the “ENTER” button to confirm the setting. To exit out of any of the above options, press the “MODE” button. Power mode: (this gives you the option to have the unit illuminated or off whilst charging) To access the power mode, press the “MODE” button on the rear of the unit to show “POWER” on the LCD display. Now press the “ENTER” button and use the “UP” and “DOWN” buttons set to ON or OFF. ON - the unit will be illuminated whilst charging OFF - the unit will be off whilst charging Press the “ENTER” button to confirm the setting. To exit out of any of the above options, press the “MODE” button. www.elumen8.co.uk Liberty 1T36 Battery Uplighter User Manual... - Page 7 Battery reference information: When the battery charge indicator LED is illuminated red, the fixture is recharging. When the battery charge indicator LED is illuminated green, the fixture is charged. When the battery life indicator LED(s) are illuminated green, the following rules apply: 4 indicators - 100% charged 3 indicators - 75% charged 2 indicators - 50% charged 1 indicator - 25% charged The recharging time for the battery is 5 hours. The battery usage time from fully charged is dependant on the mode and brightness of the fixture. For more information please see the specifications table on page 3. Wireless DMX: To activate the wireless DMX receiver press the mode button until the display shows “Wireless Off”, press “ENTER” to access the menu and then “UP/DOWN” to select “Wireless On”. When the wireless DMX signal indicator LED is illuminated red, the wireless receiver is not active. When the wireless DMX signal indicator LED is flashing red and green, the wireless DMX receiver is on and is trying to connect to the wireless DMX transmitter. When the wireless DMX signal indicator LED is green, the connection to the wireless DMX transmitter is good. When the wireless DMX signal indicator LED is green (on) and red (flashing) it means the connection is good, but the fixture is not receiving the DMX signal from the transmitter. www.elumen8.co.uk Liberty 1T36 Battery Uplighter User Manual...
-
Page 8: Important Notes
• N ow press the “5” button, and all of the To set the DMX address “245”; • Press the “S” button, the red LEDs will come on, R, G, B LEDs will come on, the third digit 5 has been set. The full DMX address setting you can now start to set the DMX address • Now press the “2” button, the green LEDs will has been changed • Now press the “DMX MODE” button to save come on, this means the first digit has been the new address into the memory set at 2 • N ow press the “4” button, the blue LEDs will come on, this means the second digit has been set at 4 Important notes: • Set the DMX address on each fixture before plugging into the DMX controller • The IR remote is cannot be used when the fixture(s) are being controlled by a DMX controller • The maximum transmitter distance is 10m - Please make sure that you have the IR remote aimed directly at the front panel of each fixture to be programmed • If you do not press the “DMX MODE” button after you have changed the DMX address, when you power down the fixture it will lose the address you have set www.elumen8.co.uk Liberty 1T36 Battery Uplighter User Manual... -
Page 9: Dmx Setup
DATA cable (DMX cable) requirements (for DMX operation): This fixture can be controlled via DMX-512 protocol. The DMX address is set on the back of the unit. Your unit and your DMX controller require a standard 3-pin XLR connector for data input/output, see image below. Further DMX cables can be purchased from all good sound and lighting suppliers or Pro Light Concepts dealers. Please quote: CABL10 – 2m CABL11 – 5m CABL12 – 10m Note: DMX cable must be daisy chained and cannot be split. www.elumen8.co.uk Liberty 1T36 Battery Uplighter User Manual... -
Page 10: Line Termination
3-pin XLR (socket) Pin 1: GND (screen) Pin 1: GND (screen) Pin 2: Signal (-) Pin 2: Signal (-) Pin 3: Signal (+) Pin 3: Signal (+) Pin 4: N/C Pin 5: N/C www.elumen8.co.uk Liberty 1T36 Battery Uplighter User Manual... -
Page 11: Optional Accessories
AUTO RUN SELECT PROG FLASH SPEED S PR DMX MODE SOUND ACTIVE SLAVE SET ADDR 1 2 3 4 5 6 0 7 8 9 Optional IR remote Order code: LEDJ90B To keep up-to-date on the latest accessories and product range additions please visit www.prolight.co.uk www.elumen8.co.uk Liberty 1T36 Battery Uplighter User Manual... -
Page 12: Weee Notice
WEEE notice Correct Disposal of this Product (Waste Electrical & Electronic Equipment) (Applicable in the European Union and other European countries with separate collection systems) This marking shown on the product or its literature, indicates that it should not be disposed of with other household wastes at the end of its working life. To prevent possible harm to the environment or human health from uncontrolled waste disposal, please separate this from other types of wastes and recycle it responsibly to promote the sustainable reuse of material resources. Household users should contact either the retailer where they purchased this product, or their local government office, for details of where and how they can take this item for environmentally safe recycling. Business users should contact their supplier and check the terms and conditions of the purchase contract. This product should not be mixed with other commercial wastes for disposal. www.elumen8.co.uk Liberty 1T36 Battery Uplighter User Manual...
Need help?
Do you have a question about the Liberty 1T36 Battery Uplighter and is the answer not in the manual?
Questions and answers