
Related Manuals for TYM T603


Summary of Contents for TYM T603
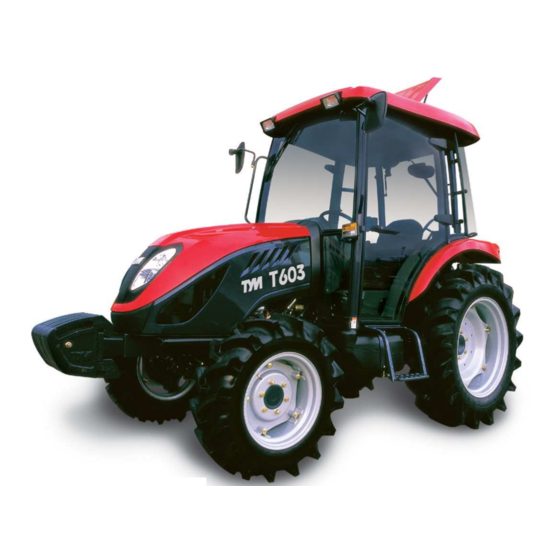
- Page 1 OPERATOR’S MANUAL TRACTORS (T603) #604-9, Namsan-dong, Changwon-city, Kyungnam, Korea ■ ■ ■ ■ TEL:82-55-279-4379, FAX:82-55-279-4447■ ■ ■ ■ www.tym.co.kr...
-
Page 3: Limited Warranty
PERKINS FEDRAL AND CALIFORNIA EMISSION SYSTEM LIMITED WARRANTY Perkins warrants to the initial owner and subsequent owners of a certified non road diesel engine (powering non road machines and equipment) that such engine is: 1. Designed, built and equipped so as conform, at the time of sale, with all applicable regulations adopted by the United States Environmental Protection Agency (EPA), the California Air Resources Board (CARB) 2. - Page 4 Responsibilities and Limitations The warranty is subject to the following: Perkins Responsibilities During the warranty period, if a defect in material or workmanship of an emission related part or component is found, Perkins will provide: • New, remanufactured or replacement parts and / or components, approved pursuant to EPA Regulations, required to correct the defect.
- Page 5 Perkins is responsible for resultant damage to an emission related part or component resulting from: • Any application or installation Perkins deem improper. • Attachments, accessory items or parts not sold nor approved by Perkins. • Improper engine maintenance, repair or abuse. •...
- Page 6 FOREWARD Thank you very much for purchasing our tractor, which, we feel sure, will give you many years of troubling the service. The introduction in this manual set out the correct manner of operating, maintaining and checking the tractor to ensure long-term durability. Please ensure correct operation of the tractor as incorrect operation can cause substantial mechanical damage as well as cause accidents with the associated injuries.
-
Page 7: Table Of Contents
CONTENTS Sr. No. Description Page No. 1. Tractor Identification -------------------------------------------------------------------------------------------- 2. About this manual ------------------------------------------------------------------------------------------------ 3. Introduction & description ---------------------------------------------------------------------------------- 8~10 4. Owner assistance ------------------------------------------------------------------------------------------------ 5. ROPS (Roll over protection structures) ------------------------------------------------------------------ 12~14 6. Safety instructions, Do’s & Don’ts ---------------------------------------------------------------------- 15~27 7. -
Page 8: Tractor Identification
TRACTOR IDENTIFICATION The engine number is stamped on the left hand side of the engine block. The chassis number is shown on the left hand side of the tractor as shown in the drawing. Stamped position of the Engine type or Number Stamped position of the chassis number Stamped position of the chassis number Illustration A... -
Page 9: About This Manual
This manual has been prepared to assist you in following/adopting the correct procedure for running-in operation and maintenance of your new Tong Yang Moolsan CO.,LTD (Here in after refer to TYM) Tractor. Your Tractor has been designed and built to give maximum performance, with good fuel economy and ease of operation under a wide variety of operating conditions. -
Page 10: Introduction & Description
Introduction & Description TRACTOR AN INTRODUCTION The word, ’Tractor’ has been derived from ‘Traction’ which means pulling. A Tractor is required to pull or haul an equipment, implement or trolley which are coupled to the Tractor body through suitable linkage. A Tractor can also be used as a prime mover as it has a power outlet source which is also called Power Take or PTO shaft. - Page 11 4WD mechanism with level gears provides wider steering and greater durability. ■ ■ ■ ■ Engine The tractors are fitted with fuel efficient Turbo charged engines with 4 cylinders of T603 designed by AVL Caterpillar ■ ■ ■ ■ Clutch and Transmission A single plate dry clutch(10.83″diameter) is used on these tractors.
- Page 12 ■ ■ ■ ■ Steering It consists of Hydrostatic Power steering system, which has a hydraulic cylinder and tandem type hydraulic pump ■ ■ ■ ■ Electrical System A 12 Volt Lead Acid Propylene Battery is used to activate the Engine through the Starter Motor and the Electrical system comprising Horn, Head Lamp.
-
Page 13: Owner Assistance
OWNER ASSISTANCE We at TYM CO.,LTD and your Dealer/Distributor wants you to be completely satisfied with your investment. Normally any problems with your equipment will be handled by your Dealer/Distributor’s Service Departments, however, misunderstanding can occur. If you feel that your problem has not been handled to your satisfaction, we suggest the following. -
Page 14: Rops (Roll Over Protection Structures)
The objective of the frame or cab structure is to protect the operator in the event of a roll over and they are designed to support the entire weight of the tractor in that event. Each TYM ROPS frame or cab structure is designed and has been tested to meet industry and or Government standards. - Page 15 Damage of the ROPS If the tractor has rolled over or the ROPS has damaged (such as striking an overhead object during transport), It must be replaced to provide the original protection. After an accident, check for damages to the 1.ROPS. 2.Seat 3.seat belt & seat mountings. Before you operate a Tractor, replace all damaged parts.
- Page 16 Fig.1 NOTE: Do not use solvents to clean the seat. Use warm water with a little detergent added. Before operating a Tractor it is important to adjust the seat to the most comfortable position & check whether it is properly locked in its position. Figure 1 identifies the seat fitted to your Tractor. FOR Sliding seat To select Seat position, move Adjusting lever and slide Seat closer to or away from Dash panel and controls.
-
Page 17: Safety Instructions, Do's & Don
SAFETY INSTRUCTIONS RECOGNIZE SAFETY INFORMATION This symbol means ATTENTION! YOUR SAFETY IS INVOLVED. The message that follows the symbol contains important information about safety. Carefully read the message SIGNAL WORDS. DANGER A signal word―DANGER, WARNING OR CAUTION―is used with safety alert symbol. DANGER identifies the most serious WARNING hazards. - Page 18 USE OF ROPS AND SEAT BELT The Roll Over Protective Structure(ROPS) has been certified to industry and/or government standards. Any damage or alternation to the ROPS, mounting hard-ware, or seat belt voids the certification and will reduce or eliminate protection for the operator in the event of a roll-over. The ROPS, mounting hardware, and seat belt should be checked after the first 100 hours of Tractor and every 500 hours thereafter for any evidence of damage, wear or cracks.
- Page 19 HANDLE FUEL SAFELY-AVOID FIRES Handle fuel with care; it is highly flammable. Do not refuel the Tractor while smoking or near open flame or sparks. Always stop engine before refueling Tractors. Always keep your tractor clean of accumulated grease, and debris. Always clean up spilled fuel.
- Page 20 AVOID HIGH-PRESSURE FLUIDS Escaping fluid under pressure can penetrate the skin causing serious injury. Keep hands and body away from pinholes and nozzles, which eject fluids under high pressure. If ANY fluid is injected into the skin. Consult your doctor immediately. PREVENT BATTERY EXPLOSIONS Keep sparks, lighted matches, and open flame away from the top of battery.
- Page 21 WORK IN VENTILATED AREA Do not start the Tractor in an enclosed building unless the doors & windows are open for proper ventilation, as tractor fumes can cause sickness or death. If it is necessary to run an engine in an enclosed area remove the exhaust fumes by connecting exhaust pipe extension.
- Page 22 SAFE OPERATION OF YOUR TRACTOR The manufacturer of your tractor has made every effort to make it as safe as is humanly possible. Beyond this point it is the responsibility of the operator to avoid accidents and we ask that you read and implement our suggestions for your safety.
- Page 23 SAFETY TIPS DURING MAINTENANCE 1. At least on a daily basis check all oil levels. Water level in the radiator and electrolyte level in the battery and perform services according to the service schedule. 2. Ensure tire pressure are even and the correct pressure for the job being done is maintained. 3.
- Page 24 ► ► ► ► MOUNTING AND DEMOUNTING IMPLEMENTS (1)Ensure that all mounting and removal of implements is done on safe flat ground. Ensure no one is between the Tractor and implement and do not get under the implement to avoid accidental injuries.
- Page 25 The following precautions are suggested to help prevent accidents. A careful operator is the best operator. Most accidents can be avoided by observing certain precautions .Read and take the following precautions before operating the Tractor to prevent accidents. Tractor should be operated only by those who are responsible and properly trained to do so.
- Page 26 ■ ■ ■ ■ Operating the tractor 1. Before starting the tractor apply the parking brake, place the PTO (Power Take Off) lever in the “OFF” position, the hydraulic control levers in the downward position, the remote control valve levers in the neutral position( if fitted) and the transmission in neutral. 2.
- Page 27 ■ ■ ■ ■ Driving the tractor 1. Watch where you are going especially at row ends, on roads, around trees and low hanging obstacles. 2. To avoid upsets, drive the tractor with care and at speeds compatible with safety, especially when operating over rough ground, crossing ditches or slopes, and when turning at corners.
- Page 28 DO’S AND DON’T’S DO’S-For Better performance DO-Ensure that safety shields are in place and in good condition. DO-Read all operating instructions before commencing to operate Tractor. DO-Carry out all maintenance tasks without fail. DO-Keep the air cleaner clean. DO -Ensure that the correct grade of lubricating oils is used and that they are replenished and changed at the recommended intervals.
- Page 29 DON’T-Use the independent brakes for making turns on the highway or at high speeds. DON’T-Refuel the tractor with the engine running. DON’T-Mount or dismount from the right side of the tractor. DON’T-Temper the hydraulic control levers’ upper limit stops. DON’T-Use draft control lever for lifting of implements. DON’T-Start the engine with the PTO engaged.
-
Page 30: Safety Signs
SAFETY SIGNS (Replace all missing, damaged or illegible signs) GENERAL SAFETY INFORMATION IMPORTANT: This “General safety Information” should be kept with the machine at all times as reference data. This symbol means ATTENTION! YOUR SAFETY IS INVOLVED. The message that follows the symbol contains important information about safety. Follow recommended precautions and safe operating practice. - Page 31 Location: On Radiator shroud side LH & RH Part No.: 1200-910-012-0 Location: Near the Radiator Part No.:1200-910-024-0 Location: On the Fuel filler Location: On the Cab No.:1200-910-005-0 Part No.:1200-910-011-0 Location: On Dash cover side RH Location: On the Cab Part No.:1200-910-003-0 Part No.: 1200-910-023-0 Location: On Radiator Part No.: 1200-910-015-0...
- Page 32 Location: On the Fender LH Part No.: 1995-904-025-0 Location: On the Fender RH Part No.:1200-910-019-0 Location: On the Fender LH Part No.:1200-910-016-0 Location: On the Fender RH Part No.:1200-910-019-0 Location: On the Fender LH Part No.:1200-910-001-0 Location: Below the Seat Location: Below the Seat Part No.:1200-910-006-0 Part No.:1200-910-016-0...
-
Page 33: Universal Symbols
UNIVERSAL SYMBOLS Some of the universal symbols have been shown below with an indication of their meaning Engine speed Pressured- Corrosive rev/minX100) open slowly substance ”Tortoise” Hours, Continuous Slow or recorded variable minimum Setting Engine ”Hare” fast or coolant maximum Warning temperature setting... -
Page 35: Section A
Section - A Controls, Instruments Operations The following pages in this section detail the location and function of various instruments, switches and controls on your Tractor. Even if you operate other Tractors, you should read through this section of the manual and ensure that you are thoroughly familiar with the location and function of all the features of your New Tractor. - Page 36 DESCRIPTION OF TRACTOR CONTROLS INSTRUMENT AND SWITCHES ►Main switch [OFF]-The key can be inserted or removed [ON]- The electric circuit is on. [Glow]-Glow plugs preheat the combustion chamber [START]-The starter motor is engaged. When the key is released it will return to the ON position...
- Page 37 ►LIGHT SWITCH, INDICATORS AND HORN High and low beam are operated On the main switch Position 1. High beam Position 2. Low beam ►TACHOMETER This meter shows the revolutions of the engine and the PTO shaft as well as the travel speed in top gear (1) Right needle Indicates speed in top gear.
- Page 38 ► ► ► ► WARNING LIGHTS Charge lamp This light will go off as soon as the engine starts to run to indicate that the alternator is changing. (Please note, as broken fan belt can cause the light to come on, please stop the engine as overheating can occur if not rectified immediately) Oil pressure lamp Will go out as soon as the engine starts if the oil pressure is correct.
- Page 39 ►Independent PTO ■ It must be noted that the PTO shift lever on the LHS below the driver seat should be shifted to position 1 (540 RPM) 0r 2 (1000RPM) depending upon the implement specification. In no case the specified speeds be crossed as serious damage to the tractor/implement to person can result because of this.
- Page 40 First select the specified speed for the PTO by using the PTO shifter on the LHS, below the driver seat. Hydraulic Monitor ON/OFF Control Clutch Pedal. Position PTO SHAFT Lamp on the Switch Switch Control Lever. dash panel Manual Either pressed Either raised or Glows Rotates...
- Page 41 TRACTOR CONTROLS ► ► ► ► Hand Throttle (Throttle lever) Pulling the hand throttle towards the driver increases Pulling the hand throttle towards the driver increases revolutions. Pushing it away from the driver decreases revolution. ► Foot operated accelerator This pedal can override a fixed hand throttle setting ►...
- Page 42 ► ► ► ► BRAKE PEDAL Right and left brake pedals are provided to assist in turning the tractor in the field. A connecting latch is provided to connect the right and left brake pedals for high speed or road use. In the interest of safety always use it on the road or at high speed as using one side only can cause rollovers.
- Page 43 Operate the shuttle shift only while seated on the tractor. Do not use the shuttle shift lever to start the tractor for towing or traveling uphill, use the clutch instead. Caution Always stop the tractor before getting off. ▶ Power Shuttle Lever – If Equipped. Ensure Forward/Reverse lever is set to neutral position, When the machine is stopped or Before starting the Engine.
- Page 44 Avoid damage! Select the proper speed range and gear for the job. • The machine maybe operated in any gear with engine speeds at 950-2600 rpm. Within these limits, the engine can be placed under varying load operations. • Never overload engine by lugging machine at low idle speeds. important •...
- Page 45 -When starting to operate the tractor,be sure to release the parking brakes.Misuse of the brakes may cause damage to the transmission and is therefore not acceptable to TYM for coverage under the warranty.
- Page 46 Never use the diff lock at high speed or on the road as this can cause roll over and injury. Caution ▶ ▶ ▶ ▶ Front wheel drive lever (4WD shift Lever) In the ON position the front wheels are engaged and in the OFF position they are disengaged.
- Page 47 Your tractor is equipped with 2 Speed PTO to suit range of applications and conditions. POSITION MODEL T603 1000 (750) Always use the clutch when engaging or disengaging the PTO or changing PTO speed. Let the PTO driven implement come to a complete stop before changing.
- Page 48 After finishing the work, always lower the implement to the ground and switch off the engine, Set the parking brake to avoid injuries and accidents . Warning Draft control lever ▶ Soil engaging implements can be set for precision work by using draft control. By mounting the lever forward.
- Page 49 Exterior hydraulic Lever (Optional) Move the lever up or down and hold.This will raise or lower the implement (rotavator or hydraulic plow). Lever will return to neutral by itself. Important: -Do not hold the lever in the “pull” or “Push”position once the remote cylinder has reached the end of the stroke.as this will cause oil to flow through the relief valve.Forcing oil through the relief valve for extended...
- Page 50 1) To raise the front end loader. 2) To lower the front end loader. 3) To rollback the bucket. 4) To dump the bucket. NOTE : The Joystick control and valve can also be used for other applications if a front end loader is not fitted.
- Page 51 ▶TELESCOPIC STABILIZERS ADJUSTMENT The stabilizers are intended for limiting or preventing implement side movement. There should be no clearance(Position A) during implement transport and when working with grades,rollers mowers,seeders,drills and similar implements.However,a slight play is necessary(Position B) when working with ploughs,Harrows,ditchers,cultivators and the like:that is when working with “draft control”.The length of stabilizers is adjusted by removing the pin and rotating the turn buckle barrel...
- Page 52 ▶ADJUSTMENT OF THE LIFT LINK ON THE LOWER LINK For different applications change the position of the yoke rod on the lower links as shown and insert the pin in the direction of the arrow 1) For general implement : Use the Pin to “A: point 2) For Rotary tilling : Use the Pin to “B”point Only use drawbar to tow and keep the 3 point linkage in raised position when toeing with...
- Page 53 DRIVING THE TRACTOR STARTING THE ENGINE Before starting the engine carry out the pre-operational checks as set out on page 20. (1) Sit on the driver seat (2) Apply the footbrake. (3) Put the hydraulic lever in the down position. (4) Push down the clutch to activate the safety-starting switch.
- Page 54 WARMING UP When starting the engine allow it to warm up to operating temperature by allowing it to idle 5-10 minutes to ensure full lubrication and operating temperature. Failure to do so can shorten engine life substantially. ▶ ▶ ▶ ▶ WARMING UP IN COLD WEATHER Cold weather will change the viscosity of the oil, resulting in a reduced oil pumping capacity, which can cause damage to the engine if it is not warmed up correctly.
- Page 55 Do not ”ride” the clutch to control speed, use a lower gear. Do not travel with your foot on the clutch pedal. Caution Always connect the brake pedals when traveling on the road. Never tow anything except with the drawbar. Do not tow loads which are too large for the tractor’s capacity to brake effectively especially in hilly terrain.
- Page 56 UPHILL STARTS ON A STEEP SLOPE With the pedals connected together push down on the brake pedals and push down the clutch. Set all gear levers to low and the throttle to medium engine speed. Release the clutch and as it engages release the brake pedals. Adjust the throttle to the required speed.
- Page 57 ▶ ▶ ▶ ▶ Fuel gauge. To avoid excessive condensation in the fuel tank refill at the end of each day’s work and ensure during the day that it does not drop to a low level where the fuel system will require bleeding to expel air in the system after refilling the tank.
- Page 58 ▶ ▶ ▶ ▶ Track adjustment T603 models of are front wheel assist the front track can be set in 2 positions The rear track can be set in 5 positions as illustrated. Unit : mm(in)
-
Page 59: Section B
Section-B Lubrication & Maintenance This section gives full details of the service procedures necessary to maintain your Tractor at peak efficiency while the lubrication and maintenance chart provides a ready reference to these requirements. - Page 60 CHECKS AND SERVICE PRE-START CHECKS To avoid problems it is recommended that a range of checks be carried out daily before starting the tractor. For full details of the items and frequency please refer to the tables on page 60,61 and 62. ▶Engine coolant Remove the radiator cap and ensure that the coolant is up to the filler neck and that it is...
- Page 61 Drain plug (front transmission) Drain plug (Spacer transmission) ▶ ▶ ▶ ▶ Fuel ▶ ▶ ▶ ▶ Fuel Use the fuel gauge to check the fuel level and top up if too low. It is a good practice to refill the tank immediately after use to avoid condensation ▶...
- Page 62 ▶ ▶ ▶ ▶ Steering Ensure that the steering wheel does not have excessive free play. ▶ ▶ ▶ ▶ Brake Ensure that the left and right brakes are adjusted correctly so they operate simultaneously. The correct free play on the brake is 1.18-1.57 in (30~40 mm). ▶...
- Page 63 MAINTENANCE AND ADJUSTMENT SCHEDULE ○ Check, Top-up or adjust ● Replace Periodical check and service table △ Clean or wash ★ Consult the service Dealer Service interval(hour meter,mark) Item Frequency Comment Engine Every 500 hours or To correct level on the ○...
- Page 64 Service interval(hour meter,mark) Item Frequency Comment Trans Every 500 hours or mission oil ○ ● ● 12months after first 50 hours Free play ○ Check daily (0.78-1.18in) of clutch pedal Free play ○ of brake Check daily (1.18-1.57) pedal State of Adjust so that both brake both operate...
- Page 65 Tire Front 9.5 - 20 32 PSI (Standard) Rear 14.9 - 28 20 PSI Tire Front 12 -16.5 50 PSI T603 (R3) Rear 17.5 - 24 26 PSI Tire Front 12 - 16.5 30 PSI (R4) Rear 16.9 - 24...
- Page 66 FILLING DIAGRAM & CAPACITY TABLE Filling point Fillings Quantity Liter (gal.) MODEL T603 50/50 : Ethylene Glycol/Water (L.L.C) 50/50 : Ethylene Glycol/Water (L.L.C) RADIATOR 8ℓ(2.11 US gal) ASTM D4985 / D6210 API : CH4 grades Recommended SAE viscosity grades ENGINE 7.0ℓ...
- Page 67 ●Recommended Transmission oil ① RPM Tractor Hydraulic Fluid or Textron TDH Premium (CALTEX) ② TDH Oil or TDH Oil special (TEXACO) ③ Chevron 1000THF (CHEVRON) Opening method of each cover ▶ ▶ ▶ ▶ Opening method of Hood With the hood up,the Hook release lever can be removed by pulling Hook release lever rearwards,having first detached the...
- Page 68 BLEEDING THE FUEL SYSTEM 1) Fill the tank with fuel and turn the ignition key to on. 2) Loosen the air breather screw of the fuel filter two or three turns. 3) When fuel free from air flows (bubbles) from the Air breather screw, tighten the Air breath screw.
- Page 69 When changing the oil always change the filter. Always use the same oil, as using different oils or specifications can cause damage. important Dispose off the old oil as per local regulations. ▶ ▶ ▶ ▶ Changing the transmission oil Remove the drain plug from bottom of the transmission and drain the oil.
- Page 70 ▶Changing Oil in the Front axle 1. Drain the oil from the center diff plug and the drain plug in each drive. 2. Replace and tighten all drain plugs. 3.Remove the top plug(Vent plug)from each final drive to vent air from final drives. 4.
- Page 71 ■ FUEL FILTER The fuel filter/water separator (if equipped) is not usually supplied by Perkins. The following test describes a typical fuel filter/water separator. Refer to the OEM information for further information in the fuel filter/water separator. Turn the fuel supply valve (if equipped) to the OFF position before performing this maintenance.
- Page 72 Never use petrol (gasoline) thinner or similar inflammable material to wash the primary fuel filter. After replacing the filter always bleed the system important ▶ ▶ ▶ ▶ HYDRAULIC OIL FILTER and Engine Oil filter cartridge Remove the filter with a filter wrench. To replace, apply oil or grease on the seal, fit by hand until seal contacts bare, then turn it 2/3 turn further to tighten it check for leaks.
- Page 73 Do not remove the radiator cap on a hot engine. Allow the engine to cool down and then turn the cap slowly to ensure, that there is no excessive pressure in the radiator. Caution Serious burns, can result from the contents of pressurized, hot radiators. Allow the engine to cool down completely before opening radiator cap.
- Page 74 GREASING THE TRACTOR Grease the tractor according to the service schedule (page 61 and 62) Ensure that grease nipples are cleaned well before any attempt is made to grease them. ▶ ▶ ▶ ▶ Brake area / Clutch area Front Axle Grease Nipple Grease Nipple ▶...
- Page 75 GAP ADJUSTMENT ADJUSTING THE CLUTCH Using the clutch over a period of time will increase the free play. The correct free play of the pedal is 0.78~1.18 in To adjust, loosen the locknut on the turnbuckle and adjust. Check the adjustment and tighten the locknut if the free play is correct.
- Page 76 Uneven adjustment of the left and right pedal will result in one sided braking when the pedals are connected and can cause serious accidents, especially at high speeds. Double check to ensure free play is the same on both pedals. Caution ADJUSTING THE THROTTLE LEVER If this lever is either loose or difficult to move please consult your dealer for rectification of the problem.
- Page 77 ▶ ▶ ▶ ▶ BATTERY MAINTENANCE Low temperatures will affect the performance of batteries so take particular care of it in winter. For long-term storage of the tractor remove the battery and keep it in a cool dry room. If it is on the tractor while stored, disconnect the negative terminal. Batteries will self discharge if left for a period of without use time.
- Page 78 Alternator Inspect Perkins recommends a scheduled inspection of the alternator.Inspect the alternator for loose connections and proper battery charging.Inspect the ammeter(If equipped) during engine operation in order to ensure proper battery performance and/or proper performance of the electrical system. Make repairs, as required. Check the alternator and the battery charger for proper operation.If the batteries are properly charged,the ammeter reading should be very...
- Page 79 AIR CONDITIONER COMPRESSOR BELT ADJUSTMENT Check the compressor belt tension regularly and adjust If required. The correct tension is if the center of the belt is Pushed With a finger it moves in approx. 10 mm (0.39 in) as shown in the picture. To adjust the belt, loosen the top bolt on the alternator, move the alternator to the desired position and tighten the bolt.
- Page 80 CHECKING THE WIRING HARNESS AND FUSES Loose wires make inferior connections and damaged wires can cause short circuits, fires burnt wiring or reduce efficiency of components. Replace or repair any faulty wiring or insulation. If a fuse burns out again after it has been replaced, do not replace it with wire or a high capacity fuse, find the cause and rectify it or get an auto electrician to do so.
- Page 81 3. MAINTENANCE For daily or short term storage Clean the tractor and remove all dirt from field work. Fill the fuel tank to avoid condensation and rust. Lower the implement to the ground.. Keep it in a machinery shed or, if not available cover the unit if left outside. In very cold conditions it is advisable to remove the battery and keep it inside in a warm environment.
-
Page 83: Section C
Section - C CABIN The cab fully conforms to the international standard as far as safety and soundproofing are concerned. It can be provided with ventilation, heating and air-conditioning system. It is available in the following version.: ● Cab with ventilation and heating systems ●... - Page 84 Remember that steering, braking and operational performances are highly influenced by the implements mounted, the trailers transported and the ballasts applied to the tractor. When transporting heavy loads (exceeding the weight of the tractor) reduce the speed under 15 Km/h.. All the implements mounted onto the tractor must be safely secured.
- Page 85 Working lamps (front and rear) : the working lamps are located on the cab roof (two in the front and two in the rear) .They are switched on by means of the special switches on the roof console Working Lamp Rearview mirrors.: the cab is provided with rearview mirrors on both sides.
- Page 86 VENTILATION The ventilation unit is housed in the cab ceiling. To switch it on and adjust it, turn the electrical fan switch to the desired speed. The cab becomes slightly pressurized when the ventilation system is in operation, so that the fresh air can enter only by way of the filter installed in the rear section of the cab roof.
- Page 87 Blower control switch Temperature control Three position rocker switch Set temperature control as required,fully clockwise For maximum cool and fully counterclockwise for heat Air conditioning switch To operate the air conditioner,the blower must be on.The blower speed temperature control and all vents must be adjusted to obtain the best cooling for the ambient temperature and dust conditions.
- Page 88 Heating system General description The heater is switched on and adjusted by rotating the control knob at the roof console, then switching on the blower and setting the selector at the preferred speed . To warn the cab up quickly, the knob should be rotated fully clockwise and the blower set to speed 3. The screen is demisted or defrosted by air directed through a slot vent .
- Page 89 SYSTEM CONFIGULATION 1.The heating system consist of two units: 1-Electric heater and blower unit installed behind roof console. 2-Power supplying set, consisting of an auxiliary alternator located front of the engine and driven by a belt directly linked to the engine pulley. If the air does not come out from the diffusers right away as soon as the system is started, turn off immediately and identify the fault.
-
Page 90: Air Conditioning System
2) Compressor belt adjustment Check the compressor belt tension regularly and adjust If required. The correct tension is if the center of the belt is Pushed With a finger it moves in approx. 10 mm (0.39 in)as shown in the picture. To adjust the belt, loosen or tighten the nut as shown in the picture. - Page 91 Roof hatch( if equipped) Ventilation-push the latch towards the front of the tractor and then push the hatch up. Emergency Exit-Push firmly upwards to release the support struts from the lower retainer clips. Circulation diffuses With the circulation vent set in any position outside Air will still be pulled into the cab.
- Page 92 3. Checking the air conditioning system. ①Economic friendly refrigerant : R134a 0.7∼0.85Kg. The presence of air and water in the system could jeopardize its efficiency. -The air is uselessly compressed by the compressor and no cooling effect is produced. -The moisture has a tendency rise to obstructions which prevent the cooling efficiency. ②...
- Page 93 Bubbles or foam visible Trouble shoot ● No bubble shown ●Too much of refrigerant deflate. Abnormal ●High pressure pipe is not abnormal High-pressure pipe is hot ● H.L pressure of the pressure abnormally. H-L pressure of the gauge needle indicates high pressure gauge needle abnormally.
- Page 94 SYMPTOM CONDITION CAUSE REMEDY 2.Motor Weak from Motor is normal Air inlet clogged Remove pressure or don”t Evaporator freezing Controlling work minimum pressure Ventilator switch Replace the switch damage Compressor Replace Motor is abnormal Motor failure Replace Wire cut Replace Air leakage Duct leakage Check,tighten...
-
Page 95: Section D
Section - D Specifications The specifications on the following pages are given for your information and guidance. For further information concerning your Tractor and equipment, consult your Authorized Dealer/ Distributor. CO.,LTD. policy is one of continuous improvement and the right to change prices, specifications or equipment at any time without notice is reserved. - Page 96 SPECIFICATIONS Model: T603 ENGINE CLUTCH Four strokes, Direct injection, water-cooled Type : Dry single Diesel Engine. Outer dia. X Inner dia. : 275X180 (10.83X7.09) Model : C2.2T (404C - 22T) CLUTCH (Power Shuttle) No. of cylinders Type : Wet Multi plate Swept Volume : 2.216 Liter 5(135 in³)
- Page 97 ▶ ▶ ▶ ▶ MAIN SPECIFICATIONS MODEL T603 Manufacturer CAT(Caterpillar) Model C2.2T (404C - 22T) Gross power, HP (kw) 58.5 (43) ENGINE Rated speed, rpm 2600 Number of cylinder Displacement, cu.in. (cc) 135 (2216) Air cleaner Dual Dry Alternator 12V , 65A...
- Page 98 Traveling Speed : Km/hour (mile/hour) MODEL T603 Creeper Range shift Main shift Forward Reverse 1.01 (0.63) 1.04 (0.65) 1.61 (1.01) 1.65 (1.03) 2.47 (1.53) 2.53 (1.57) 3.07 (1.91) 3.15 (1.96) 3.24 (2.01) 3.32 (2.06) 5.13 (3.19) 5.26 (3.27) 7.90 (4.91) 8.09 (5.03)
-
Page 99: Fuel Saving Tips
FUEL SAVING TIPS To save fuel & oil in your tractor, following things should always be kept in mind. A) Air cleaning system 1) Clean the air cleaner regularly so that dust does not settle down. 2) For every 50 hours & everyday in sandy/dusty conditions. (a) Clean the air cleaner filter element with compressed air. - Page 100 E) Lubrication system 1) Always use recommended grade of oil. 2) Everyday before starting the engine, check the oil level with a dipstick & refill between the minimum & maximum level. 3) Charge the engine oil, Replace filter & “O” ring, as & when required. F) Cooling system 1) Check the fan belt tension regularly.
-
Page 101: Fault Tracing
FAULT TRACING SYMPTOM CAUSE REMEDY Turning the main switch Clutch not pushed in Push the clutch in will not operate the starter Battery flat Charge or replace the battery Dealer to repair or replace Switch faulty Contact dealer for repair or replace Starter operates but not Low battery... - Page 102 FAULT TRACING SYMPTOM CAUSE REMEDY White smoking from the Oil level too high Reduce to correct quantity exhaust Shortage of or faulty fuel Contact dealer for repair Reduced performance of The injectors are clogged, Contact dealer for repair the engine carbon coated and sticking Low compression Leaking valve seat...
- Page 103 FAULT TRACING SYMPTOM CAUSE REMEDY The clutch slips Incorrect adjustment Adjust to correct free play Worm or burnt lining Contact dealer for repair The clutch does not Incorrect adjustment Rusty Adjust to correct free play disengage clutch lining Contact dealer for repair Brake not working Incorrect free play Worm or Adjust to correct free play...
- Page 104 FAULT TRACING SYMPTOM CAUSE REMEDY Steering wheel shaking Wrong toe-in Adjust toe-in Unequal tire pressure Inflate both to correct pressure Loose component Tighten or replace if worn Excessive play in the Worn steering shaft Contact dealer for repair steering Worn components Contact dealer for repair Flat battery Faulty wiring...
- Page 105 T603 CABIN WIRING DIAGRAM (A3)
- Page 107 T603 ROPS WIRING DIAGRAM (A3)
- Page 109 T603 WIRING DIAGRAM FOR POWER SHUTTLE (If equipped)
-
Page 111: Wiring Diagram
WIRING DIAGRAM... - Page 112 CABIN WIRING DIAGRAM...
- Page 113 CABIN WIRING DIAGRAM...
- Page 114 ▶ Drawing for fixing position of the fuse ▶ Wiring diagram of the electric instrument 1. PANEL 2. LIGHT, HORN 3. WORKING LIGHT 4. STOP LAMP 5. TURN SIGNAL 6. CONTROLER 6. CONTROLER 7. ENGINE STOP 8. FUEL PUMP 9. COUPLER 10.
-
Page 115: Power Train
◎ ◎ ◎ ◎ T603 POWER TRAIN... - Page 116 ◎ ◎ ◎ ◎ T603 POWER TRAIN FOR POWER SHUTTLE (If equipped)
-
Page 117: Tractor History Card
TRACTOR HISTORY CARD JOB CARD NATURE OF W/CLAIM NO. REMARK DATE PARTS REPLACEMENT DEFECT AND DATE... -
Page 118: Service Record
SERVICE RECORD DATE TRACTOR HOURS NATURE/TYPE OF REPAIR/SERVICE CARRIED OUT... -
Page 119: Daily Operating Log
DAILY OPERATION LOG MACHINE HOURS FUEL ENGINE OIL DATE JOB DONE REMARKS CONSUMPTION TOPPED UP START... -
Page 120: Part Replacement Record
PART REPLACEMENT RECORD PART PART DATE COST DATE COST DESCRIPTION DESCRIPTION... - Page 121 T603 Operator’s Manual for Tractors Code No. 1995-940-002-1 Printed on August. 2008 3rd Edition...
Need help?
Do you have a question about the T603 and is the answer not in the manual?
Questions and answers
Tym 603 will no go into 4 wheel drive. It only has 650 hours on the tractor.
The TYM T603 tractor's 4-wheel drive may not engage due to several possible reasons:
1. Transmission Issue – The front wheel drive power is taken from the rear transmission. If there is a problem with the transmission, it may not transfer power to the front differential.
2. Differential or Final Case Problem – The power is transmitted to the front differential and then divided into left and right wheels. If there is damage or wear in the differential or final cases, the 4WD may not function.
3. Gear Engagement Failure – The 4WD mechanism uses level gears for power transmission. If these gears are worn, broken, or not properly engaged, the system will not work.
4. Hydraulic Clutch Issue (if equipped with IPTO) – If the tractor has an Independent Power Take Off (IPTO) with a hydraulic clutch assembly, a hydraulic failure or air in the system could affect engagement.
5. Mechanical Disconnection – A broken or disconnected drive shaft between the transmission and front axle could prevent power from reaching the front wheels.
Checking these components and ensuring proper engagement should help diagnose why the 4WD is not working.
This answer is automatically generated