
Related Manuals for Delphi DEA601


Summary of Contents for Delphi DEA601
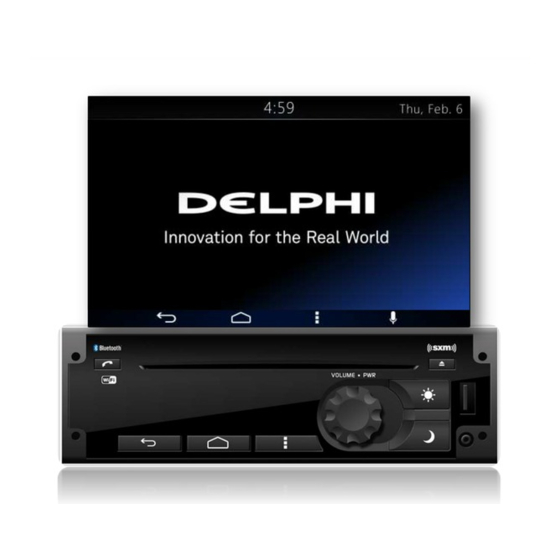
- Page 1 Owner´s Manual DEA601 Radio Owner´s Manual DEA601 Radio MY 2015 P a g e Delphi 3/1/2015...
-
Page 2: Table Of Contents
Table of Contents Gauge States ......... 38 iPod not functioning ......62 Virtual Gauges Pop-Up ......39 Bluetooth ........... 62 DEA601 Radio System ........3 Gauges Settings ........39 My radio doesn't recognize my Bluetooth Introduction ..........3 Voice Recognition ........43 enabled device. -
Page 3: Dea601 Radio System
The DEA601 System consist of 7" Smart Display connected to a Radio. The Smart Displaly function as a main display managing the entire user interface. The Smart Display with resistive touch-screen has a rear USB for playback or USB modem connection, it manages the Applications, Phone interface, Audio, Internet and Bluetooth / W-Fi conections. -
Page 4: Radio
Owner´s Manual DEA601 Radio Dim Day / Night Radio The Dimming “day” is used to increment the brightness level of the Smart Display and the backlight level of the Radio bezel. Radio Button Operation The Dimming “night” is used to decrease the brightness level of the Smart Display and the backlight level of the Radio bezel. -
Page 5: Smart Display
Owner´s Manual DEA601 Radio Smart Display Getting Started Using the touch screen A Touch over a soft key activates or selects the corresponding function. Figure 2: Swipe to the Left action presents right screen. The next to the left screen is presented once the system senses a Swipe to the Right action. - Page 6 Owner´s Manual DEA601 Radio Each of the home screens present 6 application icons maximum plus the Audio widget. The number of the subsequent home screens is relative to the number of installed applications. Each subsequent home screen is added to the right of the main home screen or next to the right of the last subsequent home screen.
- Page 7 Owner´s Manual DEA601 Radio The alarm setting opens once the system senses a touch over the displayed time area. The weather information is presented in the Notification Bar; information is updated based on the ambient air temperature reported by the vehicle. The temperature measure units displayed are accordingly to the units selected in the Display Settings menu.
- Page 8 Owner´s Manual DEA601 Radio Notification Icons If the Menu button is activated at the home screen, the system settings screen is presented. The following icons are placed in the Notification Bar in case these are activated. Icon Meaning Weather Information.
- Page 9 Owner´s Manual DEA601 Radio Figure 11: The Dimming level indicator pop-up Figure 13: The Mute activation indicator icon pop-up Volume Volume level is indicated each time the volume knob is turned. Figure 14: The Mute icon on the Notification Bar...
-
Page 10: Audio Application
Owner´s Manual DEA601 Radio If this event occurs, the Media sources are paused. Once it ends, the The system does not allow the selection of more than one Audio Source systems behave as if a pause was cancelled. option at a time. If the system senses the selection of the current Audio source option no change will take place. -
Page 11: Media Audio Control Softkeys
Owner´s Manual DEA601 Radio Media Audio Control Softkeys The system present the next control softkeys as part of the Media sources interface. Play/Pause Next Previous Repeat Shuffle Search Views The softkeys are placed at the bottom of the Audio App screen. - Page 12 Owner´s Manual DEA601 Radio For Apple devices the system supports the following additional views: Genre Composer Audio Books The Views options replace the Audio Source options in the Media interface. The system displays the song name, artist name and the album image artwork if available.
- Page 13 Owner´s Manual DEA601 Radio Figure 21: The Artist Albums view Figure 23: Apple Artist Albums View. For Apple devices the artist view screen follows the distribution and styling Each item of the list presents the Artist name. The system displays up to 5 as the Figure 22 illustrates.
- Page 14 Owner´s Manual DEA601 Radio Figure 24: The Albums view Figure 25: The Songs contained in the selected album screen The system display the albums contained in the media source selected. The In the case the album artwork is not available the system displays a albums are displayed in a grid manner.
- Page 15 Owner´s Manual DEA601 Radio All Songs In the case the Rear Aux media source is selected, the user interface shall The all songs view screen follows the distribution and styling as the Figure follow the distribution and styling of the Figure 28.
-
Page 16: Usb
Owner´s Manual DEA601 Radio In the case the Wi-Fi media source is selected, the user interface shall follow MS-Dos partition only. the distribution and styling of the Figure 30. Class specification (USB MSC) and supports formats of FAT32, FAT16, NTFS, and HFS+. -
Page 17: Cd Player
Owner´s Manual DEA601 Radio iPod Error Messages This Radio supports the following iPod models: If an “UNSUPPORTED” message is displayed, it could be for one of the following reasons: ® iPod classic (6th generation) ® iPod nano ( 6G) When the iPod connected is not supported. -
Page 18: Front Auxiliary
Owner´s Manual DEA601 Radio To load a disc: Sampling frequencies: 32, 44.1 and 48 kHz for MPEG-1 Audio Layer 3. Turn the vehicle on. Maximum number of folders: Eight folders with 255 files per folder. Insert a disc into the slot, label side up. The player pulls it in the ... -
Page 19: Bluetooth Player
Note 5: Some devices will disconnect Bluetooth when a transfer is performed. Rear Auxiliary The DEA601 is not safety product. The cameras and the rear auxiliary inputs are provided for driver conveniences only. The purpose of this stereo input is to connect the audio output of an external source or a sound channel from a safety system. -
Page 20: Am/Fm
Owner´s Manual DEA601 Radio The system displays up to 12 presets memories in a tab divider manner at Next the bottom of the screen interface. Each preset work as softkey button Previous selector. The presets that do not have a frequency assigned display only the SCAN number of the grid. - Page 21 Owner´s Manual DEA601 Radio Channel Browsing The system display a pop-up sub menu in the case the Menu button is Presets (Smart Favorites) selected while in this screen. The pop-up sub menu presents the next options as Figure 34 illustrates.
- Page 22 Owner´s Manual DEA601 Radio In the case the Category List option is selected, a separate screen opens Tune start listing all the available categories. Figure 37 as reference. Reset Default Figure 37: The Category list screen. The listed elements work as a soft key.
-
Page 23: Audio Widget
Owner´s Manual DEA601 Radio Audio Widget The Audio widget is displayed at the right of the home screen. The Audio widget is displayed in case the system is playing Audio at the Audio application and either the Back button of the Home button is pressed. - Page 24 Owner´s Manual DEA601 Radio Previous Play/Pause Next Figure 40 The Audio widget with available art work screen for USB & Bluetooth. The Audio widget displays the art work corresponding to the playing song if available. The Audio widget shall display a generic art work in case there is Figure 42: The Audio widget for the CD configuration screen.
-
Page 25: Radio Source
Owner´s Manual DEA601 Radio Figure 43: The Audio widget for the AUX configuration screen. Figure 45: The Audio widget for the Wi-Fi configuration screen. Radio source The Audio widget shall display the next audio controls for the Radio source configuration. - Page 26 Owner´s Manual DEA601 Radio Figure 46: The Audio widget for the radio band AM screen. Figure 48: The Audio widget for the Weather channel screen. The Audio widget shall present the next audio controls for the SXM configurations. Illustrated in Figure 49.
-
Page 27: Phone
Owner´s Manual DEA601 Radio Phone Once your device is properly paired (see Settings / Bluetooth section), DEA601 System supports Hands Free features if the connected device has that capability. Open the Phone App located on the home screen of the Smart Display as illustrated on Figure 50. -
Page 28: Contact Information
Owner´s Manual DEA601 Radio The system activates the search function in case one of the next options is selected. Magnifying Glass icon White box In the case the search function is activated, the system displays a keyboard. Figure 54 as reference. -
Page 29: Favorites
Owner´s Manual DEA601 Radio E-mail Address If the contact photo is not available a generic contact image is displayed. The Phone 1 and Phone 2 items work as a softkey. Figure 55 as reference. Figure 56 The 8 favorites contacts screen. -
Page 30: Recent Calls
Owner´s Manual DEA601 Radio Figure 57: The dialing process screen. Figure 58 The history of calls screen. Recent calls The Receive call indicator is represented with a Blue arrow. In the case the recent calls option is selected, the system displays the The Made call indicator is represented with a Green arrow. - Page 31 Owner´s Manual DEA601 Radio Figure 60: The current call screen. Figure 59: The incoming call screen. In the case the system detects the selection of the Hang On softkey the In the case the system detect the selection of the Reject softkey the system system terminate the call.
-
Page 32: Sms
Owner´s Manual DEA601 Radio If the system detects the selection of the second call soft key the current call The system provides the following options upon message notification shown is place on hold allowing dial to another number. on the screen Read / Ignore When the second call is activated, a numeric keyboard shall be displayed. -
Page 33: Apps
Owner´s Manual DEA601 Radio Figure 64 Message editor Figure 65: Clock screen While the vehicle is in motion (parking brake is not set or vehicle speed is In the case the alarm icon is selected, the system presents the following more than 5 km/h), the Personalize option is disabled. - Page 34 Owner´s Manual DEA601 Radio If click on the chevron icon the alarm audio settings are presented with the following options Figure 68 as reference. Tone Volume Repeat Figure 66 Alarm list Each item of the alarm list works as a softkey. Each item in the list can be activated or deactivated with the ON/OFF select softkey.
-
Page 35: Camera Views
The repeat options allow the user to set the days of the week that the alarm will be activated. The DEA601 is not a safety product. Once the alarm is set, the alarm indicator icon is displayed in the top bar of The cameras and the rear auxiliary inputs are provided for driver the home screen. -
Page 36: Application Interface
Owner´s Manual DEA601 Radio Figure 72: Open Camera Views App. Figure 73: Camera view reference. This feature may not be available in all vehicles. Application Interface The mentioned activation softkeys is presented as part of the standard view of the activation. The user is able to establish the view as full screen mode The Camera Views App present the view of the 4 cameras installed on the and to return to the standard view mode. -
Page 37: Gauges
Owner´s Manual DEA601 Radio The system activates the Left view in case the left turning signal is activated (if the automatic view function is activated). The system informs the user which camera view is activated. The forward camera view can only be activated manually. -
Page 38: Gauge States
Owner´s Manual DEA601 Radio The symbol “-”represent a 0 MPG (or 0 L/100km). The warning inputs are: The symbol “+”represent 2x the average fuel economy. Engine Oil Overtemp (primary warning) Stop Engine (secondary warning) In case of missing data or error message the needle is positioned vertically ... -
Page 39: Virtual Gauges Pop-Up
Owner´s Manual DEA601 Radio Gauge in a warning state will be displayed for at least 3 seconds. After 3 seconds, the Virtual Gauge in a full screen state due to a warning state return to a normal state allowing the second Virtual Gauge in a warning to state to toggle to full screen. - Page 40 Owner´s Manual DEA601 Radio Preset selection pop-up menu is displayed in order to specify which preset memory should save the new layout. Figure 80 as reference. Figure 78 Gauges Settings Pop-up Pressing the "Edit Presets" option from the settings pop-up allows the edition Figure 80 Gauges Save Configuration Pop-up of the Presets.
- Page 41 Owner´s Manual DEA601 Radio The User Defined Virtual Gauges Priorities does not modify the Default Virtual Gauges Priorities. Gauge Population Automatic arrangement is used to identify available gauges. The population of the gauges for the Automatic arrangement is depending on the priority preset selected.
- Page 42 Owner´s Manual DEA601 Radio The Virtual Gauges app does not allow the user to select the disabled gauge Percent Horsepower pages until they become available. Idle Time Idle Fuel Each time a Virtual Gauges app page is filled with gauges, the Virtual...
-
Page 43: Voice Recognition
Voice Recognition allows the user to launch applications, perform calls, Reset to Default Screen accept calls, and control actions of DEA601 system hands free. If the Reset to Default Soft key from the General Settings of the Virtual Gauges app is depressed, the Virtual Gauges app shall restore the gauge... -
Page 44: Vocabulary
“Ten, Eleven, Twelve, Thirteen, Fourteen, Fifteen, Sixteen, Seventeen, Eighteen, Nineteen” -“What day is it” The DEA601 show the Date in full format (It is [Day of the week], [Month] Decimals: [Day], [Year]) in the Voice Recognition Pop-Up for 5 seconds. -
Page 45: Phone Commands
Owner´s Manual DEA601 Radio -" Johnny Cash home" “****** at Home or ****** Home “ The DEA601 Call the contact specified by the user to the Home phone number specified by the Bluetooth Paired device. ****** at Mobile or ****** Mobile The DEA601 Call the contact specified by the user to the Mobile phone number specified by the Bluetooth Paired device. - Page 46 Owner´s Manual DEA601 Radio While the system is processing the captures voice command the system display a processing information indicator as Figure 86 illustrates. Figure 86: Voice Recognition processing screen Once the system registers a valid command, the command to be performed is displayed.
-
Page 47: Settings
Owner´s Manual DEA601 Radio Settings The system presents the next settings options. Figure 87 & Figure 88 as reference: Wireless & Networks Language & Inputs Date & Time System Audio System Information Cameras settings ... -
Page 48: Display Settings
Owner´s Manual DEA601 Radio On: slide action to the right. Off: slide action to the left. In the case the system detects an On state the corresponding automatic camera view is activated. In the case the system detects an Off state the corresponding automatic camera view is deactivated. -
Page 49: Wireless & Networks
Owner´s Manual DEA601 Radio Figure 90: The Display Settings screen. Figure 91: The Wireless & Networks settings screen Wireless & Networks The Bluetooth & Wi-Fi activation options are presented to the user as a slider controls. The Wireless & Network settings are open once the system senses a touch over the "Wireless &... - Page 50 Owner´s Manual DEA601 Radio Figure 92: The Wi-Fi menu screen Part I. Figure 94: The Wi-Fi menu screen Part II. The system captures the introduced password. The system uses the captured password for the network connection process. The system display a pop-up message for 3 seconds in case the captured password is incorrect.
- Page 51 Owner´s Manual DEA601 Radio Wi-Fi Direct Advanced Figure 96: The Wi-Fi menu screen Part IV. Figure 98: The Wi-Fi pop-up screen. In the case the advanced option is selected the system display the standard advanced Wi-Fi menu, Figure 99 & Figure 100 as references.
-
Page 52: Bluetooth
Owner´s Manual DEA601 Radio In the case the Bluetooth option is turned ON, a sub screens displayed listing the next options. Figure 101 as reference. “Visible to all nearby Bluetooth devices” option. List of the Bluetooth devices available to connect. - Page 53 Owner´s Manual DEA601 Radio Figure 103: The Bluetooth menu screen III. Figure 102: The Bluetooth menu screen II. If the system detects the selection of the white box a keyboard is displayed. In the case one item of the "List of the Bluetooth devices available to connect"...
-
Page 54: Ota (Over The Air)
Owner´s Manual DEA601 Radio Figure 107: Error - Invalid Password process terminated The mentioned message is displayed for 3 seconds. OTA (Over the Air) The system is capable to manage the next OTA updates having Wi-Fi. OS version. ... -
Page 55: Date & Time
Owner´s Manual DEA601 Radio 31/12/2014 2014/12/31 Applications The system supports the standard application manager settings. In the case the Apps option is selected the system present a list of the installed apps illustrated in. Figure 109. Figure 108: The Keyboard sound option screen. -
Page 56: System Information
Owner´s Manual DEA601 Radio Controls: Force stop button Clear data button Clear cache button Clear Defaults button if available Information Application name Application version Application icon List of applicable permissions Storage information Figure 111: The App controls &... -
Page 57: Language & Inputs
Owner´s Manual DEA601 Radio Figure 112: The System Information screen. Figure 113: The Language & Inputs options screen Part I. Language & Inputs In the case the Language & Inputs menu is selected, the system displays the next options: Each option works as a softkey. -
Page 58: Text To Speech Output
Owner´s Manual DEA601 Radio English Faster Spanish Very Fast Canadian French Rapid Very Rapid Each language option has a checkbox as selector control. The system Fastest allows the selection of one option at a time. -
Page 59: Manual Equalization
Owner´s Manual DEA601 Radio Balance Speed Dependent Volume 4/2 Speakers Configuration Seek Sensitivity Figure 119: The System audio screen Part III. The Manual Equalization and the Auto Equalization options work as softkeys. The Fade and Balance configuration options are presented in a bar selector manner. -
Page 60: Auto Equalization
Owner´s Manual DEA601 Radio JAZZ CLASSICAL Figure 120: The Manual equalizer screen. The system adjust the Bass value accordingly with the selected value in the Bass bar control. Figure 121: The Auto equalizer screen Part I. The system adjust the Middle value accordingly with the selected value in the Middle bar control. -
Page 61: Speed Dependent Volume
Owner´s Manual DEA601 Radio Speakers Configuration Each Audio setting section has a checkbox as selector control. The system adjusts the Audio output configuration based on the option selected. The In the case the Speakers configuration option is selected, the system system does not allow selecting more than one Auto Equalization option. -
Page 62: Tips And Troubleshooting
Owner´s Manual DEA601 Radio Tips and Troubleshooting iPod iPod does not play or there is no sound Radio The iPod has not been recognized. Unable to tune stations Verify that the iPod is supported. If the iPod is supported, reset the iPod and re-connect again (see You are in a weak signal area. -
Page 63: Device Music Cannot Be Heard
Also, the system allows the user to call using the virtual numeric keypad in the screen. Precautions Other Phone functionalities are restricted while in the Driving Distraction The DEA601 is not a safety product. The cameras and the rear auxiliary Avoidance Driving State. inputs are provided for driver conveniences only. System memory... -
Page 64: Sirius Xm
Agreements in the vehicle, any configurable settings (advanced menu, frequency zone, etc) are configured with both modules connected. Delphi does not take any responsibility of an incomplete system in the Product Cleaning vehicle. Use a soft dry cloth for periodic cleaning. for more severe stains, please dampen the cloth with water only. -
Page 65: Fcc Information
Le présent appareil est conforme aux CNR d'Industrie Canada applicables Bluetooth SIG, Inc. and any use of such marks by Delphi is under license. aux appareils radio exempts de licence. L'exploitation est autorisée aux deux Other trademarks and trade names are those of their respective owners.”... -
Page 66: Can Ices-3 (B) / Nmb-3 (B)
Owner´s Manual DEA601 Radio Connect the equipment into an outlet on a circuit different from that to which the receiver is connected. Consult the dealer or an experienced radio/TV technician for help. CAN ICES-3 (B) / NMB-3 (B) This Class B digital apparatus complies with Canaopedian ICES-003.
Need help?
Do you have a question about the DEA601 and is the answer not in the manual?
Questions and answers