Table of Contents
Advertisement
Available languages
Available languages
Advertisement
Chapters
Table of Contents

Related Manuals for Royal Sovereign ARP-7014


Summary of Contents for Royal Sovereign ARP-7014
- Page 1 OWNER’S MANUAL PORTABLE AIR CONDITIONER ARP-7014 PORTABLE AIR CONDITIONER PORTÁTIL DE AIRE ACONDICIONADO Página en Español Read and retain these instructions for future reference Royal Sovereign International, Inc...
- Page 2 INTRODUCTION Thank you for choosing Royal Sovereign to provide you and your family with all of the “Home Comfort” requirements for your home, apartment, or office. This Portable Air Conditioner can be set-up in just minutes and can be easily moved from room to room. It is a multi-functional room air comfort system that offers you Air Conditioning, Dehumidification and Air Circulation modes.
-
Page 3: Table Of Contents
CONTENTS Page Safety Awareness ∙ ∙ ∙∙∙∙∙∙∙∙∙∙∙∙∙∙∙∙∙∙∙∙∙∙∙∙∙∙∙∙∙∙∙∙∙∙∙∙∙∙∙∙∙∙∙∙∙∙∙∙∙∙∙∙∙∙∙∙∙∙∙∙∙∙∙∙∙∙∙∙∙∙∙∙∙∙∙∙∙∙∙∙∙∙∙∙∙∙∙∙∙∙∙∙∙∙∙∙∙∙∙∙∙∙∙∙∙∙∙∙∙∙∙∙∙∙∙∙∙∙∙∙∙∙∙∙∙∙∙∙∙∙∙∙∙∙∙∙∙ 4 Identification Of Parts ∙ ∙ ∙∙∙∙∙∙∙∙∙∙∙∙∙∙∙∙∙∙∙∙∙∙∙∙∙∙∙∙∙∙∙∙∙∙∙∙∙∙∙∙∙∙∙∙∙∙∙∙∙∙∙∙∙∙∙∙∙∙∙∙∙∙∙∙∙∙∙∙∙∙∙∙∙∙∙∙∙∙∙∙∙∙∙∙∙∙∙∙∙∙∙∙∙∙∙∙∙∙∙∙∙∙∙∙∙∙∙∙∙∙∙∙∙∙∙∙∙∙∙∙∙∙∙∙∙∙∙∙∙∙∙ 5 Appearance and Function of Control Panel ∙∙∙∙∙∙∙∙∙∙∙∙∙∙∙∙∙∙∙∙∙∙∙∙∙∙∙∙∙∙∙∙∙∙∙∙∙∙∙∙∙∙∙∙∙∙∙∙∙∙∙∙∙∙∙∙∙∙∙∙∙∙∙∙∙∙∙∙∙∙∙∙∙∙∙∙∙∙∙∙∙∙∙∙∙∙∙∙∙∙∙∙∙∙∙∙∙∙∙∙∙∙ 6 Appearance and Function of Remote Controller ∙ ∙ ∙∙∙∙∙∙∙∙∙∙∙∙∙∙∙∙∙∙∙∙∙∙∙∙∙∙∙∙∙∙∙∙∙∙∙∙∙∙∙∙∙∙∙∙∙∙∙∙∙∙∙∙∙∙∙∙∙∙∙∙∙∙∙∙∙∙∙∙∙∙∙∙∙∙∙∙∙∙∙∙∙∙∙∙∙∙∙∙∙∙∙∙∙∙ 6 Introduction ∙ ∙ ∙∙∙∙∙∙∙∙∙∙∙∙∙∙∙∙∙∙∙∙∙∙∙∙∙∙∙∙∙∙∙∙∙∙∙∙∙∙∙∙∙∙∙∙∙∙∙∙∙∙∙∙∙∙∙∙∙∙∙∙∙∙∙∙∙∙∙∙∙∙∙∙∙∙∙∙∙∙∙∙∙∙∙∙∙∙∙∙∙∙∙∙∙∙∙∙∙∙∙∙∙∙∙∙∙∙∙∙∙∙∙∙∙∙∙∙∙∙∙∙∙∙∙∙∙∙∙∙∙∙∙∙∙∙∙∙∙∙∙∙∙∙∙∙∙ 7 Installation ∙ ∙ ∙∙∙∙∙∙∙∙∙∙∙∙∙∙∙∙∙∙∙∙∙∙∙∙∙∙∙∙∙∙∙∙∙∙∙∙∙∙∙∙∙∙∙∙∙∙∙∙∙∙∙∙∙∙∙∙∙∙∙∙∙∙∙∙∙∙∙∙∙∙∙∙∙∙∙∙∙∙∙∙∙∙∙∙∙∙∙∙∙∙∙∙∙∙∙∙∙∙∙∙∙∙∙∙∙∙∙∙∙∙∙∙∙∙∙∙∙∙∙∙∙∙∙∙∙∙∙∙∙∙∙∙∙∙∙∙∙∙∙∙∙∙∙∙∙∙∙ 9 Maintenance ∙∙∙∙∙∙∙∙∙∙∙∙∙∙∙∙∙∙∙∙∙∙∙∙∙∙∙∙∙∙∙∙∙∙∙∙∙∙∙∙∙∙∙∙∙∙∙∙∙∙∙∙∙∙∙∙∙∙∙∙∙∙∙∙∙∙∙∙∙∙∙∙∙∙∙∙∙∙∙∙∙∙∙∙∙∙∙∙∙∙∙∙∙∙∙∙∙∙∙∙∙∙∙∙∙∙∙∙∙∙∙∙∙∙∙∙∙∙∙∙∙∙∙∙∙∙∙∙∙∙∙∙∙∙∙∙∙∙∙∙∙∙∙∙∙∙∙... -
Page 4: Safety Awareness
SAFETY AWARENESS Electrical Specifications and Power Cord Check to ensure that the electrical service being used is adequate for the model you’ve chosen. The electrical rating of your new air conditioner is defined on the serial plate of the unit. Please refer to the rating when checking electrical requirements to ensure they meet the electrical codes of your location. -
Page 5: Identification Of Parts
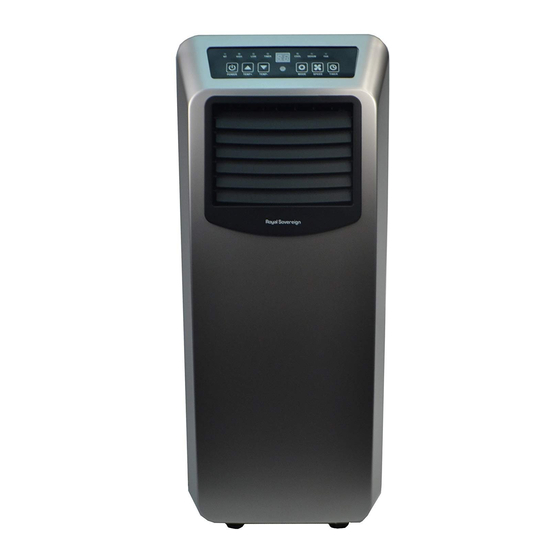
ARP-7014 IDENTIFICATION OF PARTS 1. Rear cover 2. Air inlet 3. Front cover 4. Operation panel 5. Castor 6. Power line 7. Air inlet 8.∙∙∙Hot-air∙exhaust 9.∙∙∙Hose∙connector∙(∙Window∙end∙) 10.∙Hose∙connector∙(∙Air∙conditioner∙end∙) 11. Window kit Fig.1 12. Remote control 13. Drain plug POWER TIMER TEMP+... -
Page 6: Appearance And Function Of Control Panel
APPEARANCE AND FUNCTION OF CONTROL PANEL 1. POWER button 2. TEMPERATURE+ button 3. TEMPERATURE- button 4.∙SIGNAL∙RECEIVER∙WINDOW 5. OPERATION MODE button 6. FAN SPEED ADJUSTMENT button Fig.3 7.TIMER ON/OFF button APPEARANCE AND FUNCTION OF REMOTE CONTROLLER 1. POWER button Press this button will turn the machine ON or OFF. POWER TIMER 2. -
Page 7: Introduction
ARP-7014 INTRODUCTION Fig.5 Fig.5a Before starting operations in this section: •∙Place∙air∙conditioner∙near∙a∙power∙supply∙outlet.∙ •∙As∙shown∙in∙Fig.5∙and∙Fig.5a,∙install∙the∙exhaust∙hose,∙and∙install∙the∙window∙slider∙into∙the∙window. •∙Insert∙the∙power∙cord∙into∙a∙grounded∙AC115V/60Hz∙socket.∙ •∙Press∙the∙POWER∙button∙to∙turn∙on∙the∙air∙conditioner.∙ Before using Notice: Operation temperature range: Maximum cooling Minimum cooling DB/WB∙(℉) 95/75 64/54 •∙Allow∙unit∙to∙sit∙in∙upright∙position∙for∙at∙least∙2∙hours∙prior∙to∙first∙use. •∙Check∙to∙make∙sure∙the∙exhaust∙hose∙has∙been∙installed∙properly. •∙Check∙to∙make∙sure∙the∙rubber∙drain∙plug∙is∙securely∙plugged∙into∙the∙drain∙on∙the∙back∙of∙the∙unit∙to∙prevent∙water∙leaks. •∙Check∙to∙make∙sure∙the∙air∙conditioner∙is∙on∙a∙flat∙surface. Fig.6 Cautions for cooling and dehumidifying operations: •∙∙ I f∙you∙turn∙the∙air∙conditioner∙off∙and∙immediately∙restart∙it,∙allow∙3∙minutes∙for∙the∙compressor∙to∙restart∙cooling.∙... - Page 8 Cooling operation •∙Press∙the∙“Mode”∙button∙till∙the∙“Cool”∙icon∙appears.∙ •∙Press∙the∙“Temp+”∙or∙“∙Temp-”∙button∙to∙select∙a∙desired∙room∙temperature.∙(62℉-90℉) •∙Press∙the∙“Fan∙Speed”∙button∙to∙select∙wind∙speed.∙ Dehumidifying operation •∙Press∙the∙“Mode”∙button∙till∙the∙“Dehumidify∙Indicator∙Lamp”∙blinks. Fan operation •∙Press∙the∙“Mode”∙button∙till∙the∙“Fan”∙icon∙appears.∙ •∙Press∙the∙“Fan∙Speed”∙button∙to∙select∙wind∙speed. Timer operation Timer ON setting: •∙When∙the∙air-conditioner∙is∙OFF,∙press∙the∙“Timer”∙button∙and∙select∙a∙desired∙ON∙time∙through∙the∙temperature∙and∙time∙setting∙buttons.∙ •∙“Preset∙ON∙Time”∙is∙displayed∙on∙the∙operation∙panel.∙ •∙ON∙timer∙can∙be∙set∙for∙any∙time∙from∙0∙to∙24∙hours. Timer OFF setting •∙When∙the∙air-conditioner∙ON,∙press∙“Timer”∙button∙and∙select∙a∙desired∙OFF∙time∙through∙the∙temperature∙and∙time∙setting∙buttons.∙ •∙“Preset∙OFF∙Time”∙is∙displayed∙on∙the∙operation∙panel. •∙OFF∙timer∙can∙be∙set∙for∙any∙time∙from∙0∙to∙24∙hours. Drainage Internal Tank Water Full Alarm Function The inner water tank in the air conditioner has one water level safety switch, it controls water level. When the water level reaches an anticipated height, the water full indicator lamp lights∙up.∙(If∙water∙pump∙is∙damaged,∙when∙the∙water∙is∙full,∙please∙remove∙the∙rubber∙drain∙plug∙at∙the∙bottom∙of∙unit,∙and∙all∙water∙will∙drain∙outside.) Continuous Drainge •∙∙...
-
Page 9: Installation
ARP-7014 INSTALLATION Installation Explanations: •∙Install∙the∙air∙conditioner∙on∙a∙flat∙surface∙at∙least∙12inches∙away∙from∙any∙wall∙or∙object∙that∙could∙block∙the∙airflow.(See∙Fig.7) •∙Socket∙wiring∙should∙be∙in∙accordance∙with∙the∙local∙electric∙safety∙requirements.∙ Fig.7 Fig.8 Introduction to Exhaust Hose Installation Temporary installation •∙Twist∙both∙ends∙of∙the∙exhaust∙hose∙into∙the∙square∙fixing∙clip∙and∙the∙flat∙fixing∙clip. •∙Insert∙the∙square∙fixing∙clip∙into∙openings∙at∙back∙of∙the∙air∙conditioner∙(see∙Fig.8).∙ •∙Put∙the∙other∙end∙of∙the∙exhaust∙hose∙to∙the∙near∙windowsill.∙ Window Slider Kit Installation drain hose The∙window∙slider∙kit∙can∙be∙installed∙horizontally∙or∙vertically.∙Open∙the∙window∙and∙place∙ the window slider on the inside edge of the window. Adjust the window slider to the width of the Fig.9... -
Page 10: Troubleshooting
TROUBLESHOOTING Problem Possible Suggested Remedies Check and reset the power plug. Wait 3 minutes and try to run Unit does not start when pressing power button. the unit again. Unit does not start Water full indicator lamp blinks, and water tank is full. Drain∙the∙water∙tank.∙(see∙page∙8) when pressing power button... -
Page 11: Technical Specifications
ARP-7014 TECHNICAL SPECIFICATIONS Figures∙noted∙in∙the∙contents∙are∙for∙reference∙only;∙variation∙may∙result∙due∙to∙the∙application∙in∙different∙countries∙or∙regions,∙and∙shall∙be∙based∙on∙practical∙operation. Description of Product ARP-7014 Cooling∙capacity∙(Btu) 14000 BTU Voltage∙/Frequency 115∙V∙/∙60∙Hz Input Power 1340 W Operating Sound Level 52 dB Timer 24 hours Coolant R410 A Dimensions 13.6 " ∙x∙12.6 " ∙x∙31.3 " Weight 58 lb “Electrical waste products should not be disposed of with household waste. -
Page 12: Warranty
Alternating∙Current∙(AC)∙circuit,∙in∙accordance∙with∙the∙factory∙provided∙instructions∙which∙accompany∙it. Limited Five Year Warranty (Compressor) For a period of five years from the date of purchase, when this Royal Sovereign Portable Air Conditioner is operated and maintained according to the instruction manual provided with∙the∙product,∙Royal∙Sovereign∙will∙supply∙a∙replacement∙compressor∙(parts∙only),∙free∙of∙charge,∙if∙the∙original∙compressor∙is∙determined∙to∙be∙defective∙in∙workmanship∙or∙ material. If repair becomes necessary, please contact our customer service center. You will be responsible for all freight, insurance, and any other transportation charges to get the unit to our factory or service center. -
Page 13: Página En Español
PORTÁTIL DE AIRE ACONDICIONADO ARP-7014 PORTÁTIL DE AIRE ACONDICIONADO Página en Español Lea y conserve estas instrucciones para referencia futura. Para cualquier asistencia al cliente las necesidades, por favor, seleccione la pestaña de soporte en www.royalsovereign.com Royal Sovereign International, Inc... - Page 14 Introducción Gracias por elegir Royal Sovereign para brindarle a usted ya su familia con todas las de la "Casa Confort" los requisitos para su casa,apartamento u oficina. Este acondicionador de aire portátil puede ser puesta en marcha en cuestión de minutos y se pueden mover fácilmente de una habitación a otra. Es un aire multi-funcional sala de sistema de confort que le ofrece aire acondicionado, deshumidificación y los modos de circulación de aire.
- Page 15 CONTENIDOS Page Conciencia de Seguridad ∙ ∙ ∙∙∙∙∙∙∙∙∙∙∙∙∙∙∙∙∙∙∙∙∙∙∙∙∙∙∙∙∙∙∙∙∙∙∙∙∙∙∙∙∙∙∙∙∙∙∙∙∙∙∙∙∙∙∙∙∙∙∙∙∙∙∙∙∙∙∙∙∙∙∙∙∙∙∙∙∙∙∙∙∙∙∙∙∙∙∙∙∙∙∙∙∙∙∙∙∙∙∙∙∙∙∙∙∙∙∙∙∙∙∙∙∙∙∙∙∙∙∙∙∙∙∙∙∙ 16 Identificación∙de∙las∙piezas∙∙∙∙∙∙∙∙∙∙∙∙∙∙∙∙∙∙∙∙∙∙∙∙∙∙∙∙∙∙∙∙∙∙∙∙∙∙∙∙∙∙∙∙∙∙∙∙∙∙∙∙∙∙∙∙∙∙∙∙∙∙∙∙∙∙∙∙∙∙∙∙∙∙∙∙∙∙∙∙∙∙∙∙∙∙∙∙∙∙∙∙∙∙∙∙∙∙∙∙∙∙∙∙∙∙∙∙∙∙∙∙∙∙∙∙∙∙∙∙∙∙∙∙ 17 Apariencia y Función del Panel de control ∙∙∙∙∙∙∙∙∙∙∙∙∙∙∙∙∙∙∙∙∙∙∙∙∙∙∙∙∙∙∙∙∙∙∙∙∙∙∙∙∙∙∙∙∙∙∙∙∙∙∙∙∙∙∙∙∙∙∙∙∙∙∙∙∙∙∙∙∙∙∙∙∙∙∙∙∙∙∙∙∙∙∙∙∙∙∙∙∙∙∙∙∙∙∙∙∙∙∙∙∙∙ 18 Apariencia y Función del regulador alejado ∙∙∙∙∙∙∙∙∙∙∙∙∙∙∙∙∙∙∙∙∙∙∙∙∙∙∙∙∙∙∙∙∙∙∙∙∙∙∙∙∙∙∙∙∙∙∙∙∙∙∙∙∙∙∙∙∙∙∙∙∙∙∙∙∙∙∙∙∙∙∙∙∙∙∙∙∙∙∙∙∙∙∙∙∙∙∙∙∙∙∙∙∙∙∙∙∙∙∙∙∙∙∙∙∙ 18 Introducción ∙∙∙∙∙∙∙∙∙∙∙∙∙∙∙∙∙∙∙∙∙∙∙∙∙∙∙∙∙∙∙∙∙∙∙∙∙∙∙∙∙∙∙∙∙∙∙∙∙∙∙∙∙∙∙∙∙∙∙∙∙∙∙∙∙∙∙∙∙∙∙∙∙∙∙∙∙∙∙∙∙∙∙∙∙∙∙∙∙∙∙∙∙∙∙∙∙∙∙∙∙∙∙∙∙∙∙∙∙∙∙∙∙∙∙∙∙∙∙∙∙∙∙∙∙∙∙∙∙∙∙∙∙∙∙∙∙∙∙∙∙∙∙∙ 19 Instalación ∙∙∙∙∙∙∙∙∙∙∙∙∙∙∙∙∙∙∙∙∙∙∙∙∙∙∙∙∙∙∙∙∙∙∙∙∙∙∙∙∙∙∙∙∙∙∙∙∙∙∙∙∙∙∙∙∙∙∙∙∙∙∙∙∙∙∙∙∙∙∙∙∙∙∙∙∙∙∙∙∙∙∙∙∙∙∙∙∙∙∙∙∙∙∙∙∙∙∙∙∙∙∙∙∙∙∙∙∙∙∙∙∙∙∙∙∙∙∙∙∙∙∙∙∙∙∙∙∙∙∙∙∙∙∙∙∙∙∙∙∙∙∙∙∙∙∙ 21 Mantenimiento ∙∙∙∙∙∙∙∙∙∙∙∙∙∙∙∙∙∙∙∙∙∙∙∙∙∙∙∙∙∙∙∙∙∙∙∙∙∙∙∙∙∙∙∙∙∙∙∙∙∙∙∙∙∙∙∙∙∙∙∙∙∙∙∙∙∙∙∙∙∙∙∙∙∙∙∙∙∙∙∙∙∙∙∙∙∙∙∙∙∙∙∙∙∙∙∙∙∙∙∙∙∙∙∙∙∙∙∙∙∙∙∙∙∙∙∙∙∙∙∙∙∙∙∙∙∙∙∙∙∙∙∙∙∙∙∙∙∙∙∙∙ 21 Solución de problemas ∙∙∙∙∙∙∙∙∙∙∙∙∙∙∙∙∙∙∙∙∙∙∙∙∙∙∙∙∙∙∙∙∙∙∙∙∙∙∙∙∙∙∙∙∙∙∙∙∙∙∙∙∙∙∙∙∙∙∙∙∙∙∙∙∙∙∙∙∙∙∙∙∙∙∙∙∙∙∙∙∙∙∙∙∙∙∙∙∙∙∙∙∙∙∙∙∙∙∙∙∙∙∙∙∙∙∙∙∙∙∙∙∙∙∙∙∙∙∙∙∙∙∙∙∙∙∙∙∙ 22 Especificaciones técnicas ∙∙∙∙∙∙∙∙∙∙∙∙∙∙∙∙∙∙∙∙∙∙∙∙∙∙∙∙∙∙∙∙∙∙∙∙∙∙∙∙∙∙∙∙∙∙∙∙∙∙∙∙∙∙∙∙∙∙∙∙∙∙∙∙∙∙∙∙∙∙∙∙∙∙∙∙∙∙∙∙∙∙∙∙∙∙∙∙∙∙∙∙∙∙∙∙∙∙∙∙∙∙∙∙∙∙∙∙∙∙∙∙∙∙∙∙∙∙∙∙∙∙∙∙∙∙...
-
Page 16: Conciencia De Seguridad
CONCIENCIA DE SEGURIDAD Especificaciones eléctricas y cable de alimentación Compruebe∙que∙el∙servicio∙eléctrico∙que∙se∙utiliza∙es∙adecuado∙para∙el∙modelo∙que∙ha∙elegido.∙La∙potencia∙eléctrica∙de∙su∙ acondicionador de aire nuevo se define en la placa de serie de la unidad. Por favor refiérase a la calificación al comprobar los∙requisitos∙eléctricos∙para∙garantizar∙que∙cumplen∙los∙códigos∙eléctricos∙de∙su∙ubicación. •∙Instale∙el∙acondicionador∙de∙aire∙de∙acuerdo∙con∙las∙instrucciones∙de∙instalación∙suministrado. •∙No∙modifique∙ninguna∙parte∙de∙este∙producto. •∙No∙introduzca∙ningún∙objeto∙en∙el∙producto∙o∙bloquear∙el∙flujo∙de∙aire∙de∙ninguna∙manera. •∙Asegúrese∙de∙que∙la∙fuente∙de∙alimentación∙que∙utiliza∙tiene∙un∙voltaje∙adecuado. •∙Utilice∙sólo∙un∙equipo∙instalado∙de∙3∙pines,∙conector∙a∙tierra∙de∙CA∙que∙está∙clasificado∙115V,∙60Hz,∙15∙amperios∙o∙más. •∙∙ S i∙la∙toma∙de∙corriente∙que∙vaya∙a∙utilizar∙no∙está∙adecuadamente∙conectada∙a∙tierra∙o∙protegido∙por∙un∙fusible∙de∙retardo o un interruptor de circuito, usted debe tener un electricista calificado instale un tomacorriente adecuado. -
Page 17: Identificación De Las Piezas
ARP-7014 IDENTIFICACIÓN DE LAS PIEZAS 1. Cubierta trasera 2. Entrada de aire 3. Cubierta frontal 4. Panel de operaciones 5. Castor 6. Línea eléctrica 7. Entrada de aire 8.∙∙∙Extractor∙de∙aire∙caliente∙ 9.∙∙∙Conector∙de∙manguera∙(fin∙ventana)∙ 10.∙Conector∙de∙manguera∙(fin∙del∙acondicionador∙de∙aire)∙ 11. Kit de la ventana Fig.1 12. Mando a distancia 13. -
Page 18: Apariencia Y Función Del Panel De Control
APARIENCIA Y FUNCIÓN DEL PANEL DE CONTROL 1. Botón POWER 2. Botón TEMPERATURA + 3. Botón TEMPERATURA - 4.∙RECEPTOR∙DE∙SEÑAL∙DE∙VENTANA∙ 5. Botón MODO FUNCIONAMIENTO 6.∙Botón∙de∙AJUSTE∙DE∙VELOCIDAD∙DEL∙VENTILADOR∙ Fig.3 7. Botón TIMER ON / OFF APARIENCIA Y FUNCIÓN DEL REGULADOR ALEJADO 1. Botón POWER Pulse este botón para encender la máquina o NO. -
Page 19: Introducción
ARP-7014 INTRODUCCIÓN Fig.5 Fig.5a Antes de iniciar las operaciones en esta sección: •∙Coloque∙el∙aparato∙de∙aire∙acondicionado∙cerca∙de∙una∙toma∙de∙alimentación∙eléctrica.∙ •∙∙ C omo∙se∙muestra∙en∙la∙figura∙5∙y∙la∙figura∙5a,∙instale∙el∙tubo∙de∙escape,∙e∙instalar∙el∙deslizador∙de∙la∙ventana∙en∙la∙ventana.∙ •∙Inserte∙el∙cable∙de∙alimentación∙a∙una∙toma∙de∙AC115V/60Hz∙tierra.∙ •∙Pulse∙el∙botón∙POWER∙para∙encender∙el∙aire∙acondicionado.∙∙ Antes de utilizar Aviso: Rango de temperatura de funcionamiento: Refrigeración máxima Refrigeración mínima DB/WB∙(℉) 95/75 64/54 •∙Deje∙que∙la∙unidad∙se∙siente∙en∙posición∙erguida∙durante∙al∙menos∙2∙horas∙antes∙de∙su∙primer∙uso. •∙Asegúrese∙de∙que∙el∙tubo∙de∙escape∙se∙ha∙instalado∙correctamente. •∙Asegúrese∙de∙que∙el∙tapón∙de∙drenaje∙de∙goma∙esté∙bien∙enchufado∙en∙el∙desagüe∙en∙la∙parte∙posterior∙de∙la∙unidad∙para∙evitar∙fugas∙de∙agua. •∙Asegúrese∙de∙que∙el∙acondicionador∙de∙aire∙esté∙en∙una∙superficie∙plana. Fig.6 Precauciones para la refrigeración y deshumidificación de operaciones : •∙∙... - Page 20 Operación de refrigeración •∙Presione∙el∙botón∙"Mode"∙hasta∙el∙icono∙"Cool"∙aparece. •∙Pulse∙el∙"Temp∙+"∙o∙"∙Temp-∙"∙para∙seleccionar∙una∙temperatura∙ambiente∙deseada.∙(∙62℉- 90℉) •∙Pulse∙el∙botón∙"Fan∙Speed"∙para∙seleccionar∙la∙velocidad∙del∙viento. Operación de deshumidificación •∙Presione∙el∙botón∙"Mode"∙hasta∙que∙parpadee∙"deshumidificación∙Indicador∙de∙lámpara". El funcionamiento del ventilador •∙Presione∙el∙botón∙"Mode"∙hasta∙el∙icono∙"Fan"∙aparece. •∙Pulse∙el∙botón∙"Fan∙Speed"∙para∙seleccionar∙la∙velocidad∙del∙viento∙. Duncionamiento del temporizador Timer ON Ajuste: •∙Cuando∙el∙acondicionador∙de∙aire∙está∙apagado,∙pulse∙el∙botón∙"Timer"∙y∙seleccione∙un∙deseado∙en∙el∙tiempo∙a∙través∙de∙la∙temperatura∙y∙el∙tiempo∙de∙fraguado∙botones. •∙"Preset∙EN∙Time"∙se∙visualiza∙en∙el∙panel∙de∙controles. •∙ON∙temporizador∙se∙puede∙configurar∙para∙cualquier∙tiempo∙de∙0∙a∙24∙horas. Temporizador de establecer •∙Cuando∙el∙botón∙EN∙aire∙acondicionado∙de∙prensa∙"Timer"∙y∙seleccionar∙el∙tiempo∙deseado∙OFF∙a∙través∙de∙la∙temperatura∙y∙el∙tiempo∙de∙fraguado∙botones. •∙"Preset∙OFF∙Time"∙se∙visualiza∙en∙el∙panel∙de∙controles. •∙El∙temporizador∙de∙apagado∙puede∙configurarse∙para∙cualquier∙tiempo∙de∙0∙a∙24∙horas. Drenaje Tanque interno de agua completa función de alarma El∙tanque∙de∙agua∙de∙interior∙del∙acondicionador∙de∙aire∙tiene∙un∙interruptor∙de∙seguridad∙de∙nivel∙de∙agua,∙se∙controla∙el∙nivel∙del∙agua.∙Cuando∙el∙nivel∙del∙agua∙alcanza∙una∙altura∙...
-
Page 21: Instalación
ARP-7014 INSTALACIÓN Explicaciones de instalación: •∙Instale∙el∙aparato∙de∙aire∙acondicionado∙en∙una∙superficie∙plana∙por∙lo∙menos∙12∙pulgadas∙de∙distancia∙de∙cualquier∙pared∙u∙objeto∙que∙pueda∙bloquear∙el∙flujo∙de∙aire.∙(Ver∙Fig.∙7) •∙Ocupación∙del∙casquillo∙debe∙estar∙de∙acuerdo∙con∙los∙requisitos∙de∙seguridad∙eléctrica∙locales. Fig.7 Fig.8 Introducción a la instalación de la manguera de escape Instalación temporal •∙Gire∙los∙dos∙extremos∙de∙la∙manguera∙de∙escape∙en∙el∙clip∙de∙fijación∙cuadrado∙y∙el∙clip∙de∙fijación∙plana. •∙∙ I nserte∙el∙clip∙de∙fijación∙cuadrado∙en∙las∙aberturas∙en∙la∙parte∙posterior∙del∙acondicionador ∙de∙aire∙(ver∙Fig.∙8). •∙Coloque∙el∙otro∙extremo∙de∙la∙manguera∙de∙escape∙a∙la∙ventana∙cerca.∙ Instalación Kit de ventana deslizante manguera de drenaje El∙equipo∙deslizador∙de∙la∙ventana∙puede∙instalarse∙horizontal∙o∙verticalmente.∙Abra∙la∙ventana∙y∙lugar Fig.9 Fig.9a el∙deslizador∙de∙la∙ventana∙en∙el∙borde∙interior∙de∙la∙ventana.∙Ajuste∙el∙deslizador∙de∙la∙ventana∙a∙la∙ anchura∙de∙la∙ventana.∙La∙figura.∙9∙y∙la∙figura.∙9a∙muestra∙la∙ventana∙de∙tamaño∙máximo∙y∙mínimo∙para∙ el∙equipo∙deslizador∙de∙la∙ventana. -
Page 22: Solución De Problemas
SOLUCIÓN DE PROBLEMAS Problema Posibles Soluciones Recomendadas Verificar∙y∙restablecer∙el∙enchufe∙de∙alimentación.∙Espere∙3∙ Unidad no se inicia cuando se pulsa el botón de encendido. Unidad no inicia minutos y tratar de ejecutar de nuevo la unidad. la al pulsar Agua∙completos∙parpadea∙la∙luz∙indicadora∙y∙el∙tanque∙de∙agua∙está∙lleno. Vacíe∙el∙depósito∙de∙agua.∙(ver∙página∙8) botón de La temperatura ambiente es superior a la temperatura ambiente. Restablecer la temperatura. -
Page 23: Especificaciones Técnicas
ARP-7014 ESPECIFICACIONES TÉCNICAS Las∙cifras∙observadas∙en∙el∙contenido∙son∙sólo∙para∙referencia;∙variación∙puede∙resultar∙debido∙a∙la∙aplicación∙en∙los∙diferentes∙países∙o∙regiones,∙y∙se∙basará∙en∙el∙ funcionamiento práctico. Descripción de producto ARP-7014 Capacidad∙de∙enfriamiento∙(Btu)∙ 14000 BTU Voltaje∙/∙frecuencia∙ 115∙V∙/∙60∙Hz Potencia de Entrada 1340 W Operativo de nivel de sonido 52 dB Timer 24 horas Refrigerante R410 A Dimensiones 13.6 " ∙x∙12.6 " ∙x∙31.3 "... -
Page 24: Garantía
Royal Sovereign. Esta garantía cubre al comprador original por un desde la fecha de compra y no es transferible. Esta garantía se aplica solo si el acondicionador de aire se usa en un circuito de Corriente Alterna, de acuerdo a las instrucciones de fábrica que acompañan al producto.
Need help?
Do you have a question about the ARP-7014 and is the answer not in the manual?
Questions and answers