FP PostBase Operator's Manual
Mailing system
Hide thumbs
Also See for PostBase:
- Operator's manual (204 pages) ,
- Operator's manual and parts list (60 pages) ,
- Connectivity manualline (18 pages)
Table of Contents
Advertisement
Advertisement
Table of Contents

Related Manuals for FP PostBase


Summary of Contents for FP PostBase
- Page 1 Mailing system Operator Manual First steps...
-
Page 2: About This Operator Manual
Further documents For complete specifications of the mailing system and all optional modules, refer to the Operator Manual PostBase – available as a download from Francotyp-Postalia. Information on available product variants and country-specific particularities can be found in the Addendum to the Operator Manual (if available in your country). -
Page 3: Table Of Contents
Contents About this Operator Manual _____________________________________2 1 Safety tips ____________________________________________________4 2 A short description of the PostBase _______________________________6 PostBase franking machine – overview _______________________6 Feeder – overview (optional) ________________________________8 Things worth knowing about PostBase _______________________9 3 Installation ___________________________________________________12 Step 1: Unpacking and checking the contents of the package ___________12... -
Page 4: Safety Tips
PostBase Mailing System Safety tips PostBase is a digital mailing system with ink-jet print technology for franking mail. PostBase complies with the pertinent safety regulations for office information equipment. Please observe the following tips for your own safety: Prevention of electrical hazards •... - Page 5 • When you move the PostBase from a cold environment (i.e. below 10 °C / 50°F): Unpack the PostBase and wait at least 2 hours before connecting the PostBase.
-
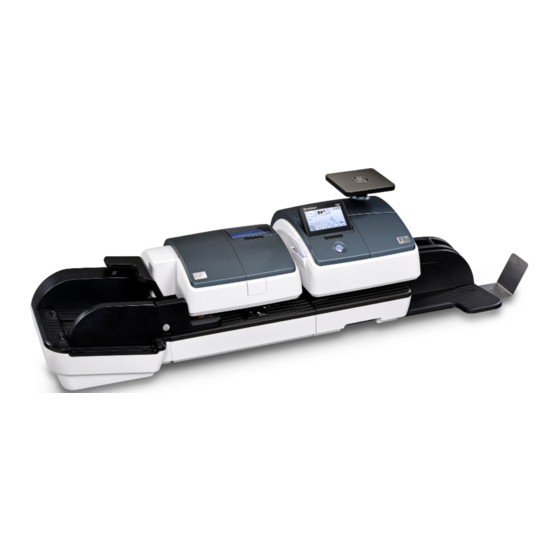
Page 6: Short Description Of The Postbase
PostBase Mailing System A short description of the PostBase PostBase franking machine – overview Display / touch screen (hinged), stored in a receptacle on the back of the display housing: stylus for touch screen operation To adjust the display Scale with weighing platform... - Page 7 A short description of the PostBase Franking machine – rear view Flap covering the Revenector security device USB port LAN port PC connection Emergency release for ink cartridges CAN BUS / port automatic feeder Power connection Slider for unlocking the...
-
Page 8: Feeder - Overview (Optional)
PostBase Mailing System Feeder – overview (optional) Cover flap, with sealant Open flap: tank underneath press button (illuminated) Roller transport Release key (move roller trans- Safety sign port upward) Slope Seal / non seal switch Brush for moistening envelope flaps... -
Page 9: Things Worth Knowing About Postbase
Connection to franking machine franking machine housing) Tray with sponge Things worth knowing about PostBase PostBase is a digital mailing system featuring a touch screen and inkjet print technology. Modular design In its basic version, the mailing system consists of the PostBase franking machine with integrated scale, a hand feed tray and a letter catch tray. - Page 10 PostBase Mailing System Franking To frank a letter, simply position it with the side to be printed on facing up – PostBase will seize the letter and frank it, after which it is exited to the right side ready for dispatch.
- Page 11 – Feeder. Automatic feeder with sealer for the PostBase. The letters are separated from the stack, optionally moistened and sealed, and fed to the PostBase franking machine.
-
Page 12: Installation
• Check that the contents of the packages are complete and free from any damage. Keep the packing. Use it again when you need to transport PostBase or send it in to Service. Scope of delivery – PostBase franking machine –... -
Page 13: Step 2: Assembling Postbase
Step 2: Assembling PostBase Caution! When you move PostBase from a cold environment (i.e. below 10 °C / 50°F): Unpack the PostBase and wait at least 2 hours before connecting PostBase. PostBase requires this period to adapt to the ambient conditions. - Page 14 PostBase Mailing System PostBase with hand feed tray PostBase with sealer (optional) PostBase with feeder (optional) Details on how to assemble the modules can be found on the following pages.
- Page 15 Installation Catch tray: attaching the stop • Attach the stop to the catch tray: Slide the stop into the guides on the catch tray bottom. Mounting the weighing platform • Hold the weighing platform such that the long slot in the weighing platform foot points to the front.
-
Page 16: Step 3: Preparing The Feeder (Optional)
PostBase Mailing System Preparing the feeder (optional) Step 3: Inserting moistening sponge • Open the flap by pressing the release button. • Remove sealant tank out of the housing and put it at a safe place. At the rear of feeder: •... - Page 17 Installation • Carefully insert the basket with sponge into the tray until basket and tray are flush. Mind the position of the cut-out. Cut-out Checks: Basket on the Basket flushed on top extreme left • Check if the basket is correctly seated: It must rest on the extreme left in the tray and close on top in a flushed manner.
- Page 18 PostBase Mailing System Filling with sealing liquid • Unscrew sealant tank cover. • Fill the sealant tank with ‘sealit’ sealing liquid. • Place sealant tank screw cover and tighten. • Turn sealant tank upside down in a non- dangerous area (e. g. over a sink) to check if the cover is well sealed.
- Page 19 Installation • Close the flap. Attach the pendulum • Insert the base of the pendulum into the fixture of the slope. • Press down on the pendulum until it clicks into place.
-
Page 20: Step 4: Connecting Postbase
Make sure your office power supply conforms to the power requirements indicated on the serial number plates. Make sure the socket for connecting PostBase is close by and easily accessible at all times. PostBase franking machine USB port (e.g. connection to... - Page 21 Installation Feeder (optional) Termination plug (already plugged) Power connection Connection to franking machine...
-
Page 22: Step 5: Installing Postbase
• Turn PostBase on: Press the PostBase PostBase button button. The display lighting and button illumination switch on. PostBase performs a self test and then starts the installation procedure. • Follow the instructions on the display. PostBase will guide you step by step through the installation procedure: –... -
Page 23: The Basics Of Operation
The basics of operation The basics of operation In this chapter you will learn about the basic functions of the PostBase mailing system and how to handle the touch screen. Turning the PostBase on/off The franking machine can remain connected to mains all the time to ensure it is always ready for use. -
Page 24: Standby
The PostBase franking machine will go to standby automatically if it is not used for some time. The display is dark and the PostBase button is illuminated in standby. The touch function is inactive. You can ‘wake up’ PostBase by briefly pressing the PostBase button. -
Page 25: Setting Up The Label Dispenser (Optional)
Francotyp-Postalia. The manufacturer FP has established reliability, safety and applicability. The manufacturer cannot assess the reliability, safety and applicability for products not approved by FP, and therefore not vouch for such products We can ensure correct label processing only when you comply with this. -
Page 26: Setting Up The Catch Tray
PostBase Mailing System Setting up the catch tray • The catch tray can be adapted to different envelope sizes (up to ISO B4) by displacing the catch bracket. The stop features several catches for the most common sizes. -
Page 27: Screen Elements And Operation Philosophy
The basics of operation Screen elements and operation philosophy This chapter covers the user interface of the PostBase franking machine. You will learn how to operate the touch screen, the screen elements and the menus, window types and symbols. 4.6.1 The touch screen The touch screen is active when the display is lit. - Page 28 PostBase Mailing System Buttons You distinguish buttons from the screen background by a shadow. They can have various states, depending on the function: Button can be pressed / is active. Button is selected / passive. Confirmation: Button is being pressed.
-
Page 29: The Home Screen
A function can be edited or selected by simply touching its button. Depending on the respective function, the PostBase opens a list, an adjustment menu or a menu offering further options. In the chapters to follow, you will be introduced to each of the menu and window types and their operation. -
Page 30: The Product Calculation Menu
Selecting mailing data Mailing data Current settings By pressing the respective buttons, you select mailing data. The PostBase guides you through the postage calculation process step by step. Press OK to accept the current settings and to return to the Home screen. -
Page 31: The Menu
The basics of operation Returning to the Home screen With the OK button, you set the current selected mailing data for franking and return to the Home screen. Pressing the B button repeatedly deletes the mailing data step by step. By pressing the button again after having deselected all mailing data you will cancel the product selection. -
Page 32: Lists
PostBase Mailing System 4.6.5 Lists Lists (e.g. for adverts, SMS texts) offer all available settings in list form. Use the arrow buttons to scroll forward or backward. Press the respective button to select one of the provided settings and return to the Home screen. -
Page 33: Adjustment Menus
The basics of operation 4.6.6 Adjustment menus A separate menu each opens for editing system parameters and for typing, editing, and clearing user-specific data. There are three types: Lists, input via keypad, and input according to the counter principle. Lists Current setting The left area of the display shows the available settings. -
Page 34: Pop-Up Windows
PostBase Mailing System Input using the counter principle Display field PostBase may require you to enter values via a counter principle. Use the arrow buttons to increase or decrease the figure in each digit until the desired amount is displayed in the top right text box. -
Page 35: Procedures (Wizards)
The basics of operation 4.6.8 Procedures (wizards) For more complex settings, e.g. when setting up connection data, the PostBase opens a ‘procedure’, guiding you through all necessary actions step by step. Different window types are used, depending on requirements. Press C... -
Page 36: Test Print
Once all necessary mailing data are set, you can perform a test print. The T EST PRINT option is shown at the end of the PRODUCT additional services list. • Choose T EST PRINT PRODUCT PostBase prompts you to position a letter. - Page 37 • Choose L to print the test print on a ABEL label. PostBase prints the test print on a label and discharges the label to the right. Positioning an envelope at the feeder (optional) • Position a letter on the feeder: –...
- Page 38 PostBase Mailing System Checking the print quality Make sure the PostBase always provides clean and legible franking imprints. • Check the print quality. There must not be any offsets, blurred or blank spots. Pay special attention to the data matrix symbol (if any).
-
Page 39: Technical Data
Appendix – Technical Data Technical Data Dimensions 310 mm (12.2") – housing – Length 146 mm (5.7") – hand feed tray / sealer 385 mm (15.2") – feeder 280 mm (11") – slope 320 mm / 445 mm (12.6" / 17.5") – catch tray min / max –... - Page 40 Rel. humidity 15% to 80% non-condensing Weighing area 3 g to 7000 g (0.1 oz to 15 lb) Ink cartridges Ink cartridges FP cartridge kit for PostBase Operating and storage +15°C to +35°C (59°F to 95°F) conditions Use in closed rooms only...
- Page 41 Appendix – Technical Data Mail piece specifications Format 105 mm x 148 mm up to 250 mm x 353 mm (3" x 5" up to 10" x 14") (Postcard format up to ISO B4) Thickness up to 10 mm (0.4") (franking without usage of sealing function) Material Ink-absorbent material (suitable for inkjet printing)
- Page 42 PostBase Mailing System Envelope specifications for automatic sealing (feeder) Format 105 mm x 148 mm up to 250 mm x 353 mm (3" x 5" up to 10" x 14") (up to ISO B4) Thickness up to 7 mm (0.3") Material Envelopes must be suitable for sealing by machine.
- Page 43 Appendix – Technical Data...
-
Page 44: License
PostBase Mailing System License This is a copy of the current LICENSE file inside the CVS repository. LICENSE ISSUES ============== The OpenSSL toolkit stays under a dual license, i.e. both the conditions of the OpenSSL License and the original SSLeay license apply to the toolkit. - Page 45 Appendix – License * This product includes cryptographic software written by Eric Young * (eay@cryptsoft.com). This product includes software written by Tim * Hudson (tjh@cryptsoft.com). Original SSLeay License ----------------------- /* Copyright (C) 1995-1998 Eric Young (eay@cryptsoft.com) * All rights reserved. * This package is an SSL implementation written * by Eric Young (eay@cryptsoft.com).
-
Page 46: United States Patents
United States Patents Following patents and applications for patents, designs and trademarks are reserved for the franking machine PostBase ™. US 5671146, US 5699415, US 5790768, US 6247774, US 6594648, US 6625741, US 6629084, US 6698953, US 6733194, US 6739245, US 6771179, US 6853986... -
Page 47: Service / Warranty
Service Every PostBase mailing system is thoroughly checked before leaving the factory. Should any faults occur with your PostBase mailing system in spite of our extensive quality control, please contact Francotyp-Postalia help line. Our main office will be pleased to tell you the address of your local servicing dealer.