Table of Contents
Advertisement
Quick Links
Advertisement
Table of Contents

Related Manuals for Aztech WL593USB


Summary of Contents for Aztech WL593USB
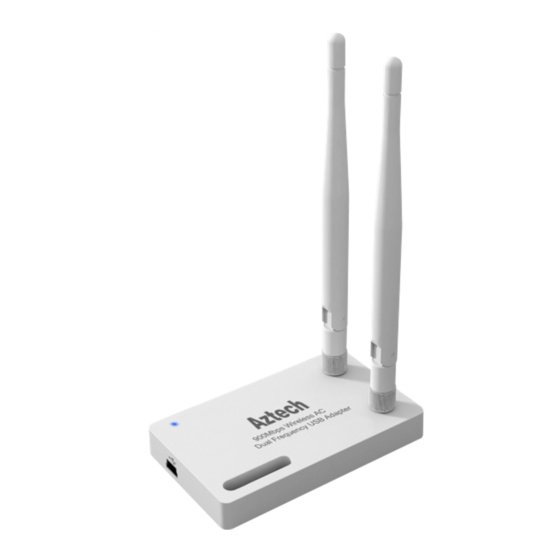
- Page 1 Aztech WL593USB 900 Mbps Wireless AC Dual Frequency USB 3.0 Adapter...
- Page 2 User Manual 2013 © All rights reserved. Version 1.0 No part of this document may be reproduced, republished, or retransmitted in any form or by any means whatsoever, whether electronically or mechanically, including, but not limited to, by way of photocopying, recording, information recording, or through retrieval systems without the express written permission.
-
Page 3: Table Of Contents
User Manual Contents Getting Started ......................5 Check Package Contents ................6 Device Overview ..................6 Configuring Internet Properties ..............7 Removing Temporary Internet Files ............7 Software Installation....................8 Hardware Installation ..................... 10 Connect to a Network ..................11 A. -
Page 4: About The Product
This device also supports connection to other wireless network standards like Wireless G, Wireless B and Wireless N. WL593USB is easy to setup - install the necessary driver software, connect it to an available USB slot, and then connect to a wireless network. The... -
Page 5: Getting Started
User Manual Getting Started Setting up the device is easy. The flowchart below provides an outline of the steps needed to complete the installation. Brief descriptions appear beside each step. Detailed instructions are provided in the subsequent pages. Check Package Contents Remove/Disable Conflicts... -
Page 6: Check Package Contents
Warranty Card USB Cable Resource CD – contains WL593USB Utility installer, User Manual and Easy Start Guide Note: You may also download the Utility installer, the Easy Start Guide, and the User Manual by visiting this link: http://www.aztech.com/support/... -
Page 7: Configuring Internet Properties
User Manual Internet Sharing, Proxy, and Security Applications Internet sharing, proxy software, and firewall applications may interfere with the installation. These should be removed or disabled before starting the installation. If you have any of the following or similar applications installed on your computer, remove or disable them according to the manufacturer’s instructions. -
Page 8: Software Installation
User Manual Software Installation Here are the instructions on how to install the driver software for Windows Vista, 7 and 8. Note: Do not connect the device until the Utility is completely installed. To install the driver software: 1. Insert the Resource CD to the CD-ROM. Then double click Setup.exe in the proper folder to start the installation. - Page 9 User Manual Note: After the installation, the Wireless Utility icon will appear in your system tray. Page 9 of 31...
-
Page 10: Hardware Installation
Hardware Installation 1. After installing the Utility software, you may now proceed to hardware installation by inserting the WL593USB to any of the USB ports available on your computer. 2. When your device is detected, the icon appears in the System Tray. Double-click this icon to open WL593USB Utility. -
Page 11: Connect To A Network
2. Press the WPS of your Access Point for 5 seconds. 3. Press the WPS button of the Aztech WL593USB device for 5 seconds. 4. The WL593USB LED will start to blink during pairing. To confirm the connection, see status of the Wireless Connection if connected. - Page 12 User Manual 3. The Wireless LAN Utility window will appear. Page 12 of 31...
- Page 13 User Manual 2. On the Wireless Utility window, click the ‘Available Network’ tab, it will provide the list of available network within your area. Note: The Available Network will display Network SSID, Channel, Encryption, Network Authentication, Signal, Type, BSSID and Mode. Page 13 of 31...
- Page 14 User Manual 3. Select a network (e.g AZTECH803GHz-625C) and click the ‘Add to Profile’ button. The Wireless Network Properties window will appear. 4. On the Wireless Network Properties window, input on the ‘Network Key’ and ‘Confirm Network key’ input box, the Access Point password. Click the ‘OK’ button. Page 14 of 31...
- Page 15 ‘Link Quality’ bars would be GREEN in color. 6. The Wireless Utility will provide Access Point with Dual Frequency (2.4GHz and 5GHz). The adapter tray’s icon indicates the connection status received by your WL593USB adapter: If the icon is green, a wireless connection has been established.
- Page 16 User Manual 3. To connect to available wireless network, click the wireless zero configuration icon. The wireless network connection interface will appear with the available wireless network within your area. 4. Choose one network name (e.g. AZTECH8035GHz-625C Router 5G) and double click ‘Connect to a Network’.
- Page 17 User Manual 6. If the screen displays as seen below, it means that a successful wireless connection has been made. You can now surf the Internet. Page 17 of 31...
-
Page 18: General
User Manual About the WL593USB Realtek Wireless Utility A. General Display the status of the current connection SSID, encryption, MAC address and Quality of the connection. Page 18 of 31... -
Page 19: Profile
User Manual B. Profile Here you can add, edit, duplicate and remove profile from your profile list. Add/Remove You can add/remove as many Access Point as possible by clicking the Add or Remove button. Edit You can edit a selected Access Point based on your own parameters. Page 19 of 31... -
Page 20: Available Network
User Manual Duplicate Set Default This will put your selected Access Point into a default connection. C. Available Network Display the list of available wireless AP in range. Page 20 of 31... -
Page 21: Status
User Manual D. Status Shows the detail information about your connection Page 21 of 31... -
Page 22: Wi-Fi Protected Setup (Wps)
User Manual E. Wi-Fi Protected Setup (WPS) Allows you to determine the method of WPS connection (PBC and PIN Configuration). Page 22 of 31... -
Page 23: Pbc (Push Button Configuration)
User Manual PBC (Push Button Configuration). To connect using PBC, click ‘Push Button Config (PBC)’ and the WPS button on your wireless router within 2 minutes WPS simulation button found on the utility. Page 23 of 31... -
Page 24: Pin (Pin Input Configuration)
User Manual PIN (Pin Input Configuration) A. Click the PIN button from the utility. B. Select the desired Wireless AP you would connect to. C. Within 2 minutes, enter the pin shown the screen to your AP’s WPS PIN configuration page. - Page 25 User Manual Note: To use WPS, your router must support the WPS feature. Please refer to your router’s manual to check if it has the WPS feature. Page 25 of 31...
-
Page 26: Disable Adapter
Disables the WL593USB adapter on your network. Virtual Wi-Fi allowed (Only available in Windows 7 and 8) Allows other wireless clients to connect to your WL593USB wireless adapter Windows Zero Config (Only Available for Win XP) Tick if you prefer using Windows wireless connection manager, and disable “REALTEK 11ac USB Wireless LAN Utility”. - Page 27 User Manual Use as an Access Point Share Internet connection coming from your Local Area Network connection with the use of WL593USB adapter. 1. Set the utility to AP mode. 2. Click Config to setup wireless Access Point settings Page 27 of 31...
- Page 28 User Manual 3. Enter SSID, Encryption and Password for the network, then click OK. 4. Tick Settings Internet Connection Sharing (ICS) and select the Local Area Network you wish to share and Apply. Page 28 of 31...
- Page 29 User Manual Use as Virtual Wi-Fi Configure WL593USB wireless adapter as Virtual Wi-Fi to Share your Internet to mobile devices which cannot get the Wi-Fi signal from your main AP. 1. Disable built in Wi-Fi in your computer if available.
- Page 30 User Manual 3. Virtual Wi-Fi Virtual Wi-Fi tab will appear on top. a. Start Virtual Wi-Fi Soft AP b. Click Config c. Configure SSID, Encryption and Password d. Tick Internet Connection Sharing Internet Connection Sharing (ICS) e. For Shared Network, select Realtek 8812AU Wireless LAN 802.11ac USB NIC f.
-
Page 31: Safety Warnings
User Manual Safety Warnings For your safety, be sure to read and follow all warning notices and instructions. Do not open the device. Opening or removing the device can expose you to dangerous voltage points or other risks. Only qualified service personnel can service the device.
Need help?
Do you have a question about the WL593USB and is the answer not in the manual?
Questions and answers