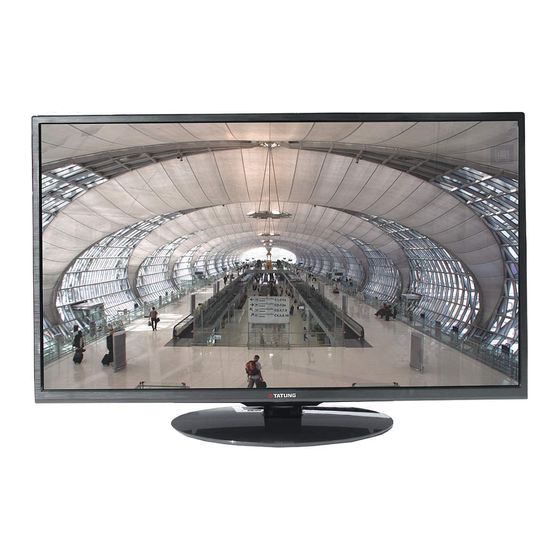
Summary of Contents for Tatung TME50
-
Page 1: Lcd Monitor
TME50 LCD MONITOR With FHD LED 1920 x 1080 pixel resolution panel Please read this manual carefully for proper usage before installation and use.It is recommended to keep this manual properly for future check. -
Page 2: Table Of Contents
Contents Features……………………………………………1 Basic Operations…………………………………9 Safety Warning and Notice………………………1 Turning on/Standby……………………………9 Mounting and Connecting………………………3 Signal source selection………………………9 Packing list………………………………………3 Menu operation description……………………9 … ……………3 Mounting the Monitor set……… Menu setting list………………………………10 …… ……5 Connecting peripheral equipment… USB multimedia function……………………11 ……… ………7 Panel Control Keys………………... - Page 3 Safety Warning and Notice Under Following Conditions Turn off the Monitor set immediately, ● Power failure or unstable voltage. unplug the power cord from the ● Abnormal sound or smell from the device. power outlet, and contact ● AC power cord is damaged. authorized maintenance ●...
-
Page 4: Mounting And Connecting
Safety Warning and Notice Attention ● Do not let children climb onto the Monitor set. ● Keep the small accessories away from children's reach to avoid swallowing. ● If the Monitor set won't be used for a long time, please turn off the device and unplug the power cord. - Page 5 Mounting and Connecting Insert base supporting to supporting holes of base (Need to align the locating bulge on base supporting and the locating slot in base supporting holes.). Align the screw holes on base supporting and base, then fasten screws. Fasten base supporting assembly to back cover. Base installation figure Screws The base supporting...
-
Page 6: Connecting Peripheral Equipment
Mounting and Connecting Mount on the base Mount on the wall 30cm 30cm 10cm 10cm 10cm 10cm 10cm Obstruct the air circulation Obstruct the air circulation Ventilation ● Please keep this space at least around the Monitor as shown in the figure. ●... - Page 7 Mounting and Connecting Connecting power supply USB 1 interface To power socket Power cord (100-240VAC 60/50Hz) USB 2 interface Earphone port Connect to the AV device with HDMI interface HDMI1 input connection G Green (Y signal cable) Connect t o the device with Connect to the AV device B Blue (Pb/Cb signal cable) YPbPr/YCbCr...
-
Page 8: Panel Control Keys
Mounting and Connecting Y Yellow (VIDEO signal cable) W White(AUDIO-L signal cable) R Red (AUDIO-R signal cable) Video cable Audio cable Audio cable Connect to the devices with AV output Connect to the devices with AV Connect to the devices with AV output interface (e.g. -
Page 9: Remote Control
Remote Control Remote Control Key Instruction Invalid Function Power Mute POWER( Switch between normal working and standby Turn off the sound MUTE( Numerical key Numerical input button Freeze picture Numerical key Switch the audio mode among Standard, Music, Movie, User SMART S SMART P Switch the image mode among Standard, Soft, User, Bright... -
Page 10: Basic Operations
Basic Operations Turning on/Standby Insert the power plug into the outlet. Press " " button on the Monitor set, and press " " key on the remote control or on the control panel to turn on the Monitor set. Press " "... -
Page 11: Menu Setting List
Basic Operations Menu setting list Refer to the table below for the specific menu settings. Picture Mode Adjust the overall effect of images: Standard, Soft, User, Bright. Adjust the overall layering of images: increase the analog value to improve the Contrast contrast and decrease the analog value to reduce the contrast (0-100). -
Page 12: Usb Multimedia Function
Basic Operations USB multimedia function Connect the USB storage device to the USB interface in the Monitor set, press "SOURCE" key to select the USB signal source and press "OK" key to confirm. Remark: 1. Compatible USB media files: video, audio, picture, and text. The nonstandard USB storage devices may be incompatible;... - Page 13 Basic Operations Rotate CW: Press " " key to select this function, and press "OK" key to rotate the picture clockwise. Rotate CCW: Press " " key to select this function, and press "OK" key to rotate the picture counterclockwise.
-
Page 14: Troubleshooting
Basic Operations Troubleshooting Problem Reason Solution Monitor image is good, but Enter “ Monitor " setting menu and reset the sound Monitor sound setting is improper. there is noise. system. Power plug is loose, or power 1.Check if the power cord is connected properly. No screen display, no sound, supply isn't connected. -
Page 15: Technical Specifications
Technical Specifications Master unit Panel size 50" Max. Resolution 1920×1080 Best Resolution 1920×1080@60Hz Pixel Pitch 0.5708mm×0.5708mm Active Area 1095.84mm×616.41mm Power Supply 100-240VAC 60/50Hz Power Consumption of Speaker 8W+8W Unpacking: 1135×661×73(mm) Net Weight: 16kg Excluding base Dimension(L×H×W)and Packing: 1280×782×175(mm) Gross Weight: 20kg Weight Unpacking: 1135×728×73(mm) Net Weight: 17.5kg...


Need help?
Do you have a question about the TME50 and is the answer not in the manual?
Questions and answers