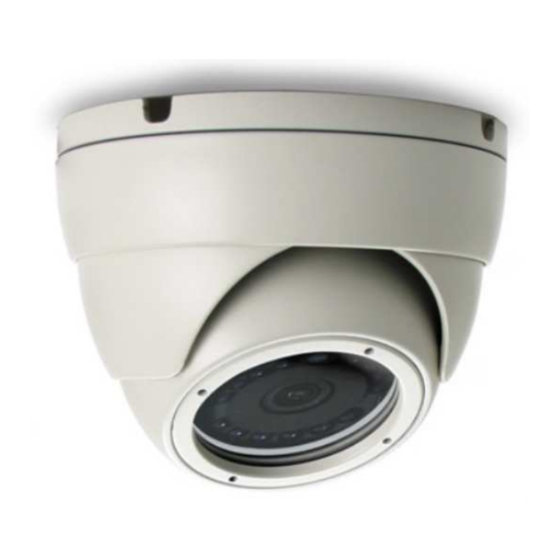
Summary of Contents for Avtech DG104
- Page 1 AV TECH CORPORATION DG104 Easy repair manual Date: 2015/05/10 Verson 1.0 Producer: - 1 -...
-
Page 2: Table Of Contents
Tools Introduction(工具介紹)………………………………………………………………….3 Component drawing(零件位置圖)…………………………………………………………….4 Block diagram(零件方塊圖)…………………………………………………………………..5 Easy installation(簡易接法)……………………………………………………………………6 Measurement methods–Multimeter(簡易量測方式-三用電表)……………………………….7 Repair flow chart(維修流程圖)………………………………………………………………..8 Dismantling process explanation(拆解說明)………………………………………………….9 Check the voltage-is there short circuit (短路量測方式)…………………………………..10 Repair Check point(維修確認點)……………………………………………………………..11 Repair material BOM list(維修物料清單)…………………………………………………….12 Quickly repair(簡易維修)……………………………………………………………………..13 Check the IR-cut module and LED board status 確認切換模組及燈板狀況…………………18 Quickly repair for LED Board(燈板簡易維修)………………………………………………..19 Solve power issue,when power can not Successfully open(解決電源無法正常開啟問題)……20 - 2 -... -
Page 3: Tools Introduction(工具介紹)
Equipment&Tools Introduction(工具介紹) 三用電表(Multimeter) 烙鐵(Soldering iron) 示波器(Oscilloscope) Suggestion:40MHz or 100MHz 螢幕(Monitor) 變壓器 DC 12V(Adapter DC 12V) - 3 -... -
Page 4: Component Drawing(零件位置圖)
Component drawing(零件位置圖) Main Board(TOP) Main Board(Bottom) LED Board(TOP) LED Board(Bottom) - 4 -... -
Page 5: Block Diagram(零件方塊圖)
Block diagram(零件方塊圖) Main Board(Senor Board) Bottom LED Board Bottom - 5 -... -
Page 6: Easy Installation(簡易接法)
Easy installation(簡易接法) Only see the video output SDI to HDMI Converter HDMI Monitor Through the HDVR Can be control camera Monitor Power IN DC 12V AVTECH AVT Serial HDVR - 6 -... -
Page 7: Measurement Methods-Multimeter(簡易量測方式-三用電表)
Measurement methods–Multimeter (簡易量測方式-三用電表) Sensor Board Black probe touch GND 黑色探棒接地 Red probe touch Measuring point 紅色探棒接 測點 Change to the DC 20 voltage profile 切換到 DC 20V 檔位進行量測 - 7 -... -
Page 8: Repair Flow Chart(維修流程圖)
Change bad material visual investigation 直接更換零件 Have see the bad issue DC 12V DC 3V8 Check DC12V DC 3V3 DC 1V5 DC 1V2 Check DC3V8 Refurbished Check DC3V3 客戶自行整新出貨 Check 1V5 Check 1V2 RMA repair to AVTECH - 8 -... -
Page 9: Dismantling Process Explanation(拆解說明)
Dismantling process explanation(拆解說明) Pull out the connector Pull out the cable Remove the screw - 9 -... -
Page 10: Check The Voltage-Is There Short Circuit (短路量測方式)
Check the voltage-is there short circuit (短路量測方式) 1.Use the multimeter and switch to the diode stalls. 使用三用電表並切換到二極體檔進行量測 Multimeter OFF Multimeter switch to the diode stalls 2.Do not used any power in the camera.(Please reference to voltage measurement point) 過程中不要輸入任何電源(量測零件可參考電壓量測點) Do not used power 請勿使用電源... -
Page 11: Repair Check Point(維修確認點)
Repair Check point(維修確認點) LT302 DC3V3 LT301 DC3V3 LT303 DC3V3 DP01 DC12V CT122 DC1V2 BD2 1V5 L502 DC3V8 - 11 -... -
Page 12: Repair Material Bom List(維修物料清單)
Repair material BOM list(維修物料清單) Sensor Board Location Part Number Part Name DP01 PDRB521SSA-0L PRB521S-30(SC79)<LISION> IC501 PU-FR9801-110 PFR9801S6CTR(SOT23-6) L502 PL4U7/2512-00 P4.7uH(2512)/GNR2512PL U301 PUAT5231330C0 PAT5231-3.3KE(SOT25) 3.3V U302 PUAT5231330C0 PAT5231-3.3KE(SOT25) 3.3V LT301 PB601/1005-00 P600(1005)/FBMA-11-100505-60 1A03T 300mA LT302 PB601/1005-00 P600(1005)/FBMA-11-100505-60 1A03T 300mA LT303 PB601/1005-00 P600(1005)/FBMA-11-100505-60 1A03T 300mA U201... -
Page 13: Quickly Repair(簡易維修)
Quickly repair(簡易維修) DC 12V 請依照圖片標示位置進行量測 Please follow the picture indicate the location to measurement. 若無電壓值請進行更換零件動作 If there have no voltage ,please change material. Test sequence 測試順序 DP01 DP01 DC12V - 13 -... - Page 14 DC 3V8 請依照圖片標示位置進行量測 Please follow the picture indicate the location to measurement. 若無電壓值請進行更換零件動作 If there have no voltage ,please change material. Test sequence 測試順序 IC501->L502 IC501 Pin6 DC3V8 IC501 Pin5 DC12V L502 DC3V8 - 14 -...
- Page 15 DC 3V3 請依照圖片標示位置進行量測 Please follow the picture indicate the location to measurement. 若無電壓值請進行更換零件動作 If there have no voltage ,please change material. Test sequence 測試順序 U301->U302->LT301->LT302->LT303 U302 Pin1 DC3V8 U302 Pin5 DC3V3 U301 Pin5 DC3V3 U301 Pin1 DC3V3 LT301 DC3V3 LT302 DC3V3 LT303 DC3V3 - 15 -...
- Page 16 DC 1V5 請依照圖片標示位置進行量測 Please follow the picture indicate the location to measurement. 若無電壓值請進行更換零件動作 If there have no voltage ,please change material. Test sequence 測試順序 U201 U201 Pin1 DC3V8 U201 Pin5 DC1V5 - 16 -...
- Page 17 DC 1V2 請依照圖片標示位置進行量測 Please follow the picture indicate the location to measurement. 若無電壓值請進行更換零件動作 If there have no voltage ,please change material. Test sequence 測試順序 UT01 UT01 Pin5 DC 1V2 UT01 Pin1 DC 3V3 - 17 -...
-
Page 18: Check The Ir-Cut Module And Led Board Status 確認切換模組及燈板狀況
Check the IR-cut module and LED board status 確認切換模組及燈板狀況 Check the LED module status 確認 LED 狀況 Blank the light sensor Main board and LED Board Find the Light sensor location And see the LED status need to combine Check the IR Cut module status 確認 IR-Cut 模組狀況 The picture are B/W mode Blank the light sensor and LED turn on... -
Page 19: Quickly Repair For Led Board(燈板簡易維修)
Quickly repair for LED Board(燈板簡易維修) Some LED part damage Multimeter switch to the diode stalls 切換到二極體檔位 Measurement diode 量測二極體兩端 If the measured value of 1 indicates diode is damaged. 若量測數量為 1 表示零件已經損壞 Please change diode materila. 請更換零件 - 19 -... -
Page 20: Solve Power Issue,When Power Can Not Successfully Open(解決電源無法正常開啟問題)
Check the IR-CUT status 檢測 IR-CUT 問題 If installation of AVTECH AVT series can be directly reply to the factory setting. 若有裝設 AVTECH AVT 系列 可直接透過 HDDVR 進行回覆出廠設定動作 Setting ADVANCED CONFIG Select DCCS mode and SETUP mode Enter 5.FACTORY setting and Enter 6.SYSTEM setting... - Page 21 Check firmware version 確認軟體版本 Check firmware version Stand color are green or purple If see the different color please contact FAE 請確認版本顏色 出廠設定為綠色或紫色 若看到不同顏色請與 FAE 聯絡 - 21 -...
- Page 22 When power can not successfully open(解 決電源無法正常開啟) CPVD1-> 1uF/6.3V(PC105/6V3C000) RDVD1-> 47R(PR47R/0402-00) CDVD2-> 1K(PR102/0402-00) CDVD2 Change material RDVD1 Change material CPVD1 Change material 1uF/6.3V - 22 -...


Need help?
Do you have a question about the DG104 and is the answer not in the manual?
Questions and answers