Advertisement
Table of Contents
- 1 Instructions for Safe Use
- 2 Battery Charging
- 3 Important Notes before Use
- 4 Charging Station
- 5 Virtual Barrier
- 6 Remote Control
- 7 Cleaning Programs
- 8 Additional Features
- 9 Emptying the Dust Container
- 10 Replacing the Batteries
- 11 Troubleshooting
- 12 Error Codes
- 13 Your Guarantee
- Download this manual
Advertisement
Table of Contents

Related Manuals for Hoover Robo.com3


Summary of Contents for Hoover Robo.com3
- Page 1 User MANUAL ®...
-
Page 2: Instructions For Safe Use
Please read the following information carefully before using your Robo.com³ or its accessories. Do not disassemble the Robo.com³ and do not attempt to repair it yourself. If a fault occurs, please contact the Hoover after Sales Service for professional advice. - Page 3 In the event of a significant drop of the Robo.com³ performance, replacement batteries can be obtained from your Hoover retailer. Only use Hoover approved replacement parts for your Robo.com³. Use of parts that are not approved by Hoover are dangerous and will invalidate your warranty.
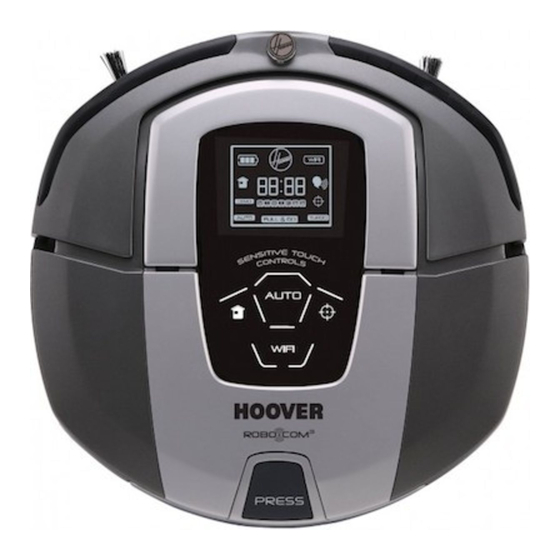
- Page 4 gETTINg TO KNOw YOUR ROBO.COM³ CLEANER robo.com³ top View Front Sensor window Bumper F-Soft Furniture Protector R-Soft Furniture Protector L-Soft Furniture Protector Display Screen & Control Panel Left Sensor window Carry Handle Top Cover Top Infrared Lens Dust Container Release Button robo.com³...
-
Page 5: Charging Station
gETTINg TO KNOw YOUR ROBO.COM³ CLEANER Charging station* Infrared Signal window Charging Indicator Charging Contacts Power Indicator Power Supply Connector Infrared Transmitter Main Power Adaptor Virtual Barrier* Virtual Barrier Selector Switch Long Range Infrared Transmitter Short Range Power Indicator Medium Range Near Infrared Transmitter * Certain Models only ** May vary according to model... -
Page 6: Remote Control
gETTINg TO KNOw YOUR ROBO.COM³ CLEANER remote Control** Power On/Off Button Auto Button Arrow Button Up DEMO Arrow Button Left Ok Confirmation Button Arrow Button Back Arrow Button Right Scheduling Button DEMO Timing Setting Button & wi-Fi Switch Button* Home Button Spot Button Turbo Button Full &... - Page 7 PREPARE YOUR ROBO.COM³ CLEANER PACkAGiNG Do not dispose of your Robo.com³ packaging. It may be required in the future for storing or transporting your Robo.com³. WArNiNG: when unpacking your Robo.com³ and its accessories, take care to keep plastic bags away from babies, young children and animals to avoid the risk of suffocation. Before using your Robo.com³...
- Page 8 reMote CoNtroL** set UP [Fig.6] Remote control function ON To install batteries see cleaner maintenance – Replacing the batteries. Every time you switch On the robot, press the button** on the main product for 4 seconds to activate the remote control function.when this button on the robot is illuminated* or when on LCD** the indicator appears it means that the remote control function is active and vice versa.
-
Page 9: Cleaning Programs
is displayed. Press the OK confirmation button to confirm. 4. The minute display will flash. Press the up and down arrow on the remote control until the correct minute is displayed. Press the OK confirmation button to confirm. 5. Day and time are now set. With Wi-Fi Application* Following the instruction in the wi-Fi Application*. -
Page 10: Additional Features
Home Mode: [Fig.15] You can command your Robo.com³ return to the charging station for charging by: 1) Press the sensitive touch control on the robot 2) Press the button on the remote control 3) Following the instruction in the wi-Fi Application*. ADDitioNAL FeAtUres DEMO Demo Mode:... - Page 11 BrUsHes If the edge brush is damaged it will need to be replaced. Replacement edge brush can be obtained from your Hoover retailer. 1. Switch the Robo.com³ off and turn it over. 2. Remove the retaining screw with a screwdriver.
-
Page 12: Replacing The Batteries
3. Dispose of the batteries safely. Used batteries should be taken to a recycling station and not disposed of with household waste. TROUBLESHOOTINg Fig.28 The following is a list of commonly encountered problems and solutions. If any of these problems persist contact your local Hoover representative. The Robo.com³ does not • Check that the Robo.com³ is switched on. work •... -
Page 13: Error Codes
Dust container is absent. Replace dust container. Er12 Debris in the left edge brush. See ‘Cleaning the edge brushes’. AtteNtioN: If any of these failures persist, contact your local Hoover representative. DO NOT try to disassemble the Robo.com³ by yourself. IMPORTANT INFORMATION Hoover spares and Consumables Always replace parts with genuine Hoover spares. - Page 14 ® PriNteD iN P.r.C. 48010192...
Need help?
Do you have a question about the Robo.com3 and is the answer not in the manual?
Questions and answers