Table of Contents
Advertisement
Advertisement
Table of Contents

Related Manuals for Hoover Robo-com 2


Summary of Contents for Hoover Robo-com 2
-
Page 1: Instruction Manual
robocom2 cover en.pdf 1 7/17/2012 2:44:07 PM INSTRUCTION MANUAL ®... -
Page 2: Important Safety Reminders
• Do not continue to use your Robo.com² if it appears to be faulty. If the mains power adaptor power cord is damaged, stop using it IMMEDIATELY: to avoid a safety hazard, only an authorised Hoover Service engineer must replace the Power Cord. -
Page 3: Contents Of The Box
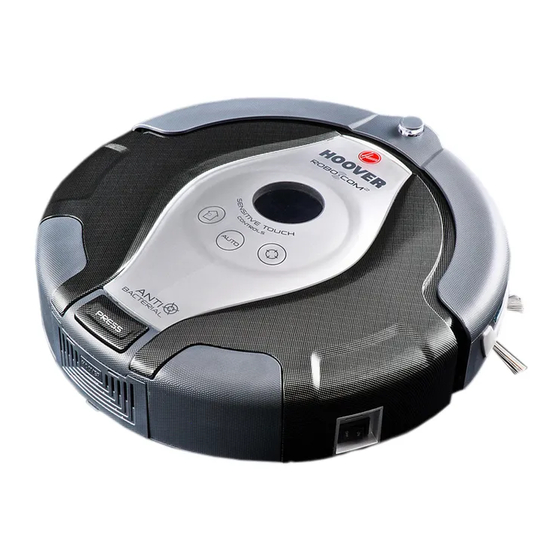
CONTENTS OF THE BOX Robo.com² Charger Base Station Filter** ® Mains Power Adaptor User Manual Remote Control** Virtual Barrier* Floor Polisher Pad Holder* Floor Polisher Pad* Multi-purpose Edge Cleaning Brush Cleaning Brush * Certain Models Only ** May vary according to model robo_com2 IM Australia.indd 2 7/19/2012 4:22:05 PM... - Page 4 GETTING TO KNOW YOUR ROBO.COM² CLEANER Robo.com² Top View Front Bumper Right Drive Wheel Infrared Receiver Power Switch Auto Charge Contacts Charging Connector Soft Furniture Protector Exhaust Grille Sensor Window Dust Container Display Screen Floor Polisher Pad* Dust Container Release Button Floor Polisher Pad Holder* Floor Sensor Floor Brushes Release Latch...
-
Page 5: Virtual Barrier
GETTING TO KNOW YOUR ROBO.COM² CLEANER Charger Base Station Night Light Switch Virtual Barrier* Set Switch Night Light Power Supply Connector Short Range Barrier- 2m Charging Contacts Medium Range Barrier - 4m Infrared Transmitter Long Range Barrier - 6m Charge Indicator Infrared Transmitter Power Indicator Power Indicator... -
Page 6: Remote Control
GETTING TO KNOW YOUR ROBO.COM² CLEANER Remote Control** On / Off Power Button Day Indicator (Scheduling Function)* Automatic Cleaning Mode Button Automatic Return to Charger Base Station Indicator Spot Cleaning Mode Button Automatic Cleaning Mode Indicator OK Confirmation Button Spot Cleaning Mode Indicator Arrow Buttons Maintenance Indicator Local Time Setting Button UV Lamp Indicator*... -
Page 7: Automatic Charging
PREPARING YOUR ROBO.COM² CLEANER Packaging Do not dispose of your Robo.com² packaging. It may be required in the future for storing or transporting your Robo.com². When unpacking your Robo.com² and its accessories, take care to keep plastic bags away from babies, young children and animals to avoid the risk of suffocation. Before using your Robo.com² for the first time, you must fully charge it. This will take approximately 6 hours. Do not expose the Robo.com², Mains power adaptor or Charger Base Station to temperatures below 0°c or above 30°c as this may damage the Battery. -
Page 8: Remote Control Setup
PREPARING YOUR ROBO.COM² CLEANER Remote Control** Set Up To install batteries see Cleaner Maintenance - Replacing the batteries. Note: The Remote Control** can be used through walls because it works on radio waves not infrared. Virtual Barrier* Set Up To install batteries see Cleaner Maintenance - Replacing the batteries. The Virtual Barrier* is used to prevent the Robo.com²... - Page 9 USING YOUR ROBO.COM² CLEANER Power On Press the on / off switch on the side of the Robo.com². The LCD screen will illuminate. NOTE: If your robot is already switched On, but in standby mode, it can be activated from the remote control** or pressing one of the touch sensitive keys.
-
Page 10: Additional Features
USING YOUR ROBO.COM² CLEANER Setting up the Cleaning Schedule* The Robo.com² can be programmed to automatically clean each day or on specific days as desired. Once set up this will occur at the same time on each day specified. To set up a cleaning schedule over one week complete the following: Press the Scheduling Function button on the Remote Control**. A flashing box will appear around M (Monday). Use the up and down arrow keys to select the desired day and then press the OK Confirmation Button to confirm that day. You can also choose multiple days (up to 7 days). Once each day of the week have been selected, you can decide the hour of the cleaning schedule: the hour will start flashing on the display. Use the up and down arrow keys to select the desired ... -
Page 11: Emptying The Dust Container
MAINTAINING YOUR ROBO.COM² CLEANER Before performing any maintenance task, ensure the Robo.com² is switched off. Turn the Robo.com² off and remove from the Charger Base Station. Use a damp cloth with a little soap to clean all surfaces. DO NOT allow water into any part of the product whilst cleaning. -
Page 12: Cleaning/Replacing The Floor Brushes
MAINTAINING YOUR ROBO.COM² CLEANER Cleaning the Floor Brushes Clean the Floor Brushes regularly to maintain maximum cleaning performance. Turn Robo.com² off and remove from the Charger Base Station. Turn the Robo.com² over. Rotate the Floor Brush assembly carefully and using scissors cut and remove any tangled threads or hair etc. -
Page 13: Cleaning The Front Wheel
MAINTAINING YOUR ROBO.COM² CLEANER Cleaning the Edge Cleaning Brush The Edge Cleaning Brush can be easily worn from heavy use so you should check it regularly to monitor its condition. Switch the Robo.com² off and turn the Robo.com² over. Remove the retaining screw with a screwdriver. Use a pair of scissors to remove any trapped hair or debris. -
Page 14: Cleaning The Sensor Window
Re-assemble when fully dry. Replacing the Batteries Only use approved replacement parts for your Robo.com². Using parts not validated by Hoover are dangerous and will void the warranty. If the Robo.com², Virtual Barrier* and Remote Control** is not to be used for several months please remove the batteries and store in a dry location. -
Page 15: Troubleshooting
TROUBLESHOOTING The following is a list of commonly encountered problems and solutions. If any of these problems persist contact your local Hoover representative or service agent. The Robo.com² does not work • Check that the Robo.com² is switched on. • Check that the Dust Container, filter and motor are clean. -
Page 16: Your Guarantee
IMPORTANT INFORMATION Hoover Spares and Consumables Always replace parts with genuine Hoover spares. These are available from your local Hoover dealer or direct from Hoover. When ordering parts always quote your model number. Consumables • Pre-Motor Filter: RB 208 35601261 Spares • Robo.com² Battery Pack: RB 201 35601254 • Floor Brushes: RB 202 35601255 • ... - Page 17 Keep this Guarantee with your receipt as proof of purchase should you ever require service. Purchase Date../../..Hoover Floorcare policy is one of continuous development and accordingly we reserve the right to change specifications without prior knowledge. Contents are copyright.
- Page 18 530 Springvale Road, Glen Waverley Victoria 3150 Hoover Customer Helpline 1 300 360 845 Due to a policy of continuous development Designed and Engineered in Italy The words HOOVER and the circular emblem PRINTED IN CHINA are registered trademarks. 4800XXXX V1 0712 ROBO.COM²’ is a trademark.
Need help?
Do you have a question about the Robo-com 2 and is the answer not in the manual?
Questions and answers