Epson TM-L90 User Manual
Hide thumbs
Also See for TM-L90:
- Technical reference manual (212 pages) ,
- Service manual (148 pages) ,
- Developer's manual (140 pages)
Table of Contents
Advertisement
Quick Links
Advertisement
Table of Contents

Related Manuals for Epson TM-L90


Summary of Contents for Epson TM-L90
- Page 1 User’s Manual M00075800EN...
- Page 2 Seiko Epson Corporation. No patent liability is assumed with respect to the use of the information contained herein. While every precaution has been taken in the preparation of this book, Seiko Epson Corporation assumes no responsibility for errors or omissions.
-
Page 3: Important Safety Information
Shut down your equipment immediately if it produces smoke, a strange odor, or unusual noise. Continued use may lead to fire. Immediately unplug the equipment and contact your dealer or a Seiko Epson service center for advice. Never attempt to repair this product yourself. Improper repair work can be dangerous. -
Page 4: Caution Labels
4 TM-L90 User’s Manual... -
Page 5: Downloading Utilities And Manuals
The latest versions of utilities and manuals can be downloaded from one of the following URLs. For customers in North America, go to the following web site: http://www.epsonexpert.com/ For customers in other countries, go to the following web site: http://download.epson-biz.com/?service=pos TM-L90 User’s Manual 5... -
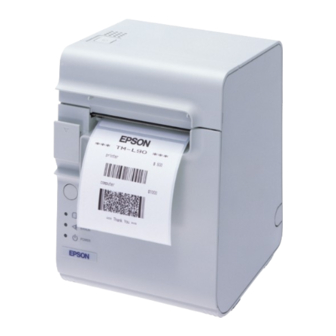
Page 6: Printer Parts
ERROR LED Off when the printer is online, lights when the printer is offline, and flashes when an error occurs. POWER LED Lights when the power is on, and is off when the power is off. 6 TM-L90 User’s Manual... -
Page 7: Power Switch Cover
Power switch cover WARNING: If an accident occurs with the power switch cover attached, unplug the power cord immediately. Continued use may cause fire or shock. CAUTION: Do not remove the power switch soft cover. TM-L90 User’s Manual 7... -
Page 8: Installing The Printer Vertically Or Horizontally
Turn the lever to move the sensor in the direction of the arrow in illustration until the sensor comes out from another hole near the bottom of the printer. Lever Near-end sensor Screw Hole Tighten the screw and make sure the lever moves smoothly. 8 TM-L90 User’s Manual... -
Page 9: Changing The Paper Width
61 to 70 mm wide, break two tabs off the back of the roll paper spacer. (You can still use widths from 38 mm to 60 mm with the roll paper spacer with the tabs broken off.) Follow the steps below to attach the roll paper spacer. Tabs Open the roll paper cover. TM-L90 User’s Manual 9... - Page 10 Slide the roll paper spacer to the appropriate width. You can use the ruler printed inside the printer, aligning the inside edge of the spacer with the desired measurement. Hook Shaft Inside edge Ruler 10 TM-L90 User’s Manual...
-
Page 11: Notes On Changing The Paper Type
See the TM-L90 Technical Reference Guide for details. See the TM-L90 Technical Reference Guide also for how to use the product and detailed product specifications. Go to http://www.epson.jp/dl-sd to download the memory switch setting utility and TM-L90 Technical Reference Guide. -
Page 12: Connecting Cables
Break off by hand any of the three portions indicated by circles in illustration to pass the cables through. Connect the cables to the printer. Attach the cover while passing the cables through the holes. 12 TM-L90 User’s Manual... -
Page 13: Wire Saddle
Note: When using a roll paper that has a paper core smaller than the specified (internal diameter: 25.4 mm {1"}, external diameter: 31.4 mm {1.24"}), do not use the paper guide, or paper jam may result. TM-L90 User’s Manual 13... -
Page 14: Installing The Roll Paper
Installing the Roll Paper Lift the cover open lever and open the roll paper cover. Remove the used roll paper core, if any. Install the roll paper in the correct direction. 14 TM-L90 User’s Manual... - Page 15 Pull out some roll paper, so that the paper is set between the paper guides. Paper guides Close the roll paper cover. TM-L90 User’s Manual 15...
- Page 16 Tear off the roll paper. Note: Be sure to use the roll paper that meets the specifications. 16 TM-L90 User’s Manual...
-
Page 17: Cleaning The Printer Case
Turn the printer off and open the printer cover. Clean the thermal elements of the thermal head with a cotton swab moistened with an alcohol solvent (ethanol or IPA). Thermal head Epson recommends cleaning the thermal head periodically (generally every 3 months) to maintain receipt print quality. TM-L90 User’s Manual 17... -
Page 18: Troubleshooting
If glue or another foreign substance is present on the autocutter blade, platen roller, or the paper path, a paper jam is likely to occur. See “Cleaning the Thermal Head” on page 17 for cleaning instructions. 18 TM-L90 User’s Manual... - Page 19 Slot Turn the knob in the direction of the arrow in illustration, by using a ballpoint pen or tweezers, until you see a triangle mark in the opening. Knob Triangle mark TM-L90 User’s Manual 19...
- Page 20 Approximately 1.9 kg {4.19 lb} dpi: dots per 25.4 mm (dots per inch) *: Be sure to use a safety-standards-applied power source that meets the following specifications. Rated output: 24 V/2.0 - 10.0 A, Maximum output: 240 VA or less 20 TM-L90 User’s Manual...
Need help?
Do you have a question about the TM-L90 and is the answer not in the manual?
Questions and answers