Table of Contents
Advertisement
Advertisement
Table of Contents

Subscribe to Our Youtube Channel
Related Manuals for Magnadyne M9900CDS


Summary of Contents for Magnadyne M9900CDS
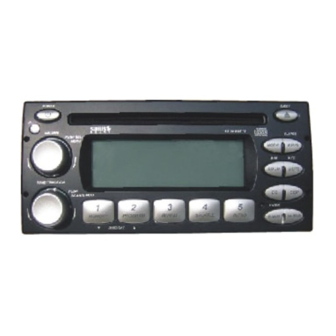
- Page 1 4 X 50 WATTS VOLUME ELAPSE PUSH SEL/ MENU MODE AS/PS / II LOUD MUTE TUNE/TRACK/CH PUSH DISP SCAN/S-MOD ENTER MEMORY PROGRAM REPEAT SHUFFLE INTRO BAND W-BND DISC/CAT M9900CDS AM / FM / WB and CD Stereo Receiver U.S. Patent No. D486,815...
-
Page 2: Button Locations And Functions
Introduction Your new Sirius ready in-dash entertainment system has been designed for many years of listening plea- sure. Take a moment to read through this manual and become familiar with the operations and features of this outstanding product. It is advisable to keep this manual in your vehicle ready for reference. We hope the experience with your new mobile entertainment system is a pleasurable one. - Page 3 Button Locations and Functions 5. Multi-Function Button #2: Radio Mode: Push and hold until a beep is heard to memorize a radio station into memory #2 (CH2). Push and release when recalling preset radio station #2. CD Mode: Push to play programmed CD tracks (see CD Operation for more information, page 6-7). CD Changer Mode: Push to change to a higher number disc in the CD changer.
-
Page 4: Basic Operation
Basic Operation Turning the Unit On and Off: Push the Power button. Selecting Play Source: Push the Mode button to choose a play source: Radio, Sirius Satellite Radio (if equipped), CD, External CD Changer (if equipped or Auxiliary Sources (if equipped). Dimming the Display: Push and hold the LOUD button to dim the backlight of the display. -
Page 5: Sound Controls
Preset AM/FM Radio Stations Automatically Programming AM/FM Radio Stations: You can program up to 15 FM radio stations and 10 AM radio stations automatically. 1. Select from F1, F2, F3, AM1 or AM2 by pushing the BAND button repeatedly. 2. Push and hold AS/PS button until the display starts scanning for a radio station. -
Page 6: Clock Setting
Sound Controls (continued) Equalizer: Push the EQ button to choose between preset equalizer settings: Classic, Rock, DSP Off (digital sound processor off), Flat, Pop and Jazz, as indicated in the display area. Mute (CD Play/Pause) Button: Push the MUTE button to mute the radio volume. -
Page 7: Cd Changer Operation
CD Operation (continued) Programming CD Tracks into Memory: 1. In the CD mode, push the MEMORY button once. “P-01”will be displayed. 2. Select the desired track on the CD by rotating the TUNE knob. 3. Push the MEMORY button again to store that track into memory. 4. -
Page 8: Sirius Satellite Radio Setup
CD Changer Operation Preview CD Tracks: Push and release the INTRO button until “SCN” appears in the display. Each track on the disc will play for 10 seconds. To cancel this feature push the INTRO button until “SCN” disappears from the display. Preview CDs: Push and hold the INTRO button until “DSN”... - Page 9 Sirius Satellite Radio Operation Category Tuning (continued): 3. Rotate the TUNE knob and select a station. Direct Tuning: 1. Push the TUNE knob until “DIRECT” appears in the display. 2. Rotate the TUNE knob and select the first digit (0 or 1). 3.
-
Page 10: Auxiliary Input
Selecting Auxiliary Input: Push the MODE button until “AUX1” or “AUX2” appears in the display which indicates that the auxiliary unit is playing through the M9900CDS. Note: All sound controls (pages 5-6) are active when the Auxiliary source is playing. -
Page 11: Speciality Features
Speciality Features Display Button: The factory default setting is clock display priority. Push the DISPLAY button at any time will display the radio frequency, CD track, AUX 1 or AUX 2. Note: In the Sirius mode the factory default setting is Sirius channel dis- play priority. -
Page 12: Default Settings
Default Settings The M9900CDS has a small group of settings that can be changed to suit your personalized requirement. Button Confirmation Beep: The factory default setting is BEEP ON (a confirma- tion beep every time a button or knob is pushed). To turn the beeps off, push and hold the VOLUME knob until “BEEP ON”... -
Page 13: Installation
Installation Step 1: The radio chassis is designed to be “Sleeve Mounted” through a opening in the dashboard panel. The required opening size is 182mm (7-3/16") x 84mm (3-5/16"). Cut or engage an opening in the dashboard to accommodate the mounting sleeve. Step 2: Insert the mounting sleeve into the hole in the dashboard. -
Page 14: Speaker Connection
White Wire: Front Left Speaker (+) Black Wire: Ground Blue Wire: Power Antenna Red Wire: Ignition Switched 12 VDC Yellow Wire: 12 VDC Constant Sirius Tuner Connection (Optional) M9900CDS Right Front Speaker Left Front Speaker See Amplifier Instructions for Proper Connections... -
Page 15: Auxiliary Connection
Auxiliary Connection Red (Right) White (Left) AUX 1 Yellow Cable M9900CDS AUX 2 Black Cable Red (Right) White (Left) CD Changer Connection M9900CDS Remote IR Sensor Connection (Optional) M9900CDS Male/Male (Supplied with CD Changer) Black Remote IR Sensor (Mounted In-Dash) -
Page 16: One (1) Year Limited Warranty
Warranty ONE (1) YEAR LIMITED WARRANTY Magnadyne Corporation or its authorized agents will within one year from the date of sale to you, repair, replace or refund the retail sales price of said product or any part thereof, at the option of the Magnadyne Corporation or its authorized agents, if said product or part is found defective in materials or workmanship, when properly connected and operating on the correct power requirements designated for the specific product.
Need help?
Do you have a question about the M9900CDS and is the answer not in the manual?
Questions and answers