
Related Manuals for Kenwood BLP60


Summary of Contents for Kenwood BLP60
- Page 1 English 2 - 12 Type BLP60, BLP61 Type BLM60, BLM61 ´ ¸ ∂ instructions BLP60 BLM60 HEAD OFFICE: Kenwood Limited, 1-3 Kenwood Business Park, New Lane, Havant, Hampshire PO9 2NH BLP61 BLM61 126672/1...
- Page 2 safety Read these instructions carefully and retain for future reference. Remove all packaging and any labels. Switch off and unplug: before fitting or removing parts; when not in use; before cleaning. Never fit the blade unit to the power unit without the blender goblet or mill jar fitted.
- Page 3 Never run the blender empty. Never blend more than the maximum capacity stated in the recommended usage chart. To ensure long life of your blender or mill, do not run it continuously for longer than 60 seconds. Smoothie recipes - never blend frozen ingredients that have formed a solid mass during freezing, break it up before adding to the goblet.
- Page 4 Only use the appliance for its intended domestic use. Kenwood will not accept any liability if the appliance is subject to improper use, or failure to comply with these instructions. The maximum rating is based on the attachment that draws the greatest load.
- Page 5 Blue = Neutral replacement may be obtained from Brown = Live. your Kenwood Authorised Repairer The appliance must be protected by (see Service). a 13A approved (BS1362) fuse. If a non-rewireable plug is cut off it must be DESTROYED IMMEDIATELY.
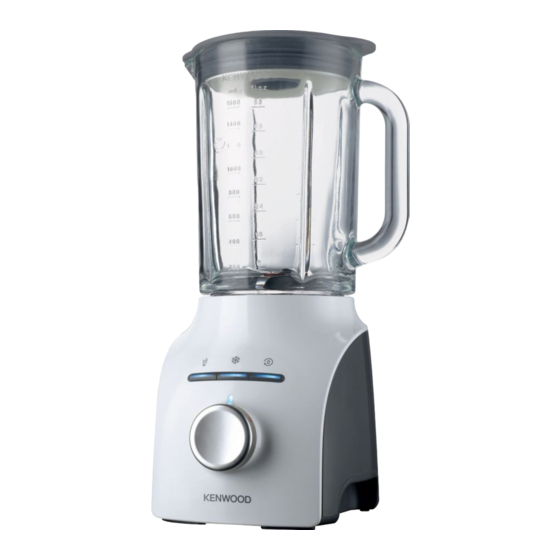
- Page 6 8 Plug in and the indicator light will drinks remain unlit whilst in the “O” OFF ice crush position. rinse TYPE BLM60 & BLP60 - Turn the speed control to select a speed Multi mill (if supplied) (refer to the recommended usage multi mill jar chart).
- Page 7 TYPE BLM61 & BLP61 only - When making mayonnaise, put all Turn to the “on” position and the the ingredients, except the oil, into Power On indicator and the 3 the blender. Remove the filler cap. pre-programmed buttons will light Then, with the appliance running, add the oil slowly through the hole in Note: In the “on”...
- Page 8 Recommended Usage Chart (Programme buttons) Programme Usage/Food Max. Programme Button Items Recommended Time Quantity Cold Liquids Max 1.6 litres 60 secs Drinks & Cocktails Milkshakes and milk Max 1.2 litres based drinks Smoothies 1 litre Liquid Place the fresh fruit and Drinks liquid ingredients in first (includes yoghurt, milk...
- Page 9 Recommended Usage Chart (Manual control) Usage/Food Recommened Speed Time Items Quantity Soups Stock based soups 1.2 litres Min - Max 30 secs Soups using milk 1 litre We recommend that hot ingredients are allowed to cool before blending. However should you wish to process hot ingredients please read the Hot Blending Safety instructions.
-
Page 10: Care And Cleaning
to use your grating mill (if supplied) Suitable for grating parmesan cheese, nutmeg, coconut and dried fruit. 1 Place your ingredients into the blade assembly 2 Fit the lid and turn to lock 3 Place the mill onto the power unit. 4 Select a speed or use the pulse (P) control. - Page 11 (in or damaged it; out of guarantee) it has not been modified (unless by call Kenwood customer care on 023 Kenwood); 9239 2333. Have your model it is not second-hand; number (ie BLM60 or BLP60) it has not been used commercially;...
-
Page 12: Troubleshooting Guide
troubleshooting guide Problem Cause Solution The Blender will not No Power/Power On Check blender operate. Light not illuminated. plugged in. Blender not assembled Check blade unit is correctly. fully tightened to the goblet. Power On Light flashing The blender has been left Turn the speed slowly. - Page 13 ∫ « ∞ ∫ ∑ « ∞ L ∂ V º « ∞ J K W « ∞ L...
- Page 14 ‹ d « « ∞ « ‹ • b Ë … b œ ∑ F W ± ∫ M Ë « ∞ à U “ « ∞ L ‹ ± U b « ∑ ª ß « ô Ë ‚ √ Ë...
- Page 15 ≠ w U Â • J « ù • K d « ¸ ∑ I « ß ± s b Í ¢ Q Ø ∫ O Å U ° ± u...
- Page 16 ∫ M ° U ∞ ’ ∞ ª q « « ∞ ∑ U ‹ d ´ ß ‹ Å ¢ u Ë ‰ § b ∞ ∑ s « “ ± d ´ º « ∞ Æ « _ ∫...
- Page 17 Í ) b Ë « ∞ O ∑ ∫ ( « ∞ ° t Å « ∞ L b « Â ∑ ª ß « ô Ë ‰ § b Æ X « ∞ u d ´ º « ∞ °...
- Page 18 ± Z d « « ∞ ∂ « ¸ √ “ ¸ ° N Å « ∞ L ‹ ± U b « ∑ ª ß « ô Ë ‰ § b “ ± º « ∞ U Â « ∞ «...
- Page 19 … ± H ‹ • ± ö ≠ I Ë Ê ¥ ö u œ « ∞ L • K Ë ‹ ö « ∞ L · Ø ∑ r « º Æ § ¸ « ± l ‹ ö ±...
- Page 20 O U ¸ « ∞ ∑ b ¸ “ ° π « ∞ Å q ¢ Æ ∂ ° w « ∞ J ¨ O √ Ë ¢ U ∞ U Â • J « ù • K Ø U ≤ ≈...
- Page 21 L U Î œ « z c ¸ ¥ ∫ … ± d Ø q...
- Page 22 ‹ ≤ U « ∞ L Ã W ° Å î U ‹ ¢ F Â : ≥ U î M º U « ∞ W Æ u ≤ ª º « ∞ b … b ¥ ® ‹ ≤ U «...
- Page 24 ° w ´ d O ∫ « ∞ ∑ U ‹ u ± ß « ∞ d ´ K Í ∑ u ¢ ∫ « ∞ ∑ U ± ô ± W « H ∫ « ∞ ∑ ` ¡ ≠ §...
Need help?
Do you have a question about the BLP60 and is the answer not in the manual?
Questions and answers