Subscribe to Our Youtube Channel
Summary of Contents for Swann ADW-350
- Page 1 ADW-350 Digital Wireless Security System Quick Start Guide Welcome! Lets get started. QH_350KIT110214E | © Swann 2014...
-
Page 2: Getting To Know The Monitor And Camera
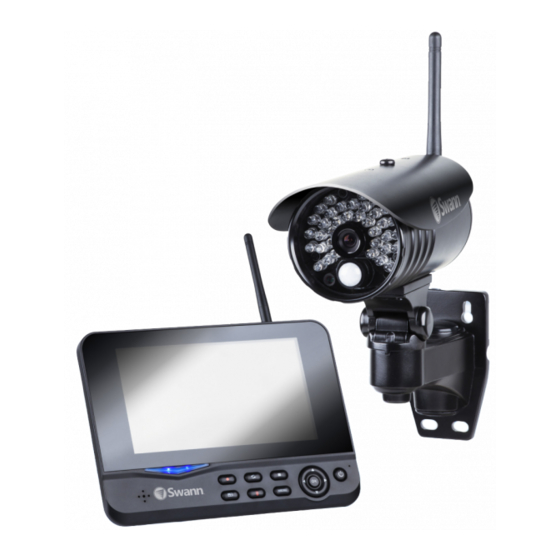
Getting to know the Monitor And Camera Congratulations on your purchase of this Digital Wireless Security System from Swann. This guide will familiarize you with the features and functionality of your wireless monitor and camera kit and get you up and running as soon as possible. Once you’ve installed the monitor and camera kit, read the guide on the reverse side to find details on setting up your system. - Page 3 1. Power and Link LED Indicator - Left side lights up when the monitor is turned on; blinks when the monitor is on standby mode. Right side lights up when the monitor links successfully with the camera. 2. Display Mode - Change the arrangement of channels on your screen.
- Page 4 CAMERA 1. Pair Button - This is used to pair the camera with the monitor during pairing mode. 2. Power LED Indicator - Lights up solid red when the camera is supplied power through the power adapter. 3. Link LED Indicator - Lights up solid green when the camera is paired with the monitor.
- Page 5 Installing the Monitor and Camera Kit Screw an antenna onto the gold connector on the back of the monitor and the camera. For best reception, make sure the antenna is vertically positioned.
- Page 6 Attach the power adapter connector labelled ‘RECEIVER ONLY’ to the DC 5V Power input located on the side of the monitor and then plug the power adapter into an electrical outlet. The blue Power LED on the monitor starts blinking when the monitor is connected to a power source.
-
Page 7: Powering Up The Monitor
Powering up the Monitor Press and hold the Power button on the front of the monitor until the Swann “Loading” splash screen appears. Wait a few seconds for live video from the camera to appear on the screen. Follow the guide on the reverse side to learn how to configure basic settings for the system. -
Page 8: Mounting The Camera
Mounting the Camera The camera comes with a built-in lace the base of the camera stand, which you can mount to a wall stand in the location you or any suitable vertical flat surface. want to mount it and mark the screw holes on the surface to position the screws. - Page 9 (Optional) Connecting to your TV The monitor’s AV Out port lets you connect to your TV to view live video and recordings on a much bigger display. onnect the three color-coded connectors on the AV cable to the corresponding video and audio inputs on onnect the black AV connector on the AV cable to the AV Out port located on the side of the monitor.
-
Page 10: Configuring Basic System Settings
Configuring Basic System Settings The Wireless Monitor’s On-screen Menu allows you to access a variety of settings (System, Record, Playback, Camera and Alarm) for the system. Navigating through the menus is easy; use the Arrows to highlight options, the OK button to confirm selections and the MENU button to move back to the previous screen. - Page 11 Language Main Menu: From the System Language Select > Choose the language you would like the menu system to be displayed in.
-
Page 12: Date And Time
Date and Time Main Menu: From the System Date / Time Select > It’s important that the system has the correct date and time to ensure recorded events are properly time stamped and schedules are triggered at the right time. -
Page 13: Status Icons
Status Icons Main Menu: From the System Display Items Select > Extra Icons can be displayed on the monitor screen to provide you with additional information on the monitor’s status. RSSI: Shows the monitor signal strength. The number of bars displayed represents the strength of the signal received from the camera. - Page 14 TV System Main Menu: From the System TV System Select > If you are outputting the monitor’s display to your TV via the AV Out port, you will need to set the appropriate TV video standard. For example, NTSC (used in USA, Japan, Canada) or PAL (used in UK and Australia).
- Page 15 Recording Storage Media Main Menu: From the System Storage for Recording Select > The monitor can record videos to either an SD memory card* (up to 32GB) or a USB hard drive* (up to 1TB). * SD card/USB device not included. Must be purchased separately,...
-
Page 16: Display Brightness
Display Brightness Main Menu: From the System Brightness Select > You can adjust the brightness level of the monitor screen if the default brightness level doesn’t allow you to see video clearly on the screen. Changing the brightness does not affect the actual images coming from your cameras, just how they are displayed. - Page 17 Video Resolution and Quality Main Menu: From the Camera PIP Setting Select > You can change a camera’s video resolution and quality setting. High resolution looks sharper and clearer, but require more data and, therefore, a better wireless signal to transmit. The Top quality setting gives you the best looking image possible but also require more space on your storage media when...
-
Page 18: Motion Detection Alarm
Record Recording). It’s the (Select > recommended way to get your system to operate almost autonomously for long periods of time without having to worry about available space in your storage media. QH_350KIT110214E | © Swann 2014...


Need help?
Do you have a question about the ADW-350 and is the answer not in the manual?
Questions and answers