Table of Contents
Advertisement
Quick Links
- 1 Camera Pairing
- 2 Live View ��������������������������������������������������������������������������������������������������������������10 Swann Security Video Management Software (Vms)
- 3 Main Menu ������������������������������������������������������������������������������������������������������������15 Device: Hdd
- 4 Camera Configuration ���������������������������������������������������������������������������������������17 Device: Cloud Storage - Dropbox Activation
- 5 Frequently Asked Questions
- Download this manual
Advertisement
Table of Contents

Related Manuals for Swann MaxRanger4K


Summary of Contents for Swann MaxRanger4K
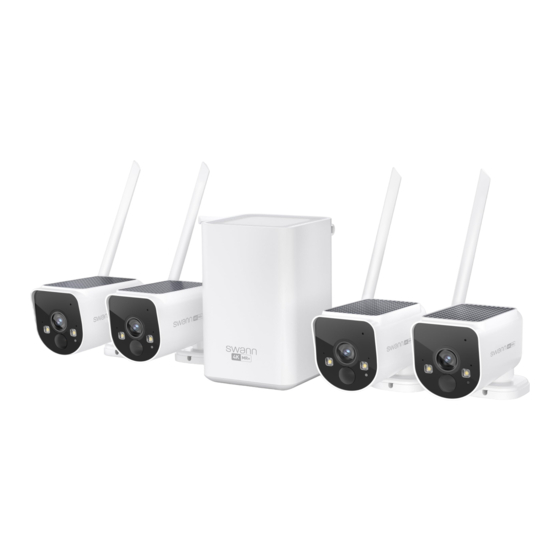
- Page 1 MaxRanger4K Solar Security Kit INSTRUCTION MANUAL...
-
Page 2: Table Of Contents
Display: Display Configuration ��������������������������������������������������������������������������� 35 Camera Pairing ������������������������������������������������������������������������������������������������������ 9 Network: Port Configuration ������������������������������������������������������������������������������ 36 Live View Swann Security Video Management Software (VMS) ������������������������������������� 37 ��������������������������������������������������������������������������������������������������������������10 Live View Mode ���������������������������������������������������������������������������������������������������� 11 Network: Email Configuration - Email Verification ����������������������������������������� 38 Live View Controls ����������������������������������������������������������������������������������������������� 12 Network: Email Configuration - Manual Setup ... - Page 3 Contents Event Playback & Backup ����������������������������������������������������������������������������������56 Search: Basic ������������������������������������������������������������������������������������������������������� 57 Search: Events (copy events to a USB flash drive) ������������������������������������������ 60 Search: QuickShot (copy snapshots to a USB flash drive) ����������������������������� 62 Playing a Slideshow �������������������������������������������������������������������������������������������� 63 Search: QuickReview ������������������������������������������������������������������������������������������� 64 Search: External File ...
-
Page 4: Important Information ������������������������������������������������������������������������������������������ 4 Capture: Schedule
Important Information This instruction manual was created to cover the use, operation and features of a broad number of Swann CCTV systems. Some features and configuration options shown in this manual aren’t available on all models and may only be accessed on specific models. -
Page 5: Warranty Information �������������������������������������������������������������������������������������������� 5 Camera: Wireless Camera
Any unit which proves defective during the stated period will be repaired without charge for parts or labor or replaced at the sole discretion of Swann. The end-user is responsible for all freight charges incurred to send the product to Swann’s repair centers. -
Page 6: Password Reset
Password Reset There are two methods available to reset your Power Hub’s password Channel 1 Channel 2 02/04/2024 04:33:08 PM 02/04/2024 04:33:08 PM using the MAC address of your Power Hub sent to your email or by pressing and holding down your Power Hub’s reset button. Please try the first method first - Right-click the mouse on the Live View screen to display the Menu Bar, click the “Start”... -
Page 7: Password Access Using Swann Security
You can find your Power Hub’s password as- sociated with your Swann Security account security challenge on your mobile device. De- using the Swann Security app on your Android pending on your device, you’ll be prompted to or iOS device (iOS screenshots shown). -
Page 8: Restoring Your Power Hub
Restoring your Power Hub Warning: For security and privacy reasons to stop malicious access, restoring your Power Hub will reset all saved changes to the settings available, and the storage device will be formatted as well, removing any saved events. Using a paper-clip or pin, carefully insert this into the port marked “reset”. -
Page 9: Camera Pairing
Camera Pairing After restoring your Power Hub, all cameras previously paired will need to be repaired. Press the Pair button to commence pairing. In Live View mode, click a channel you want to pair the camera to. Press the blue Pair button to commence pairing. A message will appear stating that you need to press the pair button on the camera (as shown on the bottom left). -
Page 10: Live View ��������������������������������������������������������������������������������������������������������������10 Swann Security Video Management Software (Vms)
Live View Channel 1 Channel 2 02/04/2024 04:33:08 PM 02/04/2024 04:33:08 PM Live View is the default display mode for your Power Hub. Each camera connect- ed will be displayed on-screen. You can Channel 3 Channel 4 02/04/2024 04:33:08 PM 02/04/2024 04:33:08 PM check the status or operation of your Power Hub and cameras using the icons... -
Page 11: Live View Mode
Live View Mode Live View mode is the default display for your Power Hub. Each camera connected will be displayed (multiple view modes available). You can check the oper- ation of your Power Hub by using the status icons on the Live View screen. The date and time, as well as the name of each camera, are also displayed. Camera Name Channel 1 Channel 2... -
Page 12: Live View Controls ����������������������������������������������������������������������������������������������� 12 Network: Email Configuration - Manual Setup
Live View Controls Menu Bar Click to reveal additional functions available (see dialogue box below). Indicates that your Power Hub is connected to your home network using the supplied Ethernet cable. When viewing a single camera, click this to revert to four camera view. Click to enter Manual Record mode. - Page 13 Live View Controls Status Icons The Event Notification Panel displays a thumbnail of an event that has occurred via human-sized object de- Indicates that the camera is being recorded tection or motion detection. Events are color-coded ac- (either manually or by motion). cording to the event type.
-
Page 14: Live View Digital Zoom Mode
Live View Digital Zoom Mode To enter Zoom mode, left-click a camera in Live View mode, then click the Channel 1 02/04/2024 04:33:08 PM “Zoom” button on the Camera Toolbar (as shown on the left). To zoom, move the mouse to the area or object that you want to zoom to, then use the scroll wheel on the mouse to zoom in or out. -
Page 15: Main Menu ������������������������������������������������������������������������������������������������������������15 Device: Hdd
Main Menu The Main Menu is where you control the var- ious actions and options available on your Power Hub. Functions such as adjusting the motion detection area and changing the re- cording schedule. You can also enable Cloud Storage to copy snapshots and video to the cloud when events occur. -
Page 16: Menu Layout
Menu Layout The various functions and options Clicking each category will reveal several available, are categorized on the left- tabs or sub-categories that can be changed hand side of the Menu. from their default setting. To exit or access the previous Save changes that have been menu, right-click the mouse. -
Page 17: Camera Configuration ���������������������������������������������������������������������������������������17 Device: Cloud Storage - Dropbox Activation
Camera Configuration The camera configuration options are avail- able in the Record and Alarm menus, acces- sible from the Main Menu. Your Power Hub has controls for detecting motion, allowing you to define specific areas to alert you to a potential threat in and around your home. -
Page 18: Record: Mainstream �������������������������������������������������������������������������������������������� 18 System: General
Record: Mainstream The resolution and frames per second are au- tomatically set to match the signal strength of the connection between the camera and your Power Hub. When streaming live video, the overall quality is dependent on your internet connection and the camera’s signal strength. →... -
Page 19: Record: Substream ���������������������������������������������������������������������������������������������� 19 System: Date And Time
Record: Substream The resolution and frames per second are au- tomatically set to match the signal strength of the connection between the camera and your Power Hub. When streaming live video, the overall quality is dependent on your internet connection and the camera’s signal strength. →... -
Page 20: Alarm: Detection
02/04/2024 04:33:08 PM potential threats at your home. This notifica- tion can be delivered via email and/or push notifications through the Swann Security app. Additionally, you can store a snapshot and/or a video clip of the event in the cloud. - Page 21 Picture to Cloud (PIR and Person only): By default, snapshots are copied to can view these files on your mobile device through the Swann Security app. If the cloud. Click the checkbox if you want to disable this. you can’t find them, use the Search function on your Power Hub. Subscribers...
-
Page 22: Motion Detection Setup
Motion Detection Setup To remove the default motion detection area, move the mouse to the top left-hand corner Channel 1 02/04/2024 04:33:08 PM (as shown on the left), then click and drag to the bottom right-hand corner. To create a new motion detection area, press and hold the left mouse button to select the cell or square that you want to start at, then click and drag to select the area that you want to create. -
Page 23: Motion Detection Tips ����������������������������������������������������������������������������������������� 23 Advanced: Events
Motion Detection Tips Placement of the cameras Place cameras so they are facing areas where people must walk through to approach your home regardless of where they are headed. A good idea is to place a camera overlooking your front door to capture an image of anyone approaching it for later reference. -
Page 24: Thermal-Sensing Tips ���������������������������������������������������������������������������������������� 24 Advanced: Auto Upgrade
Thermal-Sensing Tips Your cameras have a built-in PIR (passive infrared motion detector) sensor. This means they can sense the movement of infrared objects, including people, cars, and animals. The advantage over cameras that don’t have a PIR sensor is they’re resistant to false triggers from changes in the image. →... -
Page 25: Alarm: Deterrent
(the camera has a sensor that can detect light levels). You can also turn it on manually using the Camera Toolbar or the Swann Security app. The sensitivity of the spotlight is fixed and can’t be adjusted. -
Page 26: Deterrent Schedule ��������������������������������������������������������������������������������������������� 26 System Status
Deterrent Schedule By default, the spotlight and siren (if enabled) will not trigger between 06:30 a.m. and 04:30 p.m. however, you can change this according to your needs. Each square represents 30 minutes. Using the mouse, click on a particular square to change or click and drag the mouse over the squares correspond- ing to your desired period. -
Page 27: Recording Configuration �����������������������������������������������������������������������������������27 System: Information
Recording Configuration The recording configuration options are avail- able in the Record and Capture menus, ac- cessible from the Main Menu. You can access and change the default recording schedule (presented as a 24-hour, 7-day week grid) for each camera connected. You can also enable and set a schedule for your Power Hub to take a snapshot each time an event occurs. -
Page 28: Record: Record
Record: Record → Use the “Copy” function to apply all set- tings to the other cameras paired. → Click “Default” to revert to default settings. → Click “Apply” to save settings. Record Enable: When disabled, your Power Hub will detect motion but won’t record (manual record is also disabled). -
Page 29: Record: Schedule
Record: Schedule A 24-hour, 7-day week PIR and Motion/Person schedule has been enabled for each camera connected. You can change the schedule to suit your needs, and each camera can have a different schedule if needed. → Use the “Copy” function to apply all set- tings to the other cameras paired. -
Page 30: Capture: Capture
Capture: Capture As an added feature, you can enable and set a schedule for your Power Hub to take a snap- shot each time an event occurs. It helps to find motion events quickly and can also be used for time-lapse photography. - Page 31 Capture: Schedule → Use the “Copy” function to apply all set- tings to the other cameras paired. → Click “Default” to revert to default settings. → Click “Apply” to save settings. Channel: Select a camera that you would like to edit. PIR and Motion/Person/Vehicle: A snapshot is taken each time motion has been detected according to the alarm interval selected.
- Page 32 Camera: Wireless Camera The functions here will display technical and status information of the cameras paired to your Power Hub. You can also change the channel name and adjust image settings. → Click “Default” to revert to default settings. → Click “Apply”...
-
Page 33: Camera: Wireless Camera - Setup
Camera: Wireless Camera - Setup Channel 1 02/04/2024 04:33:08 PM Channel: Select a camera that you would like to edit. Use the slider to adjust each setting. When finished, click the “Apply” button, then click “OK”. Right-click the mouse to exit. Channel Name: Enter a name for the camera selected. -
Page 34: System Configuration
System Configuration The options available give you complete con- trol over how your Power Hub is configured and how it operates. Some of the options, such as display resolution, time zone, email configuration, Daylight Saving, and password creation, are configured during the Startup Wizard. -
Page 35: Display: Display Configuration
Display: Display Configuration → Click “Default” to revert to default settings. → Click “Apply” to save settings. Output Resolution: Select a display resolution that is suitable for your TV. Transparency: Click and hold the slider left or right to change how trans- parent the Menu Bar and Main Menu appears on-screen. -
Page 36: Network: Port Configuration
Http: This port will log into your Power Hub via your network or remotely. The Swann Security Video Management Software (see page 37). default port number (85) is seldom used by other devices. If you have another device using this port, you may need to change it. An alternative port number to use is 90. - Page 37 Swann Security Video Management Software (VMS) 20/07/2022 21:38:30 PM Channel 1 When using your Power Hub’s P2P ID, you can login either locally or remotely to view your cameras. The VMS interface has a look & feel very similar to how your Power Hub is displayed on your TV.
-
Page 38: Network: Email Configuration - Email Verification
Network: Email Configuration - Email Verification Inputting an email address is a requirement so your Power Hub can send you a password reset request if you have forgotten your pass- word. Both Gmail and Outlook are supported. Alerts are also sent to your email. - Page 39 Network: Email Configuration - Manual Setup → Click “Default” to revert to default settings. → Click “Apply” to save settings. Setup: Interval: Click the drop-down menu and select “Manual” to use the email from This is the length of time that must elapse after your Power Hub your service provider.
-
Page 40: Network: Email Schedule
Network: Email Schedule → Use the “Copy” function to apply all set- tings to the other cameras connected. → Click “Default” to revert to default settings. → Click “Apply” to save settings. Channel: Select a camera that you would like to edit. desired period. - Page 41 Device: HDD This feature lets you prepare your Power Hub’s storage device for use. If you’ve just installed a new storage device, you need to format it first. You can also plug in a USB flash drive or a hard drive to increase the storage space of your Power Hub.
-
Page 42: Device: S.m.a.r.t
When performing a test, your Power Hub will continue to work as normal. The information here isn’t required for general use of your Power Hub, but one of our Swann Helpdesk & Technical Support staff may ask you to access this if you call for assistance. - Page 43 This will change to Activated when active. If you see Network Blocked, if you have already done this). check that your Power Hub has internet access. In the Swann Security app, tap “Menu” (top left), then tap “Dropbox”. Video Stream Type: Mainstream (high-quality) video is copied to the cloud.
- Page 44 Hub will exit the Main Menu when idle. You can also disable this by selecting “OFF” (password protection will be temporarily disabled). Watermark: By default, the Swann logo is overlaid as a watermark for each camera. If this isn’t required, click the drop-down menu to disable it. Show Wizard:...
- Page 45 System: Date and Time → Click “Default” to revert to default settings. → Click “Apply” to save settings. Date and Time DST Settings Enable DST: If the date, time and, time zone are incorrect, click the relevant dialogue box- If Daylight Saving applies to your time zone or region, click the es and drop-down menus to change.
-
Page 46: System: Users
System: Users To change your Power Hub’s password, click the “Edit” button. The password all options. Click the “Save” button, then click “OK” to confirm. has to be a minimum of six characters and can contain a mixture of numbers and letters. -
Page 47: Advanced: Maintain
USB flash drive. We recommend that the battery level is at 50% or above be- Save Settings: Click this button to export a configuration file containing all fore updating. Go to support.swann.com to check for available updates. Click for contents... - Page 48 Send Email: Click the checkbox if you would like to enable email alerts for the event available. Push: Push notifications are sent via the Swann Security app. Click the check- box if you want to disable this. Click for contents...
- Page 49 Advanced: Auto Upgrade → Click “Default” to revert to default settings. → Click “Apply” to save settings. IP Cameras Auto Upgrade: Auto Upgrade: By default, your Power Hub will automatically check and alert Click the drop-down menu to enable your Power Hub to au- you if new firmware is available for download.
-
Page 50: Advanced: Remote Support
Advanced: Remote Support If you call for assistance, the Remote Support function is used by our Swann Helpdesk & Technical Support staff to remotely connect to your Power Hub. This will assist them in diagnosing any issues that you may be having. This function is not used in the day-to-day operation of your Power Hub. - Page 51 System Status The various status tabs give you an overview of the settings and options that have been se- lected for your Power Hub to function. Actions performed by your Power Hub and events de- tected are logged, which you can search and view.
- Page 52 Write down your MAC Address: _______________________________ Agent Cloud Link Status: Indicates if your Power Hub is connected to the Swann Security cloud system. Click for contents...
-
Page 53: System: Channel Information & Record Info
System: Channel Information & Record Info Displays the Mainstream, Substream, and the recording settings used for each camera connected (settings will only be shown when one or more cam- eras are detecting motion and recording). If you call our helpdesk for assistance, our staff may ask you to access this tab to assist them in solving any technical issues that you may be having. -
Page 54: System: Network State
System: Network State Displays the network settings used by your Power Hub. If you call our helpdesk for assistance, our staff may ask you to access this tab to assist them in solving any technical issues that you may be having. Right-click the mouse to exit. -
Page 55: Search: Log
Search: Log Each action that your Power Hub performs, as well as events detected, are logged. These log files can be searched, viewed, and copied to a USB flash drive for safekeeping. Start/End Time: Click the calendar icon to select the month, year, and date that you would like to search on. -
Page 56: Event Playback & Backup
Event Playback & Backup Channel 1 Play 28/02/2024 09:27:07 AM Search allows you to play recorded videos and snapshots saved to your Power Hub’s stor- age device. You can play video that matches your recording schedule, analytic events, and more. The Backup function allows you to save wanted events to a USB flash drive. -
Page 57: Search: Basic
Search: Basic Mainstream Channel 1 Play 28/02/2024 09:27:07 AM When zoomed into the timeline, pause playback, click and hold the time above the timeline, then drag left or right to the desired time. Click the calendar icon to select a date that you want to search on. A red Select from one or more cameras to display for playback (a maximum underline on a date indicates recordings on those particular dates. - Page 58 Search: Basic Substream Channel 1 Channel 2 Play 07/03/2024 04:23:52 PM 07/03/2024 04:23:52 PM Channel 3 Channel 4 07/03/2024 04:23:52 PM 07/03/2024 04:23:52 PM From left to right, they are your reverse, slow motion, play/pause, frame out points which you can then copy to a USB flash drive. Click on a camera to advance, stop and fast forward controls.
- Page 59 Search: Basic Substream Channel 1 Channel 2 Play 07/03/2024 04:23:52 PM 07/03/2024 04:23:52 PM Channel 3 Channel 4 07/03/2024 04:23:52 PM 07/03/2024 04:23:52 PM Click this button to mute or unmute the audio. This button allows you to save a snapshot to a USB flash drive. Click on a camera to select it, then press this button.
-
Page 60: Search: Events (Copy Events To A Usb Flash Drive)
Search: Events (copy events to a USB flash drive) Use this function to search, play and copy events to a USB flash drive. eo at the camera’s native recording resolution). Click the calendar icon to select a date that you want to search on. A red Select from one or all cameras that you would like to search on. - Page 61 Search: Events (copy events to a USB flash drive) Click the checkbox to view the events in descending order. Click this button to play a selected event. Right-click to exit. Click the checkbox to select all events. Click these to change how the events are displayed. The default view is Thumbnail, but you can change it to List or Detail.
-
Page 62: Search: Quickshot (Copy Snapshots To A Usb Flash Drive)
Search: QuickShot (copy snapshots to a USB flash drive) Click these to change how the events are displayed. The default view is Thumbnail but you can change it to List or Detail. Use this function to search, play and copy snapshots to a USB flash drive. Click this to commence a search. -
Page 63: Playing A Slideshow
Playing a Slideshow Channel 1 Channel 1 08/03/2024 12:47:11 PM 08/03/2024 12:47:17 PM Click the checkbox on a snapshot that you want to Channel 1 Channel 1 08/03/2024 12:47:23 PM 08/03/2024 12:47:29 PM save to a USB flash drive. 3 4 5 Select a snapshot, then click this button to copy it to a USB flash drive. -
Page 64: Search: Quickreview
Search: QuickReview Channel 1 Channel 1 04/03/2024 08:04:32 AM 04/03/2024 12:47:17 PM Play Click on a split-screen to select it (a surrounding blue square is shown). Channel 1 Channel 1 04/03/2024 03:29:05 PM 04/03/2024 06:14:05 PM QuickReview lets you watch different actions happening at the same time on Click the drop-down menu to select the preferred split-screen mode. -
Page 65: Search: External File
Search: External File Channel 2 Play 28/02/2024 08:27:53 AM Events saved to your USB flash drive will be displayed here. Use this function to play events that you have copied to a USB flash drive. If multiple USB flash drives are connected, click the drop-down menu to select the drive that you want to read from. -
Page 66: Frequently Asked Questions
No. The Power Hub can operate as a local-only system without an internet What range do the cameras operate at? connection. However, to view anything via the Swann Security app, you would have to view it via a monitor connected to the Power Hub. - Page 67 Ethernet cable or try a different port on your modem or router. Due to the nature of how portable USB hard drives operate, there is no guar- Search “less secure apps” at support.swann.com (if using Gmail). antee that your drive, when connected to the Power Hub’s USB port, will How long does my Power Hub record for when motion has been detected? work.
-
Page 68: Fcc Verification
FCC Verification This equipment has been tested and found to comply with the limits for Class B digital device, pursuant to part 15 of the FCC Rules. These limits are de- signed to provide reasonable protection against harmful interference in a residential installation. -
Page 69: Help & Resources
Help & Resources Visit Swann Support Center at support.swann.com. You can register your product for dedicated customer support, download guides, find answers to commonly asked questions, and more. Support Community Customer Support Product Manuals Frequently Asked Questions Firmware Version: V8.2.2-20240404...
Need help?
Do you have a question about the MaxRanger4K and is the answer not in the manual?
Questions and answers
NVW MR4K Have set schedule, and capture and selected no push on the app. I still get emails sent on detection
You are still receiving email notifications because disabling push notifications in the app does not automatically disable email alerts. Email notifications must be turned off separately by unchecking the "Send Email" option in the event settings of your Swann 4K NVW MR4K system.
This answer is automatically generated
i have the maxranger 3 camera setup and was wondering if there is a way to disable a camera from my app. i dont need coverage thru the day on backyard camera.
No, you cannot fully disable a Swann 4K camera from the app. Some settings, such as adjusting AI sensitivity or recording length, can only be controlled from the Hub or NVR interface, not the app.
This answer is automatically generated
Can you install as a stand alone cam
Is there any way to continues power WHILE ON AND HAVE CONTINUOUS LIVE VIEW