
Related Manuals for Peavey VYPYR PRO


Summary of Contents for Peavey VYPYR PRO
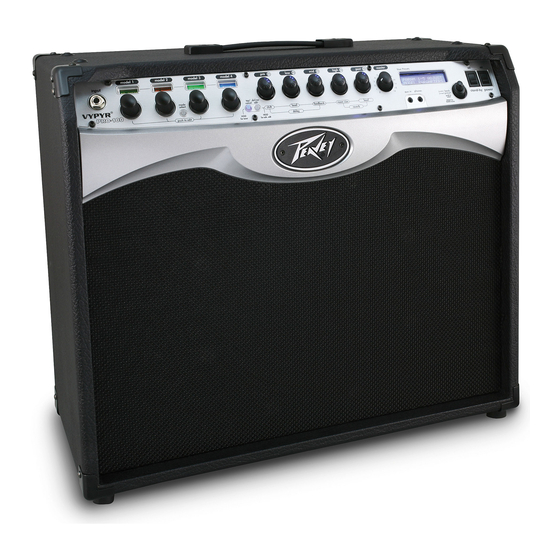
- Page 1 VYPYR® PRO Modeling Amplifier Operating Manual www.peavey.com...
- Page 20 (2) this device must accept any interference received, that may cause undesired operation. Warning: Changes or modifications to the equipment not approved by Peavey Electronics Corp. can void the user’s authority to use the equipment.
-
Page 21: Key Features
VYPYR Series, the VYPYR PRO 100. As the name implies, the VYPYR PRO is an amp featuring professional-grade tone and features, in a unique and intuitive layout. Because of the advanced dual processor design, the VYPYR Pro can run up to four amplifier models in parallel. - Page 22 • The parameter knobs will illuminate to reflect that model’s settings. • Edit chosen model. • The Vypyr Pro will remember your changes even if you change models until you save the preset • Delay/Reverb Quick Edit Menu • Tap the Delay/Reverb Edit button (6) •Use the parameter knobs to edit the basic Delay and Reverb functions.
- Page 23 C. VYPYR® Main Edit Menu •To enter main menu, press inner preset button (2) •Use outer bank wheel (1) to scroll through the following functions: *Load Preset – Load your favorite presets *Save Preset—Save presets after editing them *Rename Preset—Give an epic name to your combination *Rename Bank—Rename a group of presets *Assign Pedals—Assign functions for the optional Sanpera pedal (can be assigned to any parameter and is range definable)
-
Page 24: Instrument Input
Front Panel model 1 model 2 model 3 model 4 high post master User Presets input mode tap/ del/rev bank (outer) VYPYR ® select cancel edit preset aux in phones (inner) standby power push to select shift level feedback room size level PRO-100 HOLD for... - Page 25 Front Panel continued Auxillary Input This 3.5mm input allows for external audio sources, such as a CD or MP3 player. Headphone Jack 3.5mm output for Headphones Master LCD Display Screen Displays presets, modes, amp and effects parameters. Bank Wheel (outer) and Preset Wheel (inner) Allows user to scroll through Banks of presets (outer wheel) and through presets within a particular Bank (inner wheel).
- Page 26 50%, the amp will begin to distort at the same volume. MIC SIMULATED DIRECT INTERFACE - MSDI™ Peavey’s exclusive MSDI™ simulates the sound of a microphone placed approximately 8” from a loud- speaker cone, allowing the user to send an accurate, good quality signal to the mixing console without any acoustic spill from other instruments on stage.
- Page 27 MIDI OUT Sends MIDI preset messages to any external MIDI device, including the Peavey AT-200™ Autotune guitar. FOOTSWITCH/MIDI IN This enables MIDI signals to be recieved from an external MIDI capable device, and can also be a means of plug- ging in the optional Sanpera PRO footswitch.
- Page 28 Creating and Editing Presets •The different types of models are color coded. Amps are red, Instruments (M1 slot only) are yellow, stomp boxes are orange and effects are blue. •If there is already a model present, you can change either the type of currently chosen model or you can change the overall type of model.
- Page 29 •RENAME BANK: The Vypyr Pro’s presets are arranged in banks of 4 presets. Not only can you rename indi- vidual presets, you can also rename the banks as well. The default is ELECTRIC 1, ELECTRIC 2, BASS 1 etc.
- Page 30 Pressing and releasing the INNER encoder will go to the screen where the user can define a boost or a cut in the Input Sensititivy. The Vypyr Pro defaults to 0.00dB.
- Page 31 Deep Edit Menu •Pressing and holding the DEL/REV EDIT button will access the Deep Edit Menu. This is the menu where more detailed settings for Delay and Reverb are selected, as well as several Input and Output settings. In the main screen of this menu, the Delay Tempo Mode is selected.
- Page 32 VYPYR® SANPERA® PRO Footcontroller for VYPYR PRO Operating Manual www.peavey.com...
-
Page 33: Key Features
Featuring direct access to all 4 model locations, plus delay and reverb, the Sanpera Pro unlocks all the power of your Vypyr Pro. The dual expression pedals can be assigned to either the default setting (volume on left, wah on right) or assigned to an alternate effect, for instance pitch control, or rotary speaker speed. - Page 34 These four switches allow you to select one of four models within the Preset Bank. Bank Selectors These two switches allow you to scroll through the Vypyr Pro’s Preset Banks. Preset Selectors These selectors allow easy access to your favorite presets.
- Page 35 Top Panel continued Delay and Reverb Engage Switches These switches turn the delay and reverb effects of the VYPYR PRO on and off. Rear Panel Footswitch MIDI Connectors *Footswitch (Control to Amplifier)– connects the Sanpera to the VYPYR Amplifier *MIDI OUT– connects to AT200-B Breakout box (for controlling the AT-200 guitar)
- Page 36 Looper Function To operate the looper for the Sanpera® Pro, simply press the REC/PLAY switch and begin playing. To end record- ing simply press REC/PLAY again. The recorded loop will automatically start playing once recording has ended. You can wait as long as you want to remove the last overdub - as long as the looper is still playing and you have not started a new overdub.
Need help?
Do you have a question about the VYPYR PRO and is the answer not in the manual?
Questions and answers