Table of Contents
Advertisement
Advertisement
Table of Contents

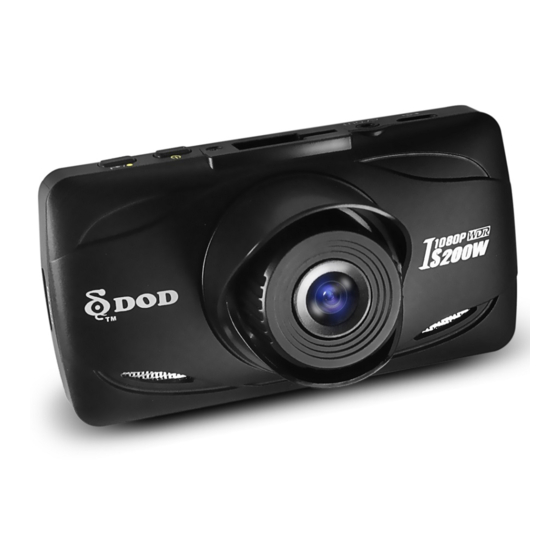
Summary of Contents for DOD Is200W
- Page 1 USER MANUAL...
- Page 2 Copyright 2014 DOD Tech All Rights Reserved...
-
Page 3: Table Of Contents
CONTENTS IMPORTANT SAFETY INSTRUCTION ........... 2 PACKAGE CONTENTS................3 CONTROLS AND FUNCTIONS............... 4 INSTALLATION AND CONNECTION............6 GETTING STARTED................7 INTRODUCTION OF OTHER FUNCTIONS..........12 ON-SCREEN DISPLAY (OSD) MENUS ..........14 ADDITIONAL INFORMATION..............16... -
Page 4: Important Safety Instruction
Please avoid fierce impact upon the product. If the unit is damaged or malfunctions, don’t open it and don’t attempt to repair it. Please contact DOD or DOD authorized local dealer. About the car charger Only use the car charger provided by manufacture, others might cause malfunctions or danger. -
Page 5: Package Contents
PACKAGE CONTENTS Host computer User manual Stand HDMI Cable(optional) Car charger USB Data cable(optional) *Supplied accessories may vary by region. -
Page 6: Controls And Functions
CONTROLS AND FUNCTIONS... - Page 7 CONTROLS AND FUNCTIONS Menu/SOS Emergency File Lock/[ Record/Shutter/OK/[ When the unit is on Recording, press it for stop Turns on the On-Screen Display (OSD) menu, Recording. Exits and saves menu setting. It is not activated when the unit is on recording. When it is at Camera Mode, press it for photo shooting.
-
Page 8: Installation And Connection
INSTALLATION AND CONNECTION NOTE: ● Assemble the unit on to the bracket and mount the bracke on to the windshield glass. ● Only use the car charger proivided by manufacture,others might cause malfunctions or danger. ● Please cautiously select the location where the unit weill be mounted,do not mount the unit in places that may obstruct the driver's view or affect the normal operation of the airbag. -
Page 9: Getting Started
GETTING STARTED 1. Insert a memory card (sold separately) Please insert a micro SDHC card with class 6 or above, into the slot located on the side of the unit. Be sure to format the SD card before the initial use. Press [ ] twice to enter System Settings, [ ] to Format, and press [... - Page 10 GETTING STARTED 3. Select language Press[ ] twice to enter system settings,[ ] to Language. Press[ Press [ ]or[ ] to move to Language, and then press [ ] to select the desired language. ] is not activated when the unit is on Recording Mode, please press [ ] to stop recording and return to Standby Mode.
-
Page 11: Video Recording
GETTING STARTED 5. Video Recording When the car engine is started, the unit will automatically start video recording (it is mandatory to insert a micro SDHC class 6 memory card) When it is not connected to the car charger, press [ ] button to turn on the unit, and press [ ] button to start video recording. -
Page 12: Getting Started
GETTING STARTED 6. Taking Photos Press [ ] once to Camera Mode.。 Press [ ] to take a picture. ] cannot be activated when the unit is on Recording Mode, please press [ ] to stop recording and return to Standby Mode. Image Resolution Digital Image Stabilizer (on) Camers Mode... - Page 13 GETTING STARTED 7. Playback Mode Select the preview/next photo/movie. Press [ ] twice to enter Playback Mode. Press [ ] / [ ] to select the photo or movie clip you want to playback. Starting movie playing back. Press [ ] to playback.
-
Page 14: Introduction Of Other Functions
INTRODUCTION OF OTHER FUNCTIONS Loop Recording (default) Loop Recording can be set at 2/3/5 minutes, it means that the video clip intervals will be set at 2/3/5 minutes long and after memory card is full, the oldest video clips will be deleted and new video clips will take its place. - Page 15 INTRODUCTION OF OTHER FUNCTIONS Password settings It allows password owner to restrain drivers or others from operating settings, modifying or deleting the video and picture data files. Image Rotation This feature will flip the screen 180 degree allowing for other recording opions. Time-Lapse Photography To capture a frame every 200mS/500mS/1 seconds/5 seconds.
-
Page 16: On-Screen Display (Osd) Menus
ON-SCREEN DISPLAY (OSD) MENUS Main Sub Menu Options [MODE] [UP]/[DOW N]-[OK] [UP]/[DOW N]-[OK] Resolution 1080FHD/720P/720P 60FPS/WVGA/VGA +3/+2/+1/0/-1/-2/-3 Exposure White Balance Auto/Daylight/Cloudy/Tungsten/Fluorescent Record Audio Off/On Recording Date Stamp Off/On Setting Loop Recording off/2 Minutes/3 Minutes/5 Minutes Gsensor Off/High/Middle/Low Motion Detecion Off/On Plate Stamp Standby Password Setting... - Page 17 ON-SCREEN DISPLAY (OSD) MENUS Main Menu Sub Menu Options [MODE] [UP]/[DOW N]-[OK] [UP]/[DOW N]-[OK] Image Size 12M/10M/8M/5M/3M/2MHD/VGA/1.3M Color Normal/Black & White Anti-Shaking Off/On Capture Mode Single/2S Timer/5S Timer/10S Timer Camera Mode Camera Setting White Balance Auto/Daylight/Cloudy/Tungsten/Fuorescent Auto/100/200/400 +3/+2/+1/0/-1/-2/-3 Exposure Date Stamp Off,Date,Date/Time Quality Fine/Normal/Economy...
-
Page 18: Additional Information
ADDITIONAL INFORMATION HOW TO PLAYBACK ON COMPUTER If the camera you purchased with GPS logger, please download the DOD GPS player with the CD-ROM (included), or go to http://www.dod-tec.com/ to download and install the DOD GPS player. If the camera you purchased without GPS logger, please go to http://www.videolan.org/vlc/ to download and install the VLC PLAYER.


Need help?
Do you have a question about the Is200W and is the answer not in the manual?
Questions and answers