Table of Contents
Advertisement
Available languages
Available languages
Advertisement
Table of Contents

Related Manuals for DOD RX7W PLUS


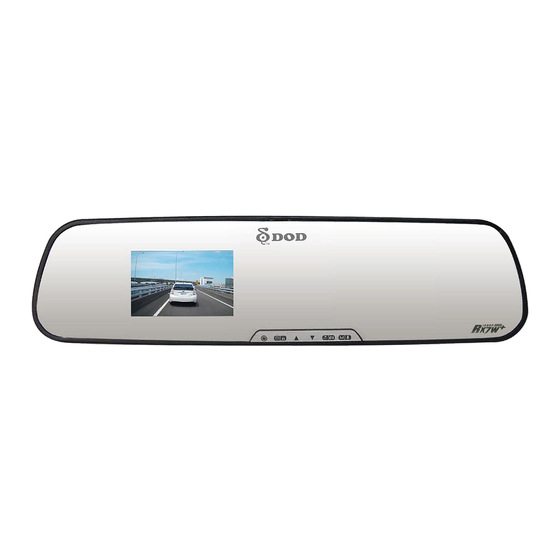
Summary of Contents for DOD RX7W PLUS
- Page 1 MANUEL DE L’UTILISATEUR...
- Page 2 Copyright © 2014 DOD Tech All Rights Reser ved...
-
Page 3: Table Of Contents
CONTENTS IMPORTANT SAFETY INSTRUCTION …………………………………………………… PACKAGE CONTENTS ………………………………………………………………………… CONTROLS AND FUNCTIONS …………………………………………………………… INSTALLATION AND CONNECTION …………………………………………………… GETTING START ………………………………………………………………………………… INTRODUCTION OF OTHER FUNCTIONS ………………………………………… ON-SCREEN DISPLAY (OSD) MENUS ………………………………………………… ADDITIONAL INFORMATION ……………………………………………………………... - Page 4 TABLE DES MATIÈRES IMPORTANT INSTRUCTIONS DE SÉCURITÉ ……………………………………… CONTENU DE L'EMBALLAGE …………………………………………………………… COMMANDES ET FONCTIONS ………………………………………………………… INSTALLATION ET CONNEXION ……………………………………………………… DÉMARRER …………………………………………………………………………………… INTRODUCTION AUX AUTRES FONCTIONS …………………………………… MENUS À L'ÉCRAN (OSD) ……………………………………………………………… INFORMATIONS COMPLÉMENTAIRES………………………………………………...
-
Page 5: Important Safety Instruction
IMPORTANT SAFETY INSTRUCTION About the Product Please do not install the product in a highly humid environment. Please avoid fierce impact upon the product Due to high temperatures during summer, please do not expose the product to long period of time, because it may reduce the product's lifespan. Please do not install the product in places that may cause interference while driving. -
Page 6: Package Contents
PACKAGE CONTENTS * Supplied accessories may vary by region. -
Page 7: Controls And Functions
CONTROLS AND FUNCTIONS 11 12... - Page 8 CONTROLS AND FUNCTIONS Reset Key movie playing back, press it to Rewind or fast forward the tape. USB Port Record/Shutter/OK/[ Micro USB Port Required a micro SDHC card, class 6 When the unit is on Recording, press it for or above Support 8~32GB. stop Recording.
-
Page 9: Installation And Connection
INSTALLATION AND CONNECTION NOTE: Please insert Micro SD card to the unit, and fix the unit on the vehicle's rearview mirror with the mounting straps. Adjust the camera lens to the best angel, which do not blocked by the rearview mirror. -
Page 10: Getting Start
GETTING START 1. Insert a memory card (sold separately) Please insert a micro SDHC card with class 10 or above, into the slot located on the side of the unit. Be sure to format the SD card before the initial use. *This Camera supports to 32GB Micro SD Card. - Page 11 GETTING START 3. Select language Press[ ] twice to enter system settings,[ ]to Language. Press[ Press [ ]or[ ] to move to Language, and then press [ ] to select the desired language. ] is not activated when the unit is on Recording Mode, please press to stop recording and return to Standby Mode.
- Page 12 GETTING START 4. Setting the date and time Press Twice to enter System settings, to Date/Time. Press Press , then select to set Year, Month, Day, Time, and Format fields. Press 5. Video Recording When the car engine is started, the unit will automatically start video recording (it is mandatory to insert a micro SDHC class 10 memory card) When it is not connected to the car charger, press [ ] button to turn on the...
- Page 13 GETTING START 6. Taking Photos Press once to Camera Mode. Press to take a picture. ] cannot be activated when the unit is on Recording Mode, please press [ ] to stop recording and return to Standby Mode.
- Page 14 GETTING START 7. Playback Mode Select the preview/next photo/movie. Press twice to enter Playback Mode. Press to select the photo or movie clip you want to playback. Starting movie playing back. Press to playback. Press button to navigate. Press to pause it. Press to return to the Playback Mode.
-
Page 15: Introduction Of Other Functions
INTRODUCTION OF OTHER FUNCTIONS Loop Recording (default) Loop Recording can be set at 2/3/5 minutes, it means that the video clip intervals will be set at 2/3/5 minutes long and after memory card is full, the oldest video clips will be deleted and new video clips will take its place. If Loop Recording is turned off, it will stop recording when the memory card is full. - Page 16 INTRODUCTION OF OTHER FUNCTIONS GPS Track (only available when connect with GPS signal) Display the driving route with Google Maps. Standby Speed Display (only available when connect with GPS signal) Current speed of the vehicle will be displayed on the screen once the GPS signal is detected.
-
Page 17: On-Screen Display (Osd) Menus
ON-SCREEN DISPLAY (OSD) MENUS Main Menu Sub Menu Options [MODE] [UP]/[DOWN] - [OK] [UP]/[DOWN] - [OK] Resolution 1080FHD/720P/720P 60FPS/WVGA/VGA Exposure +3/+2/+1/0/-1/-2/-3 White Balance Auto/Daylight/Cloudy/Tungsten/ Fluorescent Record Audio Off/On Date Stamp Off/On Loop Recording Off/2 Minutes/3 Minutes/5 Minutes Gsensor Off/High/Middle/Low Motion Detection Off/On Recording Setting Plate Stamp... - Page 18 ON-SCREEN DISPLAY (OSD) MENUS Main Menu Sub Menu Options [MODE] [UP]/[DOWN] - [OK] [UP]/[DOWN] - [OK] Image Size 12M/10M/8M/5M/3M/2MHD/VGA/1.3M Color Normal/Black&White/Sepia Anti-Shaking Off/On Capture Mode Single/2S Timer/5S Timer/10S Timer Camera Camera Setting White Balance Auto/Daylight/Cloudy/Tungsten/ Fluorescent Setting Auto/100/200/400 Exposure +3/+2/+1/0/-1/-2/-3 Date Stamp Off/Date/ Date/Time Quality...
-
Page 19: Additional Information
System Menu and select “Version” to view the current firmware version. - Connect the micro SD card into the computer. - Access DOD Tech website (http://www.dod-tech.com) to download the latest software to the SD Card. - Insert the micro SD card to the unit - Connect the unit with the external power supply*. -
Page 21: Important Instructions De Sécurité
IMPORTANT INSTRUCTIONS DE SÉCURITÉ À propos du produit N'installez pas le produit dans un environnement trop humide. Évitez les impacts forts sur le produit. En raison des températures élevées l'été, n'exposez pas le produit pendant une période prolongée, au risque de réduire sa durée de vie. N'installez pas le produit à... -
Page 22: Contenu De L'emballage
CONTENU DE L'EMBALLAGE * Les accessoires fournis peuvent varier selon la région. -
Page 23: Commandes Et Fonctions
COMMANDES ET FONCTIONS 11 12... - Page 24 COMMANDES ET FONCTIONS En mode lec ture , appuyez dessus pour Touche de réinitialisation sélectionner le fichier à afficher. Lors de Réinitialisation aux réglages d'usine. la lecture de vidéos, appuyez dessus pour Port USB reculer ou avancer rapidement sur la mplacement de carte micro SD bande.
-
Page 25: Installation Et Connexion
INSTALLATION ET CONNEXION REMARQUE: Veuillez insérer la carte Micro SD dans l’appareil, et fixer ce dernier sur le rétroviseur du véhicule avec les attaches de montage. Ajustez l’objectif de la caméra au meilleur angle, sans blocage de la vue par le rétroviseur. -
Page 26: Démarrer
DÉMARRER 1. Insérez une carte mémoire (vendue séparément) Veuillez insérer une carte micro SDHC de classe 6 ou supérieure dans l'emplacement situé sur le côté de l'unité. Veillez à formater la carte SD avant la première utilisation. * La caméra prend en charge les cartes SD d’une capacité allant jusqu'à 32 Go. Veuillez contacter votre revendeur local pour tout conseil d'achat. - Page 27 DÉMARRER 3. Sélectionner une langue Appuyez deux fois sur [ ] pour accéder aux réglages du système. Sélectionnez [ ] pour accéder aux paramètres de langue. Appuyez sur[ Appuyez sur [ ] ou [ ] tpour aller sur Langue, puis appuyez sur [ pour sélectionner la langue souhaitée.
- Page 28 DÉMARRER 4. Configurer la date et l'heure Appuyez [ ] deux fois sur pour accéder aux réglages du système. Sélectionnez [ ] pour accéder aux paramètres de date/heure. Appuyez sur [ Appuyez sur [ ] / [ ], puis sélectionnez [ ] pour régler les champs année, mois, jour, heure et format.
- Page 29 DÉMARRER 6. Prendre des photos Appuyez sur [ ] une fois pour le mode caméra. Appuyez sur [ ] pour prendre une photo. ] e peut pas être activé lorsque l'unité est en mode d'enregistrement, appuyez donc sur ] pour arrêter l'enregistrement et revenir en mode veille.
- Page 30 DÉMARRER 7. Mode lecture Sélectionner la photo/vidéo suivante/précédente Appuyez sur [ ] deux fois pour le mode lecture. Appuyez sur [ ] / [ ] pour sélectionner la vidéo ou la photo à lire. Commencer la lecture d'une vidéo Appuyez sur [ ]pour la lecture.
-
Page 31: Introduction Aux Autres Fonctions
INTRODUCTION AUX AUTRES FONCTIONS Enregistrement en boucle ( défaut L'enregistrement en boucle peut être défini sur 2/3/5 minutes, ce qui signifie que l'intervalle des clips vidéo sera défini sur 2/3/5 minutes et qu'une fois la mémoire pleine, les clips vidéo les plus anciens seront supprimés et les nouveaux prendront leur place. - Page 32 INTRODUCTION OF OTHER FUNCTIONS Surimpression de la plaque Saisissez votre numéro de plaque ou le texte de votre choix, et celui-ci s'affichera sur les vidéos prises. Suivi GPS (disponible uniquement lors de l'utilisation d'un signal GPS) Affiche le trajet avec Google Maps. Affichage de la vitesse (disponible uniquement lors de l'utilisation d'un signal GPS) La vitesse actuelle du véhicule sera affichée à...
-
Page 33: Menus À L'écran (Osd)
MENUS À L'ÉCRAN (OSD) Micro-SD... - Page 34 MENUS À L'ÉCRAN (OSD)
-
Page 35: Informations Complémentaires
équipement vidéo/audio. MISE À NIVEAU DU FIRMWARE Visitez le site Web officiel de DOD Tech (http://www.dod-tech.com) afin de télécharger la dernière version du firmware pour votre unité. Avant de télécharger le firmware mis à jour, veuillez naviguer vers le menu Système et sélectionner "Version"...
Need help?
Do you have a question about the RX7W PLUS and is the answer not in the manual?
Questions and answers