Table of Contents
Advertisement
Quick Links
Advertisement
Table of Contents

Related Manuals for Hyundai H-CDM8033


Summary of Contents for Hyundai H-CDM8033
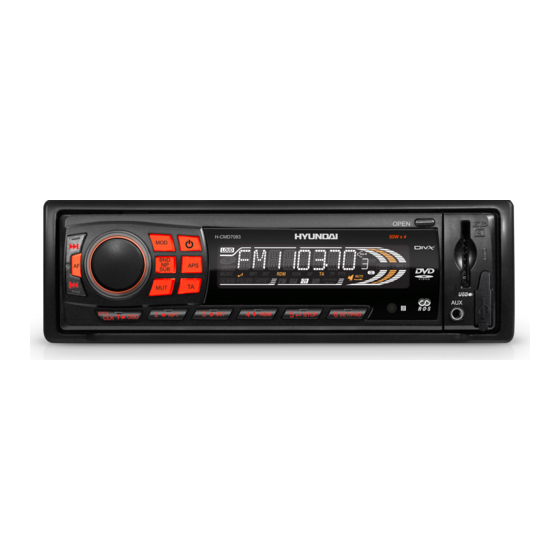
- Page 1 H-CDM8033 CD/MP3-RECEIVER CD/MP3- Instruction manual...
-
Page 2: Table Of Contents
Dear customer! Thank you for purchasing our product. For safety, it is strongly recommended to read this manual carefully before connecting, operating and/or adjusting the product and keep the manual for reference in the future. Table of contents Table of contents....................................2 Important safeguards.................................. -
Page 3: Important Safeguards
Important safeguards Read carefully through this manual to familiarize yourself with this high-quality sound system. The beginning of operation is the moment of the unit installation. Before use the device in winter it is recommended to heat up the passenger compartment during 20 seconds or to the operation temperature. Use the unit with the temperature that goes beyond the operation temperature greatly decreases the operation resource of the screen and other components of device and can result an outage. -
Page 4: Accessories
Accessories Receiver 1 pc Remote Controller 1 pc Front panel 1 pc Carrying case 1 pc ISO connector 1 pc Mounting parts: Hexagon nut M5 T (3.5 mm) 1 pc Mounting box (0.6 mm) 1 pc Left key (1.0 mm) 1 pc Right key (1.0 mm) 1 pc... -
Page 5: Installation/Connections
Installation/Connections Choose the mounting location where the unit will not interfere with the normal driving function of the driver. Before finally installing the unit, connect the wiring and make sure that the unit works properly. Consult with your nearest dealer if installation requires the drilling of holes or other modifications of the vehicle. Install the unit where it does not get in the driver's way and cannot injure the passenger if there is a sudden stop, like an emergency stop. - Page 6 1. Install the sleeve into the dashboard; ensure it is installed with the correct side and there are no obstacles (wires, dashboard elements, etc) for the unit installation. 2. After installing the sleeve into the dashboard, bend tabs fitting to the size of the dashboard to fix the sleeve in place.
- Page 7 2. DIN REAR-MOUNT (Method B) For this method, use the screw holes in the lateral sides of the unit. Fix the unit with the help of the factory radio mounting brackets. 1. Select a position in which the screw holes of the brackets (3) are aligned with the screw holes in the unit body, and screw in two screws (2) in each side.
-
Page 8: Connection Diagram
Connection diagram ISO speaker connection Notes: In spite of having any kinds of speaker system, must use 4 ohms impedance of speaker to reduce the distortion during high volume level. Prohibited to make the conductors of auto antenna and ground touch with each other. -
Page 9: Controllers
Controllers Front panel 1. PREVIOUS/NEXT button 2. VOL knob/SEL button 3. BAND/SUB button 4. MODE button 5. POWER button 6. F/PS button 7. OPEN button 8. SD/MMC slot 9. Light indicator 10. USB jack 11. AUX in jack 12. IR sensor 13. - Page 10 Back of the front panel Press the OPEN button to open the panel. 1. LED indicator 2. RESET button (hole) 3. Disc slot 4. EJECT button Note: Pressing the RESET hole will erase the clock setting and stored stations. Panel status indicator lights up when you slide the panel down, flashes when you remove the panel.
- Page 11 Remote control 1. POWER button 2. VOL+/VOL-, NEXT/PREV, SEL buttons 3. BAND button 4. APS button 5. MODE button 1/PLAY/PAUSE button 2/INT button 3/RPT button 4/RDM button 5/DN10 button 6/UP10 button 6. RDS buttons: TA button AF button PTY button 7.
-
Page 12: General Operations
General operations Power button Press any button to switch the unit on. The display will show a message “WELCOME”. Press and hold POWER button to switch the unit off. The display will show a message “GOOD-BYE”. Note: After the unit is off, volume level and radio current settings will be memorized, and when you turn the unit on it will resume the stored status you set. - Page 13 Mode selection Press MODE button on the RC to cycle the play mode: AUX => RADIO => DISK => USB => CARD. Note: USB, CARD, DISK mode will only show on the display when a USB flash memory is inserted into the USB port. Mute function Press MUTE button to cancel the sound.
-
Page 14: Radio Operations
Radio operations BAND selection Press BND/SUB button repeatedly or press BAND button on the RC to select your desired radio band during RADIO mode: FM1, FM2, FM3, AM1, AM2. Each band can store 6 preset stations, for a total of 30 preset memory stations. Tuning In Radio mode press PREV/NEXT buttons to manually adjust the radio frequency. - Page 15 RDS function Note: RDS (Radio Data System) service availability varies with areas. Please understand if RDS service is not available in you area, the following service is not available, either. During listening to radio or CD if there are any travel announcements from a nearly local station the radio will always know the frequency of that radio station.
- Page 16 Press PTY/SLK button twice to show the speech type program. Then press 1-6 button to choose the different speech type program. Each number key will show 3 different speech program for you to choose. Function Mask DPI- Mask all Press SEL button for 2 seconds. Press SEL button to cycle through to “Mask DPI”.
-
Page 17: Cd/Mp3/Wma/Usb/Sd/Mmc Card Operations
CD/MP3/WMA/USB/SD/MMC card operations Discs for playback This unit can play disc types: CD/CD-R/-RW. Compatible with formats: MP3/WMA. USB/SD/MMC notes USB functions (flash memory type) MP3 music play. SD/MMC card support, 2in1 (SD/MMC) support. USB flash memory. FAT 12/ FAT 16/ FAT 32 is possible FAT 12/16 (dir: 200 support, file: 500 support), FAT 32 (dir: 200 support, file: 500 support). - Page 18 Press EJECT button to eject the disc. If the disc is not removed from the slot within several seconds, it will automatically be loaded into the slot again. When the disc is ejected and removed, the unit will automatically switch to radio mode. Multi-session CD reading The multi-session reading will be activated automatically if the player detects a file that is written in multi-session format.
- Page 19 During playback the MP3/WMA/USB/SD/MMC format press 3/RPT button to choose RPT-1, RPT-DIR (folder repeat) or RPT-OFF. Random playback During disc playback, press and hold 4/RDM button to start random playback of the tracks. The display will show “RDM”. Press again to cancel. Intro playback You can play the beginning of every track for 10 seconds in sequence.
- Page 20 Press F/PS button three times and the display will show the current FOLDER name. The digit “D” is showing after the file name to indicate this is a directory. Use the volume button to select the folder name. Press SEL button, the chosen folder will start to play. USB mode: If the MP3/WMA files are stored in folders on the USB drive, the unit will start by playing the first song in the first folder.
-
Page 21: Mp3 Overview
MP3 overview Notes on MP3 and WMA MP3 is short for MPEG Audio Layer 3 and refers to an audio compression technology standard. This product allows playback of MP3 files on CD-ROM, CD-R or CD-RW discs. The unit can read MP3 files written in the format compliant with ISO 9660. However it does not support the MP3 data written by the method of packet write. - Page 22 Make sure that when MP3 CD-R or CD-RW is burned that it is formatted as a data disc and NOT as an audio disc. You should not write non-MP3 files or unneeded folders along with MP3 files on the disc otherwise it takes a long time until the unit starts to play MP3 files.
-
Page 23: Anti-Theft System
Anti-theft system Remove the panel 1. Press POWER button to switch off the power of the unit. 2. Press OPEN button to flip down the panel. 3. Push the panel to the left and then pull it towards you. 4. Put it to the special box and take it with you. Remove the unit 1. -
Page 24: Handling Compact Discs
Handling compact discs Dirty, scratched or warped discs may cause skip ping or noise. Handle the disc only by the edges. To keep clean do not touch its surface. Discs should be stored in their cases after use to avoid scratches. Do not expose discs to direct sunlight, high humidity, high temperature or dust. -
Page 25: Troubleshooting Guide
Troubleshooting guide Symptom Cause Solution No power The car ignition is not on. If the power supply is properly connected to the car accessory switch the ignition key to “ACC”. The fuse is blown. Replace the fuse. Disc cannot be loaded. Presence of disc inside the player. -
Page 26: Specification
Specification General Power supply 12 V DC Current consumption max. 10 A Maximum power output 50Wx4 channels Fuse 10A/1A Dimensions (L x W x H) 178 x 50 x 150 mm FM stereo radio Frequency range 87.5 - 108.0 MHz Usable sensitivity 3 uV I.F. - Page 27 ....................................27 ................................28 ..................................29 ................................30 ..................................34 ................................... 35 ..................................38 /SD/MMC /USB ..................43 3..................................... 47 ................................49 ..............................50 ....................................50 ..........................51 ................................ 52...
- Page 29 M5 T (3,5 (0,6 (1,0 (1,0 (0,8 (5X25 M5 (5X29,3...
- Page 30 30°, « » « » « » ( « » ( DIN, « » (...
- Page 31 (5 25 – – –...
- Page 32 « » (...
- Page 33 OPEN . 1). . 2). . 3).
- Page 35 PREVIOUS/NEXT VOL/ BAND/SUB MODE POWER F/PS OPEN 8. SD/MMC 10. USB 6/UP10 5/DN10 4/RDM 3/RPT 2/INT MUTE PTY/CLK/1/PLAY/PAUSE...
- Page 36 OPEN, ) RESET EJECT RESET : « ».
- Page 37 POWER VOL+/VOL-, NEXT/PREV, SEL BAND MODE 1/PLAY/PAUSE 2/INT 3/RPT 4/RDM 5/DN10 6/UP10 RDS: MUTE...
- Page 38 «WELCOME». POWER, «GOOD-BYE». VOL+/VOL- : VOL ( ) => BAS ( ) => TRE ( ) => BAL ( ) => FAD ( ) => LOUD ) => LOC ( ) => ST ( ) => EQ ( ) => BEEP ( ) =>...
- Page 39 MODE, : AUX => RADIO => DISC => USB => CARD. USB, CARD, DISC «LOUD OFF». VOL+/VOL-, ON ( OFF ( MUTE, VOL+/VOL- VOL, BND/SUB, PTY/CLK PTY/CLK VOL+/VOL- SEL; VOL+/VOL- PTY/CLK...
- Page 40 BND/SUB BAND : FM1, FM2, FM3, AM1, PREV/NEXT, ( FM «ST ON» «ST OFF» ( VOL+/VOL-, « », F/PS F/PS (18 FM, 12 AM) PREV/NEXT.
- Page 41 (1-6), (1-6), RDS ( AF ( «AF» , RDS TA ( SEEK. TA SEEK TA ALARM, TA SEEK TA ALARM «TA/TP»...
- Page 42 SEL, (LOC ON/OFF). PTY/CLK 1-6, 1-6, Mask DPI- Mask all SEL. SEL, «Mask DPI». VOL+/VOL-, MASK DPI MASK ALL. MASK DPI, (AF), MASK ALL, RDS. Retune S/L – Short/Long SEL, «TA SEEK». SEL, «RETUNE_S». VOL+/- VOL, «RETUNE_S» ( «RETUNE_L» - RETUNE_S.
- Page 43 /SD/MMC /USB : CD/CD-R/-RW. MP3/WMA. USB/SD/MMC SD/MMC, 2 1 (SD/MMC). FAT 12/ FAT 16/ FAT 32 FAT 12/ 16 ( , 500 FAT 32 ( , 500 : 32 : 32 (id3tag ver 2.0) USB 2.0. USB: USB 2.0. : 8 M ~ 1 : Cannon, Fuji film, Palm, Motorola, Microsoft, IBM, HP, Compaq, Sharp, Samsung, : 8 M ~ 1 MMC:...
- Page 44 «LOAD», EJECT, USB/SD/MMC SD/MMC MODE, USB. 1/PLAY/PAUSE, NEXT/PREV, NEXT/PREV 1/PLAY/PAUSE, UP 10/DN 10 ( MP3, WMA...
- Page 45 6/UP10, 5/DN10, «RPT». MP3/WMA USB/SD 3/RPT, RPT-1 ( ), RPT-DIR ( RPT-OFF ( 4/RDM, «RDM». Intro ( 2/INT, «INT». ID3 Tag , USB MP3/WMA F/PS, VOL+/VOL-, SEL,...
- Page 46 F/PS «F». VOL+/VOL-, SEL, F/PS «D». VOL+/VOL-, SEL, SD/MMC: MP3/WMA AUX IN MODE, AUX.
- Page 47 MPEG 3 CD-ROM, CD-R CD-RW. ISO 9660. “.mp3”. “.mp3”, “ MP3” “ ”, ” “ ” 256. VBR, . VBR: WMA (Windows Media Audio) – Microsoft Corporation. , 64 CD-R CD-RW, 44,1...
- Page 48 ISO 9660, CD-R MP3 CD-R CD-RW CD-R CD-RW CD-R CD-RW 1. ID3TAG.
- Page 49 POWER, OPEN,...
- Page 51 “ ”. POWER...
- Page 52 12 , . 10 10 /1 A 178 50 150 87.5 - 108.0 10.7 522-1620 MP3/ CD-R/ CD-RW 20-100 10-20 . 2000...
Need help?
Do you have a question about the H-CDM8033 and is the answer not in the manual?
Questions and answers