Table of Contents
Advertisement
Available languages
Available languages
Advertisement
Chapters
Table of Contents

Subscribe to Our Youtube Channel
Related Manuals for Magic Chef MCSCD6W1


Summary of Contents for Magic Chef MCSCD6W1
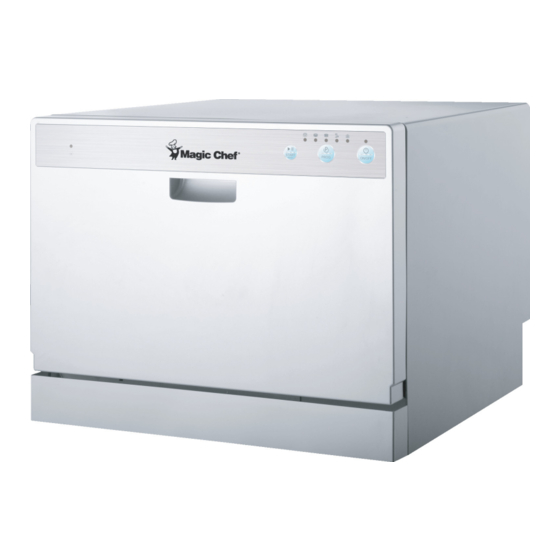
- Page 1 COUNTERTOP DISHWASHER User Manual MODEL MCSCD6W1...
-
Page 2: Table Of Contents
CONTENTS IMPORTANT SAFETY INSTRUCTIONS ······································································· 3 SPECIFICATIONS ········································································································· 6 PARTS AND FEATURES ································································································ 7 INSTALLATION INSTRUCTIONS ··················································································· 9 RECOMMENDATIONS FOR USE ················································································ 12 OPERATIONAL INSTRUCTIONS ················································································· 16 CARE AND MAINTENANCE ······················································································· 21 TROUBLESHOOTING ································································································ 24 WARRANTY ·············································································································· 26... -
Page 3: Important Safety Instructions
IMPORTANT SAFETY INSTRUCTIONS Inside you will find many helpful information on how to use and maintain your dishwasher properly. Following these guidelines can save you a great deal of time and money over the life of your dishwasher. Additional answers to common problems can be found in the chart of Troubleshootng Tips. - Page 4 8. DO NOT wash plastic items unless they are marked “dishwasher safe” or the equivalent. For plastic items without such markings, check the manufacturer’s recommendations. 9. DO NOT operate this appliance unless all enclosure panels are properly in place. 10. DO NOT tamper with controls. 11.
-
Page 5: Electrical Requirements
hydrogen escape. During this process do not turn on an electric appliance, smoke, light a match or lighter, or use a flame to avoid serious injury, due to the highly flammable nature of hydrogen gas. ELECTRICAL REQUIREMENTS GROUNDING INSTRUCTIONS This appliance must be plugged into at least a 15 AMP 120 Volt 60 Hz grounded outlet. This appliance must be grounded. -
Page 6: Specifications
SPECIFICATIONS Height 17.2" Width 21.7" Depth 19.7" Depth with Door Opened 31.5" Capacity 6 Place Settings Power Supply See Rating Label Voltage Connected Load See Rating Label Water Pressure 0.04 - 1.0 MPa Hot Water Connection Max 60°C... -
Page 7: Parts And Features
PARTS AND FEATURES CONTROL PANEL ② ④ ① ③ ⑤ ① B A) Dishwasher Door B) Rinse Aid Indicator ① C C) Door Handle D) Start/Pause/Reset Button E) Wash Program Button ① A F) Power Button (ON/OFF) 1) Heavy Cycle 2) Normal Cycle 3) Light Cycle 4) Speed Cycle... -
Page 8: Back View
BACK VIEW 1) Drain Pipe Connector 2) Power Cord Connector 3) Inlet Pipe Connector ①② ③ QUICK FAUCET ADAPTER CONNECTION ② ⑦ ⑤ ⑧ ⑥ ⑨ ⑩ ③ ⑪ ④ ① Drain Hose Inlet Hose Quick Connect 1) Drain Port Connection 5) Faucet Adapter 9) Locking Collar 2) Quick Connect Connection... -
Page 9: Installation Instructions
INSTALLATION INSTRUCTIONS UNPACKING AND PROPER PLACEMENT UNPACKING Inspect and remove all packing materials. This includes the foam and any adhesive tape both inside and outside of the unit. 2. Inspect and remove any remains of packaging, tape, or printed materials before powering on your appliance. - Page 10 NOTE: Recommended dishwasher location is next to the sink. Make sure there is an electrical power supply within easy reach of the machine. The power cord is 6-feet long. The dishwasher must be installed on a solid, level surface. To level the dishwasher, adjust the four legs under the dishwasher.
- Page 11 C) Water Intake Hose: Connect to the rear of the dishwasher using the large, 4-corner shaped wing nut. D) Drain Hose: Connect to the rear of the dishwasher. It is suggested you use pliers to tighten but DO NOT over tighten. E) With both hoses connected, make sure you can plug the power cord into a 120 volt, grounded AC outlet, then turn the dishwasher so it is facing forward.
-
Page 12: Recommendations For Use
RECOMMENDATIONS FOR USE WATER, PRESSURE, AND TEMPERATURE For the best operating results, the incoming water should be HOT and the pressure should be between 0.03~1.00 Mpa. Incoming water supply for the dishwasher is controlled by a “low water switch” application, in the event your household water ceases, the dishwasher will stop. -
Page 13: Loading Dishwasher
TIPS TO AVOID STAINS AND FILMS The following suggestions are recommended to prevent stains and films from forming on dishware and utensil items: A) You must rinse all dishware, silverware, glassware, and food containers immediately after use. Some citric based food products, coffee, tea, and iron deposits in water can cause yellow or brown filming on the inside surfaces when left on for long durations. - Page 14 HOW TO LOAD ITEMS A) Locate sharp items so that they are not likely to damage the door seal. B) DO NOT load plastic items unless they are marked “Dishwasher Safe” or the equivalent. For plastic items without such markings, check the manufacturer’s recommendations.
- Page 15 CUTLERY BASKET Silverware should be placed in the basket with handles at the bottom. If the rack has side baskets, the spoon should be loaded individually into the correct slots. Exceptionally long utensils should be placed in the horizontal position on the cup shelf.
-
Page 16: Operational Instructions
OPERATIONAL INSTRUCTIONS OPERATING YOUR DISHWASHER 1) Ensure that all electrical, water, and drain connections have been installed correctly before proceeding. 2) Load the dishwasher (see the “Loading Dishwasher” section). 3) Make sure that the water supply is turned on to full pressure. 4) Add the appropriate amount of dishwasher detergent to the dispenser (see “Dishwashing Detergent”... - Page 17 After you finish loading the detergent, securely close the cover. See below: Push latch to open Detergent Types: Powder Tablets USING A RINSING AID AGENT Using a specially formulated rinsing agent will help rinse away food and detergent residues that can be left behind on your dishes during the final rinse. This helps to prevent unslightly spots, films on dishes and glassware, and reduce drying time.
- Page 18 ① ② ③ 1) To fill the dispenser, turn the cap to the left and lift it out. 2) Add rinse agent until the indicator level turns completely black. 3) Replace the dispenser cap and close the dishwasher door. WASH CYCLE SEQUENCES NOTE: Wash cycle times listed here are for reference use only as they can change based on conditions such as inlet water temperature, whether the dishwasher is partially or fully loaded, and the heating element power rating.
- Page 19 Pre-Wash Pre-Wash 3.17 Gallons 45 Minutes Wash Rinse Speed Rinse 0.66 Gallons 10 Minutes Pre-Wash Soak PAUSING THE WASH CYCLE SEQUENCE In order to make any changes to the selected wash cycle sequence, load additional items, or remove previously loaded items, the dishwasher must be put into “PAUSE” mode.
- Page 20 2) Select the desired wash cycle sequence by pressing the program button. 3) Press the START/RESET button again to resume operation using the newly selected wash cycle sequence. NOTE: If you change the wash cycle sequence after the detergent has been dispensed, or the dishwasher has already drained the water, you will need to refill the detergent dispenser for the newly elected wash cycle sequence, accordingly.
-
Page 21: Care And Maintenance
CARE AND MAINTENANCE HOW TO MAINTAIN YOUR DISHWASHER After every wash, leave the dishwasher door slightly ajar so that any moisture and odor are not trapped inside the appliance. DO NOT USE SOLVENTS OR ABRASIVE CLEANING PRODUCTS To clean the exterior and rubber parts of the dishwasher, do not use solvents or abrasive cleaning products. -
Page 22: Cleaning The Spray Arm
To remove the filter assembly, grab the Open handle of the fine filter, rotate it counter ① clockwise, and then pull the filter in an ② upward direction. 1) Rotate the fine filter counter clockwise. ③ 2) Lift fine filter up. 3) Lift main filter up. -
Page 23: Cleaning The Control Panel
CLEANING THE CONTROL PANEL To clean the control panel, use a lightly dampened cloth. To clean the exterior, use a good appliance polish wax. Never use sharp objects, scouring pads, or harsh cleaners on any part of the dishwasher (exterior or interior). CLEANING THE DISHWASHER DOOR To clean the edge around the dishwasher door, you should use only a soft rag that is dampened with warm water. -
Page 24: Troubleshooting
TROUBLESHOOTING PROBLEM POSSIBLE CAUSES POSSIBLE SOLUTION Fuse is blown or the Replace the fuse or reset the circuit breaker. Remove any circuit breaker has other appliances sharing the same circuit with the dishwasher. tripped. A) Make sure the dishwasher is turned on and the door is Dishwasher Power supply is not closed securely. - Page 25 PROBLEM POSSIBLE CAUSES POSSIBLE SOLUTION Not enough detergent Use more detergent, or change the type of detergent being was dispensed. used by the dishwasher. Items are blocking the Rearrange the items accordingly so that the spray arm can rotation path of the rotate freely.
-
Page 26: Warranty
WARRANTY LIMITED WARRANTY MC Appliance Corporation warrants each new Countertop Dishwasher to be free from defects in material and workmanship, and agrees to remedy any such defect or to furnish a new part(s), at the company’s option, for any part(s) of the unit that has failed during the warranty period. - Page 27 This warranty gives you specific legal rights, and you may also have other rights which very from state to state. Model Parts Labor Type of Service MCSCD6W1 One-Year One-Year Carry In For Service or Assistance, call 888-775-0202. Or visit us on the web at www.mcappliance.com...
- Page 28 © 2012 CNA International, Inc. doing business as MC Appliance Corporation. All rights reserved. Distributed by CNA International, Inc. doing business as MC Appliance Corporation. 777 Mark Street, Wood Dale, IL 60191 U.S. 1-888-775-0202. Visit us at www.mcappliance.com...
- Page 29 LAVAVAJILLAS PARA LA ENCIMERA Manual del Usuario MODELO MCSCD6W1...
- Page 30 ÍNDICE INSTRUCCIONES IMPORTANTES DE SEGURIDAD ····················································· 3 ESPECIFICACIONES ····································································································· 7 PARTES Y CARACTERÍSTICAS ···················································································· 8 INSTRUCCIONES DE INSTALACIÓN ··········································································· 10 RECOMENDACIONES DE USO ·················································································· 14 INSTRUCCIONES DE OPERACIÓN ············································································· 18 CUIDADO Y MANTENIMIENTO ················································································· 24 SOLUCIÓN DE PROBLEMAS ······················································································ 27 GARANTÍA ················································································································...
-
Page 31: Instrucciones Importantes De Seguridad
INSTRUCCIONES IMPORTANTES DE SEGURIDAD En este manual encontrará mucha información útil para mantener y usar correctamente su lavavajillas. Al seguir estas indicaciones, usted puede ahorrar mucho tiempo y dinero a lo largo de la vida útil de su lavavajillas. En la tabla Solución de problemas, podrá encontrar soluciones adicionales a problemas comunes. - Page 32 No fuerce la puerta del lavavajillas, ni se siente o apoye en el escurreplatos. No use este aparato para fines de lavado comercial de vajillas. No lave artículos de plástico a menos que tengan la marca “Apto para lavavajillas” o una equivalente.
- Page 33 22. Desconecte la corriente eléctrica y la manguera de entrada de agua del lavavajillas antes de limpiarlo o darle servicio. 23. Si su aparato viejo no se está usando, recomendamos que lo almacene fuera del alcance de los niños o que le quite la puerta. Esto reducirá el riesgo de lesiones para los niños.
- Page 34 B) El valor nominal marcado en la extensión debe ser igual o mayor que el valor nominal de este aparato. C) La extensión deberá colocarse de forma que no cuelgue de la mesa o la encimera donde un niño podría jalarla o tropezarse con ella. PROCEDIMIENTOS DE LIMPIEZA O MANTENIMIENTO Para minimizar la posibilidad de una descarga eléctrica, desconecte este aparato del tomacorriente o desconecte el panel eléctrico quitando el fusible o apagando el...
-
Page 35: Especificaciones
ESPECIFICACIONES Altura 17.2" Anchura 21.7" Profundidád 19.7" Profundidád con puerta abuerta 31.5" Capacidad Configuración de 6 sitios La fuente de poder Consulte la etiqueta de clasificacion Voltaje de carga conectada Consulte la etiqueta de clasificacion Presión de agua 0.04 - 1.0 MPa Conexión de agua caliente Máximo 60°C... -
Page 36: Partes Y Características
PARTES Y CARACTERÍSTICAS PANEL DE CONTROL ② ④ ① ③ ⑤ ① B A) Puerta del lavavajillas B) Indicador de agente de enjuague ① C C) Manija de la puerta D) Botón de Inicio/Pausa/Restablecer E) Botón de programa de lavado F) Botón de encendido (ON/OFF) 1) Ciclo pesado 2) Ciclo normal... - Page 37 VISTA POSTERIOR 1) Conector del turbo de drenado 2) Cable de alimentación de corriente 3) Conector del tubo de entrada ①② ③ CONEXIÓN CON ADAPTADOR PARA GRIFO ② ⑦ ⑤ ⑧ ⑥ ⑨ ⑩ ③ ⑪ ④ ① Manguera de drenado Manguera de entrada Conexión rápida 1) Conexión al puerto de drenado...
-
Page 38: Instrucciones De Instalación
INSTRUCCIONES DE INSTALACIÓN DESEMBALAJE Y COLOCACIÓN CORRECTOS DESEMBALAJE 1. Inspeccione y quite todos los materiales de embalaje. Esto incluye la espuma y toda la cinta adhesiva dentro y fuera de la unidad. 2. Inspeccione y quite los restos de embalaje, cinta o materiales impresos antes de encender el aparato. - Page 39 NOTA: Se recomienda ubicar el lavavajillas al lado del fregadero. Asegúrese de que la máquina tenga una fuente de alimentación eléctrica cerca para conectarla. El cable de alimentación eléctrica tiene 6 pies de largo. El lavavajillas deberá instalarse en una superficie sólida y nivelada. Para nivelar el lavavajillas, ajuste las cuatro patas debajo del lavavajillas.
- Page 40 Una manguera que se coloca en un aspersor para fregadero puede lanzar un chorro si se instala en la misma línea que el lavavajillas. Si su fregadero tiene un aspersor, se recomienda que la manguera se desconecte y se tape el orificio. C) Manguera de entrada de agua: Conéctela a la parte trasera del lavavajillas mediante la tuerca de mariposa grande.
- Page 41 La manguera de entrada de agua ahora está presurizada. Presione el botón rojo de liberación de presión en el adaptador para grifo de liberación rápida, con lo que despresurizará la manguera de entrada de agua para quitarla con facilidad sin chorrear agua, la cual puede estar muy caliente y provocar quemaduras o lesiones.
-
Page 42: Recomendaciones De Uso
RECOMENDACIONES DE USO PRESIÓN Y TEMPERATURA DEL AGUA Para obtener mejores resultados, el agua de entrada deberá estar CALIENTE y la presión deberá estar entre 0.03 y 1.00 Mpa. El suministro de agua caliente para el lavavajillas se controla mediante un “interruptor por flujo bajo” en el caso de que el agua del aparato se corte, el lavavajillas se detendrá. -
Page 43: Carga Del Lavavajillas
CONSEJOS PARA EVITAR FORMACIÓN DE MANCHAS Y CAPAS DE SUCIEDAD Siga estas recomendaciones para evitar la formación de manchas y capas de suciedad en las vajillas y utensilios: A) Debe enjuagar todas las vajillas, cubiertos de plata, vasos y contenedores de comida inmediatamente después de usarlos. - Page 44 CÓMO COLOCAR LOS ARTÍCULOS A) Coloque los artículos filosos de tal manera que no puedan dañar el sello de la puerta. B) No coloque artículos de plástico a menos que tengan la marca “Apto para lavavajillas” o una equivalente. Para los artículos de plástico que no tengan estas marcas, revise las recomendaciones del fabricante.
- Page 45 CANASTILLA PARA CUBIERTOS Los cubiertos deberán colocarse en la canastilla con los mangos hacia abajo. Si el escurreplatos tiene canastillas laterales, las cucharas deberán cargarse de manera individual en las ranuras correctas. Los utensilios demasiado largos deberán colocarse en posición horizontal en la repisa para tazas.
-
Page 46: Instrucciones De Operación
INSTRUCCIONES DE OPERACIÓN OPERACIÓN DE SU LAVAVAJILLAS 1) Compruebe que todas las conexiones eléctricas, de agua y drenaje se hayan instalado correctamente antes de proceder a lavar. 2) Cargue el lavavajillas (consulte la sección “Carga del lavavajillas”). 3) Asegúrese de que el suministro de agua esté abierto y con presión completa. 4) Agregue la can dad apropiada de detergente para lavavajillas al dosificador (consulte la sección “Detergente para lavavajillas”). - Page 47 Número de sitios cargados Recomendaciones de detergente para lavavajillas Menos de 4 Llene el compartimiento marcado con “A” (15g o 0.53 oz) 4 a 6 Llene el compartimiento marcado con “B” (25g o 0.88 oz) Para abrir la cubierta del depósito de detergente, presione el botón y la cubierta girará...
- Page 48 INDICADOR DE NIVEL BAJO DE AGENTE DE ENJUAGUE Al tiempo que el agente de enjuague disminuye, el tamaño del punto negro en el indicador del nivel del agente de enjuague cambiará hasta que llegue el momento en que no aparezca el punto negro. LLENADO DEL DOSIFICADOR DEL AGENTE DE ENJUAGUE El dosificador del agente de enjuague tiene capacidad para 3.5 onzas de agente de enjuague.
- Page 49 Prelavado Prelavado Lavado 3.17 galones 85 minutos Enjuagado Normal Enjuagado (*AHAM DW-1-2005 ) Secado Prelavado Prelavado Lavado 3.17 galones 75 minutos Enjuagado Ligero Enjuagado Secado Prelavado Prelavado 3.17 galones 45 minutos Lavado Enjuagado Rápido Enjuagado 0.66 galones 10 minutos Prelavado Empapo PAUSA EN LA SECUENCIA DEL CICLO DE LAVADO Para poder hacer un cambio en la secuencia del ciclo de lavado seleccionado, cargar...
- Page 50 5) El lavavajillas reiniciará la operación de inmediato usando la secuencia de ciclo de lavado más reciente. NOTA: El lavavajillas automáticamente pasará al modo de PAUSA si la puerta se abre. La puerta debe estar cerrada y el seguro colocado para que el lavavajillas reinicie su operación.
- Page 51 REVISIÓN DE LA TEMPERATURA DEL AGUA Para una limpieza más efectiva y evitar daños al lavavajillas cuando se limpie, el agua caliente suministrada al lavavajillas deberá establecerse a una temperatura de por lo menos 120°F (49°C) y a no más de 150°F (66°C).
-
Page 52: Cuidado Y Mantenimiento
CUIDADO Y MANTENIMIENTO CÓMO DAR MANTENIMIENTO A SU LAVAVAJILLAS Después de cada lavada, deje entreabierta la puerta del lavavajillas para que la humedad y los olores no queden atrapados dentro del aparato. NO USE SOLVENTES NI PRODUCTOS DE LIMPIEZA ABRASIVOS: Para limpiar las partes exteriores y de goma del lavavajillas, no use solventes ni productos de limpieza abrasivos. - Page 53 enjuagando el conjunto del filtro bajo un chorro de agua. Para limpiar el filtro grueso y el filtro fino, use un cepillo de limpieza suave. Vuelva a colocar las partes del filtro como se muestran en el diagrama y reinserte el conjunto completo en el lavavajillas colocando el filtro en su sitio y presionando hacia abajo.
- Page 54 Es necesario limpiar el brazo aspersor con regularidad pues los químicos que endurecen el agua pueden bloquear los chorros y rodamientos del brazo aspersor. Lave el brazo con agua tibia y jabonosa usando un cepillo suave para limpiar los chorros. LIMPIEZA DEL PANEL DE CONTROL Para limpiar el panel de control, use un paño humedecido un poco.
-
Page 55: Solución De Problemas
SOLUCIÓN DE PROBLEMAS PROBLEMA CAUSAS PROBABLES POSIBLE SOLUCIÓN El fusible está fundido o Reemplace el fusible o restablezca el interruptor de el interruptor de circuito circuito. Quite cualquier otro aparato que comparta el está desconectado. mismo circuito con el lavavajillas. A) Asegúrese de que el lavavajillas esté... - Page 56 PROBLEMA CAUSAS PROBABLES POSIBLE SOLUCIÓN No se usó suficiente Use más detergente o cambie el tipo de detergente que detergente. está usando en el lavavajillas. Hay artículos bloqueando la ruta de Vuelva a colocar los artículos de manera correcta para que giro del brazo aspersor el brazo aspersor pueda girar con libertad.
-
Page 57: Garantía
GARANTÍA GARANTÍA LIMITADA MC Appliance Corporation garantiza que todas las lavavajillas es la encimera carecen de defectos en el material y la mano de obra y acuerda solucionar cualquiera de estos defectos o instalar la(s) parte(s) nueva(s) (a elección de la compañía) en caso de que la unidad haya fallado durante el periodo de garantía. - Page 58 Modelo Partes Manos de Obra Tipo de Servicio MCSCD6W1 Un Año Un Año Transporte Para Servicio o Asistencia, llame por favor al 888-775-0202. O visítenos en www.mcappliance.com...
- Page 60 © 2012 CNA International, Inc. operar bajo el nombre de MC Appliance Corporation. Todos los derechos reservados. Distribuida por CNA International, Inc. operar bajo el nombre de MC Appliance Corporation. 777 Mark Street, Wood Dale, IL 60191 Estados Unidos 1-888-775-0202. Visítenos en www.mcappliance.com...
Need help?
Do you have a question about the MCSCD6W1 and is the answer not in the manual?
Questions and answers