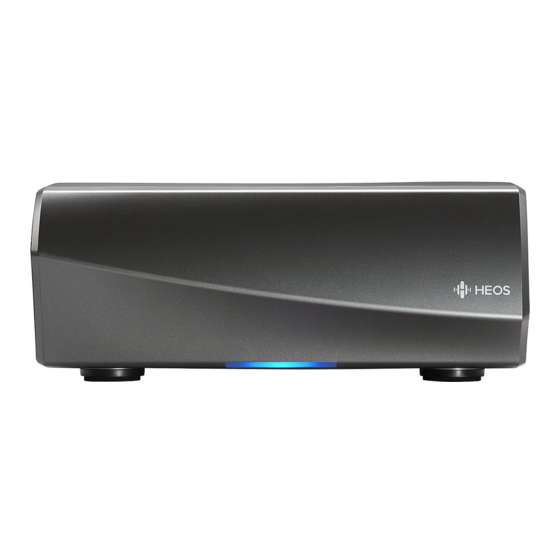
Denon HEOS Amp Owner's Manual
Hide thumbs
Also See for HEOS Amp:
- Owner's manual (67 pages) ,
- Quick start manual (12 pages) ,
- Service manual (74 pages)

Related Manuals for Denon HEOS Amp


Summary of Contents for Denon HEOS Amp
- Page 1 Contents Setup Troubleshooting Status LED Appendix Wireless Amplifier Owner’s Manual HEOS Amp...
-
Page 2: Table Of Contents
Why do I need a HEOS account? Network Requirements Signing up for a HEOS account Controller Requirements Changing Your HEOS account Getting To Know Your HEOS Amp Playing from Streaming Music Services Front panel Adding a Music Service Controls Changing Music Service Settings... - Page 3 Contents Setup Troubleshooting Status LED Appendix MAKING ADJUSTMENTS UPDATING YOUR SYSTEM Changing the Name of a HEOS Amp ADVANCED FEATURES Changing the Wireless Network Connection Submit Diagnostics Adjusting the Equalizer Sharing Music from your Mobile Device Adjusting the Balance Resetting Your Controller App...
- Page 4 I hear a delay when using the External Input with my TV License Connecting to a WPS Network License Information for the Software Used in the Unit Resetting Your HEOS Device Restoring the HEOS Device to Factory Defaults Contact Denon...
-
Page 5: Introduction
INTRODUCTION The HEOS Amp is part of the HEOS wireless multi-room sound system that enables you to enjoy your favorite music anywhere and everywhere around your home. By utilizing your existing home network and the HEOS app on your iOS or Android™ device, you can explore, browse, and play music from your own music library or from many online streaming music services. -
Page 6: Before You Begin
Wireless Router - In order to use your HEOS music system, you should have a working wireless (Wi-Fi) network in your home. If you do not have a wireless network, please contact your local Denon dealer or electronics retailer to assist you with purchasing and installing a wireless network in your home. -
Page 7: Controller Requirements
Contents Setup Troubleshooting Status LED Appendix o Controller Requirements You can control your HEOS wireless multi-room sound system using the free HEOS app on any iOS or Android mobile device that meets these minimum requirements: iOS Minimum Requirements Android Minimum Requirements iOS version 7.0 or later Android OS version 2.3 or later All resolutions... -
Page 8: Getting To Know Your Heos Amp
Troubleshooting Status LED Appendix Getting To Know Your HEOS Amp Unpack your HEOS Amp from the box and verify that the following items are included: A HEOS Amp B Quick Start Guide C Safety Information Sheets D Warranty (North America model only) -
Page 9: Front Panel
Contents Setup Troubleshooting Status LED Appendix o Front panel A Status LED Please refer to the “Status LED Table” for LED color and state meaning “Status LED Table” (v p. 50). -
Page 10: Controls
Contents Setup Troubleshooting Status LED Appendix o Controls A Volume Up/Down buttons (+, –) Adjusts the HEOS device’s volume level up or down. B Mute button (:) Mutes or unmutes the HEOS device’s volume. -
Page 11: Back Panel
Contents Setup Troubleshooting Status LED Appendix o Back panel 5V1A RESET OPTICAL IN NETWORK IMPEDANCE : 4 16 Class 2 Wiring LINE IN AUX IN CONNECT SPEAKERS WOOFER A AC input (AC IN) G Subwoofer Output (SUB WOOFER) Used to connect the power cord. (v p. 16) Used to connect this unit to a powered subwoofer. -
Page 12: Placing Your Heos Amp
HEOS Amp in a convenient location near the speakers you are connecting it to. The HEOS Amp must be within range of your wireless network. The HEOS Amp is not waterproof. Do not place it near any water source and do not leave it outside in the rain or snow. -
Page 13: Connecting External Devices
Contents Setup Troubleshooting Status LED Appendix Connecting External Devices o Connecting Speakers NOTE Carefully check the left (L) and right (R) channels and + (red) and – 0 Disconnect this unit’s power plug from the power outlet before connecting the (black) polarities on the speakers being connected to this unit, and be speakers. -
Page 14: Connecting A Subwoofer
Contents Setup Troubleshooting Status LED Appendix o Connecting a Subwoofer o Connecting an Audio Playback Device Connect the SUB WOOFER output to an input on your powered Connect the LINE IN, AUX IN or OPTICAL IN input to an audio subwoofer or your subwoofer amplifier. -
Page 15: Connecting A Usb Storage Device
Contents Setup Troubleshooting Status LED Appendix o Connecting a USB storage device Connect a FAT32 formatted USB mass storage device containing digital music files to any available USB port. USB memory device 5V1A RESET OPTICAL IN NETWORK IMPEDANCE : 4 16 Class 2 Wiring LINE IN AUX IN... -
Page 16: Powering Your Heos Amp
Contents Setup Troubleshooting Status LED Appendix Powering Your HEOS Amp Connect the power cord included in the box to the back of the HEOS Amp and the plug to a wall outlet. 5V1A RESET OPTICAL IN NETWORK for North America... -
Page 17: Setting Up Your First Heos Amp
Caution DO NOT connect the Ethernet cable if you are connecting your HEOS Amp to a wireless network. If you are connecting the HEOS Amp to a wired network, use an Ethernet cable to connect the HEOS Amp to your network or router. -
Page 18: Adding More Heos Devices
Contents Setup Troubleshooting Status LED Appendix ADDING MORE HEOS DEVICES The HEOS wireless multi-room sound system is a true multiroom audio system that automatically synchronizes audio playback between multiple HEOS devices so that the audio coming from different rooms is perfectly in sync and always sounds amazing! You can easily add up to 32 devices to your HEOS system. -
Page 19: Using Your Heos Amp
USING YOUR HEOS AMP Once you have your HEOS Amp connected to your network and the HEOS app installed on your mobile device, it’s easy to start enjoying your favorite music. You can listen to something different in every room or the same music perfectly synchronized in all rooms. It’s up to you! -
Page 20: Listening To Radio
Contents Setup Troubleshooting Status LED Appendix Listening to Radio Playing music stored on your mobile device The HEOS system includes access to more than 100,000 free internet radio streams from all corners of the globe via the TuneIn radio service. Just select the TuneIn logo from the main Music menu and browse among Tap the “Music”... -
Page 21: Playing Music From Your Networked Pc Or Nas
Contents Setup Troubleshooting Status LED Appendix Playing music from your networked PC Audio signal or NAS (Network Attached PC Storage) Select “Music Servers” from the Music tab. Select the name of your networked PC or NAS (network attached storage) server. Browse the music on your PC/NAS and select something to play. -
Page 22: Playing Music From An External Audio Device
RCA stereo or analog 3.5mm stereo input on the back of the HEOS Amp. Select “Inputs” from the Music tab. Select the name of the HEOS Amp and which input to which you connected the audio device in step 1. Initiate playback on the audio device. -
Page 23: Streaming An External Audio Device To Any Heos Device
RCA stereo or analog 3.5mm stereo inputs on the back of the HEOS Amp. Select “Inputs” from the Music tab. Select the name of the HEOS Amp and which input to which you connected the audio device in step 1. Initiate playback on the audio device. -
Page 24: Playing Music From A Usb Device
Playing music from a USB device Audio signal Insert a FAT32 formatted USB device into the USB port on the back of the HEOS Amp. Select “USB Music” from the “Music” tab. Select the name of your HEOS device. Browse the music on your USB device and select something to play. -
Page 25: Heos Account
Contents Setup Troubleshooting Status LED Appendix o Changing Your HEOS account HEOS account Tap the Music tab. o What is a HEOS account? Select the Settings a icon in the upper left corner of A HEOS account is master account or “keychain” for managing all of your HEOS music services with one single username and password. -
Page 26: Playing From Streaming Music Services
Contents Setup Troubleshooting Status LED Appendix o Changing Music Service Settings Playing from Streaming Music Services Tap the “Music” tab. A Music Service is an online music company that provides access to vast music collections via free and/or paid subscriptions. Depending upon your geographical location, there are several options to choose from. -
Page 27: Managing Inputs
Contents Setup Troubleshooting Status LED Appendix o Changing the Name of the Inputs Managing Inputs Select the name of the input you want to edit. If you connected external audio source components (like CD players, portable music players, Cable Boxes, etc...) to any of your HEOS devices Select "Name". -
Page 28: Managing Your Phone
Contents Setup Troubleshooting Status LED Appendix Managing your Phone Your smartphone or tablet can be hidden if it does not need to be in the “Music Sources” menu. Select the Settings a icon located in the upper left corner of the main Music menu to display the Settings menu. -
Page 29: Listening To The Same Music In Multiple Rooms
Contents Setup Troubleshooting Status LED Appendix Listening To The Same Music In Rooms Rooms Multiple Rooms Drag one room into another to group them Drag one room into another to group them Dining Dining The HEOS system is a true multiroom audio system that automatically Song Name 1 Song Name 1 synchronizes audio playback between multiple devices so that the audio... -
Page 30: Ungrouping Rooms
Contents Setup Troubleshooting Status LED Appendix o Ungrouping Rooms Rooms Rooms Tap the “Rooms” tab. Drag one room into another to group them Drag one room into another to group them Dining Dining Song Name 1 Song Name 1 Press and hold your finger on room that you want to remove from the group. -
Page 31: Grouping All Rooms (Party Mode)
Contents Setup Troubleshooting Status LED Appendix o Grouping All Rooms (Party Mode) Rooms Rooms You can easily group the eight rooms together into Party Mode by Drag one room into another to group them Drag one room into another to group them using a “pinch”... -
Page 32: Ungrouping All Rooms
Contents Setup Troubleshooting Status LED Appendix o Ungrouping All Rooms Rooms Rooms You can easily ungroup all of your rooms and exit Party Mode by using Drag one room into another to group them Drag one room into another to group them a “spread”... -
Page 33: Using The Now Playing Queue
Contents Setup Troubleshooting Status LED Appendix Using the Now Playing Queue HEOS uses a Now Playing “Queue” to line up music that you want to listen to. Music can be selected from any of your local or online music sources (as long as they are not preprogrammed “radio”... -
Page 34: Rearranging The Now Playing Queue
Contents Setup Troubleshooting Status LED Appendix Rearranging the Now Playing Queue Deleting Songs from the Play Queue Once you have songs lined up in your queue, you might want to rearrange You can remove songs one at a time from the Now Playing queue: the order or remove some songs: Tap the “Now Playing”... -
Page 35: Deleting All Songs From The Play Queue
Contents Setup Troubleshooting Status LED Appendix Deleting All Songs from the Play Queue Saving Playlists You can remove all of the songs from the Now Playing queue: You can save the Now Playing queue as a HEOS Playlist that you can recall later. -
Page 36: Making Adjustments
Music menu to display the Settings Select “Network”. menu. A list of wireless networks that your HEOS Amp can Select “My Devices” to display a list of your devices. access is displayed. Select the HEOS Amp you want to adjust. -
Page 37: Adjusting The Equalizer
Contents Setup Troubleshooting Status LED Appendix Adjusting the Equalizer Adjusting the Audio Quality Selects the transcoding option for rebroadcasting audio from one HEOS Select “EQ”. device to another HEOS device (or group of devices) across the network. When set to “Normal”, high bit rate audio sources originating from the first Adjust the Treble or Bass up or down. -
Page 38: Adjusting The Volume Limit
Contents Setup Troubleshooting Status LED Appendix Adjusting the Volume Limit You can set the maximum volume of the HEOS amplifiers to prevent sudden loud volume. Select “Volume Limit”. Select the maximum volume percentage (95, 90, 85, 80). NOTE 0 Depending on the speakers that are connected, the protection circuit may activate and the power may be turned off when music is played at a high volume. -
Page 39: Network Settings
Contents Setup Troubleshooting Status LED Appendix o About Wireless Power Saving Advanced Settings The Wireless Power Saving feature saves power by turning off power to the wireless radio inside the HEOS device when the device is connected Caution to an Ethernet network. If you disconnect the Ethernet cable from the Adjusting these settings may disconnect your device from your network HEOS device, Wireless Power Saving will automatically turn off and the and possibly render your device unusable. -
Page 40: Firmware Upgrade
Contents Setup Troubleshooting Status LED Appendix o Firmware Upgrade Select “Advanced”. Select “FIRMWARE UPGRADE” tab. Manually check for a firmware upgrade. o About Viewing technical details about the HEOS device. Select “Advanced”. Select “ABOUT” tab. Scroll down to see information about the device’s a. -
Page 41: Updating Your System
Contents Setup Troubleshooting Status LED Appendix UPDATING YOUR SYSTEM HEOS has the ability to add enhancements and updated functionality via your high speed Internet connection. When such updates become available, you will be notified when you open the HEOS app. Follow the instructions on the screen to update the HEOS device and/or your controller App. -
Page 42: Advanced Features
Resetting Your Controller App If you are having trouble with your network or HEOS system, you may be asked by Denon technical support personnel to select this option. This feature will automatically send Denon technical support diagnostic This feature will reset the control app to its original state when you first information about your HEOS system. -
Page 43: Power Management
Contents Setup Troubleshooting Status LED Appendix POWER MANAGEMENT Power Modes o Deep Standby o Network Standby The device also has the ability to automatically enter “Deep Standby” To save power, the device will automatically enter “Network Standby” whenever the wired or wireless network connection is removed for whenever there is no network access or playback for 20 minutes and more than 60 minutes in Network Standby. -
Page 44: Basic Troubleshooting
Alternatively, you can connect your device to your network router using the included Ethernet cable. Once connected via Ethernet, the HEOS by Denon App should recognize the device and you can manually move it to your wireless network using Settings/My Devices/Device_Name/Advanced/Network Settings. -
Page 45: My Heos Device Turns Off And The Status Led Flashes In Red
Contents Setup Troubleshooting Status LED Appendix My HEOS device turns off and the status LED flashes in red Solution Refer to Page The protection circuit has been activated due to a rise in temperature within your HEOS device. Turn the power off, wait about –... -
Page 46: Music Cuts Out Or Delays Sometimes
Contents Setup Troubleshooting Status LED Appendix Music cuts out or delays sometimes Solution Refer to Page Make sure your Internet connection is operating correctly. If you are sharing your network with other users or devices, they may be using most of your bandwidth (especially if they are streaming video). Make sure your HEOS devices are within range of your wireless network. -
Page 47: Connecting To A Wps Network
Contents Setup Troubleshooting Status LED Appendix Connecting to a WPS Network Solution Refer to Page If your wireless router support WPS (Wi-Fi Protected Setup™) your HEOS wireless device can optionally connect to your network using the “Push Button” method by following these steps: 1. -
Page 48: Resetting Your Heos Device
Contents Setup Troubleshooting Status LED Appendix Resetting Your HEOS Device Solution Refer to Page Resetting your HEOS device will clear out the wireless network info, EQ, and name but retain it’s current software. You will have to – use Settings - Add Device to reconnect the HEOS device to your home network before it can be used. To reset your HEOS device, gently insert a small paperclip into the Reset button hole on the back and hold it in until the front LED begins to flash amber. -
Page 49: Contact Denon
Telephone: Toll Free (855) 499 2820 (M-F 10:00AM to 10:00PM EST / Sat 12:00PM to 8:00PM EST) For the other region: If you need additional help in solving problems, please contact Denon customer service in your area or visit HEOSbyDenon.com... -
Page 50: Status Led Table
Contents Setup Troubleshooting Status LED Status LED Appendix Status LED Table Device Operation Description Front LED Action Rear LED Action No AC power or Deep Standby (off) (off) Plug in Booting (off) (blink) Ready-Configured and connected to your network (off) (solid) Not Connected to your network (solid) - Page 51 Contents Setup Troubleshooting Status LED Appendix Device Operation Description Front LED Action Rear LED Action Not connected (solid) (solid) Connect button was pressed (blink) (blink) Setup Cable connection is OK (solid) (solid) Connecting to your network (off) (blink)
- Page 52 Contents Setup Troubleshooting Status LED Appendix Device Operation Description Front LED Action Rear LED Action Configured and connected to your network (off) (solid) Setup Error (solid) (solid) Updating (blink) (blink) Update Rebooting (off) (blink) Ready-Configured and connected to your network (off) (solid)
- Page 53 Contents Setup Troubleshooting Status LED Appendix Device Operation Description Front LED Action Rear LED Action Soft reset - Clear user settings (solid) (fast blink) Hard reset - Factory restore (solid) (blink) Reset Rebooting (off) (blink) Ready-Not Configured (solid) (solid)
- Page 54 Contents Setup Troubleshooting Status LED Appendix Device Operation Description Front LED Action Rear LED Action Firmware Error (off) (slow blink (NOT fade)) Errors Hardware Error (off) (fast blink) Network Error (solid) (solid) Volume Change (off) (quick blink) Mute (off) (slow blink)
- Page 55 Contents Setup Troubleshooting Status LED Appendix Device Operation Description Front LED Action Rear LED Action a WPS session is active (fast blink) (fast blink) WPS connected (solid) (for 3 sec. solid) WPS time-out (solid) (for 3 sec. solid) Network Standby (off) Power Management (dimmed solid)
-
Page 56: Supported File Types And Codecs
Contents Setup Troubleshooting Status LED Appendix Appendix Supported File Types and Codecs Frequency Sample Rate File Extension Codec Bit Rates 32 kHz 44.1 kHz 16 bit 48 kHz 32 kHz MPEG-1 Audio Layer 3 44.1 kHz 16 bit 32 - 320 kbps CBR/VBR 48 kHz 32 kHz... -
Page 57: Specifications
Contents Setup Troubleshooting Status LED Appendix SPECIFICATIONS o Audio section Power amplifier Rated output: 2-channel driving 100 W+100 W (6 Ω/ohms, 1 kHz, T.H.D. 0.7 %) Output connectors: 4 – 16 Ω/ohms THD+N: ANALOG IN: 0.1 %(1 kHz) S/N ratio (10 W, 6 Ω/ohms, IHF-A): ANALOG IN: 86 dB(IHF–A weighted) Frequency response: 20 Hz to 20 kHz: ±1 dB... - Page 58 Setup Troubleshooting Status LED Appendix o Dimensions (Unit : in. (mm)) DENON DENON 8 45/64 (221) 6 3/16 (157) o Weight : 6 lbs 2.8 oz (2.8 kg) For the purpose of improvement, the specifications and design are subject to change without notice.
-
Page 59: Information
Contents Setup Troubleshooting Status LED Appendix INFORMATION Trademarks Google Play is a trademark of Google Inc. Apple, the Apple logo, iPad, iPhone, and iPod touch are trademarks of Apple Inc., registered in the U.S. and other countries. App Store is a service mark of Apple Inc. -
Page 60: License
GPL/LGPL software that is used in the product. COPYRIGHT AND PERMISSION NOTICE Denon provides the source code based on the GPL and LPGL licenses at the actual cost upon your request to our customer service Copyright (c) 1996 - 2014, Daniel Stenberg, <daniel@haxx.se>. - Page 61 Contents Setup Troubleshooting Status LED Appendix n e2fsprogs-libs-1.40.8/lib/uuid n expat-2.0.1 Redistribution and use in source and binary forms, with or without Copyright (c) 1998, 1999, 2000 Thai Open Source Software Center Ltd modification, are permitted provided that the following conditions are and Clark Cooper met: Copyright (c) 2001, 2002, 2003, 2004, 2005, 2006 Expat maintainers.
- Page 62 Contents Setup Troubleshooting Status LED Appendix n getopt n jQuery http://cvsweb.netbsd.org/bsdweb.cgi/src/lib/libc/stdlib/ Copyright 2014 jQuery Foundation and other contributors Copyright (c) 1987, 1993, 1994 The Regents of the University of http://jquery.com/ California. All rights reserved. Permission is hereby granted, free of charge, to any person obtaining a Redistribution and use in source and binary forms, with or without copy of this software and associated documentation files (the modification, are permitted provided that the following conditions are...
- Page 63 Contents Setup Troubleshooting Status LED Appendix n libpcap-1.4.0 n libtar-1.2.11 License: BSD Copyright (c) 1998-2003 University of Illinois Board of Trustees Copyright (c) 1998-2003 Mark D. Roth Redistribution and use in source and binary forms, with or without All rights reserved. modification, are permitted provided that the following conditions are met: Developed by: Campus Information Technologies and Educational...
- Page 64 Contents Setup Troubleshooting Status LED Appendix n mDNS 320.10.80 n mongoose The majority of the source code in the mDNSResponder project is licensed https://github.com/cesanta/mongoose/ under the terms of the Apache License, Version 2.0, available from: Copyright (c) 2004-2013 Sergey Lyubka <http://www.apache.org/licenses/LICENSE-2.0>...
- Page 65 Contents Setup Troubleshooting Status LED Appendix n openssl-1.0.0d THIS SOFTWARE IS PROVIDED BY THE OpenSSL PROJECT “AS IS” AND ANY EXPRESSED OR IMPLIED WARRANTIES, Copyright (c) 1998-2011 The OpenSSL Project. All rights reserved. INCLUDING, BUT NOT LIMITED TO, THE IMPLIED WARRANTIES Redistribution and use in source and binary forms, with or without OF MERCHANTABILITY AND FITNESS FOR A PARTICULAR modification, are permitted provided that the following conditions are...
- Page 66 Contents Setup Troubleshooting Status LED Appendix n portmap-6.0 n pstdint.h-0.1.12 Copyright (c) 1990 The Regents of the University of California. BSD License: All rights reserved. Copyright (c) 2005-2011 Paul Hsieh Redistribution and use in source and binary forms, with or without All rights reserved.
- Page 67 Contents Setup Troubleshooting Status LED Appendix n rl78flash 2000.3.1 n sqlite 2003.5.7 License SQLite Copyright ======= SQLite is in the The MIT License (MIT) Public Domain Copyright (c) 2012 Maxim Salov All of the code and documentation in SQLite has been dedicated to the public domain by the authors.
- Page 68 Contents Setup Troubleshooting Status LED Appendix n strlcpy.c , v1.11 n tinyxml 2002.4.3 Copyright (c) 1998 Todd C. Miller <Todd.Miller@courtesan.com> www.sourceforge.net/projects/tinyxml Original file by Yves Berquin. Permission to use, copy, modify, and distribute this software for any purpose with or without fee is hereby granted, provided that the This software is provided 'as-is', without any express or implied above copyright notice and this permission notice appear in all warranty.
- Page 69 Contents Setup Troubleshooting Status LED Appendix n Tremor n zlib http://wiki.xiph.org/index.php/Tremor http://www.zlib.net/ Copyright (c) 2002, Xiph.org Foundation zlib.h -- interface of the ‘zlib’ general purpose compression library version 1.2.3, July 18th, 2005 Redistribution and use in source and binary forms, with or without modification, are permitted provided that the following conditions are Copyright (C) 1995-2004 Jean-loup Gailly and Mark Adler met:...
- Page 71 3520 10356 20ADA HEOSbyDenon.com Copyright © 2015 D&M Holdings Inc. All Rights Reserved.
Need help?
Do you have a question about the HEOS Amp and is the answer not in the manual?
Questions and answers