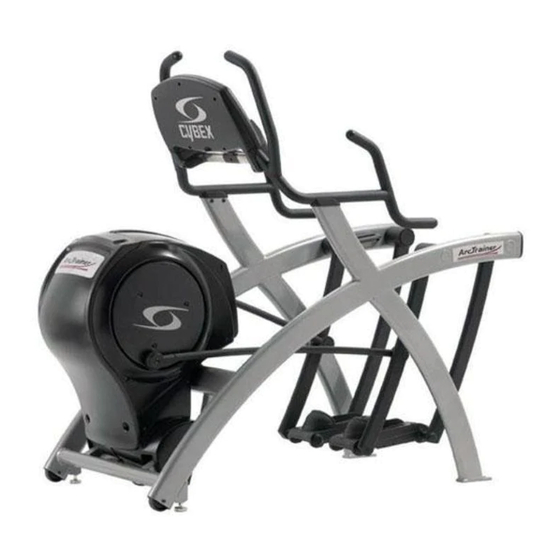
CYBEX Arc Trainer 610A Service Manual
Hide thumbs
Also See for Arc Trainer 610A:
- Owner's manual (72 pages) ,
- Owner's manual (69 pages) ,
- Installation instructions manual (4 pages)
Advertisement
Table of Contents
- 1 Test Mode
- 2 LED Functions
- 3 Key Functions
- 4 Error Codes
- 5 Speed Sensor Adjustment
- 6 Drive Belts
- 7 Eddy Current Brake
- 8 Elevation Motor
- 9 Power Switch
- 10 Upper Pillow Blocks
- 11 Lower Pillow Blocks
- 12 Lower Control Board
- 13 Upper Display Board
- 14 Upper Display Cable
- 15 Lower Display Cable
- 16 Display Overlays
- Download this manual
See also:
Owner's Manual
Warnings/Cautions
All warnings and cautions listed in this chapter are as follows:
! WARNING:
All maintenance activities shall be performed by qualified personnel.
Failure to do so could result in serious injury.
! WARNING:
Disconnect the power cord before beginning this procedure. Keep wet items
away from inside parts of the unit. Electrical shock could occur even if the unit is
unplugged.
! WARNING:
Flywheel may be hot. Wait until it cools before servicing.
! CAUTION:
Do not pinch your fingers between the belt and pulley during this procedure.
! WARNING:
Failure to release the drive belt tension may cause personal injury and may
damage the unit.
! WARNING:
Do not touch components on the lower board. A charge can remain after
unplugging the power cord and turning off the unit.
! CAUTION:
Pulley on eddy current brake is sharp. Wear work gloves to protect your hands.
Cybex Arc Trainer 610A Service Manual
4 - Service
Service
Page 4-1
Advertisement
Table of Contents

Related Manuals for CYBEX Arc Trainer 610A


Summary of Contents for CYBEX Arc Trainer 610A
- Page 1 Cybex Arc Trainer 610A Service Manual 4 - Service Warnings/Cautions All warnings and cautions listed in this chapter are as follows: ! WARNING: All maintenance activities shall be performed by qualified personnel. Failure to do so could result in serious injury.
-
Page 2: Test Mode
Cybex International, Inc. Medway, MA USA (508) 533-4300 www.Cybexinternational.com resistance Lower Overlay Figure 1 Mets Incline Down 17 Incline Up 25 Pause/End Auxiliary 10 Resistance Down 18 Resistance Up... -
Page 3: Led Functions
Cybex Arc Trainer 610A Service Manual LED Functions LEDs are used to indicate the status of many of the unit inputs. After entering Test Mode refer to the following list to check that these LEDs are functioning properly: Heart LED - Blinks on blue with every signal from the contact heart rate receiver and red for wireless signals (Polar). -
Page 4: Error Codes
Cybex Arc Trainer 610A Service Manual Error Codes Error codes notify you of a problem condition and are displayed on the center of the console. These codes can also help to indicate the part of the unit most likely to be causing the problem. Errors that present a hazard to the user provide a measure of safety by causing a one second beep, stopping the unit and locking out operation of the unit. -
Page 5: Speed Sensor Adjustment
Cybex Arc Trainer 610A Service Manual Speed Sensor Adjustment Tools Required • Phillips head screwdriver ! WARNING: Disconnect the power cord before beginning this procedure. Keep wet items away from inside parts of the unit. Electrical shock could occur even if the unit is unplugged. - Page 6 Cybex Arc Trainer 610A Service Manual 5. Adjust the speed sensor gap (if needed). A. Using a Phillips head screwdriver, loosen the screw securing the speed sensor in place. See Figure 3. NOTE: Gently bend the side cover to get at the speed sensor screw.
-
Page 7: Drive Belts
Cybex Arc Trainer 610A Service Manual Drive Belts NOTE: This procedure will cover the primary and secondary drive belts. Tools Required • Phillips head screwdriver • 3/16” Allen wrench • 2 Cloths • 3/8” Nutdriver or socket wrench • 7/16” Socket wrench •... - Page 8 Cybex Arc Trainer 610A Service Manual 4. Remove the side covers. Gasket Side Cover Screw (6) A. Remove the six screws and six washers securing each side cover in place. See Figure 5. B. Remove both side covers. NOTE: The...
- Page 9 Cybex Arc Trainer 610A Service Manual NOTE: If you are not replacing the primary belt skip to Secondary Drive Belt step 14. (Removed in Step 7) ! WARNING: Do not touch components on the lower Lower board. A charge can remain after...
- Page 10 Cybex Arc Trainer 610A Service Manual Bolt (4) Pillow Block (2) NOTE: Nuts (4) and flat washers (4) are behind the pillow blocks. Flat Washer (8) Figure 12 B. Remove the crank shaft assembly Crank Shaft Assembly along with the primary belt, pillow blocks Primary and crank arms out of the unit.
- Page 11 Cybex Arc Trainer 610A Service Manual ! CAUTION: Do not pinch your fingers between the belt and pulley during this procedure. 13. Attach the lower board assembly. A. Slide the lower board assembly over the two bottom screws and to the right.
- Page 12 Cybex Arc Trainer 610A Service Manual NOTE: Do not adjust This Side of the idler pulley unless This Side of Bracket it is obvious that your Bracket belt is not tensioned properly. Idler Pulley Top Screw Bottom Screw Figure 14 8.
-
Page 13: Eddy Current Brake
Cybex Arc Trainer 610A Service Manual B. Using a Phillips head screwdriver, tighten the four screws securing the access cover. See Figure 2. Eddy Current Brake Tools Required • Phillips head screwdriver • 3/16” Allen wrench • 7/16” Socket wrench •... - Page 14 Cybex Arc Trainer 610A Service Manual 5. Remove the left crank cover. A. Using a Phillips head screwdriver, remove the three screws securing the left crank cover in place. See Figure 6. Loosen Screws B. Remove the left crank cover.
- Page 15 D. Support the brake with your hand while removing the two top screws so that it does not fall. E. Remove the eddy current brake from the unit. NOTE: Cybex may want the old parts for evaluation. Call Cybex Customer Service to get an RMA number.
-
Page 16: Elevation Motor
Cybex Arc Trainer 610A Service Manual ! CAUTION: Do not pinch your fingers between the belt and pulley during this procedure. D. Use your hand to slowly turn the flywheel and ensure that the belt is on straight. 12. Attach the left crank cover. - Page 17 Cybex Arc Trainer 610A Service Manual 1. Elevate the unit and disconnect the power source. A. Plug the power cord into the power outlet. B. Enter Test Mode. C. Elevate the unit to a minimum of level 7 incline. D. While the unit is elevated, turn the main power switch to the off (O) position and unplug the power cord from the power outlet.
- Page 18 Cybex Arc Trainer 610A Service Manual 7. Remove the elevation motor. A. Place your body next to the front end assembly to prevent it from Spacer Bolt pivoting and falling to the floor during the next step. B. Using a 9/16” open end wrench and a 9/16”...
- Page 19 Cybex Arc Trainer 610A Service Manual D. Using a 9/16” open end wrench and a 9/16” socket wrench, tighten a nut on each bolt. 10. Connect the elevation cable. A. Connect the elevation cable to the lower board and place it in the slot mentioned in step 6B.
-
Page 20: Power Switch
Cybex Arc Trainer 610A Service Manual Power Switch Tools Required • Phillips head screwdriver 1. Disconnect the external power source. A. Turn the main power switch above the power inlet to the off (O) position. B. Unplug the power cord from the power outlet and from the power inlet. - Page 21 Cybex Arc Trainer 610A Service Manual NOTE: Shown from inside the unit. See the schematic at the end of this Brown Blue chapter for more detail. Brown Blue To the Brown Blue Controller Green and Yellow Brown Blue Green and...
-
Page 22: Upper Pillow Blocks
Cybex Arc Trainer 610A Service Manual Upper Pillow Blocks Tools Required • Phillips head screwdriver • 3/16” Allen wrench • 1/8” Allen wrench • 7/16” Socket wrench • 9/16” Socket wrench • 9/16” Open end wrench • 3/8” Nutdriver or socket wrench ! WARNING: Disconnect the power cord before beginning this procedure. - Page 23 Cybex Arc Trainer 610A Service Manual 5. Remove the crank covers. A. Using a Phillips head screwdriver, remove the three screws securing each crank cover in place. See Figure 6. B. Remove both crank covers. ! WARNING: Failure to release the drive belt tension may cause personal injury and may damage the unit.
- Page 24 Cybex Arc Trainer 610A Service Manual Pin (2) Nut (4) Pillow Block (2) Shaft Set Screws Crank Arm (2 Each Side) Screw (2) Flat Washer (8) Bolt (4) Figure 21 10. Remove the crank shaft assembly. A. Using a 9/16” socket wrench and a 9/16” open end wrench, remove the two bolts, four flat washers and two nuts form each of the top pillow blocks.
- Page 25 Cybex Arc Trainer 610A Service Manual E. Using a 1/8” Allen wrench, tighten the two set screws on each pillow block. ! CAUTION: Do not pinch your fingers between the belt and pulley during this procedure. 14. Secure the crank arms.
-
Page 26: Lower Pillow Blocks
Cybex Arc Trainer 610A Service Manual B. Using a 3/16” Allen wrench, attach each connecting rod with a screw removed in step 3A. See Figure 4. 21. Attach the access cover. A. While being sure not to pinch any cables, place the access cover in position. - Page 27 Cybex Arc Trainer 610A Service Manual 3. Detach the connecting rods. A. Using a 3/16” Allen wrench, remove the screw securing each connecting rod to each crank. See Figure 4. B. Place a cloth on the frame where each connecting rod will rest.
- Page 28 Cybex Arc Trainer 610A Service Manual 7. Secure the side covers. A. Place the two side covers and gasket in position. B. Using a Phillips head screwdriver, attach each side cover with the six screws and six washers removed in step 4A.
- Page 29 Cybex Arc Trainer 610A Service Manual Heart Rate Cable Plug Contact Heart Rate Cable Figure 23 4. Remove arm. A. Using a 7/32” Allen wrench remove the two screws and two washers securing the arm to the frame. B. Remove arm from frame.
- Page 30 Cybex Arc Trainer 610A Service Manual 6. Attach the new handle link. A. Slide the handle link onto the arm shaft and foot plate arm shaft. B. Using a Phillips head screwdriver or 3/16” Allen wrench, secure handle link with the screws and (appropriate) cap removed in step 3A.
-
Page 31: Lower Control Board
Cybex Arc Trainer 610A Service Manual Rear Pedal Front Pedal Foot Plate Small Cap (2) Foot Plate Shafts SHCS (2) Threadlocker Figure 25 Lower Control Board Tools Required • Phillips head screwdriver • 3/8” Nutdriver or socket wrench • ESD (Electro Static Discharge) grounding strap ! WARNING: Disconnect the power cord before beginning this procedure. - Page 32 A. Using a Phillips head screwdriver, remove the top two screws from the lower board assembly and loosen the bottom two screws. B. Slide the lower board assembly left and off the bottom screws. NOTE: Cybex may want the old parts for evaluation. Call Cybex Customer Service to get an RMA number.
- Page 33 Cybex Arc Trainer 610A Service Manual Lower Control Board Fuses TOOLS REQUIRED • Phillips screwdriver • Needle nosed pliers • Two (2) Fuses, part number EF-12417. 1. Disconnect the external power source. A. Turn the main power switch above the power inlet to the off (0) position.
-
Page 34: Upper Display Board
B. Lift and rotate the display board to the right and unplug the three overlay ribbon cables from the display board. Set the display board aside. NOTE: Cybex may want the old parts for evaluation. Call Cybex Customer Service to get an RMA number. - Page 35 Cybex Arc Trainer 610A Service Manual Upper Display Board Upper Switch Mounting Screws (5) Membrane Connectors (on front side) RJ-45 Port Polar connector CSAFE Display Cable Ports Connector Polar Heart Rate Board Ground wire Lower Switch Contact Heart Membrane Connector...
-
Page 36: Upper Display Cable
Cybex Arc Trainer 610A Service Manual Upper Display Cable Tools Required • 7/32” Allen wrench • Phillips head screwdriver • ESD (Electro Static Discharge) grounding strap 1. Disconnect the external power source. A. Turn the main power switch above the power inlet to the off (O) position. -
Page 37: Lower Display Cable
Cybex Arc Trainer 610A Service Manual 7. Attach the console mount. Console Assembly A. Insert the upper display cable into the console mount and place on top of Upper the base assembly. See Display Figure 29. Cable Washers (4) B. Using a 7/32” Allen... - Page 38 Cybex Arc Trainer 610A Service Manual 2. Remove the access cover. A. Using a Phillips head screwdriver, loosen the four screws securing the access cover. See Figure 2. B. Remove the access cover. 3. Remove the console assembly. A. Using an Allen wrench, remove the four screws and four lock washers securing the console assembly in place.
- Page 39 Cybex Arc Trainer 610A Service Manual B. Locate the new contact heart rate cables connected Left Side to the lower display cable. The right side cables are Heart Rate Right Side located in the outermost locations in the lower display...
- Page 40 Cybex Arc Trainer 610A Service Manual Left Contact Heart Rate Cable Right Contact Heart Rate Cable Lower Display Cable To Lower Board Figure 34 NOTE: Frame only shown for cable routing. 10. Attach the left wheel. Wire Holder A. Using a 9/16” wrench and a 3/16” Allen wrench, attach the bolt and nut Bracket securing the left transport wheel in position.
-
Page 41: Display Overlays
Cybex Arc Trainer 610A Service Manual Display Overlays NOTE: This procedure will cover the upper and/or lower display overlay. They are removed and replaced the same. Tools Required • Phillips head screwdriver • ESD (Electro Static Discharge) grounding strap • Razor blade 1. - Page 42 Cybex Arc Trainer 610A Service Manual B. Place the display board in position and secure with five mounting screws removed in step 2D. C. Place the console front in position and connect these cables to the display board: the display cables; the contact heart rate cables; ground wire and the polar heartrate cable. See Figure 28.
Need help?
Do you have a question about the Arc Trainer 610A and is the answer not in the manual?
Questions and answers