Table of Contents
Advertisement
Advertisement
Chapters
Table of Contents

Related Manuals for Geemarc CL8500


Summary of Contents for Geemarc CL8500
- Page 1 Connevans.info Solutions to improve the quality of life This product may be purchased from Connevans Limited DeafEquipment.co.uk secure online store at www.DeafEquipment.co.uk...
- Page 2 CL8500 Amplified Clamshell Mobile Phone with Dual LCD Display and Camera English...
-
Page 3: Table Of Contents
CONTENTS CONTENTS INTRODUCTION Unpacking the Telephone DESCRIPTION General Description LCD Screen Description Menu Navigation Menu Map Network Services & Password SETTING UP, Install SIM Card and Battery Charging the Battery Switching On/Off & Battery Use USING THE TELEPHONE, Standby Mode, Making a Call Making a Call from the Call Record &... - Page 4 CONTENTS Call Timer Send a Text Message Receiving a Text Message Reviewing Stored Text Messages (Inbox) Sent Messages Draftbox Delete SMS Text Message Settings Broadcaast Messages VOICEMAIL Voicemail Number Setting Listen to Voicemail PHONEBOOK Create a Phone Book Entry Create a Phone Book Entry from Standby View Phone Book Entries Options within Phone Book Create a Picture Phone Book Entry...
- Page 5 CONTENTS Display Missed Calls Display Dialled Calls Display Received Calls Delete Call Logs Call Settings HANDSET SETTINGS I.C.E Boost Settings Profiles Direct Number Phone Settings Network Settings Security Settings Restore Default SOS Function SOS Number Settings SOS Message Record SOS Text Message ADVANCED SETTINGS Organizer Multimedia...
- Page 6 CONTENTS TROUBLESHOOTING SAFETY INFORMATION HEARING AID INFORMATION NETWORK SERVICES GUARANTEE RECYCLING DIRECTIVES...
-
Page 7: Introduction
Its is important that you read the instructions below in order to use your Geemarc telephone to its full potential. Keep this user guide in a safe place for future reference. This guide explains how to use the following telephone:... -
Page 8: Unpacking The Telephone
1 GSMCL8500 mobile telephone handset 1 Desktop charging unit 1 Mains power adaptor 1 x Li-Polymer rechargeable battery 1 User Guide For product support and help visit our website at www.geemarc.com Telephone 01707 384438 Or fax 01707 832529... -
Page 9: Description
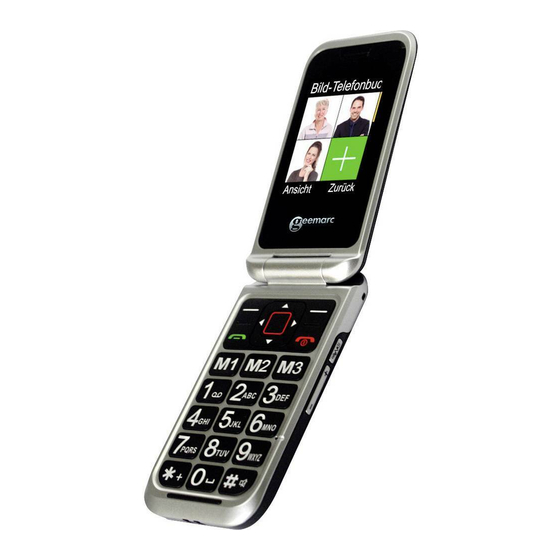
DESCRIPTION General Description Handset Description (front) Earpiece Display Navigation keys or camera function Left Soft Key Right Soft Key Dial Key End/Power Key M1, M2, M3 Keypad Confirm Key... - Page 10 DESCRIPTION Handset Description (Rear) SOS key Battery door Loudspeaker Headset Jack Torch/Amplify button Mini USB Port Volume Up/Down Button Charging Contacts...
- Page 11 DESCRIPTION Charging Contacts Mini USB port...
-
Page 12: One Touch Dialing Keys
DESCRIPTION One touch dialing keys A telephone number can be assigned to each of these buttons. To dial the number all you have to do is press the button once and the number will be dialed automatically Power key/On-hook key Long press to power the telephone on and off End a call... - Page 13 DESCRIPTION Right Key This is a dedicated key in Standby. It can be set up in Handset Settings Left Key This is a dedicated key in Standby. It can be set up in Handset Settings.
- Page 14 DESCRIPTION Call Key Make a call after dialling the number Receive a call Left/Right key These are softkeys i.e. they take on different functions depending on the menu displayed. The current function is always displayed by the text above the key Asterisk key Press this key to insert one or more symbols while composing a...
- Page 15 DESCRIPTION Press this key on the right side of the phone during a conversation to amplify the volume. Volume Up and Down Key Use this key to increase ringer volume when you access Profiles menu or when receiving an incoming call. Increase the earpiece/speakerphone volume during a call.
-
Page 16: Lcd Screen Description
DESCRIPTION LCD Screen Description The LCD screen is split into three distinct areas: The icon area. This is found at the top of the screen. This displays the various system icons which help you to use the telephone. The main area. This is found across the centre of the screen. - Page 17 DESCRIPTION level of battery charge. More bars indicate more battery charge Roaming icon A roaming call is taking place i.e.international call – outgoing or incoming SMS icon A new SMS (text message) has been received Mute icon The microphone is temporarily muted during the conversation Silent icon The telephone is in silent mode.
-
Page 18: Menu Navigation
DESCRIPTION Menu Navigation The MENU soft key or central square key is used to activate the menu. The BACK soft key is used to go back a level in the menu system. Press deactivate the menu and return to standby mode from any menu. -
Page 19: Menu Map
DESCRIPTION Menu Map Phonebook Picture Phonebook Normal Phonebook Messages Write Message Inbox Drafts Outbox Sent Messages Broadcast Messages Message Settings Call Center Call History Call Settings Record SOS Message SOS SMS Settings I.C.E Boost Setting Profiles Direct Number Dual SIM Settings Phone Settings Network Settings Security Settings... - Page 20 DESCRIPTION Tasks Alarm Bluetooth World Clock Shortcuts Services Internet Service SIM Toolkit SIM Toolkit Multimedia Camera Gallery Video Recorder Video Player Audio Player Sound Recorder FM Radio File Manager Phone Memory card...
-
Page 21: Network Services & Password
DESCRIPTION Network Services To use this mobile telephone you must subscribe to a service from a service provider. Different service providers offer different features (at a variety of charges). This may effect the features made available to you through this mobile telephone. Passwords This mobile telephone allows you to set up passwords to help protect your telephone from unauthorized use. -
Page 22: Setting Up, Install Sim Card And Battery
SETTING UP Install SIM Card and Battery Always switch the telephone off and disconnect the charger before removing the battery. Take care when handling the SIM card. The SIM card and its contacts can be easily damaged by scratches or bending. -
Page 23: Charging The Battery
SETTING UP Observe the battery contacts (the gold coloured contacts must face towards the top left).and insert the battery. Place the battery cover into position and press down lightly. Charging the Battery Charging via the Mini USB Port Plug the charger into a wall socket. Connect the lead from the charger into the the Mini USB port on the side of the telephone. -
Page 24: Switching On/Off & Battery Use
SETTING UP Note: Only use batteries and chargers supplied with the telephone. The guarantee will be invalid if an unapproved cable is used. Keep the battery contacts clean and free of dirt. Try and avoid removing the battery as this could short circuit the battery. If the battery is completely discharged, it may take a few seconds before the charging indicator appears on the display or before any calls can be made. -
Page 25: Battery Use
SETTING UP If no SIM card has been inserted, LIMITED SERVICE will be displayed. Only emergency calls can be made until the SIM has been inserted. Press again for 3 seconds to switch the telephone off. Battery Use icon is continuously displayed at the top right corner of the LCD display. -
Page 26: Making A Call
USING THE TELEPHONE Standby Mode When the telephone is ready for use and you have not entered any characters, the telephone is in standby mode. You can set the telephone to standby mode by pressing Making a Call Flip open the cover and dial the number on the keypad. -
Page 27: Menu
USING THE TELEPHONE Making a Call from the Call Record You can find numbers dialled, received or missed in the call record. 1. Menu--->Call Centre--->Call History--->Select the list required--->Select the telephone number required 2. On finding the desired number, press , the number is automatically dialled 3. -
Page 28: Making A Call Using Quick Dial
USING THE TELEPHONE Making a Call using Quick Dial If you have stored numbers in the quick dial locations, press either M1, M2 or M3 (dependant on who you wish to ring). The chosen telephone number will be dialled automatically. Making a Call from the Dialled Numbers List Press... -
Page 29: Options During A Call
USING THE TELEPHONE Press to answer To end the call simply press or flip the cover closed Rejecting a Call To reject an incoming call, simply press SILENT REJECT soft key and then Switch Off Alerts You can temporarily switch off all of the alerts and vibrations for an incoming call. -
Page 30: Receiving Volume
USING THE TELEPHONE Enter the Phonebook View Call History Messages Sound Record - Record the call Call diverting", "multiparty calls", "call hold" and "call waiting" function need network support, so please contact your network provider Receiving Volume During a conversation, the buttons found on the right side, adjust the ear piece volume level, there are... -
Page 31: Ringer Volume
USING THE TELEPHONE Ringer Volume When the phone rings with an incoming call, you can adjust the ringer volume by pressing V+ or V-. This will override the ringer volume setting in the profile currently being used. Call Timer Your handset automatically times the duration of every external call. -
Page 32: Sms
Send a Text Message A text message using this telephone can contain up to 160 characters. This figure includes spaces. 1. Menu--->Messages--->Write Message--->Text Message or MMS 2. Write your text message (See text entry in Phonebook Chapter) 3. Options--->Send to--->Enter Number and then enter the actual number or Select from the Phonebook List 4. -
Page 33: Reviewing Stored Text Messages (Inbox)
Reviewing Stored Text Messages (Inbox) 1. Menu--->Messages--->Inbox 2. Scroll to the message you wish to review 3. Press the central square key to view 4. Press OPTION soft key to see all the options available that can be performed on this selected text message 5. -
Page 34: Draftbox
5. These options include Forward, Delete and Advanced Options Draftbox The draft box stores messages that you have saved but not sent yet. You now get the chance to send the message, resume editing or delete. 1. Menu--->Messages--->Draft Messages 2. Scroll to the message you wish to review 3. -
Page 35: Text Message Settings
Text Message Settings Service Centres distribute SMS messages. Your mobile telephone must have the telephone number for the service centre programmed into memory. Generally, this will have already been set up by your service provider. There are many settings options: SIM in which you can alter settings such as Validity You can stipulate how long an attempt at delivering a... -
Page 36: Text Message Counter
A useful option is to request to see how much memory is occupied and how much is free on both the SIM card and the telephone e,g, 17/40, 2/40. Text Message Counter Save Sent Messages Storage Media If you select SIM PREFERRED, when you receive a new message it will be stored on the SIM card by default. -
Page 37: Voicemail
VOICEMAIL Voicemail Number Setting The voicemail function allows you to listen to any voicemail messages people may have left for you. The voice mailbox is a network service to which you may need to subscribe. Contact your service provider if in doubt. -
Page 38: Phonebook
PHONE BOOK Telephone numbers and names can be stored in the phone book. This is held both on the SIM and in the phone memory. It allows you to store frequently used numbers so that you can easily make a call without having to remember or enter the telephone number. - Page 39 PHONE BOOK The numeric keypad also has characters printed on the keys. These characters are used for entering text for the purposes of phonebook entry and modification, SMS text writing and searching for an entry in the phonebook. Press each key the relevant number of times to get the letter you need e..g.
-
Page 40: Create A Phone Book Entry From Standby
PHONE BOOK Create a Phone Book Entry from Standby Enter the number using the numeric keypad (always include the local area code) 1. Options---> Save to Phonebook 2. Select either SIM or Phone 3. Create a name for the Phonebook Entry using the numeric keypad (see above) 5. -
Page 41: Options Within Phonebook
PHONE BOOK Options within Phonebook 1. Menu--->Phonebook--->Normal Phonebook---> 2. Use ▼and▲ to scroll through the list until you find the desired contact 3. Press OPTION soft key 4. Options available to be performed on that contact record are as follows: VIEW Send Text Message Send multimedia message... -
Page 42: Create A Picture Phone Book Entry
PHONE BOOK 4) Copy or Move contacts between the Phone and Sim and vice versa 5) Delete all Contacts Create a Picture Phone Book Entry You can also create a Phonebook entry with a picture associated with it. This is particularly useful when you receive an incoming call as the photograph will be displayed on the screen. -
Page 43: Storing A Speed Dial Number
PHONE BOOK Press Storing a Speed Dial Number You can assign a speed dial number to a phonebook entry. This means you can dial a number very easily whenever you want simply by pressing the associated number. 1. Menu--->Settings--->Direct Number 2. -
Page 44: Call Record
CALL RECORD Display Missed Calls When you have a missed call, a message n MISSED CALLS will appear on the display e.g. 3 MISSED CALLS. Press SELECT soft key to review the details or press CANCEL to exit. You can also review missed calls via the menu as follows: 1. -
Page 45: Display Received Calls
CALL RECORD 3. Press the soft key OPTIONS, the following will be available to perform on that call record entry: View Call Send Text Message Send Multimedia message Save to Phonebook Add to block list Delete Display Received Calls 1. Menu--->Call Centre--->Call History--->Received Calls 2. -
Page 46: Delete Call Logs
CALL RECORD Delete Call Logs 1. Menu--->Call Centre--->Call History--->Delete Call Logs 2. Select either Missed call, Dialled calls, Recived Calls or All Calls to set to zero. Call Settings Within Call Settings there is SIM Call Settings and Advance Settings You can access SIM Call Settings as follows: Menu--->Call Centre--->Call Settings--->SIM Call Settings... - Page 47 CALL RECORD Divert all Calls: Call divert is applied to all incoming calls Divert if Unreachable: Call divert is applied to all incoming calls if your phone is switched off or you are not in a service area ...
- Page 48 CALL RECORD You can access Advance Settings as follows: Menu--->Call Centre--->Call Settings--->Advance Settings There are many settings available: Block List: The ability to Reject and blacklist numbers Auto Redial: If this setting is activated, when you make a call but cannot get through as the other line is engaged, your telephone will automatically redial this number after a certain amount of time (decided by you).
-
Page 49: Handset Settings
HANDSET SETTINGS I.C.E In Case of Emergency You can add 4 Names and Numbers of people who could be contacted in times of Emergency. Menu--->Settings--->ICE--->Contacts You can input all the phone owner's information e.g.name, address, disease, allergy, blood group, doctor Menu--->Settings--->ICE--->Owner Info Boost Settings Whenever you make or receive a call, the amplify feature... -
Page 50: Direct Number
HANDSET SETTINGS Alert type, Ring Type, Ringtone, Ringtone Volume, SIM 1 Message, SIM 2 Message, Message Volume, Keytone Type, Keytone Volume, Power on tone, Power Off tone, Flap open tone type, Flap close tone type, System alert Direct Number You can assign a one touch button number to a phonebook entry. -
Page 51: Network Settings
HANDSET SETTINGS Language: There are 14 languages available to display the menu i.e. English, French, Spanish, Dutch and German etc. Preferred input methods e.g. Capitals or lower case. Extra Settings: Different Modes can be set up Display Settings: You can set Wallpaper, you can alter power on and off display, display analog or digital clock on the flip cover Dedicated keys : You can set the phone so as you only... -
Page 52: Restore Default
HANDSET SETTINGS The PIN and PIN2 codes are supplied with your SIM card. The PIN code hellps to protect the SIM card from unauthorized use. The PIN2 code is required to access certain services. You can set the screen to auto lock and set the time taken to do this There is also a Phone lock Connectivity... -
Page 53: Sos
SOS Function In an emergency, you can press the SOS button for help during 3 seconds. If you have preset an SOS text message and set the SMS RECEIVER (generally another mobile phone), once you press the SOS button, the phone will send the SOS text message to the receiver. -
Page 54: Sos Number Settings
SOS Number Settings You can set up to 5 SOS numbers or set a number for a call centre. 1. Menu--->SOS--->SOS--->Set SOS number--->Set 5 Numbers Set Call centre (depending on whom you would like to call at a time of emergency). 2. -
Page 55: Sos Text Message
SOS Text Message You can enter the SOS text message. This will be sent to mobile phones on your list. Menu--->SOS---> SOS SMS--->Type an informative text message--->Options--->Done... -
Page 56: Advanced Settings
ADVANCED FUNCTIONS Organizer There are many useful functions within organizer. Human Voice You can set Human Voice Prompt, Intelligent Call alert (telephone number announced when call is received), Key Number Reporting (announcement of key pressed) and Volume of voice announcement Calendar You can review the calendar, move to a certain date quickly and add events (with an alarm) if... - Page 57 Bluetooth CL8500 supports bluetooth. Other bluetooth devices can be searched for and likewise the CL8500 can be found. Bluetooth password is 0000. You can connect with a bluetooth headset or perhaps with another phone. This would enable file transfer via bluetooth.e.g.
-
Page 58: Multimedia
Set up list of functions you wish to access quickly via the Shortcuts menu. Multimedia There is superb multimedia options available on the CL8500. There is a Camera, Video, Audio Player, Sound Recorder and FM Radio. File Manager All the files used in the many applications on the phone can be found within File Manager. -
Page 59: Troubleshooting
TROUBLESHOOTING Telephone cannot be switched on Check battery is inserted and check that it is inserted correctly Nothing appears on the display Check the handset is switched on Check the battery and SIM are inserted correctly Display is locked when the telephone is switched on ... - Page 60 TROUBLESHOOTING contact surfaces on the mobile phone and charging unit with a soft, dry cloth. Try a new battery Unable to Charge the phone Check the adaptor connections If temperature is below -10℃ or higher than 55℃ move to a place without such extremes of temperature ...
- Page 61 TROUBLESHOOTING Check if fixed dialling is set Is the bar incoming calls feature enabled Is the call diverting function enabled The keys appear to be locked Power the phone off and then on Caller Number is not displayed ...
-
Page 62: Safety Information
SAFETY INFORMATION General Only use the power supply included with the product. Only use the approved rechargeable battery supplied. Do not open the handset (except to replace the handset batteries or SIM) or base. Contact the helpline for all repairs. Never dispose of batteries in a fire. - Page 63 SAFETY INFORMATION Do not place any part of your product in water and do not use it in damp or humid conditions e.g. bathrooms. Do not expose your product to fire or other hazardous conditions. The telephone is designed for working within a temperature range of -10C to 55C.
- Page 64 SAFETY INFORMATION Do not use the device at a refuelling point. Do not use near fuel or chemicals. SWITCH OFF NEAR BLASTING Follow any restrictions. Do not use the device where blasting is in progress. USE SENSIBLY Use only in the normal position as explained in the product documentation.
-
Page 65: Hearing Aid Information
HEARING AID INFORMATION Some phones are measured for compatibility with hearing aids. If the box for your particular model has “Rated for Hearing Aids” printed on it, the following explanation applies. When some mobile phones are used near some hearing devices (hearing aids and cochlear implants), users may detect a buzzing, humming, or whining noise. -
Page 66: Network Services
NETWORK SERVICES To use the phone you must have service from a wireless service provider. Many of the features in this device depend on features in the wireless network to function. These network services may not be available on all networks have make... -
Page 67: Guarantee
GUARANTEE From the moment your Geemarc product is purchased, Geemarc guarantee it for the period of two years. During this time, all repairs or replacements (at our discretion) are free of charge. Should you experience a problem then contact our help line or visit our website at www.geemarc.com. - Page 68 GUARANTEE Electrical connection: The apparatus is designed to operate from a 230V 50Hz supply only. (Classified as ‘hazardous voltage’ according to EN60950 standard). The apparatus does not incorporate an integral power on/off switch. To disconnect the power, either switch off supply at the mains power socket or unplug the AC adaptor.
-
Page 69: Recycling Directives
- Or, hand the old product to the retailer. If you purchase a new one, they should accept it. Thus if you respect these instructions you ensure human health and environmental protection. For product support and help visit our website at www.geemarc.com Telephone 01707 384438 Or fax 01707 372529... - Page 70 UGCL8500_En_v1.0...
Need help?
Do you have a question about the CL8500 and is the answer not in the manual?
Questions and answers