Table of Contents
Advertisement
Advertisement
Table of Contents

Subscribe to Our Youtube Channel
Related Manuals for Geemarc ClearSound CL8400BT


Summary of Contents for Geemarc ClearSound CL8400BT
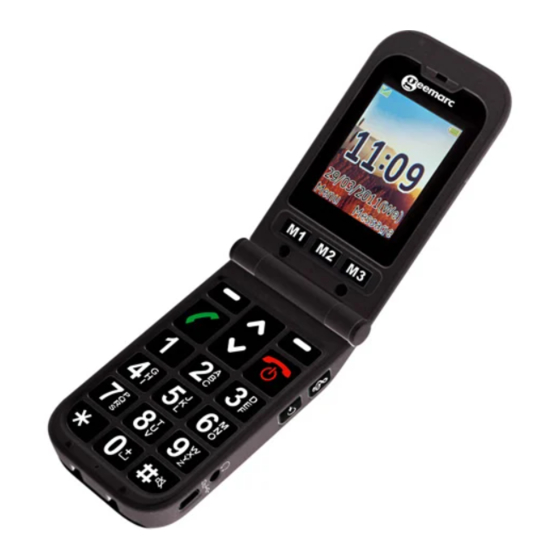
- Page 1 CL8400BT GSM Telephone with Amplification English...
-
Page 2: Table Of Contents
CONTENTS CONTENTS INTRODUCTION Unpacking the Telephone DESCRIPTION General Description LCD Screen Description Menu Navigation Menu Map SETTING UP Network Services Passwords Install SIM Card and Battery Charging the battery Switching On/Off Battery Use USING THE TELEPHONE Standby Mode Making a Call Making a Call from the Call Record Making a Call from the Phone Book Making a Call using Quick Dial... - Page 3 CONTENTS Template Message Settings PHONE BOOK Adding Phonebook Entries Character Map Searching an Entry in Phonebook Using Phonebook Options Copying all the Phonebook Entries Deleting the Phonebook Entries Caller Group Extra Number Settings CALL RECORD Received Calls Dialed Calls Missed Calls Delete Call Log HANDSET SETTINGS Clock Settings...
- Page 4 CONTENTS Other Settings SOS Setting SOS Number Setting SOS Message Setting Use SOS Function Speed Dial Network Setup Security Settings Restore Factory PROFILES Profiles TOOLS Calendar Alarm Bluetooth Calculator FM RADIO GAME FEATURE LIST TROUBLESHOOTING SAFETY INFORMATION HEARING AID INFORMATION NETWORK SERVICES GUARANTEE RECYCLING DIRECTIVES...
-
Page 5: Introduction
It is important that you read the instructions below in order to use your Geemarc telephone to its full potential. Keep this user guide in a safe place for future reference. This guide explains how to use the following telephone:... -
Page 6: Unpacking The Telephone
1 GSMCL8400BT mobile telephone handset • 1 Desktop charging unit • 1 Mains power adaptor • 1 Li-Polymer rechargeable battery • 1 User Guide For product support and help visit our website at www.geemarc.com Telephone 01707 384438 Or fax 01707 832529... -
Page 7: Description
DESCRIPTION General Description Handset Description (Front & Rear) Earpiece Speed dial Display keys SOS switch Speaker Right Left key End/ Up key Power Dial key Down # key Charging contacts Battery Compartment cover... - Page 8 DESCRIPTION Handset Description (Left & Right) Torch Button/ Volume up Tone Control Button Volume down Amplify (AMP) Button Button Headset jack Mini USB port switch Charger Rear view Charge pins Mini USB port...
-
Page 9: Navigation Button
DESCRIPTION One touch dialling keys A telephone number can be assigned to each of these buttons. To dial the number all you have to do is press the button once and the number will be dialled automatically. Power key/On-hook key Long press to power the telephone on and off. - Page 10 DESCRIPTION Left/Right key Perform the functions indicated by the text immediately over it (on the bottom line of the display) which changes time by time. Asterisk key Press this key to insert one or more symbols while composing a message or editing a phonebook entry name.
- Page 11 DESCRIPTION Torch/Volume Up Key Press this key on the right side of the phone, the light will be on steadily. Press it again to turn it off. This key can also be used to increase the earpiece/speakerphone volume during a call or increase the ringer volume when you access Profiles menu.
-
Page 12: Lcd Screen Description
DESCRIPTION LCD Screen Description Signal Strength icon This is always displayed when your telephone is switched on. It shows the current signal strength. More bars indicate more signal strength. Alarm icon The alarm has been set to ring at a specified time. -
Page 13: Menu Navigation
DESCRIPTION Menu Navigation To access a menu option 1. To display menu items, press Menu. 2. To scroll through menu options, press repeatedly. 3. To select a menu, press Ok when the desired menu appears on the LCD. 4. Repeat if necessary. To return to Standby mode from menu If you press Back, the phone returns to the previous screen. -
Page 14: Menu Map
DESCRIPTION Menu Map Short Message Restore Factory Write Message / Settings Inbox FM Radio Outbox / Template Message Settings Games Voice Mail Server Puzzle Broadcast Message Robot Phonebook Search Entry Fruit Add New Entry Game Settings Copy All Toolbox Delete Calendar Caller Group Alarm... -
Page 15: Setting Up
SETTING UP Network Services To use this mobile telephone you must subscribe to a service from a service provider. Different service providers offer different features (at a variety of charges). This may affect the features made available to you through this mobile telephone. Passwords This mobile telephone allows you to set up passwords to help protect your telephone from unauthorized use. - Page 16 SETTING UP To remove the battery compartment cover, slide the cover in the direction shown and pull it off. Remove the battery (if battery already inside). Slide the metal SIM card cover down slightly and then lift up. The SIM card contacts in the phone should now be exposed.
-
Page 17: Charging The Battery
SETTING UP Charging the battery Charging via the Mini USB Port Plug the charger into a wall socket. Connect the lead from the charger into the Mini USB port on the bottom of the telephone (pull back the protective flap first). During charging, the battery icon starts to fill. -
Page 18: Switching On/Off
SETTING UP Note: Only use batteries and chargers supplied with the telephone. The guarantee will be invalid if an unapproved cable is used. Keep the battery contacts clean and free of dirt. Try and avoid removing the battery as this could short circuit the battery. -
Page 19: Battery Use
SETTING UP Note: Nothing will appear on the LCD when battery power is very low. YOU SHOULD FULLY CHARGE THE PHONE BEFORE USING. Battery Use icon is continuously displayed at the top right corner of the LCD display. The icon indicates the level of battery power. -
Page 20: Using The Telephone
USING THE TELEPHONE Standby Mode When the telephone is ready for use and you have not entered any characters, the telephone is in standby mode. You can set the telephone to standby mode by pressing Making a Call Flip open the cover and dial the number on the keypad. Press CLEAR soft key to delete an incorrect digit. -
Page 21: Making A Call From The Call Record
USING THE TELEPHONE Making a Call from the Call Record You can find numbers dialled, received or missed in the call record. Press to enter the call record. to scroll through the lists available. Press OK soft key to select the required list. to scroll through the telephone numbers. -
Page 22: Making A Call Using Quick Dial
USING THE TELEPHONE On finding the desired name, press ; the number is automatically dialled. To end the call, simply press Making a Call using Quick Dial If you have stored numbers in the quick dial locations, press either M1, M2 or M3 (dependant on who you wish to ring). -
Page 23: Rejecting A Call
USING THE TELEPHONE displayed. If this caller’s number is stored in the Phonebook, the associated name will be displayed. Press to answer. To end the call, simply press or flip the cover closed. Rejecting a Call To reject an incoming call, simply press or the soft key REJECT. - Page 24 USING THE TELEPHONE When you press the key in receiver mode during a conversation, the Amplifier indicator on the handset lights on. If you press the key again, the indicator will go out. Please note that the phone will retain the current sound levels (Amplify on or Amplify off) automatically.
-
Page 25: Options During A Call
USING THE TELEPHONE Options During a Call You can use a variety of functions during a call by pressing the OPTION soft key. Hold Single: Hold the current call. End Single: End the current call (same as New Call: Call another number (three-party call). Phonebook: Search the phonebook. -
Page 26: Sms
Writing/Sending/Storing a new message You can create a text message containing up to 160 alphanumeric characters and send it. To do this, proceed as follows: 1. Press Menu in standby mode. 2. Press Ok to select Short Message. 3. Press Ok again to select Write Message. 4. -
Page 27: Inbox
Inbox The Inbox stores the messages you have received. You can forward, reply, delete, edit these messages or store the sender’s number to your phone or SIM card. When a new short message is received, the LCD display shows 1 New Message, and you can press Read to open it. -
Page 28: Outbox
Outbox The Outbox stores successfully sent and saved messages. 1. Press Menu in standby mode. 2. Press Ok to select Short Message. 3. Repeatedly press key to select Outbox, press Ok. 4. Select the desired message by using key, press Ok. The display will show the whole message. 5. -
Page 29: Template
Template The template folder stores 9 commonly used expressions. You can also edit them according to your needs. 1. Press Menu in standby mode. 2. Press Ok to select Short Message. 3. Repeatedly press key to select Template, press Ok. 4. -
Page 30: Memory Status
Reply Path: If you activate this feature, when you reply to messages, your message usage is charged to the recipient’s service account instead of yours. Memory Status You can check the number of messages stored in the SIM card and the phone. For example, SIM:70.00%, PHONE:20.00%. -
Page 31: Phone Book
PHONE BOOK The phonebook built in your mobile phone allows you to store frequently used numbers so that you can easily make a call without having to remember or enter the phone number. Adding Phonebook Entries You can add phonebook entries by using the menu or in standby mode. -
Page 32: Character Map
PHONE BOOK Way 2: in standby mode 1. Enter a phone number while in standby mode and then press Save. 2. Complete the storing of the entry by starting from step 4 described in Way 1. Character Map To enter a specific alphanumeric character, press one or more times the relevant key for the required character according to the following table: once for the first character, twice for the second and so on. -
Page 33: Searching An Entry In Phonebook
PHONE BOOK Searching an Entry in Phonebook You can search the entries stored in the phonebook by entering the first character of their name (alphabetic search). 1. Press Menu in standby mode. 2. Press key to select Phone Book, press Ok. 3. -
Page 34: Using Phonebook Options
PHONE BOOK Using Phonebook Options You can edit, delete or dial any phonebook number. You can also send a message to the number you select. 1. Find the desired entry in the phonebook. 2. Press Options soft key. Then press key to choose the desired option: Dial - To dial out the selected entry number. -
Page 35: Caller Group
PHONE BOOK 2. Press key to select Phone Book, press Ok. 3. Repeatedly press key to select Delete, press Ok. 4. Select From SIM, From Phone or One By One, press 5. If you select From SIM or From Phone, you need to enter the password. -
Page 36: Extra Number
PHONE BOOK Extra Number 1. Press Menu in standby mode. 2. Press key to select Phone Book, press Ok. 3. Repeatedly press key to select Extra Numbers, press Ok. Owner Number: Enter your own phone number. Service Dial Number: Display the service dial number. Please note that just some service provider has this number. - Page 37 PHONE BOOK Select SIM or Phone and press Ok to select the default storage for new phonebook entries. Name List Filter SIM Only: In the standby mode, press Name to show phonebook entries stored in the SIM card only. Phone Only: In the standby mode, press Name to show phonebook entries stored in the phone only.
-
Page 38: Call Record
CALL RECORD Using this function, you can check received calls number, dialed calls number and missed calls number. Received Calls Displays phone numbers of calls you have answered. 1. Press Menu in standby mode. 2. Repeatedly press key to select Call Record, press Ok. -
Page 39: Missed Calls
CALL RECORD 5. Press Options soft key to display the following options: Delete - To delete the selected number. Save to Phone book - To save this number in the phonebook. Dial - To dial out the selected number. Edit - To edit the selected number. Send SMS - To send a short message to the selected number. -
Page 40: Delete Call Log
CALL RECORD Send SMS - To send a short message to the selected number. Delete Call Log You can delete the whole call list. 1. Press Menu soft key in standby mode. 2. Repeatedly press key to select Call Record, press Ok. 3. - Page 41 CALL RECORD 2. Repeatedly press key to select Call Record, press Ok. 3. Repeatedly press key to select Call Cost, press Ok. 4. Press key to select among Last Call Cost, Total Cost, Reset Cost, Max Cost and Price Per Unit. Press Ok to clear them or press Back to quit.
-
Page 42: Handset Settings
HANDSET SETTINGS Clock Settings You can set the date, time and time format, you can also select to update the date and time automatically. 1. Press Menu in standby mode. 2. Repeatedly press key to select Settings, press Ok. 3. Press Ok again to select Phone. 4. -
Page 43: Language
HANDSET SETTINGS 3. Press Ok again to select Phone. 4. Press key to select Schedule Power On/Off, press Ok. 5. Repeatedly press key to select a position, press Edit. 6. Press Edit again to set the status, select Enable or Disable, press Ok. -
Page 44: Dedicated Key
HANDSET SETTINGS 5. Press key to select the language you want and then press Ok to confirm. Dedicated Key Using this function, you only need to press one key to enter the desired setting mode directly. 1. Press Menu in standby mode. 2. -
Page 45: Wallpaper
HANDSET SETTINGS 5. Use key to select an option from 15 Seconds, 30 Seconds and 60 Seconds, then press Ok to confirm. Wallpaper Using this feature, you can customize the wallpaper according to your taste and needs. 1. Press Menu in standby mode. 2. -
Page 46: Show Owner Number
HANDSET SETTINGS Show Owner Number The LCD display will show the owner number in standby mode if you have activated this function. 1. Press Menu in standby mode. 2. Repeatedly press key to select Settings, press Ok. 3. Press key to select Display, press Ok. 4. -
Page 47: Call Divert
HANDSET SETTINGS Activate: Enables the function. Deactivate: Disables the function. Query Status: Displays if the service is active or not. Call Divert Using this function, you can divert incoming calls to a specified phone number. Select a condition and press Ok, then select Activate, Deactivate or Query Status. -
Page 48: Auto Redial
HANDSET SETTINGS Auto Redial If you activate the Auto redial function, when the line does not get through, the phone will auto redial this number after the time you have set in advance if you have not cancelled the call. 1. -
Page 49: Sos Number Setting
HANDSET SETTINGS SOS Number Setting Using this function, you can set up to 6 SOS numbers. Press Ok to choose SOS Number. Repeatedly press key to choose one from 6 positions, press Edit. Press Ok soft key to choose Assign number. Repeatedly press the key to move to the desired entry, press Ok soft key, the LCD display... -
Page 50: Use Sos Function
HANDSET SETTINGS Use SOS Function In emergency cases, the user can move the SOS switch to ON position for help. If the user has preset an SOS message and selected the relative SMS receiver, after move the SOS switch to ON position (left side), the phone will send the SOS message before entering this SOS list calling. -
Page 51: Network Setup
HANDSET SETTINGS 4. Press key to select Set Number, press Ok. 5. Use key to select the desired position M1~M3, press Options. 6. Press Ok, then repeatedly press key to select a phonebook entry, press Ok again to confirm. Dialing Speed Dial Numbers After the setting, you can press one of the speed dial keys (M1~ M3) to dial out the corresponding number. -
Page 52: Security Settings
HANDSET SETTINGS provider has an agreement on roaming service with the roaming provider. 1. Press Menu in standby mode. 2. Repeatedly press key to select Settings, press Ok. 3. Press key to select Network, press Ok. Network Selection New Search: Start a new search. Select Network: Search the network. -
Page 53: Restore Factory
HANDSET SETTINGS You need to input the current phone lock password to change this setting. The default password is 1122. Fixed Dial You can restrict calls to certain numbers saved on the SIM card. The numbers in the fixed dial list are protected by PIN2 code. - Page 54 HANDSET SETTINGS 2. Repeatedly press key to select Settings, press Ok. 3. Press key to select Restore Factory, press Ok. 4. You will be asked to enter the current Phone Code (the default code is 1122). Use the numeric keypad to enter the code and press Ok.
-
Page 55: Profiles
PROFILES Profiles There are 6 kinds of profiles available. You can select desired profile and make relative detail setting. 1. Press Menu in standby mode. 2. Repeatedly press key to select Profiles, press Ok. 3. Use key to choose among General, Meeting, Outdoor, Indoor, Headset and Bluetooth, then press Options. -
Page 56: Tools
TOOLS The phone provides various functions such as Calendar, Alarm, Bluetooth and Calculator. Calendar Using this feature, you can review the calendar and move to the desired date quickly. 1. Press Menu in standby mode. 2. Repeatedly press key to select Toolbox, press Ok. -
Page 57: Bluetooth
TOOLS 5. Press Edit to complete the following settings. Alarm status: Off/On Alarm time Repeat: Once/Everyday/Days Days of the week Audio Options: Tone/FM Radio Snooze time: Default, 1~10 Alert type: Vibra and Ring/Ring/Vibration Only 6. After all the setting, press Done, then press Yes to confirm. -
Page 58: Calculator
TOOLS Setting Visibility: Makes your phone visible/invisible to other devices. Change Device Name: Modifies the name your phone should appear with for other bluetooth devices. Authentication Audio Path: Selects audio path between Phone and BT Headset. About Lists the device information such as name, address, etc. Calculator Using this function, you can perform simple calculations such as addition, subtraction, multiplication and division. -
Page 59: Fm Radio
FM RADIO Before using this feature, remember to insert the headset first. 1. Press Menu in standby mode. 2. Repeatedly press key to select FM Radio, press Ok. 3. Press Options soft key, select one from the following options: Activate: Turns the radio on. Channel List: Press keys 1-9 to quick select a preset channel while the radio is playing. -
Page 60: Game
GAME There are four games available for entertainment, Puzzle, Robot, UFO and Fruit. 1. Press Menu in standby mode. 2. Repeatedly press key to select Games, press Ok. 3. Press key to select one from 4 different games, press Ok. To adjust game settings, enter the Game Settings menu. -
Page 61: Feature List
FEATURE LIST Fit for 850/900/1800/1900MHz public mobile communication network 2 inches large LCD display with 176X220 and 262K colour HAC hearing aid function FM Radio function Bluetooth compatible Large keypad Phonebook with up to 100 entries in phone Received call list with up to 20 entries Missed call list with up to 20 entries Numbers in call list can be called back/added to phonebook/deleted/edited... - Page 62 FEATURE LIST Audio volume adjustable (7 levels) Call duration display Date & Time setting Phone code protection 11 languages selectable LCD backlight time selectable Games Calculator Calendar Call waiting Call diverting Call barring Flashlight function New call LED...
-
Page 63: Troubleshooting
TROUBLESHOOTING Telephone cannot be switched on. • Check battery is inserted and check that it is inserted correctly. Nothing appears on the display. • Check the handset is switched on. • Check the battery and SIM are inserted correctly. Display is locked when the telephone is switched on •... - Page 64 TROUBLESHOOTING • Place the phone correctly in the charging unit or connect the charging unit properly. Clean the contact surfaces on the mobile phone and charging unit with a soft, dry cloth. • Try a new battery. Failure to link to the network •...
- Page 65 TROUBLESHOOTING • Let the phone ring a few times as there may be a delay in receiving the Caller ID information. Any problems not referred to above • Check through the User Guide. • Power off and then on again. Check to see if the problem persists.
-
Page 66: Safety Information
SAFETY INFORMATION General Only use the power supply included with the product. Only use the approved rechargeable battery supplied. Do not open the handset (except to replace the handset batteries) or base. Contact the helpline for all repairs. Never dispose of batteries in a fire. There is a serious risk of explosion and/ or the release of toxic chemicals. - Page 67 SAFETY INFORMATION ROAD SAFETY COMES FIRST Obey all local laws. Always keep your hands free to operate the vehicle while driving. Your first consideration while driving should be road safety. INTERFERENCE All wireless devices may be susceptible to interference. This could affect performance. SWITCH OFF IN HOSPITALS Follow any restrictions.
-
Page 68: Hearing Aid Information
HEARING AID INFORMATION Some phones are measured for compatibility with hearing aids. If the box for your particular model has “Rated for Hearing Aids” printed on it, the following explanation applies. When some mobile phones are used near some hearing devices (hearing aids and cochlear implants), users may detect a buzzing, humming, or whining noise. -
Page 69: Network Services
NETWORK SERVICES To use the phone you must have service from a wireless service provider. Many of the features in this device depend on features in the wireless network to function. These network services may not be available on all networks or you may have to make specific arrangements with your service provider before you can utilize network services. -
Page 70: Guarantee
GUARANTEE From the moment your Geemarc product is purchased, Geemarc guarantee it for the period of one year. During this time, all repairs or replacements (at our discretion) are free of charge. Should you experience a problem then contact our help line or visit our website at www.geemarc.com. - Page 71 GUARANTEE Electrical connection: The apparatus is designed to operate from a 230V 50Hz supply only. (Classified as ‘hazardous voltage’ according to EN60950 standard). The apparatus does not incorporate an integral power on/off switch. To disconnect the power, either switch off supply at the mains power socket or unplug the AC adaptor.
-
Page 72: Recycling Directives
Or, hand the old product to the retailer. If you purchase a new one, they should accept it. Thus if you respect these instructions you ensure human health and environmental protection. For product support and help visit our website at www.geemarc.com Telephone 01707 384438 Or fax 01707 832529... - Page 73 UGCL8400BT_En_v1.5...
Need help?
Do you have a question about the ClearSound CL8400BT and is the answer not in the manual?
Questions and answers