Table of Contents
Advertisement
Advertisement
Table of Contents

Related Manuals for Klark Teknik HELIX SYSTEM DN9344


Summary of Contents for Klark Teknik HELIX SYSTEM DN9344
- Page 1 HELIX SYSTEM DN9340 / DN9344 OPERATORS MANUAL DN9340 Software V2.05 DN9344 Software V2.02 Klark Teknik Group, Klark Teknik Building, Walter Nash Road, Kidderminster. Worcestershire. DY11 7HJ. England. Tel:+44 1562 741515 Fax:+44 1562 745371 Email: sales@ktgplc.com Website: www.klarkteknik.com...
-
Page 3: Important Safety Instructions
IMPORTANT SAFETY INSTRUCTIONS CAUTION RISK OF ELECTRIC SHOCK DO NOT OPEN WARNING: O REDUCE HE RISK OF FIRE OR ELEC RIC SHOCK, DO NO EXPOSE HIS APPLIANCE O RAIN OR MOIS URE AVIS: RISQUÉ DE CHOC ELE RIQUE. NE PAS OUVRIR These symbols are internationally accepted symbols that warn of potential hazards with electrical products. -
Page 5: Declaration Of Conformity
I N G B Y D E F I N I T I O N DE IGNED FOR APURE PERFORMANCE DECLARATION OF CONFORMITY Klark Teknik Group (UK) PLC Klark Teknik Building, Walter Nash Road, Kidderminster, Worcestershire, DY11 7HJ Declare that a sample of the following product:- Product Type Number Product Description... -
Page 7: Table Of Contents
Contents Thank you for using a Klark Teknik product After you have unpacked Quick reference Introduction and key features Identification of controls: DN9340 Connections: DN9340 Signal flow: DN9340 Operation: DN9340 Home page Graphic equalisation Parametric equalisation T-DEQ Dynamic equalisation Filters... -
Page 9: Thank You For Using A Klark Teknik Product
The Klark Teknik Helix System Thank you for selecting the Klark Teknik Helix System digital equaliser. The equaliser continues the Klark Teknik tradition of providing superb audio performance, technical accuracy and rugged reliability. At the same time it offers unprecedented levels of flexibility by incorporating graphic, parametric and dual-... -
Page 11: After You Have Unpacked
If, however, the unit shows any signs of damage, please notify the transportation company without delay. Only you, the consignee, may institute a claim against the carrier for damage during transportation. If necessary, contact your supplier or as a last resort, your Klark Teknik importing agent, who will fully co- operate under such circumstances. -
Page 13: Quick Reference
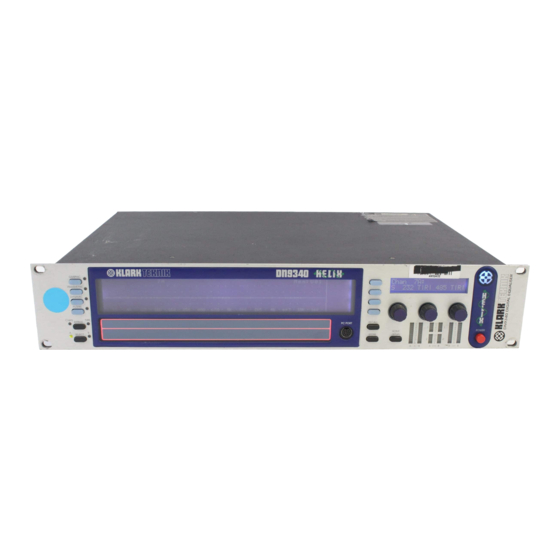
Quick reference: DN9340 Power ON indication. Power switch. The left, centre and right encoder knobs - used for controlling values and selecting Output metering incorporating multi-point options. clip indication. T-DEQ dynamic EQ metering. Alphanumeric display - this shows parameter values for the current function being Input metering incorporating multi-point clip controlled by the encoder knobs. - Page 14 Quick reference: DN9344 Power on indicator. Power switch. Section 2 output metering incorporating multi-point clip indication. T-DEQ Section 2 dynamic EQ metering. Section 2 input metering incorporating multi-point clip indication. The large red alphanumeric displays can be used to UP and DOWN keys for Section 2. Used to select show electronic scribble-strip information, Last communications channel (address) for remote control Memory Recalled, and Communications Mode.
-
Page 15: Introduction And Key Features
The Klark Teknik DN9344 Helix Slave equaliser is a 1U slave version of the DN9340 unit. By packaging FOUR channels of Helix processing into a 1U case it offers unrivalled space efficiency, with a cost per channel lower than many less flexible products. -
Page 17: Identification Of Controls: Dn9340
Identification of controls: DN9340... - Page 18 Identification of controls: DN9340...
- Page 19 Identification of controls: DN9340...
- Page 20 Identification of controls: DN9340...
-
Page 21: Connections: Dn9340
Connections: DN9340... -
Page 23: Signal Flow: Dn9340
Signal flow... - Page 25 Operation DN9340: Home page The home page is accessed from any of the EQ pages by pressing the HOME(SETUP) key once. In the setup menu the HOME(SETUP) key is pressed repeatedly to move through the menus, and after the last menu entry returns to the home page.
- Page 26 A/B Link This menu allows the unit to be linked for stereo operation. Turn the right-hand encoder to select linked or non-linked (mono) mode. Note that when linking, the channel currently displayed will be copied to the other channel, so that both channels are then identical. In other words, if the “A”...
-
Page 27: Operation Dn9340
EQ type - allows the selection of different EQ characteristics. Proportional, Constant and Symmetrical-Q types are available, together with emulations of the classic Klark Teknik DN360 and DN27. See the application notes later in this manual for more detail on selecting EQ types and Q. If in doubt, select either DN27 or DN360 emulation for sensible curves with minimum fuss…... - Page 28 · Auto-EQ - this section enables automatic room equalisation when the Helix unit is used with a Klark Teknik DN6000 Real Time Analyser. This function is only available when the optional DN6000 interface is fitted. After the Auto-EQ function is selected by setting the menu option in the Automatic Features menu page, the user will be prompted to confirm that the graphic EQ response will be set to a 1/3 octave symmetrical response (Q = 7.8) if...
- Page 29 Touchstrip operation with Graphic equalisation On the Graphic EQ page, the touchstrip can be used as an alternative to the encoder knobs for selecting and operating the faders on the display. Touch either the upper or lower part of the touchstrip below the fader that you want to select.
-
Page 30: Parametric Equalisation
Operation DN9340: Parametric equalisation Select parametric equalisation by pressing the PARAMETRIC key. The display for the parametric equaliser is similar to the home page, showing the frequency response - in this case just for the parametric sections. At the top right is a legend “PEQ 1 of 1” which indicates which PEQ section is currently active for control, and also how many sections are in use. - Page 31 Touchstrip operation with Parametric equalisation On the Parametric EQ page, the touchstrip can be used to select the currently-active section of EQ. This is achieved by pressing either the upper or lower part of the strip below the centre frequency of the chosen section. The centre frequency will highlight to indicate the selection. Once selected, the frequency of the EQ section can be “dragged”...
-
Page 32: T-Deq Dynamic Equalisation
T-DEQ Operation DN9340: Dynamic equalisation Select dynamic equalisation by pressing the DYNAMIC key. The display for the parametric equaliser is similar to the home page, showing the frequency response of the T-DEQ dynamic EQ sections. Note, however, that for each of the two sections there are two different curves drawn. - Page 33 Time constants page This page allows the attack and release time constants to be set - in other words how quickly the unit will respond to a sudden increase in level (attack) or a sudden decrease in level (release). EQ settings page ·...
-
Page 34: Filters
Operation DN9340: Filters Select filters by pressing the FILTERS key. The display for the filters is similar to the home page, showing the frequency response - in this case just for the filters.At the top right is a legend “Filter 1 of 1” which indicates which filter is currently active for control, and also how many filters are in use. - Page 35 Filter settings page · Filter type - available types are Notch, Low Pass (normal and peaking), High Pass (normal and peaking), Hi Shelf and Lo shelf. · Graph display - three modes are available, to ensure that clear information is available for any application.
-
Page 36: Storing And Recalling Settings
Operation DN9340: Storing and recalling settings The Helix unit includes two types of memory location, to provide maximum flexibility in a range of applications. There are 64 user memories in battery-backed-up SRAM, and also 32 preset memories in non- volatile FLASH memory. Recalling settings from either memory type uses the same procedure, and the user memories can be stored directly from the front panel of the unit. -
Page 37: Setup Menu
Operation DN9340: Setup menu The Setup menu provides access to the options and configuration settings for the unit. It is accessed by first selecting the HOME(SETUP) key to go to the home page, then pressing and holding the HOME(SETUP) key for one second. -
Page 38: Metering
Operation DN9340: Metering Comprehensive audio metering is provided by eight LED bargraph meters. There are a pair of input meters (labelled A and B for audio channels A and B respectively), which show the input level immediately following the input gain control. These can therefore be used as a guide for setting the input gain to match the signal level being sent to the unit. -
Page 39: Clear Down Sequence
Operation DN9340: Clear down sequence Because of the comprehensive facilities available on the DN9340, it may be important to ensure that the unit is “cleared down” before use. Remember to clear down both channels A and B if the unit is not linked for stereo operation. -
Page 40: Remote Control
Remote Control: The Basics Connections A DN9340 master unit can control both DN9340 and DN9344 units as slaves. In order to set up a remote controlled Helix system, first connect the units together using the RS-485 connectors on the rear panel. The units are connected in sequence from output to input, in any order. - Page 41 Remote Control Once all the slaves have been set up, the master unit can be set on-line. Again, it must have a communication channel allocated, which must not be the same as any of the slaves. Press HOME(SETUP). Press and hold HOME(SETUP). The left encoder lights, to show that it is active.
- Page 42 Remote Control The following name fields can be edited: This 20-character name will be used on the master unit to indicate to the user Long name: which of the slaves is being controlled. It is also displayed on any DN9340 units which are being used as slaves.
- Page 43 Remote Control Now, the possible destination channels are shown. Use the touchstrip to select one or more channels to copy to. Once all the destination channels are selected, press the soft key labelled “Confirm”. The unit will display an “are you sure” message, and a final press of the “Confirm” soft key will start the copying process.
-
Page 45: Identification Of Controls: Dn9344
Identification of controls: DN9344... - Page 46 Identification of controls: DN9344...
- Page 47 Identification of controls: DN9344...
- Page 48 Connections: DN9344...
-
Page 49: Signal Flow: Dn9344
Signal flow... -
Page 50: Remote Control Mode
Operation DN9344: Remote control mode This section describes setting up the DN9344 for remote control operation. Please refer to the DN9340 remote control section (on page 32) for information on controlling the system once it is set up. Press and hold the SETUP button to enter the SETUP menu. Note that the red alphanumeric displays are now showing Last Recalled Memory and Communication (COMMS) mode. -
Page 51: Operation Dn9344
Operation DN9344: Contact Closure (RELAY) mode This section describes setting up the DN9344 for relay operation. This allows memories to be recalled using a simple contact closure mechanism. Press and hold the SETUP button to enter the SETUP menu. Note that the red alphanumeric displays are now showing Last Recalled Memory and Communication (COMMS) mode. -
Page 52: Stand Alone Mode
Operation DN9344: Stand alone mode To prevent any changes to the settings in the unit, set the Communications Mode to OFF. Press and hold the SETUP key to enter the SETUP menu. Use the UP and DOWN keys to select OFF for each section of the unit. Press SETUP to confirm (unit will display password menu). -
Page 53: Application Notes
The system developed by the Klark Teknik research and development team for the Helix series is rather different. It draws on KT's unrivalled experience in equalisation, and uses the signal level to directly control parametric equalisers. - Page 54 If we now replace the parametric with a Helix equaliser and select the dynamic EQ, we have some additional controls. Frequency and Q controls are as before, but now we have two pairs of controls replacing the single cut and boost control; these are [low threshold] / [low level], and [high threshold] / [high level]. If we set the frequency and Q controls to the area that we wish to control, then the processor will monitor the signal level in that frequency range.
- Page 55 Without changing modes or making any other selections, we can make the unit operate ‘the other way up’ just by selecting suitable values for the two thresholds and levels see Figure 3. igure 3 – Helix with boost at high signal level 04/12/02 10:56:55 In this case, [low threshold] is -20dBu, [low level] is 0dB, [high threshold] is -5dBu, and [high level] is +12dB, so that instead of cutting this frequency range as the level increases, we are now boosting it.
-
Page 56: Application Note 2: What Do We Mean By All These Q Types
Application note 2 :What do we mean by all these Q types? The “Q” of an audio equaliser describes the steepness of the filter - the degree to which it will affect signals either side of its nominal or “centre” frequency. In general, the Q of a peaking filter is defined mathematically centre _ frequency as ,... - Page 57 06/17/02 12:38:05 Proportional Q is the mode of operation familiar to users of the Klark Teknik analogue graphic equalisers such as the DN360. As the amount of cut or boost is increased, the Q also increases. This has the effect of making the equaliser “focus”...
- Page 58 Symmetrical Q Klark Teknik Symmetrical Q 06/19/02 10:53:43 This class of equaliser has the same curves in boost as the constant-Q type, but then has cut responses that are symmetrical with the boost ones. In other words, the bandwidth in cut is defined not according to our usual definition of Q (see constant-Q above) but as “the point were the signal is cut by 3dB less than the maximum...
-
Page 59: Technical Specifications: Dn9340
Technical Specifications: DN9340 GRAPHIC PARAMETRIC DYNAMIC FILTERS CHAN TYPE BYPASS RECALL HOME SELECT STORE (SETUP) PUSH PUSH PUSH SUPPLY VOLTAGE 100-240V AC~50-60Hz 60W FUSE: 5x20mm T0.5L250V CAUTION: TO REDUCE RISK OF FIRE, REPLACE WITH SAME TYPE OF FUSE. Inputs Type Electronically balanced (pin 2 hot) Impedance (Ohm) Common Mode... -
Page 60: Technical Specifications: Dn9344
Technical Specifications: DN9344 COMMS PUSH PUSH PUSH PUSH PUSH SUPPLY VOLTAGE 100-240V AC~50-60Hz 60W FUSE: 5x20mm T0.5L250V Inputs Four Type Electronically balanced (pin 2 hot) Impedance (Ohm) Common Mode >80dB @ 1 kHz Rejection Outputs Four Type Electronically balanced (pin 2 hot) Maximum Level +21dBu into >2k Performance... -
Page 61: Service Information
Service information BATTERY REPLACEMENT Caution!: Danger of explosion if battery is incorrectly placed. Replace only with the same or equivalent type recommended by the manufacture. Discard used batteries according to the manufacturer’s instruction. Advarsel!: Lithiumbatteri. Ekxplosionsfare ved feijlagtig handtering af samme fabrikat og type. Lever det brugte batteri tilbage till leverandoren. - Page 62 lark Teknik Group DOC02-Helix System 04/06/03...
Need help?
Do you have a question about the HELIX SYSTEM DN9344 and is the answer not in the manual?
Questions and answers