Table of Contents
Advertisement
Advertisement
Table of Contents

Subscribe to Our Youtube Channel
Related Manuals for Linn Kolektor


Summary of Contents for Linn Kolektor
- Page 1 L I N N KOLEKTOR P R E A M P L I F I E R O W N E R S M A N U A L...
-
Page 3: Important Safety Information
This appliance is supplied with a non-rewireable mains plug for the intended country. Replacement mains leads can be obtained from your Linn retailer. Should you need to change the plug please dispose of it carefully. A plug with bared conductors is dangerous if engaged in a live socket. -
Page 4: General Safety Instructions
GENERAL SAFETY INSTRUCTIONS Read instructions. Read the safety and operating instructions before operating the appliance. Retain instructions. Retain the safety and operating instructions for future reference. Heed warnings. Observe all warnings on the appliance and in the operating instructions. Follow instructions. Follow all operating and use instructions. Water and moisture. - Page 5 Mains plug replacement Should your mains plug need replacing and you are competent to do this proceed as follows. If you are in doubt contact your Linn retailer or a competent electrician. a) Disconnect the plug from the mains supply.
- Page 6 CE Declaration of Conformity Linn Products Ltd declare that this product is in conformance with the Low Voltage Directive 73/23/EEC and Electromagnetic Compatibility 89/336/ EEC as amended by 92/31/EEC and 93/68/EEC. The conformity of the designated product with the provisions of Directive...
-
Page 7: Table Of Contents
Contents Introduction ... 1 Your Linn KOLEKTOR ... 2 Special features of the KOLEKTOR ... 4 Setting up the KOLEKTOR ... 6 Unpacking ... 6 Positioning the KOLEKTOR ... 7 Connecting the KOLEKTOR ... 8 Using the KOLEKTOR ... 11 Using the front panel ... - Page 8 Technical information ... 30 Specifications ... 30 Index ... 31...
-
Page 9: Copyright And Acknowledgements
Copyright and acknowledgements Copyright © Linn Products Limited. Linn Products Limited, Floors Road, Waterfoot, Glasgow, G76 0EP, Scotland, United Kingdom. All rights reserved. No part of this publication may be reproduced, stored in a retrieval system, or transmitted, in any form or by any means, electronic, mechanical, photocopying, recording, or otherwise, without the prior written consent of the publisher. - Page 10 viii...
-
Page 11: Introduction
With the capability of handling up to ten input sources, including a moving magnet phono input, the KOLEKTOR is the ideal choice as the heart of any hi-fi system. With the Linn KOLEKTOR you will hear the sources in your hi-fi system at their best, and we want to make sure that you get the maximum enjoyment possible. -
Page 12: Your Linn Kolektor
In all our products we make the audio path as short, simple, and direct as possible. A smaller circuit works better and picks up less noise. The KOLEKTOR audio path contains high-precision solid-state switches and an electronic gain control. - Page 13 Control module The control module is compact, versatile, and powerful. This power makes the KOLEKTOR very easy to use and gives you many facilities not possible in a conventional preamplifier. We have been using microprocessors in our preamplifiers from the very first one we built (the LK1).
-
Page 14: Special Features Of The Kolektor
Independent source settings The Linn KOLEKTOR can remember the volume, balance, bass, and treble settings for each of the sources. This allows you to compensate for any tonal differences between your sources, without having to readjust the settings each time you switch sources. - Page 15 Intelligent operation with other Linn products If you use the Linn KOLEKTOR with other Linn products, such as a Linn CD player or tuner, the KOLEKTOR can automatically select the appropriate input when you operate the handset controls for that source.
-
Page 16: Setting Up The Kolektor
KOLEKTOR Preamplifier is set to the correct voltage for your mains supply. The KOLEKTOR is factory-set for a 230 volts mains supply and must not be connected to a mains supply before it is adjusted for your local voltage, and fitted with the appropriate fuses. -
Page 17: Positioning The Kolektor
You can position your KOLEKTOR Preamplifier almost anywhere you find convenient, but the following considerations may be useful. The KOLEKTOR Preamplifier can be placed on top of other Linn products, provided you allow plenty of air circulation around components that generate heat, such as power amplifiers. -
Page 18: Connecting The Kolektor
AUDIO TAPE OUTPUTS OUTPUTS WARNING: The KOLEKTOR should be switched off before connecting or disconnecting any of the plugs on the rear panel, or you may generate surges which could damage other components in your hi-fi system. Connecting the sources The KOLEKTOR provides line-level RCA phono input connections for up to ten sources, labelled 1 to 10 on the back panel. - Page 19 Connecting to a power amplifier To connect the KOLEKTOR to a power amplifier connect one pair of the line outputs from the KOLEKTOR to the line inputs of the power amplifier. The KOLEKTOR provides three sets of outputs to allow you to use multiple power amplifiers in conjunction with multi-amplifier or active speakers.
- Page 20 Connecting the mains supply Connect the mains lead to the KOLEKTOR and plug it into a suitable power outlet.
-
Page 21: Using The Kolektor
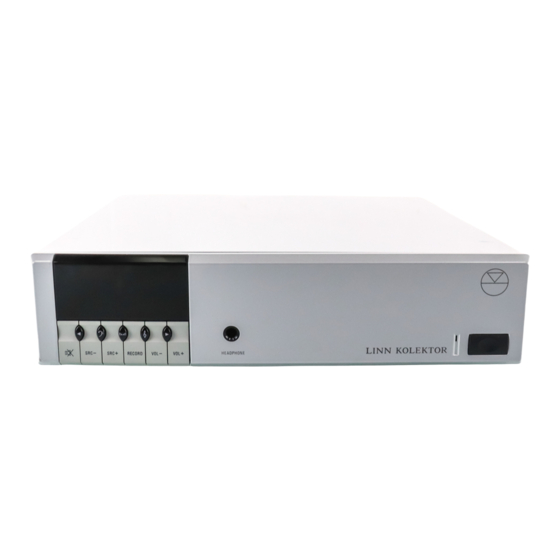
This chapter gives general information about using the KOLEKTOR. Using the front panel We designed the KOLEKTOR to be as simple as possible to operate. The front panel display gives clear information about what you are doing and, although there are many sophisticated features, all the most commonly used ones require only one or two key presses. - Page 22 SELECT BASS SELECT BALANCE CURRENT SOURCE NAME AND INPUT MUTE BASS BALANCE TREBLE RENAME tu 2 SOURCE & < SRC- SRC+ RECORD VOL- MUTE NEXT REDUCE SOURCE VOLUME RECORD PREVIOUS SOURCE SOURCE The function of each key is explained in the following table: Press this key To do this Mute or unmute the sound.
-
Page 23: Using The Handset
PREAMPLIFIER KEYS The keys on the lower half of the handset allow you to control a Linn CD player or tuner. The source operated by the number keys depends on which type of source was last controlled by the handset. If the number keys appear not to work, first press a Linn CD player or tuner key to indicate which source you want to control. -
Page 24: Switching On And Off
SOURCE Selecting a source To switch on To switch the KOLEKTOR on press the power button on the front panel. When you first switch on the KOLEKTOR the display shows the name of the currently selected source and the input number it uses. -
Page 25: Changing The Volume
The volume, balance, bass, and treble settings are normally the same for all inputs. They are restored to their previous settings when you switch the KOLEKTOR on, with the volume limited to 15. If you wish to change this see U1, U3, and U5 in User options ,... -
Page 26: Changing The Balance
VOL- MUTE Changing the balance BALANCE < > BALANCE _-~4 To change the volume VOL+ Press VOL- or VOL+ (front panel or handset), or hold down the corresponding key to decrease or increase the volume continuously. VOLUME You can change the volume in precise steps of 1dB from 0 to 60. To display the current volume setting press either key briefly. -
Page 27: Changing The Bass And Treble
While you are adjusting the balance press + to restore the balance towards the centre position. Changing the bass and treble The KOLEKTOR has individual bass and treble controls to allow you to adjust the sound to suit a wide range of speakers, sources, and room acoustics. -
Page 28: Recording A Source
SOURCE RECORD cd 1 SOURCE The KOLEKTOR allows you to record from any source to the tape output, and lock the source so that you cannot accidentally select another source while recording. To set up a recording First select the source you want to record using SRC- and SRC+ (front panel or handset) or one of the source keys on the handset. -
Page 29: Customising The Kolektor
Configuring the inputs The KOLEKTOR allows you to assign any of 12 alternative source names to each of the ten inputs on the back panel. The name you assign to an input determines the display shown on the front panel, and the handset button used to select the source. - Page 30 The procedure for configuring sources is described in the following sections. To start configuring inputs SRC- Switch off the KOLEKTOR using the power switch on the front panel. Press and hold down SRC- (front panel) and switch on the power again.
- Page 31 SRC- Press and hold down SRC- (front panel) until the progress bar display is complete. The KOLEKTOR Preamplifier will then return to normal operation """" with the new input names you have defined. Note that if you release SRC- before the progress bar is complete tp 2 you will return to input naming mode.
-
Page 32: Changing User Options
SWITCH ON POWER """" VOL- The KOLEKTOR provides 12 user options to allow you to change the way the unit operates to suit your personal preferences. To change the user options VOL- Switch off the KOLEKTOR, using the power switch on the front panel. - Page 33 To save the user options VOL- Press and hold down VOL- (front panel) until the progress bar display is complete. The KOLEKTOR Preamplifier will then return to normal operation """" with the user options you have set. cd 1 SOURCE...
-
Page 34: User Options
User options Number The following table lists the user options provided. In each case the initial value is shown underlined. Name Description Default Volume The default volume setting on power up. Ignored if U5 is enabled. Enable Sleep Defines the sleep display after 20 seconds. Mode Auto-Memory If disabled, the current volume, bass, treble,... - Page 35 Number Name Description RC5 Amplifier Configures the amplifier address. Address Leave at 16 for KOLEKTOR handset. Enable Unity Gain Enables an input as a unity gain input. For use with an external surround sound processor. Default Display Defines the display after the time-out period specified by U10.
-
Page 36: Factory Default Settings
This restores the user options to their initial values, and resets the inputs to their initial source names. To reset the KOLEKTOR VOL+ Switch off the KOLEKTOR, using the power switch on the front panel. Press and hold down VOL+ (front panel) and switch on the power again. -
Page 37: Troubleshooting And Maintenance
Troubleshooting and maintenance Troubleshooting Occasionally you may find that your KOLEKTOR fails to respond in the way you expect when you press a key. This will often be because you have pressed a key you did not intend to, which makes your KOLEKTOR behave in an unfamiliar or unexpected way. -
Page 38: Maintenance
User options , page 24, before changing them. The Linn KOLEKTOR is designed for a long life and any servicing should only be carried out by an authorised retailer. - Page 39 America: Linn Incorporated 4540 Southside Boulevard, Suite 402, Jacksonville Florida 32216 Telephone: (904) 645 5242 Facsimile: (904) 645 7275 E-mail: linnincorporated@compuserve.com...
-
Page 40: Technical Information
Specifications Technical information General Dimensions 80mm x 320mm x 325mm (3.15" x 12.6" x 12.88") (H x W x D) Weight Power consumption 8W maximum Mains supply fuses 100–115VAC T800mA 220–240VAC T400mA Mains supply tolerance ±10% with no performance change Audio Input impedance Input 1: 47k... - Page 41 26 front panel 11 fuse replacement iii, 7 handset 13 headphones, connecting 2, 9 infra-red sensor 7 inputs configuring 19 resetting 26 introduction 1 key functions 12 KOLEKTOR description 2 special features 4 Linn Interconnect cables 9 LOCK indicator 18...
- Page 42 locking a recording 18 mains plugs i mains supply connecting 10 voltage selection 6 maintenance 28 modules audio 2 control 3 RS232 4 MUTE indicator 16 muting the sound 16 phono input, positioning 7 phono source connecting 9 using 19 positioning 7 power amplifier, connecting 9 RECORD key 12, 18...
- Page 43 unpacking 6 user options 5, 24 Auto-Listen Source 24 Auto-Memory 24 changing 22 Default Display 25 Default Volume 24 Enable IR Control 24 Enable Sleep Mode 24 Enable Unity Gain 25 RC5 Amplifier Address 25 user options (continued) resetting 26 Retain User Amplifier Settings 24 RS232 Command Interface 25...
- Page 48 L I N N...
Need help?
Do you have a question about the Kolektor and is the answer not in the manual?
Questions and answers