Amana UXT5530AAS Installation Instructions And Use & Care Manual
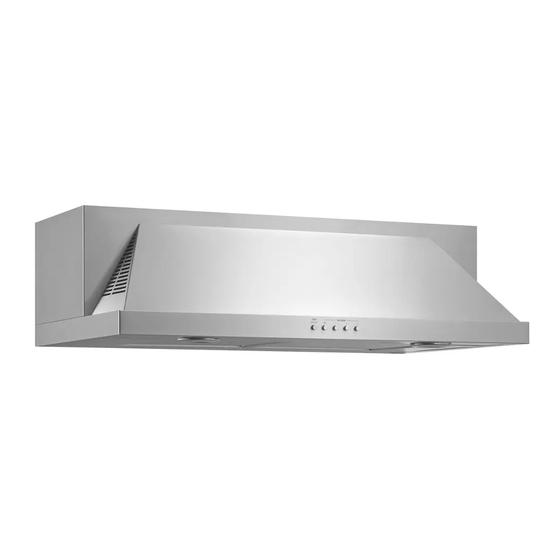
30" and 36" (76.2 and 91.4 cm) range hood
Hide thumbs
Also See for UXT5530AAS:
- Installation manual (2 pages) ,
- Installation instructions and use & care manual (28 pages) ,
- Installation instructions and use and care manual (28 pages)
Table of Contents
Advertisement
Available languages
Available languages
Quick Links
Download this manual
See also:
Installation Manual
30" AND 36" (76.2 AND 91.4 CM) RANGE HOOD
Installation Instructions and Use & Care Guide
HOTTE DE CUISINIÈRE
DE 30" ET 36" (76,2 ET 91,4 CM)
Instructions d'installation et Guide d'utilisation et d'entretien
Table of Contents/Table des matières ..................................... 2
IMPORTANT: READ AND SAVE THESE INSTRUCTIONS.
FOR RESIDENTIAL USE ONLY.
IMPORTANT : LIRE ET CONSERVER CES INSTRUCTIONS.
POUR UTILISATION RÉSIDENTIELLE UNIQUEMENT.
LI3VQD/W10274302E
Advertisement
Table of Contents

Related Manuals for Amana UXT5530AAS


Summary of Contents for Amana UXT5530AAS
- Page 1 30" AND 36" (76.2 AND 91.4 CM) RANGE HOOD Installation Instructions and Use & Care Guide HOTTE DE CUISINIÈRE DE 30" ET 36" (76,2 ET 91,4 CM) Instructions d’installation et Guide d’utilisation et d’entretien Table of Contents/Table des matières ........2 IMPORTANT: READ AND SAVE THESE INSTRUCTIONS.
-
Page 2: Table Of Contents
TABLE OF CONTENTS TABLE DES MATIÈRES RANGE HOOD SAFETY ..............2 SÉCURITÉ DE LA HOTTE DE CUISINIÈRE .......15 INSTALLATION REQUIREMENTS ..........3 EXIGENCES D’INSTALLATION ...........17 Tools and Parts ................3 Outils et pièces ................17 Location Requirements ..............4 Exigences d’emplacement ............17 Venting Requirements ..............5 Exigences concernant l’évacuation ...........18 Electrical Requirements ...............6 Spécifications électriques ............20... -
Page 3: Important Safety Instructions
IMPORTANT SAFETY INSTRUCTIONS READ AND SAVE THESE INSTRUCTIONS INSTALLATION REQUIREMENTS Tools and Parts Gather the required tools and parts before starting For vented installations, you also need: installation. Read and follow the instructions provided Saber or keyhole saw ■ with any tools listed here. Vent clamps ■... -
Page 4: Product Dimensions
4 - 8 x 40 mm wall anchors ■ Product Dimensions Recirculating kit ■ Charcoal filters for non-vented (recirculating) installations. ■ See the “Assistance or Service” section to order 12" replacement filters. (30.5 cm) Parts needed 2" For vented installations: (5.1 cm) "... -
Page 5: Venting Requirements
Venting Requirements (Vented Models Only) Vent system must terminate to the outdoors, ■ Roof Venting Wall Venting except for non-vented (recirculating) installations. Do not terminate the vent system in an attic or ■ other enclosed area. Do not use a 4" (10.2 cm) laundry-type wall cap. ■... -
Page 6: Electrical Requirements
Example vent system Electrical Requirements Wall cap 90˚ elbow 6 ft (1.8 m) WARNING 2 ft (0.6 m) Maximum Recommended Length = 50 ft (15.2 m) Electrical Shock Hazard 1 - 90° elbow = 5 ft (1.5 m) Plug into a grounded 3 prong outlet. 1 - wall cap = 0 ft (0 m) Do not remove ground prong. -
Page 7: Grounding Instructions
The grounded 3 prong outlet is to be located inside the ■ GROUNDING INSTRUCTIONS cabinet above the range hood at a maximum distance of " (85 cm) from where the power cord exits the hood. For a grounded, cord-connected range hood: This range hood must be grounded. - Page 8 Style 1 - Cut Openings for 3 " x 10" Style 2 - Cut Openings for 3 " x 10" (8.3 x 25.4 cm) (8.3 cm x 25.4 cm) Rectangular Vent System Rectangular Vent to Round Vent Transition Roof Venting Roof Venting To make a 4 "...
-
Page 9: Install Range Hood
Install Range Hood 1. Remove the grease filters. See the “Range If using rectangular vent, attach rectangular damper/vent ■ Hood Care” section. connectors to the range hood using sheet metal screws. 2. Remove mounting screws and lateral supports. A. Vertical vent B. -
Page 10: Complete Installation
7. For non-vented (recirculating) installations: 10. Reinstall the rear support. 11. Replace the 2 lateral supports. Remove screws and rear support. ■ 12. Replace filters. See the “Range Hood Care” section. WARNING Electrical Shock Hazard Plug into a grounded 3 prong outlet. Do not remove ground prong. -
Page 11: Range Hood Controls
Non-Vented (recirculating) Installation Filters Range Hood Controls The charcoal filter is not washable. It should last up to six months with normal use. Replace with Charcoal Filter Kit Number W10272068. To replace charcoal filter: A. Blower speed maximum button 1. Cover the grille that covers the blower motor with the B. -
Page 12: Wiring Diagram
WIRING DIAGRAM Switch Operation Function Position No connection GY/YL Lamps (L - LA) GY/WH Low speed (L - 1) GY/RD Med speed (L - 2) GY/BK High speed (L - 3) 12.5uF Motor Specifications 120 VAC Power Supply 60 Hz Frequency 240 WH Power Absorption... -
Page 13: Assistance Or Service
ASSISTANCE OR SERVICE In Canada If you need service Please refer to the warranty page in this manual. Call the Whirlpool Canada Customer eXperience Centre toll free: 1-800-807-6777, or visit our website at www.whirlpool.ca. If you need replacement parts If you need to order replacement parts, we recommend that Our Consultants Provide Assistance With: you use only factory specified parts. -
Page 14: Warranty
ATTACH YOUR RECEIPT HERE. PROOF OF PURCHASE IS WHIRLPOOL REQUIRED TO OBTAIN WARRANTY SERVICE. ® Please have the following information available when you call the MAJOR APPLIANCE Customer eXperience Center: Name, address and telephone number ■ LIMITED WARRANTY Model number and serial number ■... -
Page 15: Sécurité De La Hotte De Cuisinière
SÉCURITÉ DE LA HOTTE DE CUISINIÈRE Votre sécurité et celle des autres est très importante. Nous donnons de nombreux messages de sécurité importants dans ce manuel et sur votre appareil ménager. Assurez-vous de toujours lire tous les messages de sécurité et de vous y conformer. Voici le symbole d’alerte de sécurité. - Page 16 IMPORTANTES INSTRUCTIONS DE SÉCURITÉ AVERTISSEMENT : AVERTISSEMENT : POUR MINIMISER LE RISQUE POUR RÉDUIRE LE RISQUE D'UN FEU DE GRAISSE SUR LA CUISINIÈRE : D'INCENDIE, CHOC ÉLECTRIQUE OU DOMMAGES CORPORELS, RESPECTER LES INSTRUCTIONS Ne jamais laisser un élément de surface fonctionner à SUIVANTES : puissance de chauffage maximale sans surveillance.
-
Page 17: Exigences D'installation
EXIGENCES D’INSTALLATION Outils et pièces Exigences d’emplacement Rassembler les outils et composants nécessaires avant IMPORTANT : Observer les dispositions de tous les codes et règlements en vigueur. d’entreprendre l’installation. Lire et observer les instructions C’est à l’installateur qu’incombe la responsabilité de fournies avec chacun des outils de la liste ci-dessous. -
Page 18: Exigences Concernant L'évacuation
Pour un fonctionnement efficace et silencieux : Dégagements de séparation à respecter Ne pas utiliser plus de trois coudes à 90°. ■ Veiller à ce qu’il y ait une section droite de conduit ■ de 24" (61,0 cm) au minimum entre deux coudes, si on doit utiliser plus d’un raccord coudé. - Page 19 Exemple de système de décharge Décharge à travers le toit Décharge à travers le mur Bouche de décharge murale coude à 90˚ 6 pi (1,8 m) 2 pi (0,6 m) Longueur maximale recommandée = 50 pi (15,2 m) 1 - coude à 90° = 5 pi (1,5 m) 1 - bouche de décharge murale = 0 pi (0 m)
-
Page 20: Spécifications Électriques
Spécifications électriques Pour minimiser les risques de choc électrique, on ■ AVERTISSEMENT doit brancher le cordon sur une prise de courant de configuration correspondante, à 3 alvéoles, reliée à la terre et installée conformément aux codes et règlements locaux. Si une prise de courant de configuration correspondante n’est pas disponible, le client a la responsabilité... -
Page 21: Instructions D'installation
INSTRUCTIONS D’INSTALLATION Préparation de l’emplacement REMARQUE : Pour les installations avec décharge 2. Câblage à travers le sommet du placard : à l’extérieur, on recommande d’installer le circuit Tracer une ligne à de distance “A” à gauche de l’axe central, d’évacuation avant d’entreprendre l’installation de la hotte. -
Page 22: Installation De La Hotte
3. Utiliser une scie sauteuse ou une scie à guichet 4. Utiliser une scie sauteuse ou une scie à guichet pour découper l’ouverture rectangulaire du système pour découper l’ouverture circulaire pour le passage d’évacuation dans le mur. du conduit d’évacuation. Axe central Ouverture pour le conduit circulaire Avant du... - Page 23 3. Installations avec décharge à l’extérieur : 6. Installer les 4 vis de montage n° 10 x " dans les avant- trous. Laisser un espace d’environ " (6,4 mm) entre Selon votre installation, retirer l’opercule rectangulaire ■ les têtes des vis et le placard pour faire glisser la hotte supérieur ou arrière du conduit d’évacuation.
-
Page 24: Achever L'installation
Installer les filtres à charbon. Voir la section ■ UTILISATION DE LA HOTTE “Entretien de la hotte”. 8. À deux personnes, soulever la hotte jusqu’à sa position finale, tout en insérant le câble électrique à travers le trou La hotte de cuisinière est conçue pour extraire fumée, vapeurs de passage du câble. -
Page 25: Entretien De La Hotte
ENTRETIEN DE LA HOTTE Nettoyage IMPORTANT : Nettoyer fréquemment la hotte et les filtres Remplacement du filtre à charbon : à graisse en suivant les instructions suivantes. Réinstaller 1. Placer le filtre à charbon sur la grille recouvrant le moteur les filtres à... -
Page 26: Schéma De Câblage
SCHÉMA DE CÂBLAGE Fonctionnement du commutateur Fonction Connexion Inactif Pas de connexion GRIS/JA Lampes (L - LA) GRIS/BL Vitesse basse (L - 1) GRIS/R Vitesse moyenne (L - 2) GRIS/N Vitesse élevée (L - 3) GRIS GRIS 12,5uF Caractéristiques du moteur 120 VAC Alimentation électrique 60 Hz... -
Page 27: Assistance Ou Service
ASSISTANCE OU SERVICE Si vous avez besoin de service Pour plus d’assistance Consulter la page de garantie du présent manuel. Si vous avez besoin de plus d’assistance, vous pouvez soumettre par écrit toute question ou préoccupation à Whirlpool Canada à l’adresse suivante : Si vous avez besoin de pièces de rechange Whirlpool Brand Home Appliances Si vous avez besoin de commander des pièces de rechange,... - Page 28 GARANTIE LIMITÉE DE UN AN CE QUI EST COUVERT CE QUI N’EST PAS COUVERT Pendant un an à compter de la date 1. Usage commercial, non résidentiel ou par plusieurs familles, ou non-respect des instructions d’achat, lorsque ce gros appareil de l’utilisateur, de l’opérateur ou des instructions d’installation.
Need help?
Do you have a question about the UXT5530AAS and is the answer not in the manual?
Questions and answers