Table of Contents
Advertisement
Quick Links
Download this manual
See also:
Product Data
Advertisement
Table of Contents

Related Manuals for Linksys iPhone CIT400


Summary of Contents for Linksys iPhone CIT400
-
Page 1: User Guide
Dual-Mode Internet Telephony Kit with Skype User Guide CIT400 Model No. -
Page 3: Copyright And Trademarks
Copyright and Trademarks Specifications are subject to change without notice. Linksys is a registered trademark or trademark of Cisco Systems, Inc. and/or its affiliates in the U.S. and certain other countries. Copyright © 2006 Cisco Systems, Inc. All rights reserved. Other brands and product names are trademarks or registered trademarks of their respective holders. - Page 4 Dual-Mode Internet Telephony Kit...
-
Page 5: Important Safety Instructions
IMPORTANT SAFETY INSTRUCTIONS BEFORE USING YOUR TELEPHONE EQUIPMENT, BASIC SAFETY PRECAUTIONS SHOUD ALWAYS BE FOLLOWED TO REDUCE THE RISK OF FIRE, ELECTRIC SHOCK AND INJURY, INCLUDING THE FOLLOWING. • Read and follow all warnings and instructions marked on the product. •... - Page 6 Dual-Mode Internet Telephony Kit BATTERIES • Use only the battery type listed in the instruction manual. Do not use lithium batteries or non- rechargeable batteries that may damage the handset and charger. • Do not dispose of the battery in a fire, as they can explode. •...
-
Page 7: Table Of Contents
Table of Contents Chapter 1: Introduction Welcome What’s in This User Guide? Chapter 2: Getting to Know the Dual-Mode Internet Telephony Kit Overview The Charger The Base Station The Handset’s Front Panel The Handset’s Side Panel The Handset’s Back Panel Chapter 3: Getting Started Before You Begin Getting Started with the Handset... - Page 8 Dual-Mode Internet Telephony Kit Call History Intercom and Conference Calls Skype Voicemail Your Skype Profile Skype Settings The Handset’s Display Screen Icons Landline Features Landline Voicemail Using Additional Features Customizing the Handset Managing the Handset(s) Chapter 5: Network Settings The Network Appendix A: Troubleshooting Common Problems and Solutions Frequently Asked Questions...
-
Page 9: Chapter 1: Introduction
Chapter 1: Introduction Welcome Thank you for choosing the Linksys Dual-Mode Internet Telephony Kit with Skype. It will allow you to make phone calls using your broadband connection (through Skype™) and traditional phone service (optional). It also supports SkypeOut™ dialing. For landline service, you must have a service provider and a telephone port to connect to. -
Page 10: What's In This User Guide
Appendix D: Regulatory Information This appendix supplies the regulatory information regarding the Dual-Mode Internet Telephony Kit. • Appendix E: Contact Information This appendix provides contact information for a variety of Linksys resources, including Technical Support. Chapter 1: Introduction What’s in This User Guide? -
Page 11: Chapter 2: Getting To Know The Dual-Mode Internet Telephony Kit
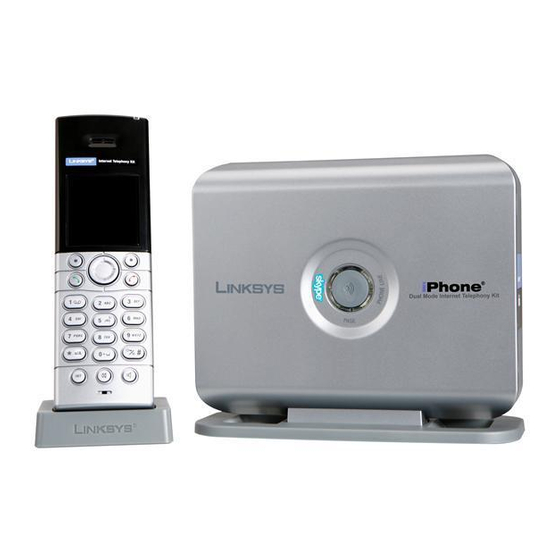
Chapter 2: Getting to Know the Dual-Mode Internet Telephony Kit Overview The Dual-Mode Internet Telephony Kit with Skype includes eight items: • A handset • A charger • A power adapter for the charger • A base station • A power adapter for the base station •... -
Page 12: The Base Station
Dual-Mode Internet Telephony Kit The Base Station The base station must be connected to an ethernet port to use Skype. To make landline calls, the base station should also be connected to a telephone line port. Front Panel Skype LED Blue. -
Page 13: The Handset's Front Panel
The Handset’s Front Panel The LED and keys of the handset are described here. You can have up to four cordless handsets for a single base station (refer to “Chapter 4: Using the Dual-Mode Internet Telephony Kit” for more information). Red. -
Page 14: Chapter 2: Getting To Know The Dual-Mode Internet Telephony Kit
Dual-Mode Internet Telephony Kit Icon Name Function Power/End Call Press this key to power on the handset when the handset is off. Press and hold this key to see the Skype menu when the handset is on. Your choices include powering off the phone. Star, Alpha Use for the functions of a * (star) key or to toggle between upper and lower case... -
Page 15: The Handset's Side Panel
The Handset’s Side Panel If you have a headset (optional), open the headset flap. Then plug your headset into the headset port. Chapter 2: Getting to Know the Dual-Mode Internet Telephony Kit The Handset’s Side Panel Dual-Mode Internet Telephony Kit HEADSET Figure 2-5: Headset Port... -
Page 16: The Handset's Back Panel
Dual-Mode Internet Telephony Kit The Handset’s Back Panel The handset’s speakerphone and battery compartment are located on the back panel. For directions on how to insert the batteries, refer to “Chapter 3: Getting Started.” Speakerphone Battery Compartment Figure 2-6: Back Panel of Handset Chapter 2: Getting to Know the Dual-Mode Internet Telephony Kit The Handset’s Back Panel... -
Page 17: Chapter 3: Getting Started
Chapter 3: Getting Started Before You Begin To use Skype you will need an available ethernet port. If you have traditional phone service (landline), you will also need an available telephone wall jack. Getting Started with the Handset To insert the batteries and charge them, follow these instructions: 1. -
Page 18: Getting Started With The Base Station
Dual-Mode Internet Telephony Kit Getting Started with the Base Station To connect the base station, follow these instructions: 1. If you have a landline, connect a RJ-11 telephone line cord (included) to the LINE port of the base station. Then connect the other end to your telephone wall jack. If only the landline is connected you can only make and receive calls over the landline. -
Page 19: Entering Names, Numbers And Special Characters
Entering Names, Numbers and Special Characters Use the handset number keys to enter text, numbers or symbols. Entering or Deleting Letters, Numbers, Symbols and Special Characters • Press the star, alpha key to change between uppercase and lowercase letters or numeric characters. Alpha modes also display some special characters. -
Page 20: Phone Features
Dual-Mode Internet Telephony Kit Phone Features Adjusting the Call Volume During a call, press up or down on the navigation pad to change the volume level. Making Handsfree Calls You can use a headset with a 2.5 mm plug or speakerphone for handsfree calls. To use a headset, follow these instructions: 1. -
Page 21: First Time Phone Use
First Time Phone Use When you turn on the phone for the first time, you will be asked to: 1. Select the language. If the language you want does not appear on-screen, scroll to find the correct language and press Select to confirm. 2. -
Page 22: Setting The Clock
Dual-Mode Internet Telephony Kit Setting the clock It is necessary to set the clock to the correct time zone of the location where your Skype phone is being used before initial phone use. The time zone is based on Greenwich Mean Time (GMT). If you don’t know your time zone, you can obtain it from http://www.greenwichmeantime.com. -
Page 23: Registering The Handset
Registering the Handset To make calls the handset must be registered to the base unit. This is preset. However, if you bought an extra handset or de-registered a handset, you may see the message Unregistered on the phone’s LCD screen. To register the handset when the Unregistered message has displayed: 1. -
Page 24: Staying Within Range
Dual-Mode Internet Telephony Kit Staying within Range If you move outside of the base station’s range during a call, an alarm tone will sound and the Base/Handset Link icon will flash on the handset’s display screen. Your call will be disconnected if you do not move back within range. -
Page 25: Chapter 4: Using The Dual-Mode Internet Telephony Kit
Chapter 4: Using the Dual-Mode Internet Telephony Kit Overview This chapter explains how to • Use the handset • Use Skype features • Use landline features • Manage the handset IMPORTANT: Emergency calls cannot be placed through a Skype line. If you dial an emergency number, it will automatically be placed through a landline if one is available. -
Page 26: Skype Basics
Dual-Mode Internet Telephony Kit Skype Basics Setting up a Skype Contact List Press Menu. 2. Scroll to Add Contact. Press Select. 3. Scroll to Skype or SkypeOut type of contact and press OK. 4. For a Skype Contact, enter the Name or Skype Name, using the handset keys. When you are finished, press OK. - Page 27 Viewing and Calling a Skype Contact To quickly dial a Skype Contact, press the right Contact key. Scroll through the Contact list or use the handset keys to find the letter of the name. When you have highlighted the name to call, press the Call key. You can also: 1.
-
Page 28: Viewing And Calling A Skypeout Contact
Dual-Mode Internet Telephony Kit Viewing and Calling a SkypeOut Contact SkypeOut Credit You can call a traditional landline or mobile phone using SkypeOut. SkypeOut calls require SkypeOut credit. While your phone is in standby, your Skype credit is displayed. To purchase additional credits, go to www.skype.com. -
Page 29: Managing Your Contacts
3. Scroll to SkypeOut. 4. Press Select. The call will be dialed. Managing Your Contacts You can allow new, rename, block, unblock or remove a contact from your list. Renaming a Contact 1. Using the Contact key, or Menu, Contact list, find the name you want to change. Press Options. 2. -
Page 30: Unblocking A Contact
Dual-Mode Internet Telephony Kit Unblocking a Contact 1. Press Menu. 2. Scroll to Settings. Press Select. 3. Scroll to Privacy. Press Select. 4. Scroll to Blocked Users. Press Select. 5. Scroll to the contact you want to unblock. Press Options. 6. -
Page 31: Incoming Skype Calls
Incoming Skype Calls Answering an Incoming Skype Call When you receive a Skype call, the handset will ring the selected Skype ring tone (refer to the “Customizing the Handset” section), and the Skype Call in Progress icon will flash. The display screen will show the display name and Skype ID of the caller or the number of the call (if it is a SkypeIn call). -
Page 32: Call History
Dual-Mode Internet Telephony Kit Call History The handset keeps track of the calls you make, miss or receive (answered or not). The history includes caller name, number call time and date. You can also review received Skype Voicemail, Skype New Contact requests and landline voicemail. -
Page 33: Deleting A Call History List
Deleting A Call History List You can delete an entire call history list at once. 1. Press the Menu key. 2. Scroll to History. Press Select. 3. Scroll to the call list you want. Press Select. 4. Press Options. 5. Scroll to Clear List. Press Select. Press Yes to confirm. -
Page 34: Intercom And Conference Calls
Dual-Mode Internet Telephony Kit Intercom and Conference Calls Intercom Calls Press INT (intercom). Scroll to the handset to call. Press Call. Transferring a Call to another Handset 1. Press INT (intercom) during a call. 2. Scroll to the handset you want. Press Call. 3. -
Page 35: Skype Voicemail
Skype Voicemail The Telephony Kit supports landline voicemail and Skype Voicemail. Skype Voicemail requires a subscription from www.skype.com. These instructions are only for Skype Voicemail. Instructions for landline voicemails are found later in this chapter. You can record “My Greeting”. 1. - Page 36 Dual-Mode Internet Telephony Kit Retrieving a Skype Voicemail Message 1. Press Menu. 2. Scroll to History. Press Select. 3. Scroll to Voicemails. Press Select. 4. Scroll to Skype VM. Press Select. 5. Scroll to the Skype Voicemail you want to listen to. Press Select. Returning a Skype Voicemail call You can return a call to the Skype Voicemail sender.
- Page 37 Deleting a Skype Voicemail These instructions are only for deleting Skype Voicemails. For Landline voicemail, follow your service provider’s instructions. 1. Select Menu. 2. Scroll to History. Press Select. 3. Scroll to Voicemails. Press Select. 4. Scroll to Skype VM. Press Options. 5.
-
Page 38: Your Skype Profile
Dual-Mode Internet Telephony Kit Your Skype Profile You have the option to create a Public and a Private profile. The details of a Public profile can be viewed by other Skype users. The details of a Private profile are not available to others. You can change your profile information at any time. -
Page 39: Skype Settings
2. Scroll to Status. Press Select. 3. Scroll to My Profile. Press Select. 4. Scroll to Private Detail. Press Select. 5. Scroll to the E-mail entry you want to modify. Press Options. 6. Scroll to Edit, Remove or Add. If your e-mail entries are blank, you will only have the Add option. Press Select. -
Page 40: Do Not Disturb
Dual-Mode Internet Telephony Kit Enter the number to forward your calls to. Press Enter. Your calls will be forwarded. To end call forwarding perform steps 1-4 above. Then scroll to No and press Select. Do Not Disturb You can turn off all ringers for Skype and SkypeIn calls. When you activate DND (Do Not Disturb) your handset will not ring when it receives incoming Skype calls. - Page 41 Privacy You can decide to allow anyone to call you, only your contacts or only authorized users, by setting the Privacy settings. 1. Press Menu. 2. Scroll to Settings. Press Select. 3. Scroll to Privacy. Press Select. 4. Choose from Skype Calls, SkypeIn Calls or Blocked Users. Press Select. 5.
-
Page 42: Changing Your Skype Status
Dual-Mode Internet Telephony Kit Changing your Skype Status In standby mode you will see an icon that displays your handset’s current status. You can quickly change your Skype Status by pressing up on the Navigation key. Scroll to the status you want and press Select to set your phone. -
Page 43: The Handset's Display Screen Icons
The Handset’s Display Screen Icons The display screen shows descriptive icons, a call timer (displayed during a call), and menus for settings. Current icons that appear on your handset are described below. . Icon Description Add Contact Battery full (This bar shortens as the battery charge runs low Call in Call missed Calls blocked... - Page 44 Dual-Mode Internet Telephony Kit Icon Description Keypad lock Login Mobile phone New Skype Voicemail Office phone Signal strength SkypeOut Skype Voicemail Status pending Icon Description Line on hold Missed Event Mute New voicemail (Standby mode) Ringer off Skype Alert (low credit or subscription expires in 7 days or less) SkypeOut blocked Speakerphone...
- Page 45 Updating Skype Software Skype periodically updates its software. You can check to see if updates are available for your phone. 1. Press Menu. 2. Scroll to Settings. Press Select. 3. Scroll to Advanced. Press Select. 4. Scroll to SW update. Press Select. 5.
-
Page 46: Landline Features
Dual-Mode Internet Telephony Kit Landline Features Answering an Incoming Landline Call When you receive a call, the handset will ring, and the Home Phone/Landline icon will flash. To answer, press the Call key. Answering a Second Landline Incoming Call When there is an incoming call from another line while you are on the first call, you will hear a call waiting tone. To pick up the incoming call, select Call. - Page 47 Calling from the Landline Number when the Preferred Line is Landline 1. Dial the landline number you want to call. 2. Press the Call key. Turning off the Landline Ringer Press the Power/End Call key to turn off the ringer for a current incoming landline call. Temporary Tone Mode If your phone is set to pulse dialing, press the * key during a call for a temporary tone mode.
-
Page 48: Dial Mode
Dual-Mode Internet Telephony Kit Dial Mode If available in your country, Dial Mode allows you to use either tone (DTMF) or pulse (rotary) dialing. To change the dial mode, follow these steps: 1. Press Menu. 2. Scroll to Settings. Press Select. 3. - Page 49 5. Scroll to Recall. Press Select. 6. Scroll to the new setting. 7. Press OK. The new setting is saved. Setting the Pause Duration A pause is a break you can enter when making a call. It may be required for PABX or operator services call. The pause duration can be changed.
-
Page 50: Landline Voicemail
Dual-Mode Internet Telephony Kit Landline Voicemail For landline voicemail, you will need to call the service provider’s voicemail message number. Retrieving a Voicemail Message 1. Press Menu. 2. Scroll to History. Press Select. 3. Scroll to Voicemails. Press Select. 4. Scroll to Landline VMWI. Press Options. 5. -
Page 51: Using Additional Features
Using Additional Features Using the Key Lock Feature During standby mode, press and hold the # key to lock the keypad. A tone will play and you will see Unlock at the bottom left of the screen. Then you can only answer an incoming call or unlock the keypad. To unlock the keypad: 1. -
Page 52: Customizing The Handset
Dual-Mode Internet Telephony Kit Customizing the Handset You can customize the look and sound of the handset. Setting the Language on the Handset This feature is available only for models with multiple language support. 1. Press Menu. 2. Scroll to Settings. Press Select. 3. -
Page 53: Changing The Contrast
2. Scroll to Settings. Press Select. 3. Scroll to Screen. Press Select. 4. Scroll to Backlight. Press Select. 5. Scroll to the new setting. 6. Press OK when finished. The new setting is saved. Changing the Contrast Adjust the contrast to change the difference between dark and light areas of the screen. Moving the sliding bar to the left allows you to see more detailed dark areas. -
Page 54: Changing The Brightness
Dual-Mode Internet Telephony Kit Changing the Brightness Adjust the brightness to make the overall screen lighter or darker. Moving the sliding bar to the left darkens the screen. Moving the sliding bar to the right lightens the screen. 1. Press Menu. 2. - Page 55 6. Scroll to the ring tone you want. 7. Press OK when finished. The new setting is saved. Setting the Handset Ringer Volume The handset has five ringer levels. This setting changes the volume level of all ringers. 1. Press Menu. 2.
-
Page 56: Setting The Keypad Tones
Dual-Mode Internet Telephony Kit 4. Scroll to Ring Type. Press Select. 5. Scroll to the new setting. 6. Press OK when finished. Then new setting is saved. Setting the Notification Tones You can choose to hear a notification tone when you have a new missed call, voicemail or New Contact request. 1. -
Page 57: Using The Auto Answer Feature
4. Scroll to Keypad Tone. Press Select. 5. Scroll to turn the tone on or off. Press Select. Setting the Confirmation Tones You can choose to hear a keypad tone when you press a key on your handset. 1. Press Menu. 2. - Page 58 Dual-Mode Internet Telephony Kit 5. Scroll to turn the Auto Answer feature on or off. Press Select. Activating Auto Update Your phone will notify you of any required Skype updates. These updates must be accepted to continue using the phone. In addition, you can program your phone to notify you automatically of other new Skype software updates.
-
Page 59: Area Code Management
Country Code Management For the phone to work correctly according to your country’s standards, you must use the code for the country you are calling from. For example, the U.S. and Canada use the country code of 1. 1. Press Menu. 2. - Page 60 Dual-Mode Internet Telephony Kit 3. Scroll to Call Settings. Press Select. 4. Scroll to Area Code. Press Select. 5. Enter the area code (up to 5 digits). Press OK. Deactivating the Area Code Use to delete an area code from the Skype calls that you place. 1.
-
Page 61: Managing The Handset(S)
Managing the Handset(s) You can register, add base stations, de-register or change the PIN for your handset. Up to four handsets can be registered to one base station. To register a handset, see Chapter 3, Registering the Handset. Registering Your Handset to an Additional Base This is not for first time registration. -
Page 62: Changing The System Pin
Dual-Mode Internet Telephony Kit 2. Scroll to Settings.Press Select. 3. Scroll to Handset. Press Select. 4. Scroll to De-register. Press Select. 5. Scroll to the handset number you want to de-register. Press OK. 6. Enter the system PIN. Use Clear to make a correction. 7. - Page 63 8. Press Enter. The new setting is saved. Transferring Your Call to Another Handset During an Outside Call 1. Press the Intercom key. 2. Use the navigation pad to select the handset you want. 3. Select OK. 4. Wait for the other handset to answer your call. 5.
-
Page 64: Reset To Factory Default Settings
Dual-Mode Internet Telephony Kit new setting is saved .The time zone is based on Greenwich Mean Time (GMT). If you don’t know your time zone, you can visit http://www.greenwichmeantime.com. Scroll to the correct zone. Press OK when finished. The new setting is saved. To have your phone adjust when daylight savings time changes, scroll to Daylight Time and choose Standard or Daylight time. - Page 65 5. Scroll to Reset All to reset all the settings including the network settings OR scroll to Keep Network to reset all the settings except the network settings. Press Select. 6. Enter the system PIN. Press Enter to confirm. User Clear to Make a correction. 7.
-
Page 66: Add Contact
Dual-Mode Internet Telephony Kit Contacts* History Status Remove New Contact Block Request Detail *These choices are also available when you press the right Contact key. Add Contact Search Services Settings Time & Date Network Handset Information Advanced Chapter 4: Using the Dual-Mode Internet Telephony Kit Managing the Handset(s) -
Page 67: Chapter 5: Network Settings
Chapter 5: Network Settings The Network This chapter is recommended for advanced users who want to configure the phone with their static IP address. Viewing Your Network Settings 1. Press Menu. 2. Scroll to Settings. Press Select. 3. Scroll to Information. Press Select. 4. - Page 68 Dual-Mode Internet Telephony Kit 4. Scroll to DHCP. Press Select. An activation request is displayed 5. Press Yes to confirm. Your IP address is displayed. The new setting is saved. PPPoE Activating PPPoE 1. Press Menu. 2. Scroll to Settings. Press Select. 3.
- Page 69 Configuring Individual Network Settings 1. Press Menu. 2. Scroll to Settings. Press Select. 3. Scroll to Network. Press Select. 4. Scroll to the item you want to change. Press Select. 5. Edit the information. 6. Press Enter when finished. The new setting is saved. Resetting the Network 1.
-
Page 70: Web Page Configuration
Dual-Mode Internet Telephony Kit Web Page Configuration You can configure some of the network settings, Skype settings, system upgrade and administrative settings from the web pages. For most users, it is not necessary to configure these settings after setting up the phone. This section is recommended for advanced users only. - Page 71 Make sure your phone is properly connected and set up sharing the same network with your router as shown below. 1. Open a web browser. 2. Enter your phone’s IP address in the address bar. An authentication window will appear. Chapter 5: Network Settings The Network Dual-Mode Internet Telephony Kit...
- Page 72 Dual-Mode Internet Telephony Kit 3. Enter the user name and password. Admin is the default user name and password. After verifying your user name and password, you will see the configuration Home page. The Home page shows your current system and network settings. Chapter 5: Network Settings The Network...
- Page 73 The Network page shows your current internet connection type and Ethernet speed. You can make changes to these settings on this page. The Skype page shows your current Skype status. You can create a new Skype account or sign in to Skype from this page.
- Page 74 The System page is where you can upgrade your phone’s operating system. You will need to have the latest software image download, which is available from www.linksys.com. The Administration page is where you change the web page access password. You can also reset your phone and network to the factory default settings from this page.
-
Page 75: Appendix A: Troubleshooting
This appendix provides solutions to problems that may occur during the installation and operation of the Dual-Mode Internet Telephony Kit. Also included is a list of its default settings. Read the descriptions below to solve your problems. If you can't find an answer here, check the Linksys website at www.linksys.com. Common Problems and Solutions 1. - Page 76 Dual-Mode Internet Telephony Kit 3. When the handset is placed on the charger, I do not hear a beep. If you have turned off the handset tone (refer to “Chapter 4: Using the Dual-Mode Internet Telephony Kit) or if the handset was previously powered off, then this is normal, and you were not supposed to hear a beep. If you were supposed to hear a beep, then do the following: A.
- Page 77 7. The handset does not ring when a call comes in. A. Make sure the phone’s mute key is not enabled. B. Make sure the ringer volume setting is enabled (Refer to “Chapter 4: Using the Dual-Mode Internet Telephony Kit.”). C.
-
Page 78: Frequently Asked Questions
Dual-Mode Internet Telephony Kit Frequently Asked Questions Can I receive SkypeIn calls? Yes, if you have purchased a SkypeIn number from Skype (go to www.skype.com for details). When you receive a SkypeIn call, it will ring the Skype ring tone, and you can answer it the same way you answer a Skype call. Can I put a Skype call on hold and make a landline call on the same handset? No. -
Page 79: Default Settings
Default Settings Setting Default Auto Answer Base Selection Auto Confirmation/Parking Tone Dial Mode Tone Handset Intercom Ring Melody Melody 3 Handset Key Tones Handset Landline Ring Melody Melody 1 Handset Ring Volume Middle Handset Skype Ring Melody Melody 2 Language English Appendix A: Troubleshooting Default Settings... -
Page 80: Country Codes
Dual-Mode Internet Telephony Kit Country Codes Country Country Name Iso Code Afghanistan Albania Algeria American Samoa Andorra Angola Anguilla Antigua and Barbuda Argentina Armenia Aruba Australia Austria Azerbaijan Bahamas Bahrain Bangladesh Barbados Belarus Country Code 1684 1264 1268 1242 1246 Appendix A: Troubleshooting Country Codes... - Page 81 Belgium Belize Benin Bermuda Bhutan Bolivia Bosnia and Herzegovina Botswana Brazil British Indian Ocean Territory Brunei Darussalam Bulgaria Burkina Faso Burundi Cambodia Cameroon Canada Cape Verde Cayman Islands Central African Republic Chad Chile China Colombia Appendix A: Troubleshooting Country Codes Dual-Mode Internet Telephony Kit 1441 1284...
- Page 82 Dual-Mode Internet Telephony Kit Comoros Congo, Republic of Congo, Democratic Republic of (was Zaire) Cook Islands Costa Rica Coe D’Ivoire (Ivory Coast) Croatia (Hrvatska) Cuba Cyprus Czech Republic Denmark Diego Garcia Djibouti Dominica Dominican Republic Ecuador Egypt El Salvador Equatorial Guinea Eritrea Estonia Ethiopia...
- Page 83 Fiji Finland France French Guiana French Polynesia Gabon Gambia Georgia Germany Ghana Gibraltar Greece Greenland Grenada Guam Guatemala Guinea Guinea-Bissau Guyana Haiti Honduras Hong Kong Hungary Iceland Appendix A: Troubleshooting Country Codes Dual-Mode Internet Telephony Kit 1473 1671...
- Page 84 Dual-Mode Internet Telephony Kit India Indonesia Iran Iraq Ireland Israel Italy Jamaica Japan Jordan Russian Federation Kazakhstan Kenya Kiribati Korea (North) Korea (South) Kuwait Kyrgyzstan Laos Latvia Lebanon Lesotho Liberia Libya 1876 Appendix A: Troubleshooting Country Codes...
- Page 85 Liechtenstein Lithuania Luxembourg Macau Macedonia Madagascar Malawi Malaysia Maldives Mali Malta Marshall Islands Martinique Mauritania Mauritius Mayotte Mexico Micronesia Moldova Monaco Mongolia Montserrat Morocco Mozambique Appendix A: Troubleshooting Country Codes Dual-Mode Internet Telephony Kit 1664...
- Page 86 Dual-Mode Internet Telephony Kit Myanmar Namibia Nauru Nepal Netherlands Netherlands Antilles New Caledonia New Zealand (Aotearoa) Nicaragua Niger Nigeria Niue Northern Mariana Islands Norway Oman Pakistan Palau Panama Papua New Guinea Paraguay Peru Philippines Poland Portugal 1670 Appendix A: Troubleshooting Country Codes...
- Page 87 Puerto Rico Qatar Reunion Romania Rwanda San Marino Sao Tome and Principe Saudi Arabia Senegal Serbia Seychelles Sierra Leone Singapore Slovak Republic Slovenia Solomon Islands Somalia South Africa Spain Sri Lanka St. Helena St. Pierre and Miquelon Sudan Suriname Appendix A: Troubleshooting Country Codes Dual-Mode Internet Telephony Kit 1939...
- Page 88 Dual-Mode Internet Telephony Kit Swaziland Sweden Switzerland Syria Taiwan Tajikistan Tanzania Thailand Togo Tokelau Tonga Trinidad and Tobago Tunisia Turkey Turkmenistan Tuvalu Uganda Ukraine United Arab Emirates United Kingdom Uruguay United States Uzbekistan Vanuatu 1868 Appendix A: Troubleshooting Country Codes...
- Page 89 Vatican City State (Holy See) Venezuela Viet Nam Virgin Islands (U.S.) Wallis and Futuna Islands Yemen Zambia Zimbabwe Appendix A: Troubleshooting Country Codes Dual-Mode Internet Telephony Kit 1340...
- Page 90 Dual-Mode Internet Telephony Kit Appendix A: Troubleshooting Country Codes...
-
Page 91: Appendix B: Specifications
Appendix B: Specifications Model Number CIT400 Handset Frequency Bands Europe:1880-1900MHz, North America:1920-1930MHz, South America:1910-1930MHz, Taiwan:1880-1895 MHz Standards DECT (Digital Enhanced Cordless Telecommunication Standard), GAP (General Access Profile) Speech Coding 32Kbps ADPCM Distance Range 300 meters outdoor, 50 meters indoor Number of Channels 10 channels (Europe and South America), 5 channels (North America), 5 channels (Taiwan) Standby/Talk Time 120 hours/6 hours... -
Page 92: Environmental
Dual-Mode Internet Telephony Kit Environmental Base Station Dimensions 5.79" x 4.96" x 1.40" (147 mm x 126 mm x 35.5 mm) W x H x D Weight 0.79 lbs (0.36 kg) Handset Dimensions 1.77" x 5.63" x 1" (45 mm x 143 mm x 25.5 mm) Weight 0.22 lbs (0.099 kg) Charger... -
Page 93: Appendix C: Regulatory Information
Appendix C: Regulatory Information IMPORTANT SAFETY INSTRUCTIONS. READ CAREFULLY AND KEEP FOR FUTURE REFERENCE. Environment and Safety Safety information: This telephone is not designed for making emergency telephone calls when the power fails. If a power outage occurs, this phone will not function. - Page 94 Because the phone works by sending radio signals between the base station and the handset, wearers of hearing aids may experience interference in the form of a humming noise. The Cordless Dual-Mode Internet Telephony Kit should not be used near intensive care medical equipment. Linksys recommends keeping the phone a minimum of 6 inches away from pacemakers.
-
Page 95: Compliance Information
Compliance Information US and Canada Compliance Information This equipment has been tested and found to comply with the limits for a Class B device, pursuant to Part 15 of the FCC rules and ICES-003 of Industry Canada. Operation is subject to the following conditions: (1) This device may not cause interference, and (2) This device must accept any interference, including interference that may cause undesired operation. - Page 96 Dual-Mode Internet Telephony Kit If this equipment causes harm to the telephone network, the telephone company may discontinue your service temporarily. If advance notice is not practical, the telephone company will notify the customer as soon as possible. Also, you will be advised of your right to file a complaint with the FCC if you believe it is necessary.
- Page 97 2. Increase the distance between the equipment and USB base station. 3. Connect the equipment into an outlet on a circuit different from that to which the USB base station is connected. 4. Consult the dealer or an experienced radio/TV technician for help. Caution Users should ensure for their own protection that the electrical ground connections of the power utility, telephone lines and internal metallic water pipe system, if present, are connected together.
- Page 98 Dual-Mode Internet Telephony Kit The base station and handset have been evaluated and found compliant in accordance with Industry Canada RSS-102 with respect to Canada’s Health Code 6 for Exposure of Humans to RF Fields. The highest SAR level measured for this phone is as follows: Max.
- Page 99 Additional information can be obtained from the following documentation: • Cisco white paper on RF exposure • FCC Bulletin 56: Questions and Answers about Biological Effects and Potential Hazards of Radio Frequency Electromagnetic Fields Additional information can also be obtained from the following organizations as well as from the Cisco white paper on the subject: •...
-
Page 100: European Union
Dual-Mode Internet Telephony Kit European Union Declaration of Conformity with Regard to the EU Directive 1999/5/EC (R&TTE Directive) Appendix C: Regulatory Information European Union... - Page 101 Dual-Mode Internet Telephony Kit Appendix C: Regulatory Information European Union...
- Page 102 If you need to see this statement in another language or have access to any other technical documentation, see the “Technical Documents” on www.linksys.com/international. The following standards were applied during the assessment of the product against the requirements of the Directive 1999/5/EC: •...
-
Page 103: Appendix D: Warranty Information
Appendix D: Warranty Information Linksys warrants to You that, for a period of two years (the “Warranty Period”), your Linksys Product will be substantially free of defects in materials and workmanship under normal use. Your exclusive remedy and Linksys' entire liability under this warranty will be for Linksys at its option to repair or replace the Product or refund Your purchase price less any rebates. - Page 104 Dual-Mode Internet Telephony Kit Appendix D: Warranty Information...
-
Page 105: Appendix E: Contact Information
Linksys products? Give our advice line a call at: Or fax your request in to: If you experience problems with any Linksys product, you can call us at: Don't wish to call? You can e-mail us at: Need to contact Linksys outside the United States? -
Page 106: E-Mail Address
Netherlands support.nl@linksys.com Norway support.no@linksys.com Portugal support.pt@linksys.com Spain support.es@linksys.com Sweden support.se@linksys.com Switzerland support.ch@linksys.com Turkey support.tk@linksys.com United Kingdom & Ireland support.uk@linksys.com Outside of Europe E-mail Address Latin America support.la@linksys.com U.S. and Canada support@linksys.com Asia Pacific asiasupport@linksys.com (English only) Appendix E: Contact Information...
Need help?
Do you have a question about the iPhone CIT400 and is the answer not in the manual?
Questions and answers