Table of Contents
Advertisement
READ AND SAVE THESE INSTRUCTIONS
xxxxxxxxxxxxxxxxxxxxxxxxxxxxxxxxxxxxxxxxxxxxxxxxxxx
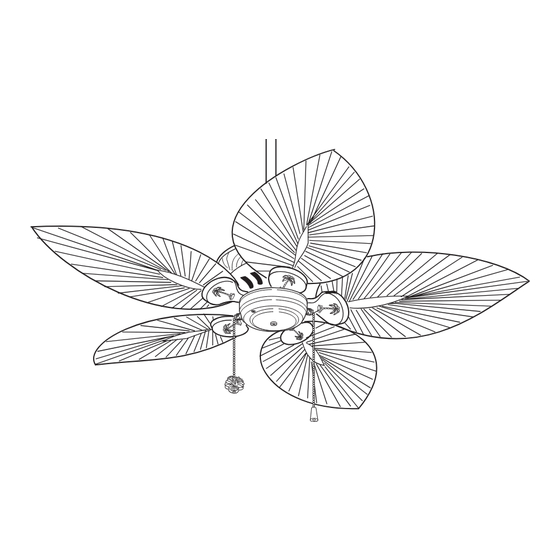
BAHAMA BREEZES
Damp Location
Ceiling Fan Owner's Manual
Model Numbers
TB344AP00
TB344DBZ00
Antique Pewter
Distressed Bronze
Housing
Housing
Net Weight:
19.0
Lbs.
xxxxxxxxxxxxxxxxxxxxxxxxxxxxxxxxxxxxxxxxxxxxxxxxxxx
Part No. F40BP72890001
Form No. BP7289-1
Advertisement
Table of Contents

Related Manuals for Tommy Bahama TB344AP00


Summary of Contents for Tommy Bahama TB344AP00
- Page 1 READ AND SAVE THESE INSTRUCTIONS xxxxxxxxxxxxxxxxxxxxxxxxxxxxxxxxxxxxxxxxxxxxxxxxxxx BAHAMA BREEZES Damp Location Ceiling Fan Owner's Manual Model Numbers TB344AP00 TB344DBZ00 Antique Pewter Distressed Bronze Housing Housing Net Weight: 19.0 Lbs. xxxxxxxxxxxxxxxxxxxxxxxxxxxxxxxxxxxxxxxxxxxxxxxxxxx Part No. F40BP72890001 Form No. BP7289-1...
- Page 2 NOTE: This fan is suitable for use with solid-state speed controls. WARNING: To avoid fire, shock or injury, do not use a Tommy Bahama or any other brand of control not specifically approved for this fan. WARNING: This product is designed to use only those parts supplied with this product and/or any accessories designated specifically for use with this product by Emerson Electric Co.
-
Page 3: Tools Needed For Assembly
THIS FAN IS SUITABLE FOR DAMP LOCATIONS SUCH AS COVERED PORCHES, COVERED PATIOS, AND COVERED DECKS... ANYWHERE THERE IS A ROOF OVERHEAD. This Manual Is Designed to Make it as Easy as Possible for You to Assemble, Install, Operate and Maintain Your Ceiling Fan Tools Needed for Assembly Installed Wire Length Wire Size A.W.G. -
Page 4: Electrical Requirements
h. One loose parts bag containing: 12. Eleven 10-32 x 3/4” oval head 1. One 5/16-18 x 1/4” setscrew screws 2. One 5/32” hex wrench 13. Twenty-one 10-32 x 5/16” Phillips pan head screws 3. Two 1” threaded studs 14. Twenty-one #10 flat washers 4. -
Page 5: How To Assemble Your Ceiling Fan
The Tommy Bahama TB344 Series Ceiling Fan is designed to be operated from wall switch(es), or from a Tommy Bahama remote control/ transmitter. There are no controls supplied with the ceiling fan. How to Assemble Your Ceiling Fan... - Page 6 8. Reinstall the hanger ball on the downrod WARNING (Figure 4) as follows. Route the motor leads through the hanger ball and slide the hang- It is critical that the clevis pin in the motor er ball over the downrod. Install the pin coupling is properly installed and the through the holes at the top of the downrod setscrew securely tightened.
- Page 7 NOTE: Some fan blades are thicker than SWITCH 10-32 x 3/4" OVAL others and require longer screws. If a HOUSING HEAD SCREWS (2) bag of screws and washers is supplied with the TB500 Series Blades (purchased separately) you are installing, use these screws in place of the screws supplied with the fan.
-
Page 8: How To Hang Your Ceiling Fan
18. Position the switch housing cover on the 1. Securely attach the hanger bracket to the switch housing and secure using two 8-32 x outlet box using the two screws supplied 3/8” pan head screws (supplied) (Figure 8). with the outlet box (Figure 10). 8-32 x 3/8"... -
Page 9: How To Wire Your Ceiling Fan
All 1. If you are going to use a Tommy Bahama wiring must be in accordance with Remote Control/Receiver or Wall... - Page 10 After connections have been made, to control your ceiling fan and optional separate the white and green wires Tommy Bahama Light Fixture (if instal- from the black and blue wires. led) simultaneously, you will need a stan- e. Carefully turn the wires upward and...
-
Page 11: Using Your Ceiling Fan
LISTED OUTLET BOX GENERAL BLACK FAN WIRE PURPOSE ON/OFF GREEN WIRE BLACK BLACK WALL SWITCH (GROUND) (HOT) FROM HANGER TO 120 BRACKET VOLT WHITE SUPPLY WHT. GROUND WIRE GROUND GROUND BLUE TWO-CONDUCTOR CABLE (WITH GROUND) BETWEEN GREEN WIRE (GROUND) CEILING AND WALL OUTLET FROM HANGER BALL BOXES LISTED WIRE CONNECTOR (3) -
Page 12: Attaching Light Kit
3. Ceiling Fan Remote Controls (see store or receiver. catalog). To install a Tommy Bahama accessory light WARNING kit, remove the two screws securing the switch housing cover on the switch housing. Remove The use of any other control not specifical-... -
Page 13: Troubleshooting
WARNING: FOR YOUR OWN SAFETY TURN OFF POWER AT FUSE BOX OR CIRCUIT BREAKER BEFORE TROUBLE SHOOTING YOUR FAN. Trouble Shooting TROUBLE PROBABLE CAUSE SUGGESTED REMEDY 1. Fan will not 1. Fuse or circuit breaker 1. Check main and branch start. -
Page 14: How To Order Repair Parts
Repair Parts Before discarding packaging material, be certain all parts have been removed. HOW TO ORDER REPAIR PARTS WHEN ORDERING REPAIR PARTS, ALWAYS GIVE THE FOLLOWING INFORMATION: • PART NUMBER • NAME OF ITEM • PART DESCRIPTION • MODEL NUMBER The model number of your Fan will be found on a label attached to the top housing. - Page 15 Repair Parts Listing Part Numbers Model No. Model No. Description TB344AP00 TB344DBZ00 Hanger Pack, Consisting of: 761655-42 761655-41 Hanger Bracket — — Hanger Ball — — Downrod — — Parts Bag, Containing: 762779 762779-2 Wire Connector (4) — — Hex Wrench, 5/32”...
-
Page 16: Limited Warranty
LIMITED WARRANTY What The Warranty Covers: This warranty covers the motor and the other components and accessories of your Emerson ceiling fan against all defects in workmanship and materials. You must be the original purchaser or user of the product to be covered. What The Period Of Coverage Is: As it applies to the motor, this warranty will last for a lifetime of your ceiling fan.
Need help?
Do you have a question about the TB344AP00 and is the answer not in the manual?
Questions and answers