
Related Manuals for STOKVIS ENERGY SYSTEMS REX


Summary of Contents for STOKVIS ENERGY SYSTEMS REX
- Page 1 TECHNICAL MANUAL REX/REX F/REX K/REX K F REX DUAL/REX DUAL F PRESSURISED STEEL BOILERS...
-
Page 3: Table Of Contents
3.2.1 Hot water heating system with closed expansion vessel - Furnace output 300.000 kcal/h (Fig. 1) 3.2.2 Hot water heating system with closed expansion vessel - Furnace output > 300,000 kcal/h (Fig. 2) 3.2.3 REX DUAL/REX DUAL F (side by side) 80÷260 POSITIONING INSTRUMENTS ......15 ELECTRICAL CONNECTION......................16 REX/REX F/REX K/REX K F OPTIONAL CONTROL PANEL (FIG. -
Page 4: General Warnings
ATTENTION: REX F, REX K F and REX DUAL F models featuring aluminum finned extru- sions in their fire tubes (Fin-e patented) are suitable exclusively for use with gaseous fuels. -
Page 5: Technical Specifications
2 TECHNICAL SPECIFICATIONS REX/REX K/REX F/REX K F 7-130 BOILER Efficiency 100% Effic. 100% NG max flow NG max flow NG max flow Max flow rate Efficiency at 30% Characteristics Heat output Heat input (N.C.V.) (stars) rate G20 rate G30... - Page 6 1030 855 415 912 415 54,5 756 700 1119 755 513 265 341 200-250 130 200 50 1" 1" 1/2" 1/2" 1/2" REX 10 REX K 10 REX 10 F REX K 10 F 1030 855 415 912 415 54,5 756 700 1119 755 513 265 341 200-250 130 200 50 1" 1"...
-
Page 7: Rex/Rex K/Rex F/Rex K F 140-500 Boiler
DN/in DN/in DN/in DN/in DN/in DN/in DN/in DN/in REX 140 REX K 140 REX 140 F REX K 140 F 1746 1630 880 880 150 1470 1270 2886 2300 831 1300 755 350-400 320 400 150 150 1" 1"1/4 1"1/2 1/2" 1/2" 1/2"... -
Page 8: Rex 400-600 Boiler
DN/in DN/in DN/in DN/in DN/in DN/in DN/in DN/in REX 400 REX 400 F 2326 2140 1135 1135 150 1980 1780 4310 3596 1105 2200 1005 450-500 400 600 200 1"1/4 1/2"-3/4" 1/2" 1/2" REX 450 REX 450 F 2326 2140 1135 1135 150 1980 1780 4660 3946 1105 2550 1005 500-550 400 600 200 1"1/4... -
Page 9: Rex Dual/Rex Dual F (Staked) 14-170 Boiler
REX DUAL/REX DUAL F (stacked) 14-170 BOILER Efficiency 100% Effic. 100% NG max flow NG max flow NG max flow Max flow rate Efficiency at 30% Characteristics Heat output Heat input (N.C.V.) (stars) rate G20 rate G30 rate G31 of flues (N.C.V.) - Page 10 PN DN/in DN/in DN/in DN/in DN/in DN/in DN/in DN/in REX DUAL 14 REX DUAL 14 F 1693 415 1245 1610 415 1245 780 54,5 884,5 939 756 700 540 1365 630 996 369 200-250 130 200 1"...
-
Page 11: Rex Dual/Rex Dual F (Side By Side) 80-260 Boiler
REX DUAL/REX DUAL F (side by side) 80-260 BOILER Efficiency 100% NG max flow NG max flow NG max flow Max flow rate Efficiency at 30% Characteristics Heat output Heat input (N.C.V.) rate G20 rate G30 rate G31 of flues (N.C.V.) - Page 12 DN/in DN/in PN DN/in DN/in DN/in DN/in DN/in DN/in REX DUAL 80 REX DUAL 80 F 1690 1015 500 1095 500 50 1901 890 955 1872 1502 600 850 422 230-280 225 250 100 100 1"...
-
Page 13: Installation
3 INSTALLATION Before connecting the boiler, perform the following operations: Thoroughly clean all the system pipes in order to remove any foreign matter that could affect correct op- eration of the boiler; Check that the flue has an adequate draught, that there is no narrowing of passages and that it is free ... -
Page 14: Hydraulic Connection
3.2 HYDRAULIC CONNECTION 3.2.1 HOT WATER HEATING SYSTEM WITH CLOSED EXPANSION VESSEL - Furnace output 300.000 kcal/h (Fig. 1) The generator must be provided with: a - Safety valve b - Expansion vessel (connected with a hose 18 mm diameter) c - Regulation thermostats d - Safety thermostat... -
Page 15: Rex Dual/Rex Dual F (Side By Side) 80÷260 Positioning Instruments
3.2.3 REX DUAL/REX DUAL F (side by side) 80÷260 POSITIONING INSTRUMENTS 1. Pressure switch fitting 2. 1 safety valve fitting or thermal drainage 1 safety 3. 1 boiler circulator consent thermostat and safety thermostat bulb wells 4. Manometer fitting with control manometer flange 5. -
Page 16: Electrical Connection
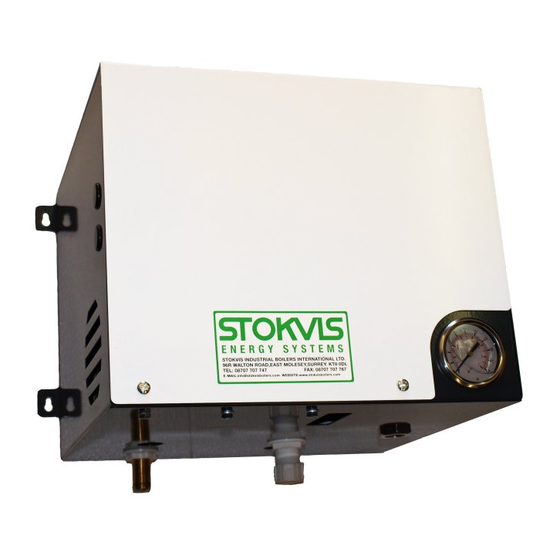
REX/REX F/REX K/REX K F OPTIONAL CONTROL PANEL (Fig. 3) The control panel (optional) with the boilers is made of self-extinguishing plas tic and houses the regulation and safety instruments: Fig. -
Page 17: Installation Of Rex 140÷350 Boiler Control Panel (Fig. 4 And Pictures)
INSTALLATION OF REX 140÷350 BOILER CONTROL PANEL (Fig. 4 and pictures) Choose the side on which to install the control panel (RH or LH), remove the covers (1) and push in the pre-cut opening (2). Pick up the kit of the arm complete with bracket (3). -
Page 19: Rex/Rex F 400-600 Control Panel
REX/REX F 400-600 CONTROL PANEL The generators are equipped with electric board (IP 55 protection level), which are already assembled to the different boiler accessories. ELECTRONIC CONTROLLER On the controller appear the water temperature in the boiler and can setting three values: 1. -
Page 20: Rex Dual/Rex Dual F Operating Principles
2 equal flows have been mixed corresponds to mean flow temperature of two units 3.7.1 REX DUAL/REX DUAL F OPTIONAL CONTROL PANEL (Fig. 5) NOTE: for boilers with two different control panels, see Par. 3.4 The optional control panel is made of plastic with IP40 protection degree and houses the regulation and... -
Page 21: Inverting The Door Aperture
INVERTING THE DOOR APERTURE If the door is to be opened to the opposite side, act as follows: 1. Switch the outside nut (or bush) of one hinge with the diametrically opposite cl osure bush; then at the hinge side, fasten the cone to the door with the inside nut. 2. -
Page 22: Assembly
4 ASSEMBLY REX K/REX K F ASSEMBLY (Fig. 7-8) Ensure that installation premises floor is even and perfectly horizontal. For perfect welding, use acid or rutile cored electrodes (check codes AWS E6020 or AWS E6013 or E44LA3 or E44LC3). a) Put the boiler rear plate (1) on the floor with the hinges pointing down and ensure that it is perfectly lev- elled (mark the middle of the plate sides in order to position correctly the furnace and the tube nest. - Page 23 Front tube plate 2. Furnace Upper tube nest* 4. Flow trap Lower tube nest* Rear tube nest 7. Smoke tubes Tie rod or stiffening stub 9. Side frame 10. Square tubes 11. Manhole 12. Smokebox N1 Flow N2 Ret urn N3 Instrum ent fitting N4 Low er fitting N5 Fitting for safety valve and expansion vessel...
-
Page 24: Rex/Rex F/Rex K/Rex K F 7-40 Boiler Casings (Fig. 9)
REX/REX F/REX K/REX K F 7-40 BOILER CASINGS (Fig. 9) In case of stave casing, please refer to the specific instructions. a) Wrap the glass wool around the boiler body leaving the bulb well (P) on the right side exposed. -
Page 25: Rex/Rex F/Rex K/Rex K F 50-130 Boiler Casings (Fig. 10)
REX/REX F/REX K/REX K F 50-130 BOILER CASINGS (Fig. 10) In case of stave casing, please refer to the specific instructions. a) Wrap the glass wool around the boiler body leaving the bulb well on the right side exposed. b) Insert the wires connecting the burner to the control panel in the lower slits of panel (1S) and (1D), allow- ing for the opening direction of the manhole. -
Page 26: Rex Dual/Rex Dual F 14-70 Boiler Casings (Fig. 11)
REX DUAL/REX DUAL F 14-70 BOILER CASINGS (Fig. 11) In case of stave casing, please refer to the specific instructions. NOTE: for boilers with two different control panels, switch the (P2) casing with (P3) or (P1) with (P4) in order to fit them on the same side. For boilers with only one model of casing, the fitting on the same side requires the piercing for the second panel. -
Page 27: Start Up
5 START WARNING: Before start up, open the door and insert w holly turbolators into the front end sections of the smoke tubes, ensuring that they hav e been pushed inside for at least 100 mm. 5.1 PRELIMINARY CHECKS Before starting the boiler, check that: - The rating plate specifications and power supply network (electricity, water, gas or fuel oil) specifications correspond;... -
Page 28: Operation
6 OPERATION 6.1 OPERATING CHECKS The heating system must be correctly operated to ensure perfect combustion as far as possible with reduced emissions of carbon monoxide, unburnt hydrocarbons and soot into the atmosphere, and to avoid hazards and damage to people and goods. Guide to combustion values: FUELS % Flue gases temperature % CO... -
Page 29: Cleaning And Servicing
Pressurisation values should be included in the range given in the table of technical specifications. IMPORTANT The delta T betw een flow and return must not exceed 30°C, in order to av oid thermal shocks in the boiler. The boiler return temperature must be higher than 50°C on natural gas or LPG firing and higher than 40°C on oil firing, in order to protect the boiler from corrosion due to acid flue gas con- densation;... - Page 31 96R WALTON ROAD, EAST MOLESEY, SURREY. KT8 0DL Tel. 02087833050 / 08707 707747 - Fax. 02087833051 info@stokvisboilers.com - www.stokvisboilers.com The illustration and details reported are indicative only and are not binding. STOKVIS reserves the right to introduce alterations and/or amendments as it deems fit and proper for the development of the product without the obligation of providing prior notice. 93120079 Ed.
- Page 32 ASSEMBLY INSTRUCTIONS STAVES LINING...
- Page 34 HOW TO ASSEMBLE THE CASE AND THE CONTROL PANEL Wrap the fiberglass around the boiler body and use the supplied strap to secure it (see fig.). DIAGRAM OF PLASTIC STRAP LOCKING TO SECURE THE FIBERGLASS TO THE BOILER SHELL Prepare the staves by inserting the four stoppers, as shown in the figure.
- Page 35 Fasten the uprights and the beams to the plates by means of appropriate screws and nuts. NOTE: the beam shown in the figure, if supplied in the package, must be placed between the two tube panels in order to support the staves.
- Page 36 Insert the staves, with the previously installed stoppers, between the uprights and the beams, as shown in the figure. 5) After all staves have been inserted, install the closing frame using the self-locking screws. NOTE: If the boiler has upper connections it is necessary to install the special central covers, as shown in the fig- ure.
- Page 37 CONTROL PANEL INSTALLATION The control panel supplied with the boiler must be installed on the special support supplied in the kit, which must be fastened to the boiler front beam. Pass the cables through the loopholes within the structure (see the figure). NOTE: if the panel supporting stave is included in the kit (containing the screw holes and the capillar eyelets) it is recommended that you use it to facilitate adjustment;...
- Page 38 96R WALTON ROAD, EAST MOLESEY, SURREY. KT8 0DL Tel. 02087833050 / 08707 707747 - Fax. 02087833051 info@stokvisboilers.com - www.stokvisboilers.com The illustration and details reported are indicative only and are not binding. STOKVIS reserves the right to introduce alterations and/or amendments as it deems fit and proper for the development of the product without the obligation of providing prior notice. 93120079 Ed.
Need help?
Do you have a question about the REX and is the answer not in the manual?
Questions and answers