Akai Advance 61 User Manual
Hide thumbs
Also See for Advance 61:
- Quick start manual (72 pages) ,
- Operator's manual (44 pages) ,
- Service manual (52 pages)
Table of Contents
Advertisement
Advertisement
Table of Contents

Related Manuals for Akai Advance 61


Summary of Contents for Akai Advance 61
-
Page 1: User Guide
User Guide English Manual Version 1.0... -
Page 2: Table Of Contents
Table of Contents (Click a chapter/section to skip to it.) Introduction ................................ 5 Box Contents ..............................5 Support ................................5 About This User Guide ..........................5 Initial Setup ................................ 6 1. Software/Driver Download and Installation ................... 6 2. Controller Setup ............................6 3. - Page 3 Operation ................................12 Setup Scenarios ............................13 With VIP in Your DAW ..........................13 With VIP in Standalone Mode (Without a DAW) ..................13 With Your DAW Only ..........................14 With External MIDI Equipment (Without a Computer) ................14 Display and Navigation ..........................15 Basic Functions ............................
- Page 4 MIDI Mode ..............................34 Selecting Controls ..........................34 Adjusting Controls ..........................34 MIDI Edit Mode ............................35 Selecting Controls ..........................35 Editing Control Parameters ........................35 Available Control Parameters ......................... 36 Multi Mode ..............................41 About Multis ............................41 Creating and Editing Multis ........................41 Adjusting Multi Slots ..........................
-
Page 5: Introduction
About This User Guide This User Guide was written to help you get familiar with the Advance 61 hardware. For consistency and to help prevent confusion, we used a uniform set of symbols to show topics of interest or significance: Important/Note/Tip: Important or helpful information on a given topic. -
Page 6: Initial Setup
Important: When installing these plugins, we recommend installing them on your computer’s internal hard drive rather than on an external hard drive. 2. Controller Setup Here is just an example of how to use Advance 61 to your setup. Items not listed under Introduction > Box Contents are sold separately. -
Page 7: Software-Controller Configuration
(presets) for all of your scanned plugins. This can take several minutes. 8. On Advance 61, turn the Data Dial to browse your list of patches in the display (the plug-in name will appear under the patch name). Press the Data Dial to load one. -
Page 8: With Vip In Standalone Mode (Without A Daw)
(presets) for all of your scanned plugins. This can take several minutes. 6. On Advance 61, turn the Data Dial to browse your list of patches in the display (the plug-in name will appear under the patch name). Press the Data Dial to load one. -
Page 9: Features
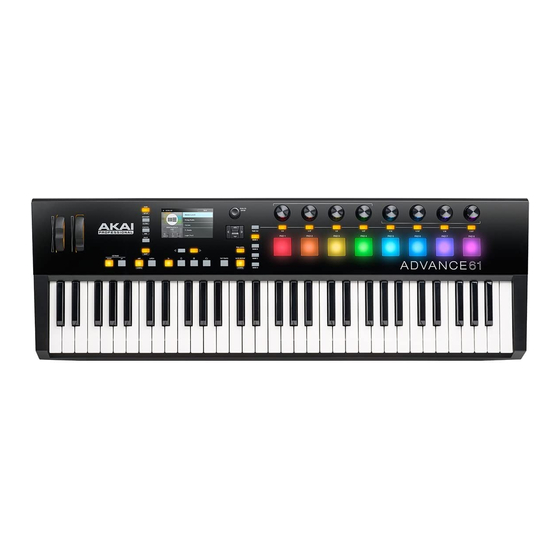
Features Top Panel 1. Keyboard: This 61-note keyboard is velocity- and pressure-sensitive and, in conjunction with the Octave Up/Down buttons, can control a 10-octave range. 2. Octave Down/Up: Use these buttons to shift the keyboard’s range up or down. Press both buttons simultaneously to reset the octave shift to “zero.”... - Page 10 Operation > Modes for more information. 20. Shift: Press and hold this button to enable secondary functions of certain other buttons on Advance 61. 21. Transport Control Buttons: These three buttons are dedicated buttons for sending conventional transport control commands: Stop, Play, and Record. These can be set to send MIDI (MIDI Start/Stop), CC (pre-assigned MIDI CC values), MMC (MIDI Machine Control), and MMC/MIDI.
-
Page 11: Rear Panel
4. USB Port: Use a standard USB cable to connect this USB port to your computer. The computer’s USB port provides ample power to Advance 61. If you connect it to a USB hub, make sure it is a powered hub. -
Page 12: Operation
Advance 61. Read Modes to learn about each of Advance 61’s modes, which let you browse and select your plugins and patches, assign/edit controllers and parameters, adjust global settings, and more. Read Timing Functions to see an overview of Advance 61’s time-related features. -
Page 13: Setup Scenarios
When VIP is used as a plugin, as in this scenario, all audio from VIP will be sent into your DAW on its track. You can switch between Advance 61’s Control Mode to control VIP or MIDI Mode to... -
Page 14: With Your Daw Only
You can connect an external MIDI device (synth, drum machine, etc.) to Advance 61’s MIDI Out, letting you use Advance 61 to control it, whether or not you’re connected to a computer. If you aren’t connected to a computer, though, remember to power Advance 61 externally (see Features >... -
Page 15: Display And Navigation
Cursors Page Left/Right Advance 61’s display shows information about its current mode and operations. You can navigate its different modes, pages, etc. by using the following controls: • Data Dial: Use this dial to change a selected parameter values, settings, etc. in the display. Press the dial to enter or confirm a command or setting. -
Page 16: Basic Functions
We’ve pre-mapped several presets that let you use Advance 61 to control your DAW in the most logical and intuitive way possible. Setup Mode will show a list of presets that let you use Advance 61 to control your DAW. If you are not using VIP, you can see this list in Main Mode, as well. -
Page 17: Controlling Your Patch Or Your Daw
Controlling Your Patch or Your DAW Advance 61 has two modes that let you view and control your patch parameters in VIP or functions your DAW: Control Mode and MIDI Mode. Control Mode shows you the current settings of Advance 61’s controls in VIP. -
Page 18: Modes
Modes Advance 61 has ten different modes of operation. Enter each mode by pressing its corresponding mode button (or Shift and the button, if it is a secondary button command). Note that a mode’s appearance may depend on whether or not you are using the VIP software. -
Page 19: Selecting The Browser Or Setlists
Selecting the Browser or Setlists While using VIP with Advance 61, the Patch Browser (the right half of the display) will show the patches and multis that are (A) currently in VIP’s Patch Browser or (B) in a setlist. The currently selected one will be shaded grey in the upper-right part of the display. -
Page 20: Loading And Saving Daw Presets
Loading and Saving DAW Presets If you are not using VIP, Main Mode will show a list of presets that let you use Advance 61 to control your DAW. We’ve pre-mapped each so you can use Advance 61 to control your DAW in the most logical and intuitive way possible. -
Page 21: Editing Various Global Settings
Editing Various Global Settings Whether or not you are using VIP, you can change some of Advance 61’s global setings in Main Mode. To adjust global settings in Main Mode: 1. Use the Cursor Buttons to select any of the three fields in the lower-left corner of the display: •... -
Page 22: Setup Mode
Loading and Saving DAW Presets Setup Mode will show a list of presets that let you use Advance 61 to control your DAW. We’ve pre-mapped each so you can use Advance 61 to control your DAW in the most logical and intuitive way possible. -
Page 23: Editing Various Global Settings
4. Press the Data Dial. The preset is now saved. Editing Various Global Settings Whether or not you are using VIP, you can change some of Advance 61’s global setings in Setup Mode. To adjust global settings in Main Mode: 1. -
Page 24: Browser Mode
Browser Mode Browser Mode lets you browse and select patches of your plugins. You can access this mode only when using VIP. To navigate this mode: • Use the Cursors to move between different fields and tabs. • Use the Data Dial to scroll through the different lists. •... -
Page 25: Loading Patches
To deselect all tags in the currently shown category, use the Cursor Buttons to select X Category (in the lower-left corner of the display), and then press the Data Dial. To deselect all tags, use the Cursor Buttons to select X All (in the lower-left corner of the display), and then press the Data Dial. -
Page 26: Global Mode
Available Global Settings Below is a list of available global parameters. Advance 61 will send its messages over this MIDI channel. This is the same as the Common Channel MIDI Ch setting in Main Mode or Setup Mode. You can select any one of Channels A1–16 or B1–16. - Page 27 Note Repeat feature and Arpeggiator. The available range is 30–300 BPM. Tap Average This is the number of times you would need to press Tap Tempo for Advance 61 to detect and enter a new tempo. The available range is 2–4.
-
Page 28: Control Mode
Control Mode Control Mode shows you the current settings of Advance 61’s controls in VIP. You can access this mode only when using VIP. Orange/yellow controls are assigned to parameters in VIP. Green/aqua controls are assigned to MIDI CC messages, which are sent to your DAW. -
Page 29: Selecting Controls
Selecting Controls In Control Mode, you can select a control (A) to view its settings or (B) to edit it in Control Edit Mode. To select a control: 1. Select the type of control by pressing the Control mode button. Each time you press it, the display will show the next type of control: encoders, switches, and pads. -
Page 30: Control Edit Mode
Control Edit Mode Control Edit Mode lets you edit the parameters of your controls (minimum values, maximum values, CC or note numbers, etc.) for the current patch in VIP. You can access this mode only when using VIP. Orange/yellow controls are assigned to parameters in VIP. Green/aqua controls are assigned to MIDI CC messages, which are sent to your DAW. -
Page 31: Available Control Parameters
Available Control Parameters Below is a list of available parameters for each type of control. Encoders Type This determines whether the encoder controls a parameter for a plugin in VIP (VST Param; the encoders will be orange/yellow) or sends a MIDI CC message to your DAW (the encoders will be green/aqua). - Page 32 Switches Type This determines whether the switch controls a parameter for a plugin in VIP (VST Param) or sends a MIDI CC message to your DAW. Parameter or CC When Type is set to VST Param, this is the parameter for a plugin in VIP that is controlled by the switch.
- Page 33 Pads Important: In VIP, the pads’ parameters are global. In other words, the pads’ MIDI note and channel assignments are not associated with a specific plugin or patch. The pads’ colors will change depending on what bank is currently selected. This is the MIDI note that the pad will send when you press it.
-
Page 34: Midi Mode
MIDI Mode MIDI Mode shows you the current settings of Advance 61’s controls when used with your DAW. To navigate this mode: • Press Shift and the Control (MIDI) mode button to view each set of controls (encoders, switches, and pads). -
Page 35: Midi Edit Mode
MIDI Edit Mode MIDI Edit Mode lets you edit the parameters of your controls (minimum values, maximum values, CC or note numbers, etc.) when used with your DAW or external MIDI device. To navigate this mode: • Press Shift and the Control (MIDI) mode button to view each set of controls (encoders, switches, pads, footswitch, expression pedal, modulation wheel, and pitch-bend wheel). -
Page 36: Available Control Parameters
Available Control Parameters Below is a list of available parameters for each type of control. Encoders Type This determines whether the encoder sends a MIDI CC message or an increment/decrement message (Inc/Dec). When Type is set to MIDI CC, this is the MIDI CC number that the encoder controls. The available range is 0–127. - Page 37 Switches Type This determines whether the switch sends a MIDI CC message, Program Change message (Program Chn), or Program Bank message. When Type is set to CC, this is the MIDI CC number that the switch controls. The available range is 0–127. Program When Type is set to Program Chn or Program Bank, this is the Program number that the switch sends.
- Page 38 Pads Important: Remember that you can use the Page Left/Right buttons or the Pad Bank buttons to select the desired bank, which is shown in the upper-left corner of the display. This is the MIDI note that the pad will send when you press it. Note Tip: You can set whether this appears as a Name (e.g., C1, F#2, etc.) or a Number (e.g., 36, 66, etc.) in...
- Page 39 Footswitch Type This is the type of message that the footswitch will send when you press it. The footswitch can send a Sustain message, send a MIDI CC message, or act as a switch for Tap Tempo, Play, Record, Stop, Play/Stop, or Arp On/Off. Mode When Type is set to Sustain or MIDI CC, this determines whether the footswitch’s operation is Toggle or Momentary:...
- Page 40 Modulation Wheel MIDI Channel This is the MIDI channel over which the modulation wheel will send its MIDI message when you turn it. You can select the Common Channel (Common:##) or any one of Channels A1–16 or B1–16. When Type is set to MIDI CC, this is the MIDI CC number that the modulation wheel controls.
-
Page 41: Multi Mode
Multi Mode About Multis Multi Mode lets you use your Advance 61 to control a multi in VIP. A multi is collection of 2–8 patches (from 1 or more plugins). Each patch is assigned to a slot, and each slot has an assigned color. When using a multi, you can simultaneously control volume, panning, solos, and mutes for each slot in a mixer-style interface. -
Page 42: Adjusting Multi Slots
Adjusting Multi Slots Use the following Advance 61 controls to adjust the volume, panning, solos, and mutes for each slot in a multi. The 8 slots correspond to the 8 encoders, switches, and pads. • To solo a slot, press its switch. The S button will light up in the display and its pad will flash. -
Page 43: Multi Edit Mode
Multi Edit Mode Multi Edit Mode lets you edit the various settings of each slot when using Advance 61 (keyboard range, transposition, MIDI channel, and mute or solo status). To navigate this mode: • Use the Cursors to select the parameter you want to edit. -
Page 44: Available Multi Slot Parameters
This also is useful for creating different regions on your Advance 61 to play specific patches only. For instance, you could assign 5 non- overlapping, 2-octave regions of the keyboard to play 5 different patches. -
Page 45: Timing Functions
You can use Global Mode to customize the Tap Tempo button’s operation. Use Tap Average to set the number of times you would need to press Tap Tempo for Advance 61 to detect and enter a new tempo. Use Tempo LED to turn the button’s light On or Off. -
Page 46: Arpeggiator
Note Repeat While Advance 61’s Note Repeat feature is active, striking a pad causes its note to retrigger at a rate based on the current tempo and time division settings. You can sync Note Repeat to an internal or external MIDI Clock source. -
Page 47: Technical Specifications
Specifications are subject to change without notice. Trademarks and Licenses Akai Professional is a trademark of inMusic Brands, Inc., registered in the U.S. and other countries. Portions of the Advance 61 software are Copyright ©2014 The FreeType Project (freetype.org). All rights reserved. - Page 48 akaipro.com Manual Version 1.0...
Need help?
Do you have a question about the Advance 61 and is the answer not in the manual?
Questions and answers