Akai MPK 25 Service Manual
Hide thumbs
Also See for MPK 25:
- Quick start manual (76 pages) ,
- Operator's manual (46 pages) ,
- Manual (25 pages)
Advertisement
Quick Links
SERVICE MANUAL
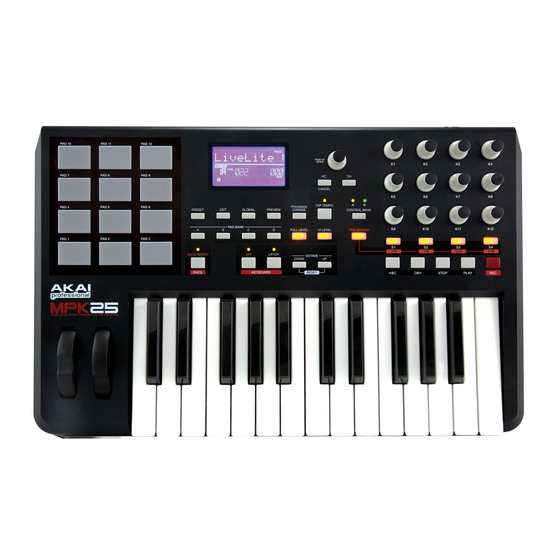
GENERAL
Display
Dimensions (WxDxH)
Weight
Power
Number of Presets
MIDI output channels over USB
MIDI output channels from 5-pin MIDI
Keyboard
Drum pads
Drum pad banks
360 degree knobs
Switches
Accessories
INPUTS/OUTPUTS
MIDI inputs
MIDI outputs
USB
DC IN
SPECIFICATIONS
custom LCD w/ backlight
477 mm x 359 mm x 88 mm
3.4 kg
~100mA, 5V DC via USB
~1A, 6V DC via external adaptor
30
48 (16 channels x 3 ports)
16
25 Semi-Weighted keyboard (velocity
and channel pressure sensitive)
12 (velocity and pressure sensitive)
4
12
4
User's manual
USB cable (1m)
CD-ROM disc
5-pin DIN x 1
5-pin DIN x 1
Slave connector x 1 (MIDI over USB)
6V DC, 1A
MODEL:
MPK 25
Advertisement

Subscribe to Our Youtube Channel
Related Manuals for Akai MPK 25


Summary of Contents for Akai MPK 25
- Page 1 SERVICE MANUAL MODEL: MPK 25 SPECIFICATIONS GENERAL Display custom LCD w/ backlight Dimensions (WxDxH) 477 mm x 359 mm x 88 mm Weight 3.4 kg Power ~100mA, 5V DC via USB ~1A, 6V DC via external adaptor Number of Presets...
-
Page 2: Disassembly Procedures
DISASSEMBLY PROCEDURES 1. DISASSEMBLE THE CABINET (Fig1) (A) REMOVE 14 SCREWS FROM BOTTOM PANEL. (Fig1) 2. DISASSEMBLE THE TOP PANEL AND MAIN PCB ASS’Y. (Fig2) (A) REMOVE 13 KNOBS (B) REMOVE 4 NUTS AND 4 WASHERS (C)(D)(E)(F) REMOVE 4 CABLES. (G) REMOVE 3 SCREWS (Fig.2) - Page 3 3.DISASSEMBLE THE TOP PANEL PCB ASS’Y. (Fig.3) (A) REMOVE 1 CABLE (B) REMOVE 13 SCREWS (Fig.3) 4.DISASSEMBLE THE LCM ASS’Y. (Fig.4) (A) REMOVE 4 SCREWS. (Fig.4)
- Page 7 MPK25 DESCRIPTION LEVEL BAAMB-10S FLEXIBLE BUSHING 50x1.0MM BAGL-55A CABLE CLIP 55L BAS-MS-RR3NNS PAD SENSOR CN0100000503 Flat Cable GND Wire Black Leng CN0100001101 Flat Cable GND Wire Black Le EVA1304408 FOAM EVA STRIP 71x4x1.5t mm SA EVA1504405 FOAM EVA STRIP 75x61x1.0t mm SA FFC1810001201 FFC 18PIN PITCH:1.0MM LENGTH:1 FFC2210002001...
- Page 8 SC0310RBBI SCREW M3x10MM PRB TAPPING SC0408PBBI SCREW M4x8MM PPB TAPPING TWBAEP250-W-AF ASS'Y KEYBED TAHORNG 25-KEY BAEP250-W-AF KEYBED TAHORNG 25-KEY WITH AFTERTOUCH EP-250 BAFAM-25A FLAT CABLE CLAMP CN0225404501 CONNECTOR 2P SOCKET 450MM CN1625405001 Flat Cable Type 8Px2 Pitch 2. TWPT151062001 ASS'Y KNOB PT1510620 KNOB AD24,COOL GRAY 4C PT1510621...
- Page 9 CS220J5003NPO CCAP SMD 22pF/50V 5% 0603 NPO C58,59 DIEN1N4148WSM DIODE SMD EC10716S ELECTRIC CAPACITOR ECS47525BP ELECT CAP 4.7UF/25V C1,22,23,38 FCN2S1002201 FCN DUAL TOUCH 180° PITCH=1.0 FCN2S1002601 FCN DUAL TOUCH 180° PITCH=1.0 ICYH97M07 IC(ICLCMX0640C) ICLCMXO640C IC LCMXO640C-3TN100C (U7) ICYH97M08 IC(AL2-70-3433) AL2-70-3433 IC UPSD3433EV-40U6 (U6) ICYHFRM06...
- Page 10 IC74AC574PW IC74AC574PW TSSOP-20 U2,4 ICCD74HC4067M IC C074HC4067M SOIC-24 U1,3 LD-LG2040 LED GREEN 3MM LED3 LD1030 LED GREEN LED1,2,11,12,13 PT111048009 FIXED BASE,LED 9MM (LED1,2,3,11,12,13) RS001208J05 RES 12 5% SMD 0805 RS10018J05 RES 10 5% SMD 0805 RS10310J03 RES 10K 5% SMD 0603 R6,9,17,19,35,48,49 RS10418J05 RES 100K 5% SMD 0805...
- Page 29 Date: 12/04/08 Purpose This current document describes the procedure for using the MPK 25 Test Program to perform a quality check of unit functionality. It does not describe any tests to be performed regarding physical or mechanical integrity. Required Materials...
- Page 30 Pots and Buttons that have not passed are in red. All items are assumed to have not passed until they have been explicitly tested. Onscreen instructions appear on the right of the screen. Please follow these instructions carefully. The instructions will advance automatically as each section of the test passes. If a section does not pass and the tester wishes to check another section, they may press the “Advance Test Sections”...
- Page 31 The tester is now instructed to: Next test the Pots Turn each knob slowly one at a time Remember to turn the encoder knob Move the Pitch and Modulation wheels Test the Expression and Sustain Pedals The encoders are looking for a full range of values. If having difficulty passing an encoder, please turn more slowly across the 127/0 crossing at 6’o clock on the dial.
- Page 32 The tester is now instructed to Next test the Keys Press the first key all the way down and up slowly Confirm AfterTouch goes to 127 and back to 0 Confirm AfterTouch has outlined in green Continue pressing all keys normally Confirm Velocity has full range The aftertouch is, touchy.
- Page 33 The tester is now instructed to Next test the Pads Press one pad at a time Confirm full AfterTouch and Velocity Range Aftertouch values are displayed by the aftertouch field under the keyboard. Please confirm a full range to 127. Velocity values are displayed on the top left of the screen as the Current Parameter.
- Page 34 The tester is now advised to Visually Confirm All LEDs are on If LED' s pass click LEDs Pass Visually Confirm all Display Chracaters are on If the Display passes click Display Pass You want the unit to look like this: Serialization If all the tests Passed then the big All Pass message will light green and the tester may serialize.
- Page 35 This unit has Passed To test another unit please close and restart Thank You for using the MPK25 Test Program Sun-kia ! Pêng-an ! You are done! Please restart the application after disconnecting the unit and before connecting a new unit to refresh the midi ports.
Need help?
Do you have a question about the MPK 25 and is the answer not in the manual?
Questions and answers