R82 cheetah User Manual
Hide thumbs
Also See for cheetah:
- User manual (42 pages) ,
- Mounting instruction (7 pages) ,
- Mounting instruction (6 pages)

Related Manuals for R82 cheetah


Summary of Contents for R82 cheetah
- Page 1 English user manual © 2010 R82 A/S. All rights reserved. The R82 logo and the Cheetah chairs are registered trademarks of R82 A/S. 05.2011 rev. 003...
-
Page 2: Table Of Contents
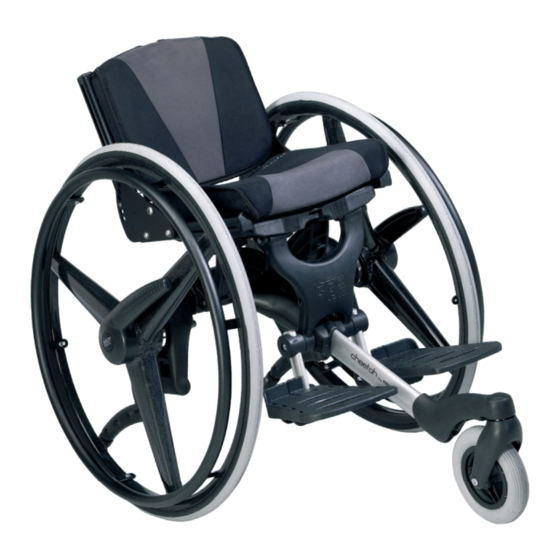
Side plates ............... 20 Mudguards............... 20 Arm rests ................. 21 Tray ................. 22 Conversion kit ..............23 Wheel combinations Cheetah 3-wheeler ......24 Wheel combinations Cheetah 4-wheeler ......25 Seat belt attachment............26 Fix locks ................26 Hip belt ................28 Y-hip strap ............... - Page 3 U.S. Patent No. US7,404,567 B2 CHEETAH In choosing the Cheetah, we are sure that you have got an active wheelchair, which will live up to any expectations one can have for a modern aid for children. Cheetah is an active wheelchair, developed for the active child who both wants to and can move around on its own.
-
Page 4: Safety
The Cheetah has earned the CE-mark. This certifies that it meets all relevant European safety requirements. Further the Cheetah is approved according to EN 12182 and EN 12183. This manual is approved according to ISO 7176-15 and EN 1041. The durability of this product is 5 years when it is used on a daily basis. Hereafter the product must be renovated (by R82 personnel) to extend the lifetime. -
Page 5: Warranty
Instructions about getting in and out of the wheelchair are given by R82 representatives when the Cheetah is purchased. Before placing the user into the Cheetah the brake has to be locked in place. Place the user into the Cheetah and adjust the accessories to achieve the optimal seating for the child. -
Page 6: Quick Release
QUICK RELEASE Cheetah is, as standard, supplied with remo- vable Quick Release push wheels, which means fast and easy dimounting of the wheels, when for example the wheelchair has to be transported. Quick Release driving wheels: Push and hold the release button (A) and pull out the wheel. -
Page 7: Foot Support
FOOT SUPPORT The Cheetah is delivered with foot supports mounted as standard. Loosen the screws (A) with the enclosed 6 mm Allen key to angle the foot plate. Angle the foot plates individually. The foot plates can be equipped with straps when needed (B). -
Page 8: Drum Brake
DRUM BRAKE The Cheetah, 3-wheels is as standard delivered with drum brake (A). The brake does not require any maintenance. Pull back the brake (B) to activate, and push forwards (C) to deactivate. Follow the instructions below to mount wheels with drum brake on the Cheetah 4-wheeler. -
Page 9: Hand Brake
HAND BRAKE The Cheetah, 4-wheels is delivered with a hand brake as standard. The brake is simple to use. Push the handle forwards (A) to activate and pull the handle back (B) to deactivate the brake. The hand brake is mounted in a fitting on the frame. -
Page 10: Seat And Back Angling
SEAT AND BACK ANGLING Seat ramp: The seat and back angles in one movement. Turn the handle (A) under the seat to adjust the exact position of the chair. Oil the turn handle (A) occationally. Angling the back: To adjust the angle, pull out the strap (B). The back will angle all the way down to the seat, which makes the chair take up minimum space, for instance, during transportation. -
Page 11: Back And Seat Width
BACK AND SEAT WIDTH The Cheetah has width adjustment in back and seat. 40 cm 36 cm * Loosen the 4 screws (A) with the enclosed 5 32 cm 28 cm mm Allen key to adjust the back width. * Loosen and dismount the 8 through-going screws (B) with the enclosed 5 mm Allen key to adjust the seat width. -
Page 12: Seat Depth And Back Height
SEAT DEPTH AND BACK HEIGHT If you need to adjust the width of the back or seat, please do this before you adjust the depth of the seat and height of the back (see the pre- vious page). Seat depth: * Loosen the 8 screws (A) with the enclosed 3 mm Allen key with ball end to adjust the seat depth. -
Page 13: Back Extension
BACK EXTENSION The Cheetah is designed ready to receive a back extension * The back extension is mounted in the fitting (A) on the back of the chair. Fasten when mounted. Use the enclosed fitting (B) when both the back extension and the helper's handle have to be mounted. -
Page 14: Seat Extension And Webbing
* Mount the webbing in the top groove of the rails (D) and secure as shown (E). * Remount the end pieces. Cheetah, seat width 32, 36 and 40 cm, are supplied including the seat extension. The seat and web extensions have to be adjusted when the seat depth is chan- ged. -
Page 15: Anti-Tip Device
The wheel- chair can tilt at some adjustments. Depending on the size of the wheels, the Cheetah is supplied with either short or long anti- tip. Follow the instructions below when changing the wheel position or size. The product codes for the anti-tip safety are listed under Accessories at the end of the manual. -
Page 16: Head Support And Helper's Handle
HEAD SUPPORT AND HELPER'S HANDLE The Cheetah is designed ready to receive head support and helper's handle. * The head support or the helper's handle is mounted in the fitting (A) on the back of the chair. Fasten when mounted. -
Page 17: Swing Away Side Supports
SWING AWAY SIDE SUPPORTS Swing away side supports can be mounted on the Cheetah. Follow the below instructions to mount the side supports correct: * Mount the fittings (A) for the side supports into the rails (B) and fasten at the required height. -
Page 18: Transfer Arm Rests And Side Plates
RESTS AND SIDE PLATES It is possible to mount transfer arm rests on the Cheetah. The transfer arm rests make it easier for the user to get in and out of the chair. Mount the transfer arm rests and the side plates in the rails in the back (A) and in the seat (B). -
Page 19: Pommel
POMMEL A pommel can be mounted on the Cheetah. * Mount the pommel in the seat or the seat extension and tighten under the seat (A). -
Page 20: Side Plates
The side plates can be dismounted easily from the bracket by lifting the side plate. MUDGUARDS Mudguards can be mounted on the Cheetah. Follow the instructions below to mount the mud- guards correctly: 1) Remove the end piece from the chair front (A) -
Page 21: Arm Rests
ARM RESTS Angle and height adjustable arm rests can be mounted on the Cheetah. The arm rests come in two sizes; 20 and 30 cm Follow the instructions below to mount the arm rests correctly: 1) Remove the end pieces at the top of the back... -
Page 22: Tray
TRAY The Cheetah tray will be delivered unassembled and can be used for all the sizes. Follow the instructions below to mount the tray correctly: 1) Remove the end pieces in front of the arm rests. 2) Mount the brackets on the tray top by using the screws and nuts enclosed (B). -
Page 23: Conversion Kit
CONVERSION KIT The Cheetah may be converted from a 3-wheel to a 4-wheel model. To ensure correct conver- sion, please follow the description below: 1. Remove the driving wheel and the anti-tip, where these are used. 2. Remove the bottom of the framework by loosening and removing the 15 screws. -
Page 24: Wheel Combinations Cheetah 3-Wheeler
WHEEL COMBINATIONS CHEETAH 3-WHEELER Changing the location of the driving wheel: 1. Remove the driving wheel. 2. Loosen the nut with a 24 mm open-end wrench. 3. Move the wheel sleeve to the position you want. Fasten the nut and install the driving wheel. -
Page 25: Wheel Combinations Cheetah 4-Wheeler
WHEEL COMBINATIONS CHEETAH 4-WHEELER Changing the location of the driving wheel: 1. Remove the driving wheel. 2. Loosen the nut with a 24 mm open-end wrench. 3. Move the wheel sleeve to the position you want. Fasten the nut and install the driving wheel. -
Page 26: Seat Belt Attachment
SEAT BELT ATTACHMENT * Mount the two belt fittings (A), for the seat belt, in the slots on the back side of the seat. * Mount the ends of the seat belt (B) in the fit- tings and fasten in the snap locks (C). * Secure the user in the wheelchair and fasten the seat belt using the buckle (D). - Page 27 Use this drawing together with the descriptions on the following pages.
-
Page 28: Hip Belt
HIP BELT Mount the fixlocks in the seat. See page 26. The hip belt can be opened and closed by using the buckles. Follow the instructions below, with help from page 27. * Mount the straps in the fixlocks (B). Take care that all the fixations and adjust- ments are placed and fitted correctly and check it on a regular basis. -
Page 29: Ankle Straps
ANKLE STRAPS The ankle straps can be opened and closed by using the velcro or the buckle (A). Follow the instructions below for mounting. * Remove the buckles (C). * Pull the straps (B) through the slides in the foot plates. * Mount the buckles (C) again and make sure the straps do not slide off. -
Page 30: Transportation
* Fold the back forward (C) (see the page con- cerning seat and back angle) * Lift the Cheetah safely, for instance into a car, by grapping around the seat unit (D). Do not lift the Cheetah at the wheels. -
Page 31: Transportation In Motor Vehicles 1/2
TRANSPORTATION IN MOTOR VEHICLES 1/2 The Cheetah wheelchair is approved for trans- porting people in motor vehicles, when the wheelchair is placed in forward-facing position. The approval is not valid on special made Restraints should not chairs. be held away from... -
Page 32: Transportation In Motor Vehicles 2/2
Use a hip-belt and a 3-point belt approved according to ISO 10542-1 or SAE J2249. 30° When transporting children by car, the Cheetah wheel chair is approved for a max. 75° load / user weight of 57 kg... -
Page 33: Product Identification
PRODUCT IDENTIFICATION A) Serial number The label is placed on the right side under the seat. B) Manufacturer The label is placed on the left side under the seat. Dato: 31-01-02 Belast: kg 0840-01-111878-001 Varenr: 880003 5707292 134158 Parallelvej 3 DK-8751 Gedved... -
Page 34: Measurements
Camber The Cheetah is measured according to ISO 7176-5 and 7176-7 with the following wheel combination: 24” rear wheel and 6” front wheel. We supply various types of driving wheels, which is why the weight is listed without the driving wheels. Different settings than described in the standard, may... -
Page 35: Technical Data
TECHNICAL DATA Frame: Powder lacquered aluminium pipes Cushions: Fire resistant foam Cover: Fire resistant microfibre material Plastic parts: PA6 PRODUCER R82 A/S Parallelvej 3 8751 Gedved Denmark DISTRIBUTOR Please find your distributor on www.R82.com... -
Page 36: Care And Maintenance
Accessories or available spare parts which are broken can be forwarded to R82 for repair. If fault in the fundamental parts, the hole chair need to be returned to R82 for repair. R82 will not be held responsible for damage or injury caused by use of non-original parts or repairs made by... -
Page 37: Stain Removal Guide
STAIN REMOVAL GUIDE BLOOD Was off blood with cold water. If this fails to help, add a neutral kitchen detergent. Remove as much as possible with absorbent paper. Clean with 20% denatured alcohol and wash with water to which a neutral kitchen detergent has been added. CHOCOLATE AND CONFETIONARY Dab with lukewarm water GRASS AND VEGETABLES... -
Page 38: Troubleshooting
TROUBLESHOOTING Problem* Solution Wheelchair will not hold a - Inflate the tyres straight course - Check the front fork attachments angle - Check that the front fork attachments are mounted at the same height - Rear wheel mountings are incorrectly fitted - The user is distributing weight unevenly - More strength being used on one side than the other when propel- lning the chair...
Need help?
Do you have a question about the cheetah and is the answer not in the manual?
Questions and answers