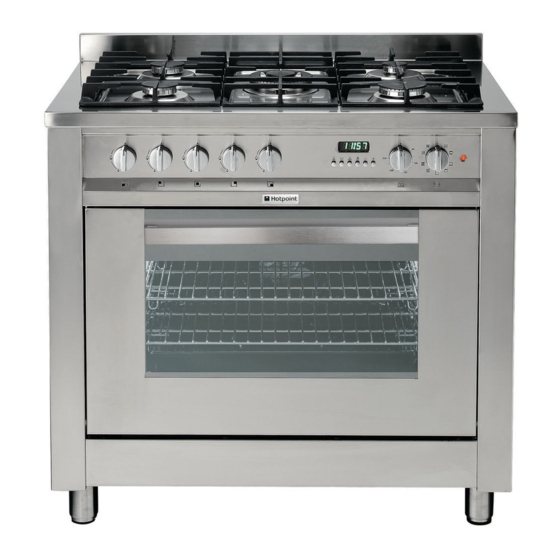
Hotpoint EG 900 X S Operating Instructions Manual
Dual fuel cooker
Hide thumbs
Also See for EG 900 X S:
- Instructions for installation and use manual (20 pages) ,
- Operating instructions manual (16 pages) ,
- Operating instructions manual (16 pages)
Summary of Contents for Hotpoint EG 900 X S
-
Page 1: Table Of Contents
EG 900 X S English Operating Instructions DUAL FUEL COOKER Contents Operating Instructions,1 Warnings,2 Description of the appliance,3 Installation,4 Start-up and use,8 The Cooking Modes:,9 Timer (Electric oven),10 Troubleshooting,11 Precautions and tips,13 Maintenance and care,14 After Sales Service,15 Guarantee,16... -
Page 2: Warnings
Warnings stop is directed upwards and in the back of the cavity. WARNING: The appliance and its accessible parts become hot during use. Care should be taken to avoid touching heating elements. Children less than 8 years of age shall be kept away unless continuously supervised. -
Page 3: Description Of The Appliance,3
Description of the appliance Overall view 1 AUXLIARY gas burner 2 SEMI-RAPID gas burner 3 RAPID gas burner 4 TRIPLE RING gas burner 5 PAN SUPPORT FOR COOKWARE 6 SAFETY DEVICE - Activates if the flame accidentally goes out (spills, drafts, etc.), interrupting the supply of gas to the burner. -
Page 4: Installation
Installation LPG cylinders, therefore, whether partially or completely full, must not be installed or stored in rooms or storage areas which are below ground level (cellars, etc.). Only the cylinder being used should be stored in the room; ! Before placing your new appliance into operation please read these operating this should also be kept well away from sources of heat (ovens, chimneys, instructions carefully. -
Page 5: Adapting To Different Types Of Gas
Once the connection has been performed, make sure that the hose: 3. While the burner is alight, quickly change the position of the knob from • Does not come into contact with any parts which reach temperatures of minimum to maximum and vice versa several times, checking that the flame over 50°C. - Page 6 TABLE OF CHARACTERISTICS Oven dimensions 32,9 x 59,5 x 39,4 cm HxLxP Volume lt. 78 Voltage and 230V-240V~ 50Hz (see data plate) frequency Power supply Max 2850-3100 W EU Directive no 65/2014 supplementing Directive 2010/30/EU. EU Regulation no 66/2014 implementing Directive 2009/125/EC. Standard EN 60350-1, Connecting the supply cable to the mains Energy...
- Page 7 Table of burner and nozzle specifications Table 1 Liquid Gas Natural Gas BURNER Diameter Thermal power By-Pass Nozzle Flow* Nozzle Flow* (mm) kW ( H.s.* ) 1/100 1/100 1/100 Nomin. Reduc. (mm) (mm) (mm) Rapid (R) 3,00 0,70 Semi Rapid (S) 1,65 0,40 Auxiliary (A)
-
Page 8: Start-Up And Use
Start-up and use Using the oven WARNING ! The oven is provided with a stop system to extract the Using the hob racks and prevent them from coming out of the oven (1). Lighting the burners As shown in the drawing, to extract For each BURNER knob there is a complete ring showing the strength of the them completely, simply lift the racks, flame for the relevant burner. -
Page 9: The Cooking Modes
The Cooking Modes: This mode is especially suited for cooking fish, which can be prepared with the addition of a limited amount of condiment, thus maintaining their flavour and appearance. CONVECTION Position the temperature selector “ ” between 50°C and 250°C. BAKING The top and bottom heating elements are used. -
Page 10: Timer (Electric Oven),10
Timer (Electric oven) have been preset to operate in automatic mode. At this point, the oven will turn on automatically at 12:30 in order to finish the cooking session within 30 minutes. When the oven is on, the symbol (cooking pot) will appear on The programmer makes it possible to preset the oven and the grill in terms of: •... -
Page 11: Troubleshooting
If, despite all of these checks, the cooker does not function properly and Check to make sure that: problem persists, call Hotpoint “After Sales Service” (see back page). • The gas holes on the burner are not clogged; • All the removable parts that make up the burner are mounted correctly;... - Page 12 FAN ASSISTED cooking Guide rail no. Quantity Temperature Time Type of dish from bottom °C (minutes) Cakes * With beaten mix, in mould 1-3-4 * With beaten mix, without mould Short pastry, flan base 1-3-4 Short pastry with wet filling Short pastry with dry filling 1-3-4 * With natural leavened mix...
-
Page 13: Precautions And Tips
Precautions and tips Disposal • When disposing of packaging material: observe local legislation so that the packaging may be reused. ! This appliance has been designed and manufactured in compliance with • The European Directive 2012/19/EU on Waste Electrical and international safety standards. -
Page 14: Maintenance And Care
Maintenance and care Hob: • The removable parts of the burners on the hob should be washed frequently with warm water and soap, making sure to remove any caked- Important: The appliance should be disconnected from the mains on substances. Check that the gas outlet slits are not clogged. Dry the supply before starting cleaning operations. -
Page 15: After Sales Service
After Sales Service No one is better placed to care for your Hotpoint appliance during the course of its working life than us – the manufacturer. Essential Contact Information Hotpoint Service We are the largest service team in the country offering you access to 400 skilled telephone advisors and 1000 fully qualified engineers on call to ensure you receive fast, reliable, local service. -
Page 16: Guarantee
5 Year Parts Guarantee Hotpoint also offers you a free 5 year parts guarantee. This additional guarantee is conditional on you registering your appliance with us and the parts being fitted by one of our authorised engineers. There will be a charge for our engineer’s time.


Need help?
Do you have a question about the EG 900 X S and is the answer not in the manual?
Questions and answers