Table of Contents
Advertisement
Quick Links
Advertisement
Table of Contents

Related Manuals for DOD RX8W


Summary of Contents for DOD RX8W
- Page 1 USER MANUAL...
- Page 2 Copyright 2014 DOD Tech All Rights Reserved...
-
Page 3: Table Of Contents
Camera Modes ....................12 Video Recording Mode ................12 Photo Mode .....................13 ..................14 Playback Mode Camera Settings ....................15 Video Recording Settings ................15 ..................18 Photo Settings Video Playback Settings ................19 Transferring Files ...................20 Video Output ....................20 DOD Video Player ..................21 ...................22 Firmware Update... -
Page 4: Safety Precautions
Use only the power adapter supplied with your unit. Other power adapters may create a safety hazard or damage the unit. Do not use damaged power adapters or cards. If damaged, disconnect the power adapter and contact DOD Tech Support for assistance. -
Page 5: Package Contents
Package Contents DOD RX8W Dash Camera User manual Power Adapter * Supplied accessories may vary by region. -
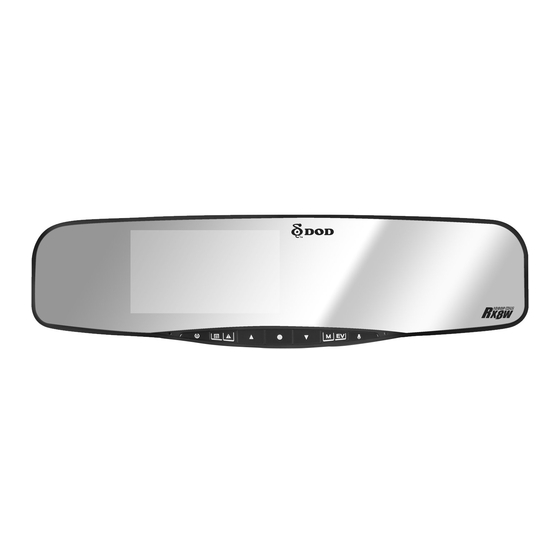
Page 6: Camera Controls
Camera Controls 5 6 7... - Page 7 Camera Controls Power Button [ Mute Button [ Turn on/off the unit. LED Notification Light Menu/SOS Emergency File Lock [ LCD Screen Access the settings menu. USB Port Press while recording videos to lock the MicroSD Slot current file from being overwritten. HD OUT Port Arrow Keys [ ] , [...
-
Page 8: Getting Started
Micro SD * Note: Please purchase a microSD card for use with this unit 2. Connect the Power Adapter Plug the DOD power adapter into your vehicle's power outlet and insert the USB plug into the USB port. USB Port... - Page 9 Getting Started 3. Turn On Your Vehicle. In most vehicles this will send power to the outlet and automatically turn on your camera. In some vehicles the power outlet is continously powered even when the vehicle is off. 4. Select language Upon powering up the camera for the first time, use the arrow keys located on the left side of the LCD Screen and select the language of your choice.
- Page 10 Getting Started 6. Set the Time zone Your RX8W will automatically sync the time and date to the atomic clock once the time zone is correctly set. Press the Menu button [ ]. Inside, scroll down and select “World Time Zone”.
-
Page 11: Installing Your Camera
Installing Your Camera 1. Clean Windshield Wipe down both the interior and exterior glass for the best image quality and to keep the mount secured to the windshield. - Page 12 Installing Your Camera 2. Insert SD card Please insert Micro SD card to the unit, and fix the unit on the vehicle's rearview mirror with the mounting straps. 3. Adjust the Angle Adjust the camera lens to the best angel, which do not blocked by the rearview mirror.
-
Page 13: Basic Camera Operation
Basic Camera Operation Everyday Operation Your dash camera will automatically turn on and start recording when it starts receiving power. The camera will record over the oldest videos when the memory card is full (looped recording) by default. Continuously Powered Electrical Outlet If your electrical outlet is always powered, the adapter must be manually removed to shut down the camera. -
Page 14: Camera Modes
Camera Modes When the camera is not recording video, you can switch between three modes by pressing the mode button [ 1. Video Recording 2. Photo 3. Video Playback. Video Recording Mode The camera defaults to video recording when the camera is first turned on. Video Resolution Loop recording length Video Recording mode Icon... -
Page 15: Photo Mode
Camera Modes LED Light Notification Steady Blue – Powered off and is charging Steady Pink – Powering up while charging or is in playback mode Steady Red – In Standby Mode Flashing Red – Recording video, not charging Flashing Blue and Pink – Recording video and charging Video Recording Shortcuts Muting the Microphone Press the microphone button [... -
Page 16: Playback Mode
Camera Modes Playback Mode In Playback mode you can watch previously recorded videos. Playback Made Icon Video File Name Video Resolution Power Connected Play/Pause Indicator Selecting a Video Use the arrow keys[ ]to navigate between videos. How to Watch a Video Press the record/select button [ ]to play and pause. -
Page 17: Camera Settings
Camera Settings Each mode has a unique set of settings. See the description below. Video Recording Settings There are two settings pages. Access the second page by pressing the menu button ] twice. If you move the cursor before pressing the menu button, you must exit and try again. - Page 18 Camera Settings G-Sensor Speed Units The G-Sensor measures shock forces. The settings Select Metric or Imperial units. from “low to high” determine the amount of force Standby Speed Display needed to lock the file from being overwritten. After a customized period of time a new screen will Recommended Setting: Low appear showing speed and direction.
- Page 19 Shows the model name and current firmware version. Completely deletes all files including locked videos on on the memory card and optimizes the card for recording. 64GB cards should use DOD's formatting program for proper functionality. See the support section online.
-
Page 20: Photo Settings
Camera Settings Photo Settings Accessed in “Photo Mode” Anti-Shaking Image Size Helps reduce the effects of shaking when taking a Adjusts the size of the image. Higher megapixels photo. increses file size and details. Capture Mode Sets a timed delay before taking a photo. Changes the ISO settings. -
Page 21: Video Playback Settings
Camera Settings Video Playback Settings Accessed in “Playback Mode”. The settings apply only to the video being viewed and not all videos unless the “All” suffix is chosen. Delete Lock Deletes the file from the card. This cannot be Locks the current file from being overwritten or undone. -
Page 22: Transferring Files
Transferring Files Video files can be transferred to your electronic device for viewing and storage. USB Micro Cable 1. Connect a USB-Mini cable from the camera's usb port to your computer. 2. Turn on your camera. A black screen should appear showing “Mass Storage”. 3. -
Page 23: Dod Video Player
DOD Video Player The DOD Video Player is a user-friendly program to playback videos and to visualize your position and speed on your PC or Mac. Please see the “Transferring Files” section to find out how to view or transfer your video files. -
Page 24: Firmware Update
Once the video is playing, your position, speed and G-Forces will be indicated on the Pressing the “Location Map” Button will show your position on Google Maps Firmware Update See the support section on DOD-Tech's website for any available firmware updates and instructions... - Page 25 Note 1...
- Page 26 Note 2...
Need help?
Do you have a question about the RX8W and is the answer not in the manual?
Questions and answers