Table of Contents
Advertisement
Quick Links
Advertisement
Chapters
Table of Contents

Related Manuals for Canon LBP2900 series


Summary of Contents for Canon LBP2900 series
-
Page 1: Service Manual
Service Manual LBP3000/2900 Series LBP2900 Mar 10 2005... - Page 3 Canon will release technical information as the need arises. In the event of major changes in the contents of this manual over a long or short period, Canon will issue a new edition of this manual.
-
Page 4: Symbols Used
Introduction Symbols Used This documentation uses the following symbols to indicate special information: Symbol Description Indicates an item of a non-specific nature, possibly classified as Note, Caution, or Warning. Indicates an item requiring care to avoid electric shocks. Indicates an item requiring care to avoid combustion (fire). Indicates an item prohibiting disassembly to avoid electric shocks or problems. - Page 5 Introduction The following rules apply throughout this Service Manual: 1. Each chapter contains sections explaining the purpose of specific functions and the relationship between electrical and mechanical systems with reference to the timing of operation. Å@In the diagrams, represents the path of mechanical drive; where a signal name accompanies the symbol , the arrow indicates the direction of the electric signal.
-
Page 7: Table Of Contents
Contents Contents Chapter 1 PRODUCT DESCRIPTION 1.1 Features ..............................1- 1 1.1.1 Features .................................. 1- 1 1.2 Product Specifications ..........................1- 2 1.2.1 Machine Specifications............................1- 2 1.3 Name of Parts.............................1- 3 1.3.1 External View................................1- 3 1.3.2 Cross Section View ..............................1- 3 1.4 Using the Machine ............................1- 5 1.4.1 Control Panel................................ - Page 8 Contents 2.5 PICKUP AND FEEDING SYSTEM......................2- 14 2.5.1 Overview/Configuration............................2- 14 2.5.1.1 Outline....................................2- 14 2.5.2 Detecting Jams ..............................2- 14 2.5.2.1 Jam Detection Outline................................2- 14 2.5.2.2 Delay Jams .................................... 2- 15 2.5.2.3 Stationary Jams ..................................2- 15 2.5.2.4 Other Jams .................................... 2- 15 2.5.3 Multi-purpose Pickup .............................2- 15 2.5.3.1 Pickup from the Pickup Tray/Manual Feed Tray........................
- Page 9 Contents 3.1.9.1 Removing the Right Cover............................... 3- 8 3.1.10 Power supply board ............................... 3- 8 3.1.10.1 Removing the Right Cover ..............................3- 8 3.1.10.2 Removing the Left Cover ............................... 3- 9 3.1.10.3 Removing the Front Cover ..............................3- 9 3.1.10.4 Removing the Upper Cover..............................3- 10 3.1.10.5 Removing the Rear Cover..............................
- Page 10 Contents 3.5.2.1 Removing the Right Cover..............................3- 25 3.5.2.2 Removing the Left Cover ............................... 3- 25 3.5.2.3 Removing the Front Cover..............................3- 26 3.5.2.4 Removing the Upper Cover ..............................3- 26 3.5.2.5 Removing the Rear Cover ..............................3- 26 3.5.2.6 Removing the Power Supply PCB ............................3- 27 3.5.2.7 Removing the Fixing Assembly..............................
- Page 11 Contents 6.1.2 Motor ..................................6- 2 6.1.2.1 Motor......................................6- 2 6.1.3 Sensor ..................................6- 3 6.1.3.1 Sensor...................................... 6- 3 6.1.4 Switch ..................................6- 4 6.1.4.1 Switch ...................................... 6- 4 6.1.5 Lamps, Heaters, and Others ........................... 6- 5 6.1.5.1 Heater ...................................... 6- 5 6.1.6 PCBs ..................................
- Page 12 Contents...
-
Page 13: Chapter 1 Product Description
Chapter 1 PRODUCT DESCRIPTION... - Page 15 Contents Contents 1.1 Features ..................................1-1 1.1.1 Features ......................................1-1 1.2 Product Specifications..............................1-2 1.2.1 Machine Specifications ................................1-2 1.3 Name of Parts.................................1-3 1.3.1 External View ....................................1-3 1.3.2 Cross Section View..................................1-3 1.4 Using the Machine .................................1-5 1.4.1 Control Panel ....................................1-5 1.5 Safety .....................................1-6 1.5.1 Safety of Laser Light ...................................
-
Page 17: Features
Chapter 1 1.1 Features 1.1.1 Features 0009-2599 1. High-Speed, Compact Mono-Color Printer The machine’s body is compact in design perfectly suited for installation on a desk, and yet it is a mono-color printer capable of turning out as many as 12.0 prints (A4) every minute. -
Page 18: Product Specifications
Chapter 1 1.2 Product Specifications 1.2.1 Machine Specifications 0009-2729 Body installation method desktop page printer Photosensitive medium OPC drum Exposure method semiconductor laser Development method toner projection Transfer method roller transfer Separation method curvature separation Cassette pickup method pad separation (pickup from pickup tray) Multifeeder pickup method pad separation (pickup from manual feed tray) Drum cleaning method... -
Page 19: Name Of Parts
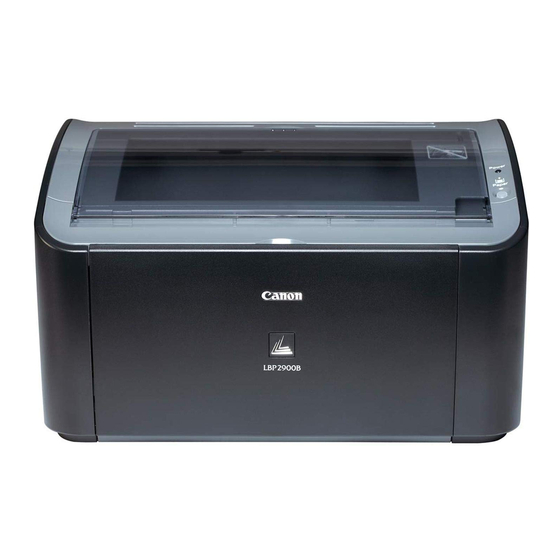
Chapter 1 1.3 Name of Parts 1.3.1 External View 0009-2753 F-1-1 T-1-1 [1] Rear cover [6] Left cover [2] Upper cover [7] Right cover [3] Delivery tray [4] Pickup tray [5] Front cover 1.3.2 Cross Section View 0007-6027 [1] [2] [3] [4] [5] [12] [11]... - Page 20 Chapter 1 T-1-2 [1] Photosensitive drum [8] Developing cylinder [2] Pressure roller [9] Pickup roller [3] Fixing film assembly [10] Separation pad [4] Delivery roller [11]Feed roller [5] Primary charging roller [12] Transfer charging roller [6] Toner cartridge [7] Laser scanner assembly...
-
Page 21: Using The Machine
Chapter 1 1.4 Using the Machine 1.4.1 Control Panel 0007-6034 F-1-3 The machine is equipped with 2 lamps and 1 control key: [1] Power Lamp ON: indicates that the machine is supplied with power. OFF: indicates that the machine is not supplied with power. [2] Paper Lamp flashing: indicates the absence of paper or the presence of a jam while a job is under way. -
Page 22: Safety
Chapter 1 1.5 Safety 1.5.1 Safety of Laser Light 0007-6035 Laser radiation could be hazardous to the human body. For this reason, laser radiation emitted inside this machine is hermetically sealed within the protective housing and external cover. No radiation can leaak from the machine in the normal operation of the product by the user. 1.5.2 Regulations Under the Center for Devices and Radiological Health (CDRH) 0007-6036 The CDRH of the US Food and Drug Administration put into effect regulations governing the sale of laser products in the US on August 2, 1976. -
Page 23: Chapter 2 Technical Reference
Chapter 2 TECHNICAL REFERENCE... - Page 25 Contents Contents 2.1 Functional Configuration ...............................2-1 2.1.1 Outline......................................2-1 2.2 Basic Sequense................................2-2 2.2.1 Basic Operation Sequence ................................2-2 2.2.2 Power-on sequence ..................................2-2 2.3 LASER EXPOSURE SYSTEM.............................2-3 2.3.1 Overview/Configuration ................................2-3 2.3.1.1 Overview .........................................2-3 2.3.2 Controlling the Laser Activation Timing............................. 2-3 2.3.2.1 Turning On/Off the Laser....................................2-3 2.3.2.2 Horizontal Synchronization Control ................................2-4 2.3.3 Laser Control ....................................
- Page 26 Contents 2.6.1 Power Supply ..................................... 2-17 2.6.1.1 Power Supply ........................................ 2-17 2.6.1.1.1 Low-Voltage Power Supply Circuit ..............................2-17 2.6.1.2 Protective Functions ..................................... 2-17 2.6.1.2.1 Protective Mechanisms ..................................2-17 2.7 ENGINE CONTROL SYSTEM ..........................2-19 2.7.1 Video Controller ..................................2-19 2.7.1.1 Overview........................................2-19 2.7.1.2 Outline of Operation by Block..................................
-
Page 27: Functional Configuration
Chapter 2 2.1 Functional Configuration 2.1.1 Outline 0007-6048 The functions of this printer can be divided into 6 blocks: the engine control system, laser exposure system, image formation system, pickup and feed system. fixing and delivery system, external and control system. Laser exposure system Image formation system Engine control... -
Page 28: Basic Sequense
Chapter 2 2.2 Basic Sequense 2.2.1 Basic Operation Sequence 0007-9885 The operation sequence of this printer is controller by the microprocessor (CPU) on the engine controller PCB. The following diagram shows the purposes of each periods from power ON until the main motor stops after the completion of printing. See the timing chart. T-2-1 Period Purpose... -
Page 29: Laser Exposure System
Chapter 2 2.3 LASER EXPOSURE SYSTEM 2.3.1 Overview/Configuration 2.3.1.1 Overview 0008-0084 The laser/scanner system serves to form images on the photosensitive drum according to the video signals coming from the video controller, and it consists of a laser driver PCB, scanner motor, and the like, which are housed inside an assembly as a single unit. The laser/scanner system is controlled by the DC controller. -
Page 30: Horizontal Synchronization Control
Chapter 2 Engine controller PCB Laser driver PCB Video controller PCB J904-8 J801-8 BD sensor /BDI IC902 (photodiode) (laser diode) J910-10 Laser driver IC CNT1 Comparator CNT0 Sample hold circuit Logic C803 circuit Drive circuit /VDO /VDO F-2-3 The engine controller is the source of video signals (VDO, /VDO) used for image formation. It is also the source of laser control signals (CNT0, CNT1) sent to the logic circuit inside the laser driver IC for switching over laser operation modes. -
Page 31: Laser Scanner Motor Control
Chapter 2 Note 1: The term "initial APC" refers to APC executed during initial rotation and in which the laser intensity is controlled by means of APC. Note 2: The term "interval APC" refers to APC executed during printing and in which the laser intensity is adjusted for a single line before the start of the line. 2.3.4 Laser Scanner Motor Control 2.3.4.1 Outline 0008-0095... -
Page 32: Image Formation System
Chapter 2 2.4 IMAGE FORMATION SYSTEM 2.4.1 Overview/Configuration 2.4.1.1 Construction 0008-0101 The image formation system is the core of the machine, and consists of a cartridge, transfer charging roller, and fixing assembly. When a print command arrives from the video controller, the engine controller drives the main motor in response, thus turning on the photosensitive drum, developing cylinder, primary charging roller, transfer charging roller, and pressure roller. -
Page 33: Latent Image Formation Block
Chapter 2 Paper delivery Electrostatic Drum cleaning 6.Fixng Fixing block latent image block formation block Drum cleaning 1.Primary charging 5.Separation Transfer block 4.Transfer 2.Laser beam exposure 3.Developing Pick-up Developing block Paper path Direction of drum rotation F-2-6 Latent Image Formation Block In this block, a latent static image is formed on the surface of the photosensitive drum. -
Page 34: Development Block
Chapter 2 In this step, the surface of the photosensitive drum is charged to a uniform negative potential by way of preparing it for the formation of a static image. The machine uses a method in which charges are directly applied to the surface of its photosensitive drum. The primary charging roller is made of conducting rubber, and is given an AC bias in addition to a DC bias to ensure that the surface potential of the photosensitive drum remains uniform. -
Page 35: Transfer Block
Chapter 2 F-2-10 step 3:Å@development This is where toner is put over the static image formed on the surface of the photosensitive drum. As shown in the figure, the developing assembly is made up of a developing cylinder (which in turn consists of a fixed magnet and a cylinder that rotates around it) and a rubber blade. -
Page 36: Fixing Block
Chapter 2 Photosensitive drum F-2-12 2.4.1.6 Fixing Block 0008-0107 The toner image moved to print paper in the transfer block is merely held to the print paper by the work of static charges, and can easily be disturbed by contact with a hand, for example. In this block, the print paper and the toner image are subjected to pressure and heat so that the toner will be fused with the fibers of the paper to form a permanent image. -
Page 37: Drum Cleaning Block
Chapter 2 2.4.1.7 Drum Cleaning Block 0008-0108 In this block, the machine uses a cleaning blade to remove the toner left behind on the surface of the photosensitive drum for collection to the waste toner case, thus cleaning the drum and making it ready for the next cycle. step 7:Å@drum cleaning In this step, the surface of the photosensitive drum is rid of residual toner for the next cycle of printing. -
Page 38: Generation Of The Primary Charging Bias
Chapter 2 Engine controller PCB Power supply PCB High-voltage power supply circuit IC902 Primary charging bias circuit IC301 PRPWM DC voltage J902-10 J201-14 generation circuit Primary charging roller J304 Combined PRAC IC301 IC301 AC voltage J902-9 J201-15 generation circuit Photosensitive drum J303 Developing bias circuit... -
Page 39: Toner Cartridge
Chapter 2 2.4.3 Toner Cartridge 2.4.3.1 Checking the Presence/Absence of a Toner Cartridge 0009-6874 The machine uses the paper width sensor (PS802) mound on its top of paper/paper width sensor PCB to detect the presence/absence of a toner cartridge. When the power is turned on or the upper cover is opened and closed, the toner cartridge detecting lever goes on in response to the insertion of a toner cartridge, causing the output of PS802 to change and, as a result, the machine to detect the presence of a cartridge. -
Page 40: Pickup And Feeding System
Chapter 2 2.5 PICKUP AND FEEDING SYSTEM 2.5.1 Overview/Configuration 2.5.1.1 Outline 0008-0146 The pickup/feed system serves to pick up and move print paper, and consists of the main motor, solenoid, and various rollers. The machine is designed to pick up paper from 2 sources: pickup tray and manual feed tray; delivery, on the other hand, must be to the face-down tray. The machine uses the same pickup roller to pick up paper, regardless of whether the paper is placed in the pickup tray or the manual feed tray. -
Page 41: Delay Jams
Chapter 2 F-2-18 The machine checks for a jam with reference to the presence/absence of paper at a specific sensor at such times as programmed in advance. When the CPU detects a jam, it will suspend the ongoing printing operation and communicate the fact to the video controller. 2.5.2.2 Delay Jams 2.5.2.2.1 Pickup Delay Jam 0008-0153... - Page 42 Chapter 2 up from the source. If paper is found in both trays, the machine uses the manual feed tray as the source of paper. The machine operates as follows to pick up paper from the pickup tray/manual feed tray: 1.
-
Page 43: External And Controls System
Chapter 2 2.6 EXTERNAL AND CONTROLS SYSTEM 2.6.1 Power Supply 2.6.1.1 Power Supply 2.6.1.1.1 Low-Voltage Power Supply Circuit 0008-0490 The low-voltage power supply circuit serves to convert the AC power from the power inlet into DC power for supply to various loads. The AC power is supplied to the low-voltage power supply circuit on the power supply PCB when the power switch (SW101) is turned on. - Page 44 Chapter 2 2-18...
-
Page 45: Engine Control System
Chapter 2 2.7 ENGINE CONTROL SYSTEM 2.7.1 Video Controller 2.7.1.1 Overview 0008-0510 The video controller receives print information from an external device (e.g., host computer) through an interface cable. The print information includes the CAPT command used to communicate printer status and unique information and dot data, which is the result of conversion of resource type print data by the host computer. -
Page 46: Engine Controller
Chapter 2 F-2-21 2.7.2 Engine Controller 2.7.2.1 Outline 0008-0558 The engine controller circuit is used to control the sequence of operation of the machine, and it operates under the control of the CPU found in the engine controller. When the machine is turned on and the power supply supplies the engine controller with DC power, the CPU starts to control the operation of the printer. When the machine is in a standby state, the CPU then drives the various loads (e.g., laser diode, motor, solenoid) according to the print command coming from the video controller. -
Page 47: Fixing Unit/Delivery System
Chapter 2 2.8 FIXING UNIT/DELIVERY SYSTEM 2.8.1 Overview/Configuration 2.8.1.1 Overview 0008-0451 The fixing/delivery system consists of the fixing film unit, pressure roller, face-down delivery roller, and the like. Its rollers are driven by the main motor (M1). When print paper carrying a toner image arrives in the fixing assembly, the machine uses the heat from the fixing heater and the pressure from the pressure roller to permanently fuse the toner with the fibers of the print paper before it moves out of the fixing assembly. -
Page 48: Various Control Mechanisms
Chapter 2 Pressure roller Fixing film unit Fixing heater Temperature fuse (TP1) Main thermistor (TH1) Fixing unit F-2-24 T-2-4 Heater: There is a single heater (fixing heater; H1) used to heat the fixing film (ceramic heater). Thermistor: There is a single thermistor (main thermistor; TH1) used for the control of the temperature of the fixing heater (non-contact thermistor). - Page 49 Chapter 2 Power supply PCB Engine controller PCB FSRD Fixing control circuit J201-19 J902-5 Power Fixing heater safety circuit Fuse switch (FU101) (SW101) +24V +3.3V Relay (RL101) SSR101 IC902 +24V Q102 Q103 FSRTH IC501 Fixing heater drive circuit J201-20 J902-4 J303-3 J303-1 Q104...
-
Page 50: Protective Functions
Chapter 2 The term "long narrow paper" refers to a type of paper that is narrow in width and long in length. 2.8.2.2 Protective Functions 2.8.2.2.1 Protective Mechanisms 0008-0380 The machine is equipped with a protective mechanism in which the power to the heater is cut off upon detection of overheating of the fixing heater; the mechanism used may be any of the following 3: 1. -
Page 51: Chapter 3 Disassembly And Assembly
Chapter 3 DISASSEMBLY AND ASSEMBLY... - Page 53 Contents Contents 3.1 EXTERNAL AND CONTROLS SYSTEM ........................3-1 3.1.1 Rear Cover ....................................3-1 3.1.1.1 Removing the Right Cover....................................3-1 3.1.1.2 Removing the Left Cover....................................3-1 3.1.1.3 Removing the Front Cover....................................3-1 3.1.1.4 Removing the Upper Cover ....................................3-2 3.1.2 Right Cover ....................................3-2 3.1.2.1 Removing the Right Cover....................................3-2 3.1.3 Left Cover ....................................
- Page 54 Contents 3.4 PICKUP AND FEEDING SYSTEM .......................... 3-17 3.4.1 Pickup Unit ....................................3-17 3.4.1.1 Removing the Transfer Charging Roller ..............................3-17 3.4.1.2 Removing the Right Cover ................................... 3-17 3.4.1.3 Removing the Left Cover ..................................... 3-17 3.4.1.4 Removing the Front Cover ................................... 3-18 3.4.1.5 Removing the Upper Cover ..................................
-
Page 55: External And Controls System
Chapter 3 3.1 EXTERNAL AND CONTROLS SYSTEM 3.1.1 Rear Cover 3.1.1.1 Removing the Right Cover 0008-3537 1) Open the delivery tray [1]. 2) Open the upper cover [2]. 3) Remove the screw [3]. 4) Remove the 4 claws [4], and slide the right cover [5] in the direction of the arrow. -
Page 56: Removing The Upper Cover
Chapter 3 3.1.1.4 Removing the Upper Cover 0008-3540 1) Free the link stop [2] from the door link [1]. 2) Remove the 2 screws [3]. Bad position Good position F-3-8 F-3-6 3.1.2 Right Cover 3) Slide the upper cover [1] in the direction of the arrow. 4) Remove the 2 claws [2] of the upper cover, and detach the cover. -
Page 57: Left Cover
Chapter 3 3.1.4 Upper Cover 3.1.4.1 Removing the Right Cover 0008-3533 1) Open the delivery tray [1]. 2) Open the upper cover [2]. 3) Remove the screw [3]. 4) Remove the 4 claws [4], and slide the right cover [5] in the direction of the arrow. -
Page 58: Removing The
Chapter 3 3.1.4.4 Removing the Upper Cover 0008-0971 1) Free the link stop [2] from the door link [1]. 2) Remove the 2 screws [3]. F-3-15 5) Remove the 3 claws [1], and slide the left cover [2] in the direction of the arrow to detach. -
Page 59: Front Cover
Chapter 3 F-3-22 3.1.5.2 Removing the Left Cover 0008-3532 Bad position Good position 1) Open the delivery tray [1]. 2) Open the upper cover [2]. F-3-20 3) Remove the screw [3]. 4) Remove the 4 claws [4], and slide the left cover [5] in the direction of 3.1.5 Front Cover the arrow. -
Page 60: Removing The
Chapter 3 3.1.5.3 Removing the Front Cover 0008-0967 1) Remove the 2 claws [1]. 2) Slide the front cover [2] in the direction of the arrow to detach. F-3-27 3.1.8 Engine controller board 3.1.8.1 Removing the Right Cover 0008-3542 1) Open the delivery tray [1]. F-3-25 2) Open the upper cover [2]. -
Page 61: Removing The Left Cover
Chapter 3 3.1.8.2 Removing the Left Cover 0008-3543 1) Open the delivery tray [1]. 2) Open the upper cover [2]. 3) Remove the screw [3]. 4) Remove the 4 claws [4], and slide the left cover [5] in the direction of the arrow. -
Page 62: Video Controller Board
Chapter 3 F-3-35 7) Disconnect the cable connector [1] found on the right side of the machine; then, detach the full flat cable [2]. F-3-38 5) Remove the 3 claws [1], and slide the right cover [2] in the direction of the arrow to detach. -
Page 63: Removing The Left Cover
Chapter 3 F-3-42 F-3-40 5) Remove the 3 claws [1], and slide the left cover [2] in the direction of the arrow to detach. 5) Remove the 3 claws [1], and slide the right cover [2] in the direction of the arrow to detach. F-3-43 F-3-41 3.1.10.3 Removing the Front Cover... -
Page 64: Removing The Upper Cover
Chapter 3 3.1.10.4 Removing the Upper Cover 0008-3574 1) Free the link stop [2] from the door link [1]. 2) Remove the 2 screws [3]. Bad position Good position F-3-47 F-3-45 3.1.10.5 Removing the Rear Cover 3) Slide the upper cover [1] in the direction of the arrow. 4) Remove the 2 claws [2] of the upper cover, and detach the cover. -
Page 65: Top Sensor
Chapter 3 F-3-52 3.1.11.2 Removing the Left Cover F-3-50 3.1.11 Top sensor 0008-3577 1) Open the delivery tray [1]. 2) Open the upper cover [2]. 3.1.11.1 Removing the Right Cover 3) Remove the screw [3]. 4) Remove the 4 claws [4], and slide the left cover [5] in the direction of 0008-3576 the arrow. -
Page 66: Removing The
Chapter 3 3.1.11.3 Removing the Front Cover 0008-3578 1) Remove the 2 claws [1]. 2) Slide the front cover [2] in the direction of the arrow to detach. F-3-55 F-3-57 3.1.11.4 Removing the Upper Cover 0008-3579 When mounting the upper cover, be sure to fit the 2 hooks [2] used to 1) Free the link stop [2] from the door link [1]. -
Page 67: Removing The Paper Leading Edge/Paper Width Sensor Pcb
Chapter 3 3.1.11.6 Removing the Paper Leading Edge/Paper Width Sensor PCB 0008-1122 1) Disconnect the connector [1], and free the harness [3] from the harness guide [2]. F-3-60 2) Remove the 2 screws [1], and detach the rear plate [2]. F-3-61 3) Remove the 2 claws [1], and detach the paper leading edge/paper width sensor PCB [2]. -
Page 68: Laser Exposure System
Chapter 3 3.2 LASER EXPOSURE SYSTEM 3.2.1 Laser Scanner Unit 3.2.1.1 Removing the Right Cover 0008-3548 1) Open the delivery tray [1]. 2) Open the upper cover [2]. 3) Remove the screw [3]. 4) Remove the 4 claws [4], and slide the right cover [5] in the direction of the arrow. -
Page 69: Removing The Engine Controller Pcb
Chapter 3 3.2.1.4 Removing the Engine Controller PCB 0008-3551 1) Remove the 4 screws [1]. F-3-68 F-3-71 2) Remove the 2 claws [1], and detach the scanner cover [2]. 8) Disconnect the connector [1], and detach the engine controller PCB [2]. -
Page 70: Image Formation System
Chapter 3 3.3 IMAGE FORMATION SYSTEM 3.3.1 Transfer Charging Roller 3.3.1.1 Removing the Transfer Charging Roller 0008-1071 1) Open the delivery tray. 2) Open the upper cover. 3) Remove the 2 claws [1] of the transfer charging roller. 4) Remove the 2 claws [2] of the transfer guide. 5) Detach the transfer charging roller [4] together with the transfer guide [3]. -
Page 71: Pickup And Feeding System
Chapter 3 3.4 PICKUP AND FEEDING SYSTEM 3.4.1 Pickup Unit 3.4.1.1 Removing the Transfer Charging Roller 0008-3559 1) Open the delivery tray. 2) Open the upper cover. 3) Remove the 2 claws [1] of the transfer charging roller. 4) Remove the 2 claws [2] of the transfer guide. 5) Detach the transfer charging roller [4] together with the transfer guide [3]. -
Page 72: Removing The
Chapter 3 3.4.1.4 Removing the Front Cover 0008-3588 1) Remove the 2 claws [1]. 2) Slide the front cover [2] in the direction of the arrow to detach. F-3-80 F-3-82 3.4.1.5 Removing the Upper Cover 0008-3589 When mounting the upper cover, be sure to fit the 2 hooks [2] used to 1) Free the link stop [2] from the door link [1]. -
Page 73: Removing The Power Supply Pcb
Chapter 3 3.4.1.7 Removing the Power Supply PCB 0009-2767 1) Disconnect the flat cable [1]. 2) Disconnect the 4 connectors [2], and free the harness [4] from the harness guide [3]. F-3-88 2) Detach the 6 adhesive segments [1] of the plastic film sheet. F-3-85 3) Disconnect the high-voltage connector [1]. -
Page 74: Multi-Purpose Pickup Solenoid
Chapter 3 detach the pickup solenoid [3]. F-3-94 F-3-91 3.4.4 Manual Separation Pad 3.4.3 Multi-purpose Pickup Solenoid 3.4.4.1 Removing the Separation Pad 3.4.3.1 Removing the Right Cover 0008-1070 0008-3546 1) Remove the 2 screws [1], and detach the separation pad [2]. 1) Open the delivery tray [1]. -
Page 75: Removing The Left Cover
Chapter 3 3.4.5.3 Removing the Front Cover 0008-3555 1) Remove the 2 claws [1]. 2) Slide the front cover [2] in the direction of the arrow to detach. F-3-97 3.4.5.2 Removing the Left Cover 0008-3553 1) Open the delivery tray [1]. 2) Open the upper cover [2]. -
Page 76: Removing The Laser Scanner Unit
Chapter 3 3.4.5.6 Removing the Main Motor 0008-1098 1) Remove the 2 screws [1], and detach the main motor [2]. F-3-103 7) Disconnect the cable connector [1] found on the right side of the machine; then, detach the full flat cable [2]. F-3-107 F-3-104 8) Disconnect the connector [1], and detach the engine controller PCB... -
Page 77: Fixing System
Chapter 3 3.5 FIXING SYSTEM 3.5.1 Fixing Unit 3.5.1.1 Removing the Right Cover 0008-3581 1) Open the delivery tray [1]. 2) Open the upper cover [2]. 3) Remove the screw [3]. 4) Remove the 4 claws [4], and slide the right cover [5] in the direction of the arrow. -
Page 78: Removing The Upper Cover
Chapter 3 3.5.1.4 Removing the Upper Cover 0008-3584 1) Free the link stop [2] from the door link [1]. 2) Remove the 2 screws [3]. Bad position Good position F-3-115 F-3-113 3.5.1.5 Removing the Rear Cover 3) Slide the upper cover [1] in the direction of the arrow. 4) Remove the 2 claws [2] of the upper cover, and detach the cover. -
Page 79: Removing The Fixing Assembly
Chapter 3 5) Remove the 3 claws [1], and slide the right cover [2] in the direction of the arrow to detach. F-3-121 F-3-118 3.5.2.2 Removing the Left Cover 3.5.1.7 Removing the Fixing Assembly 0008-3596 0008-1069 1) Open the delivery tray [1]. 1) Remove the 3 screws [1], and detach the fixing assembly [2]. - Page 80 Chapter 3 3.5.2.3 Removing the Front Cover 0008-3599 1) Remove the 2 claws [1]. 2) Slide the front cover [2] in the direction of the arrow to detach. F-3-124 F-3-126 3.5.2.4 Removing the Upper Cover 0008-3602 When mounting the upper cover, be sure to fit the 2 hooks [2] used to 1) Free the link stop [2] from the door link [1].
- Page 81 Chapter 3 3.5.2.6 Removing the Power Supply PCB 0009-2769 1) Disconnect the flat cable [1]. 2) Disconnect the 4 connectors [2], and free the harness [4] from the harness guide [3]. F-3-132 2) Remove the 2 screws [1], and detach the fixing cover [2]. F-3-129 3) Disconnect the high-voltage connector [1].
-
Page 82: Removing The
Chapter 3 F-3-137 F-3-135 5) Remove the 3 claws [1], and slide the left cover [2] in the direction of the arrow to detach. 5) Remove the 3 claws [1], and slide the right cover [2] in the direction of the arrow to detach. F-3-138 F-3-136 3.5.3.3 Removing the Front Cover... -
Page 83: Removing The Upper Cover
Chapter 3 3.5.3.4 Removing the Upper Cover 0008-3603 1) Free the link stop [2] from the door link [1]. 2) Remove the 2 screws [3]. Bad position Good position F-3-142 F-3-140 3.5.3.5 Removing the Rear Cover 3) Slide the upper cover [1] in the direction of the arrow. 4) Remove the 2 claws [2] of the upper cover, and detach the cover. - Page 84 Chapter 3 F-3-148 3) Remove the 2 springs [1], and detach the 2 releasing levers [2]. 4) Remove the 2 locking plate [3], and detach the fixing film unit [4]. F-3-145 3.5.3.7 Removing the Fixing Assembly 0008-3606 1) Remove the 3 screws [1], and detach the fixing assembly [2]. F-3-149 3.5.3.9 Removing the Pressure Roller 0008-1092...
-
Page 85: Removing The
Chapter 3 F-3-153 F-3-151 5) Remove the 3 claws [1], and slide the left cover [2] in the direction of the arrow to detach. 5) Remove the 3 claws [1], and slide the right cover [2] in the direction of the arrow to detach. F-3-154 F-3-152 3.5.4.3 Removing the Front Cover... - Page 86 Chapter 3 3.5.4.4 Removing the Upper Cover 0008-3604 1) Free the link stop [2] from the door link [1]. 2) Remove the 2 screws [3]. Bad position Good position F-3-158 F-3-156 3.5.4.5 Removing the Rear Cover 3) Slide the upper cover [1] in the direction of the arrow. 4) Remove the 2 claws [2] of the upper cover, and detach the cover.
- Page 87 Chapter 3 F-3-161 3-33...
- Page 89 Chapter 4 MAINTENANCE AND INSPECTION...
- Page 91 Contents Contents 4.1 Periodically Replaced Parts ............................4-1 4.1.1 Periodic Replacement Parts ................................. 4-1 4.2 Consumables ..................................4-2 4.2.1 Consumable Parts..................................4-2 4.3 Periodical Service ................................4-3 4.3.1 Periodic Service ................................... 4-3 4.4 Cleaning ..................................4-4 4.4.1 Items to Clean ....................................4-4 4.4.2 Cleaning (external covers) ................................4-4 4.4.3 Cleaning (printer unit)..................................
-
Page 93: Periodically Replaced Parts
Chapter 4 4.1 Periodically Replaced Parts 4.1.1 Periodic Replacement Parts 0008-0559 No parts require periodic replacement in this printer. -
Page 94: Consumables
Chapter 4 4.2 Consumables 4.2.1 Consumable Parts 0008-0561 No parts require consumables in this printer. -
Page 95: Periodical Service
Chapter 4 4.3 Periodical Service 4.3.1 Periodic Service 0008-0562 The printer has no parts that require periodic servicing. -
Page 96: Cleaning
Chapter 4 4.4 Cleaning 4.4.1 Items to Clean 0008-0656 T-4-1 Items to clean Timing of cleaning External covers when soiled Pickup roller when the performance of pickup has dropped Separation pad when the performance of the pad has dropped Feed roller when the performance of the roller has dropped Transfer charging roller when the back of paper becomes soiled;... - Page 97 Chapter 4 [2] Fixing Inlet Guide Dry wipe with lint-free paper. [3] Static Eliminator Clean with a brush. [4] Pickup Roller Dry wipe with lint-free paper. [5] Separation Pad Dry wipe the rubber portion with lint-free paper. [6] Feed Roller Dry wipe with lint-free paper.
- Page 99 Chapter 5 TROUBLESHOOTING...
- Page 101 Contents Contents 5.1 MEASUREMENT AND ADJUSTMENT ........................5-1 5.1.1 Mechanical Adjustment ................................5-1 5.1.1.1 Checking the Pressure of the Pressure Roller (nip) ............................5-1 5.2 SERVICE TOOLS .................................5-2 5.2.1 Special Tools....................................5-2 5.2.2 Solvent/Oil List .................................... 5-2 5.3 Location of Convectors ..............................5-3 5.3.1 Location of Convectors................................
-
Page 103: Measurement And Adjustment
Chapter 5 5.1 MEASUREMENT AND ADJUSTMENT 5.1.1 Mechanical Adjustment 5.1.1.1 Checking the Pressure of the Pressure Roller (nip) 0008-0569 The machine's fixing assembly does not permit adjustment of its nip. The wrong nip, however, can cause fixing faults, requiring a check as follows: 1. -
Page 104: Service Tools
Chapter 5 5.2 SERVICE TOOLS 5.2.1 Special Tools 0008-0564 The machine requires no special tools that must be used in addition to its standard set of tools. 5.2.2 Solvent/Oil List 0008-0975 T-5-1 Name Components Remarks Alcohol Cleaning:plastic Alcohol -Flammable:keep away from flame (note),rubber,metal,oil,and -Purchase locally toner stains... -
Page 105: Location Of Convectors
Chapter 5 5.3 Location of Convectors 5.3.1 Location of Convectors 0009-4697 J1102 J801 J802 J001 J910 J909 J102 INL101 J202 J902 J204 J201 J203 J904 J002 J905 J801 F-5-2... -
Page 106: Error Code Table
The messages appear in the message area [1] and the sub message area [2], and a message may be a user message or a service message; the former is used to prompt the user to take a specific action, while the latter is mat for a service person. Canon LBP3000 Canon LBP3000... - Page 107 Chapter 6 APPENDIX...
- Page 109 Contents Contents 6.1 OUTLINE OF ELECTRICAL COMPONENTS......................6-1 6.1.1 Clutch/Solenoid.................................... 6-1 6.1.1.1 Solenoid...........................................6-1 6.1.2 Motor......................................6-2 6.1.2.1 Motor..........................................6-2 6.1.3 Sensor......................................6-3 6.1.3.1 Sensor ..........................................6-3 6.1.4 Switch ......................................6-4 6.1.4.1 Switch..........................................6-4 6.1.5 Lamps, Heaters, and Others ................................. 6-5 6.1.5.1 Heater ..........................................6-5 6.1.6 PCBs ......................................6-6 6.1.6.1 PCBs..........................................6-6...
-
Page 111: Outline Of Electrical Components
Chapter 6 6.1 OUTLINE OF ELECTRICAL COMPONENTS 6.1.1 Clutch/Solenoid 6.1.1.1 Solenoid 0008-0929 F-6-1 T-6-1 Notation Name Pickup solenoid... -
Page 112: Motor
Chapter 6 6.1.2 Motor 6.1.2.1 Motor 0008-0935 F-6-2 T-6-2 Notation Name Main motor... -
Page 113: Sensor
Chapter 6 6.1.3 Sensor 6.1.3.1 Sensor 0008-0938 PS803 PS801 PS802 F-6-3 T-6-3 Notation Name PS801 Top of page sensor PS802 Paper width sensor PS803 Paper delivery sensor... -
Page 114: Switch
Chapter 6 6.1.4 Switch 6.1.4.1 Switch 0008-0939 SW101 SW301 F-6-4 T-6-4 Notation Name SW101 Power switch SW301 Door switch... -
Page 115: Lamps, Heaters, And Others
Chapter 6 6.1.5 Lamps, Heaters, and Others 6.1.5.1 Heater 0008-0941 F-6-5 T-6-5 Notation Name Fixing heater... -
Page 116: Pcbs
Chapter 6 6.1.6 PCBs 6.1.6.1 PCBs 0008-0943 F-6-6 T-6-6 Name Power supply PCB Top of Page/Paper Width Sensor PCB Engine controller PCB Video controller PCB... - Page 117 Mar 10 2005...
Need help?
Do you have a question about the LBP2900 series and is the answer not in the manual?
Questions and answers
paper not feeding automatically no printing
The Canon LBP2900 series printer may not be feeding paper automatically because paper is loaded in the manual feed tray. The manual feed tray has priority over the multi-purpose tray, so if paper is present in the manual feed tray, it will override automatic feeding from the other tray. This can also cause overlapping paper feeds or jams. Additionally, using damaged or curled paper can prevent proper feeding.
This answer is automatically generated