Table of Contents
Advertisement
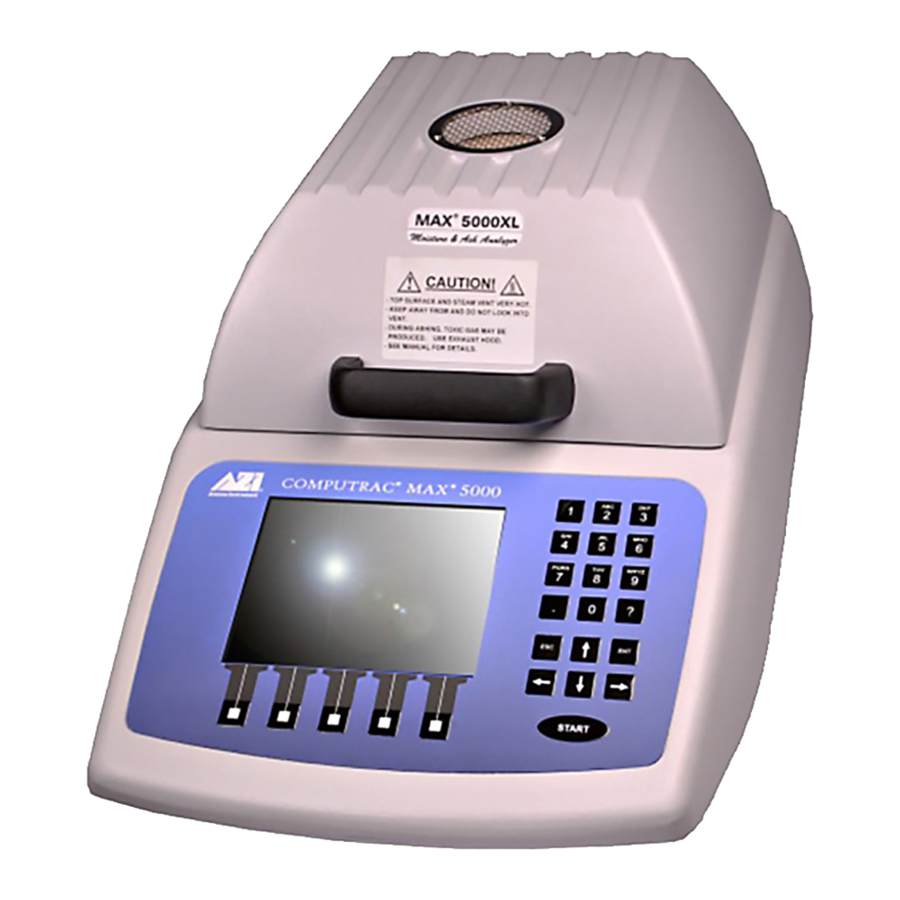
Arizona Instrument
Computrac
MAX 5000XL
MOISTURE ANALYZER
USER MANUAL
Firmware Revision 3.0X
April 2008
Arizona Instrument LLC
1912 W 4
Tempe, AZ 85281
(800) 528-7411
(602) 470-1414
Fax (480) 804-0656
http://www.azic.com
email:
azi@azic.com - General
intl@azic.com - International
support@azic.com - Customer Support
th
Street
700-0113-A
Advertisement
Table of Contents

Subscribe to Our Youtube Channel
Related Manuals for Arizona Instrument Computrac MAX-5000XL


Summary of Contents for Arizona Instrument Computrac MAX-5000XL
- Page 1 Arizona Instrument Computrac MAX 5000XL MOISTURE ANALYZER USER MANUAL Firmware Revision 3.0X April 2008 Arizona Instrument LLC 1912 W 4 Street Tempe, AZ 85281 (800) 528-7411 (602) 470-1414 Fax (480) 804-0656 http://www.azic.com email: azi@azic.com - General intl@azic.com - International support@azic.com - Customer Support ...
- Page 2 Computrac PROPRIETARY RIGHTS NOTICE The material in this manual contains valuable information developed by Arizona Instrument LLC for use with the Computrac line of moisture analyzers. No part of this manual can be reproduced or transmitted in any form or by any means, electronic, mechanical, or otherwise.
-
Page 3: Table Of Contents
1. WARNINGS AND SAFETY INFORMATION ----------------------------------------------------------- 5 2. PACKING AND SHIPPING INSTRUCTIONS ---------------------------------------------------------- 7 3. INSTRUMENT DESCRIPTION ---------------------------------------------------------------------------- 9 3.1. Hardware ... 10 3.2. Oven ... 10 3.3. Inventory ... 11 4. INSTRUMENT SETUP ------------------------------------------------------------------------------------- 12 4.1. Interior of Test Chamber ... 13 4.2. - Page 4 Report Items to Print ... 52 Add/Edit Company Name ... 52 Date/Time Setup ... 52 Data Format Setup ... 53 EC Display ... 53 Lot Number ... 53 Access Key Setup ... 54 Master Key ... 54 Calibration Key ... 54 Ethernet Setup ...
-
Page 5: Warnings And Safety Information
WARNINGS AND SAFETY INFORMATION The MAX 5000XL moisture analyzer complies with the Underwriter Laboratories Inc. standards and European Council Directives, Equipment for Laboratory Use, electromagnetic compatibility, stipulated requirements. However, improper use or handling of the instrument can result in damage to the equipment and/or injury to personnel. - Page 6 MAX 5000XL. Before using any cleaning or decontamination method except those recommended by Arizona Instrument, check with AZI Customer Service at 800-528-7411 or 602-470-1414, to ensure that the proposed method will not damage the equipment.
-
Page 7: Packing And Shipping Instructions
PACKING AND SHIPPING INSTRUCTIONS Movement, handling, and packaging of the instrument must be done with EXTREME CARE to avoid permanent, expensive internal damage. The MAX 5000XL uses a delicate and very sensitive electronic force balance to measure small weights and weight losses. The balance is capable of measuring weight to a resolution of 0.1 milligram. - Page 8 Please save the shipping box and all packaging materials for future use. REMOVE THE PAN SUPPORT and Pack separately BOX FOR PAN SUPPORT AZI Customer Service 800-528-7411 or 602-470-1414 Page 8 of 92...
-
Page 9: Instrument Description
INSTRUMENT DESCRIPTION The Computrac MAX 5000XL is a high performance programmable loss-on-drying analyzer. Typical Repeatability: Periodic balance and temperature calibration maintains accuracy. Test temperatures from 25º C to 600º C set at increments of one degree. Programming is through the front panel keyboard and menu system. ... -
Page 10: Hardware
Hardware 3.1. The MAX 5000XL consists of: A ceramic convection air oven A precision balance weighing mechanism with a resolution of 0.0001 gram and a full scale range of 100 grams A backlit, color graphic liquid crystal display ... -
Page 11: Inventory
Inventory 3.3. Carefully unpack the instrument and locate the following items: MAX 5000XL Accessory Kit Line Cord, 110 VAC or Line Cord, 220 VAC (UK) or Line Cord, 220 VAC (Europe) Test Weights: Tweezers Sample Pans, Waffle: 100 ea. Sample Pans, Heavy: 5 ea. -
Page 12: Instrument Setup
INSTRUMENT SETUP Contact Arizona Instrument Customer Service at 800-528-7411 or 602-470-1414 or by e-mail at support@azic.com The MAX 5000XL is designed to provide reliable results under normal ambient conditions in the laboratory and on the production floor. Compliance with the following guidelines will help ensure optimum accuracy in minimum time. -
Page 13: Interior Of Test Chamber
Interior of Test Chamber 4.1. Remove the sample pan support from its separate box and packing foam. Save the box and foam so that the support can be packaged when the instrument is returned to the factory for annual calibration. NOTE: Shipment of the instrument with the pan support in place will damage the ceramic oven and the balance. -
Page 14: Ac Power Connection
AC Power Connection 4.2. Power Requirements: 100-130 VAC, 50/60 Hz @ 8 Amps – fuse is F8A T250V 220-240 VAC, 50/60 Hz @ 4 Amps – fuse is F4A T250V Fused on/off switch is part of an EMI power entry module The MAX 5000XL can be used with a 100-130 VAC or a 220-240 VAC input power source. - Page 15 All accessory equipment, printer, computer, etc., should be connected before applying power to the instrument. See the following sections, 4.4 and 4.5, to connect a printer and/or computer. Plug the line cord into a dedicated electrical power outlet. Line noise on the power lines may affect accuracy.
-
Page 16: Contrast Adjustment
After power-up, the balance temperature will be stabilized for high temperature testing, which may take up to 2 hours. Wait for the balance temperature stability icon on the main screen to change from unstable the balance calibration or low moisture/solids/ash testing (<1%). See section 6.1 Balance Temperature Stability on page 64 for more information. - Page 17 To set up the MAX 5000XL, begin at the Main Test Screen and press [Menu], (center key below display) to access the Main Menu. Select SETUP MENU, press [ENT]. Select PRINTER SETUP, press [ENT]. Highlight Parallel for printer only, RS-232 for computer only, and Both for the printer and computer at the same time.
- Page 18 Move the selection box down to REPORT START and press [ENT]. Select between: Test Start – begins to send data at the start of the test, First Prediction - begins to send data as soon as the instrument makes the first prediction, or ...
-
Page 19: Connecting A Computer
Connecting a Computer 4.5. If you wish to monitor the test with a computer, connect a null modem cable to the serial connector at the rear of the instrument. Use any serial port communications program (not provided) on your computer to read the reports transmitted from the MAX 5000XL serial port. -
Page 20: Calibrate The Balance - 50 Gram Weight
Calibrate the Balance - 50 gram weight 4.7. NOTE: The MAX 5000XL must be powered on until the balance temperature stability icon in the lower left corner of the main screen changes from unstable to stable to allow the balance to stabilize before beginning the balance calibration. - Page 21 After placing a clean pan on the balance, close the lid. The screen will “CALIBRATING ZERO LOAD, display PLEASE WAIT.” As soon as the tare is finished, the next prompt appears. Open the lid and gently place a 50-gram weight in the center of the sample pan or press [ABORT] to return to the menu.
-
Page 22: Weight Test
Weight Test 4.8. To ensure proper calibration and become familiar with the instrument, run a weight test. This test simulates moisture loss by the removal of one of two known weights. Both a three and a five-gram weight are required. ... -
Page 23: Main Menu
MAIN MENU Press [MENU] to display the MAIN MENU. Memory Starts Menu 5.1. Memory Starts are stored test parameter sets. The MEMORY START MENU allows access to the stored test parameter sets. This is where the contents of the stored parameters may be printed out or changed. -
Page 24: Editing Test Parameters
Editing Test Parameters The memory start parameters may be edited by highlighting a memory start and pressing the [ENT] key. From the eight (8) primary selections, there are many other selections available to allow changing the data stored and altering the test characteristics. ... -
Page 25: Temperatures
Temperatures This menu gives access to three temperature parameters, an oven stable indication, an ashing moisture rate control parameter, and an enable switch used during a test. Test Temperature - The current temperature setpoint is displayed to the right of TEST TEMPERATURE. -
Page 26: Ending Criteria
The possible displays are: CHAMBER STABLE - The oven has been at a stable temperature for at least the time period set. CHAMBER STABILIZING: LOW TEMP - Oven is below temperature setpoint. CHAMBER STABILIZING: HIGH TEMP - Oven is above temperature setpoint. - Page 27 When the prediction is sufficiently reliable, the test ends and the predicted result is displayed, stored in the instrument, and printed if an accessory printer is enabled and attached. Proper selection of the ending criteria can greatly improve the test times and repeatability. ...
- Page 28 Some samples contain more than one volatile material, for example, nylon resins with large amounts of unpolymerized material (Caprolactam). In these cases, the rate will fall to some fixed value when all the moisture is evaporated but while the monomer is still evaporating. The graphical display available from the Main Test Screen is of great help in visualizing these cases.
-
Page 29: Sample Size Options
Reliability – This feature is similar to Rate but is based on a percent of accuracy. With reliability set to 99%, the test would end when the actual moisture loss was within 99% of the predicted result. A value may be set that would give exceptional results when the actual result is within 90 to 99... -
Page 30: Tare Options
Inside Limits and Outside Limits - Selections of no sound, one beep, two beeps or three beeps may be programmed to have the instrument indicate when the weight of the sample is inside or outside the sample weight tolerance. Tare Options Two tare options define how stable the balance must be before a test will... - Page 31 Sample Tare – Records the average initial sample weight during a programmable period of time. After lid closure, there is a 7 second delay before the sample tare time begins. There are five (5) possible choices under this menu. The factory default is Start After ...
-
Page 32: Result Display Options
Result Display Options DISPLAY RESULT AS: Selects the final display value of moisture, solids or dry weight, ash or LOI. % Moisture - Test results are displayed as a percentage of weight loss. % Solids - Test results are displayed as a percentage of weight remaining. -
Page 33: Linked Test Options
Linked Test Options Linking tests enables multiple adjoining memory starts to be run together as one test. Increasing temperatures, rates, times, etc., may be selected to monitor the progress of moisture loss for research and/or control purposes. In some materials, such as gypsum powder, moisture occurs in more than one molecular state, usually free water and one or two bound water states. - Page 34 Use This Test Weight For Total Calculations? Toggle this parameter to YES if this test’s starting weight is to be used in Total Result calculations for this or later linked tests. The starting weight for this test will be used for total calculations until another YES is encountered.
-
Page 35: Cut Memory Start
CUT Memory Start This command removes a memory start, which can be optionally inserted at another location. Use this carefully. The “(Factory)” memory starts cannot be deleted with this option. COPY Memory Start To quickly create a new set similar to an old one, use [COPY] from one location, move the highlight bar to the desired location and [INSERT↑] or [INSERT↓] into a new location. -
Page 36: Print Memory Start
PRINT Memory Start This command prints the stored parameters. All of the numbered Memory Start Sets are printed, giving the values of the parameters shown below in the print out example. COMPUTRAC MAX 5000XL MEMORY START REPORT COMPANY: AZI Preferred Customer ----------------------------------------------------------------------------- # ID -----------------------------------------------------------------------------... -
Page 37: Stored Data Menu
Stored Data Menu 5.2. This function is used to work with data stored in the instrument from past tests. Up to 1,000 test results and 100 graphs can be stored before the oldest is "pushed out" (overwritten). To access this function, go to the Main Menu and select the STORED DATA MENU. -
Page 38: Select All Data
To analyze a set of data: Use the arrow keys to highlight the data items to be included in the analysis, and press the [ENT] key. Notice that each selected item is marked with a triangular symbol at the left of the data item. If one has been designated in error, move the selector bar to it and press the [ENT] key to deselect (and unmark) it. -
Page 39: View Stored Data
View Stored Data This function is used to view a list of results for a selected test. Move the selector bar to a particular test and press [VIEW] to display the data. There are three (3) pages of data. Print Stored Data Stored data can be printed to a parallel printer attached to the MAX 5000XL (See page 16). -
Page 40: Calibration Menu
Calibration Menu 5.3. Balance Calibration Balance calibration is explained and performed as part of instrument setup, see page 20. The sequence is repeated here for continuity. The balance should be calibrated: If the instrument has been turned off for several hours or in storage, ... -
Page 41: View Calibration Report
As soon as the instrument detects weight on the balance, the prompt appears. With the lid closed the prompt At the conclusion of the calibration, the appears with a PASS/FAIL indication of the calibration success. If the result is “PASS”, open the lid; remove the weight and press [PROCEED] to continue. -
Page 42: High Temperature Lift Calibration
High Temperature Lift Calibration The MAX 5000XL High Temperature Lift Calibration routine records the lift that is created in the heat chamber from air currents. The calibration will significantly improve low ash accuracy and unit to unit correlation. Since the calibration is performed at 600°C and ramps the temperature to 600°C twice with a room temperature cool down in between, it takes about 2 ½... -
Page 43: Temperature Calibration
Temperature Calibration The MAX 5000XL temperature calibration routines will calibrate and verify the accuracy of the oven temperature throughout the usable range. The oven is calibrated at twelve (12) preset increments and verified at temperatures that are user selectable. Verification Setup The VERIFICATION SETUP menu allows the verification of the temperature calibration to be enabled... -
Page 44: Perform Calibration
Perform Calibration This selection starts the automatic process of calibration, and verification if selected, of the MAX 5000XL when the Temperature Calibration Interface (TCI) is connected to the unit. A detailed procedure begins on page 47. The calibration uses an NIST traceable device to measure the temperature at the sample level and compare that to the temperature measured by the... -
Page 45: View Cal Report
View Cal Report The VIEW CAL REPORT selection provides information about the last calibration date and performance. A record of the calibration date, verification date, and calibration devices used is shown. The data may be printed from this screen by pressing [PRINT]. -
Page 46: Calibration Reminder Setup
Calibration Reminder Setup A TEMPERATURE CALIBRATION REMINDER is available to remind you when scheduled calibrations are due. The default factory settings are: ENABLE - No TIME – 00:00 INTERVAL - 0 Weeks To turn the prompt on, off, or adjust the interval, go to the Main Test Screen and select in order: MENU, CALIBRATION MENU, TEMPERATURE CALIBRATION, and CALIBRATION REMINDER SETUP. -
Page 47: Temperature Calibration Instructions
Temperature Calibration Instructions Ensure the instrument is turned ON A Temperature Calibration Kit, [AZI P/N Y990-0193 for 110V or Y990-0224 for 220V], with 9 VDC, 100 mA, 3.5 mm male plug positive tip adaptor, must be used to perform the calibration. ... - Page 48 The disk number is located on the probe fixture and should match the probe number on the TCI box. If the probe number does not match the serial number on the TCI box, call customer service at 800-528-7411 or 602-470-1414 for assistance.
-
Page 49: Oven Cleaning
Oven Cleaning This selection is the start of an oven cleaning process that burns off most residue build-up in the oven. Use a fume hood to remove possible toxic emissions from the work place. Similar to the self-cleaning mode in a home oven, the process turns the heating elements on to reach an oven temperature of 550º... -
Page 50: Setup Menu
Setup Menu 5.4. The SETUP MENU is used to program the MAX 5000XL with information relevant to all operations and tests. From the SETUP MENU, it is possible to setup the printer, items to be printed, time and date, certain items on the display, access codes, network addressing and access, and prepare foils for testing. -
Page 51: Report Setup
Report Setup This menu allows the report outputs to be enabled and the printout to be customized to your needs. Report Control Options REPORT ENABLED – A YES sends a progress report (optional, see below) to the printer during a test and a final report to the printer after a test. -
Page 52: Report Items To Print
Report Items to Print Test results are available to be printed, sent to a computer, or used for statistical analysis (mean, standard deviation and relative standard deviation). To be printed, the data fields must be selected. Highlight the data to be printed and press the [ENT] key. -
Page 53: Data Format Setup
Data Format Setup This menu brings up the two categories of data, one display oriented and the other report oriented. EC Display This selection controls the displaying of the word RELIABILITY on the Main Test Screen for PREDICT ENDING CRITERIA. Displaying this value is useful during parameter development to aid in selecting the best ending criteria. -
Page 54: Access Key Setup
Access Key Setup This menu provides a means of preventing unauthorized access to memory start edit, calibration, and setup menus. If Access Keys have been activated by setting Activate Keys: Yes, and a Master Key code has been entered, the instrument will prompt for the key code each time a protected menu is accessed. -
Page 55: Name And Password
Although the following options are accessible in all MAX 5000XL instruments, the optional Web Server feature must be purchased in order to access the instrument over your network. NAME and PASSWORD The NAME and PASSWORD can be used to restrict access to the instrument over the intranet. -
Page 56: Special Features
Special Features This menu provides optional features for the instrument. A Web Server and Parameter development tools are examples of additional features that can be purchased. If you have purchased one of these features, you have been given an access code to enable/disable the feature. - Page 57 To add a new foil, select [ADD]. Follow the prompts to open the lid, place a foil on the sample pan, and close the lid. After the foil is weighed and the lid is opened, the weight of the foil is given and a box appears so that a unique identifying name may be given to the foil.
-
Page 58: Parameter Expert (Optional Feature)
Parameter Expert (Optional Feature) 5.6. A Parameter Expert option can be purchased for the MAX 5000XL. The Parameter Expert (PE) assists a user through the development of a memory start. PE queries the user about his reference method, sets up a memory start, and walks the user through a series of tests to determine the highest acceptable test temperature. - Page 59 • This is an interim screen. Ensure you have the material properly prepared. •This is another interim screen. You will see these throughout the Parameter Expert testing. Continue to press start to go to next step in the parameter development process •Add sample to pan until white bar is within green area.
- Page 60 • Answer appropriately and the system will ask you to start the next test. • In this example, the answer was YES. In this case, the parameterization will be done at a lower temperature. Press start to begin the next test. •The display will recommend opening the lid if the oven temperature is too high.
- Page 61 •Again the system prompts to see if the temperature is too high, indicated by a burned or degraded sample. In this case the answer is NO. •The system will then lead you to the optimal temperature for the fastest test time. Press Start to begin the next test.
-
Page 62: Optimize Temp/Speed/Repeatability
Optimize Temp/Speed/Repeatability The Parameter Expert Optimize feature determines the proper ending rate criteria for a user-specified test temperature for the currently active memory start. The Optimize feature is for an already developed memory start that needs minor improvement. The Optimize feature allows the user to raise or lower the test temperature to improve test speed and repeatability. - Page 63 Press OK and exit Parameter Expert to use the optimized memory start. For more information regarding the Parameter Expert option, please contact Arizona Instrument Sales or a customer service representative at 800-528-7411 or 602-470-1414. AZI Customer Service 800-528-7411 or 602-470-1414...
-
Page 64: Sample Preparation, Testing And Analysis
SAMPLE PREPARATION, TESTING AND ANALYSIS Balance Temperature Stability 6.1. The force balance in the MAX 5000XL is most accurate in a stable temperature environment. To maintain a constant balance temperature, whether the instrument is testing or idling, the instrument heats the balance at initial power-up and maintains the balance temperature at all times. -
Page 65: Preparing Granular And Powdery Samples
Preparing Granular and Powdery Samples 6.2. The MAX 5000XL can be used to test a wide range of products from finely ground, low-moisture powders to high-moisture slurries. For best results, the sample should be of a uniform particle size distributed evenly over the sample pan. If sample material is collected into a jar or sampling bag, shake the jar or bag to produce a uniform mixture. -
Page 66: Selecting The Optimum Sample Size
Selecting the Optimum Sample Size 6.4. Each particular sample will have its own optimum sample size. Best results will be obtained if the sample consists of a single layer of particles, as long as this is sufficient to develop a weight loss of 10 milligrams or more. A rule of thumb is "the lower the moisture, the larger the sample."... - Page 67 A typical drying curve is shown at the right. Section (A-B) represents the sample's weight loss as it heats from room to testing temperature. Section (B-C) is linear, representing moisture loss from the interior of each particle of the tested sample. Section (C-D) is exponential in nature and represents the final evolution of moisture from within the particle.
-
Page 68: Determining Proper Test Temperature
Determining Proper Test Temperature 7.2. If the moisture of the sample material is known, as determined by a reference method, the MAX 5000XL's temperature can be adjusted until test results correlate with the established moisture concentration. If the moisture is not known, prepare a moisture versus temperature curve to decide the proper test temperature for a particular sample. -
Page 69: Selection Of Ending Criteria
Selection of Ending Criteria 7.3. The decision of which ending criteria to use is application dependent. Best results are typically given with PREDICTION or RATE, rather than TIME. Experiment with your particular sample to determine which criterion is best for your product. See Ending Criteria on page 26. -
Page 70: Performance Verification
PERFORMANCE VERIFICATION Periodic checks of the system are recommended to verify proper system operation. These periodic checks will satisfy some quality assurance requirements as specified in your quality assurance/control policy. A log is recommended, either hand written or computer managed, which will record the weight test results, sodium tartrate test results, and retained samples’... -
Page 71: The Precision Weight Test
The Precision Weight Test 8.2. The precision weight test consists of performing the weight test in Section 8.1 multiple times to determine the instruments repeatability. This is a more critical verification of the instrument’s performance. Mean, Standard Deviation, and Relative Standard Deviation are calculated using the following formulas. -
Page 72: Sodium Tartrate Test
Sodium Tartrate Test 8.3. The sodium tartrate test verifies the heater and force balance operation. Sodium tartrate dihydrate is a chemical with a known moisture concentration that releases moisture at temperatures greater than 120º C. Because of its consistent moisture concentration, it is used as a standard in moisture measurement using oven or titration methods. -
Page 73: Precision Sodium Tartrate Test
Precision Sodium Tartrate Test 8.4. Perform the sodium tartrate test in Section 8.3 multiple times to determine the instruments repeatability. This is a more critical verification of the instrument’s performance. Mean, Standard Deviation, and Relative Standard Deviation are calculated using the following formulas. -
Page 74: Retained Samples
Retained Samples 8.5. The weight test and the sodium tartrate test are usually sufficient to satisfy industry guidelines for quality control in moisture measurement. Some additional checks can be performed using replicate testing of retained samples. Retained samples, when stored under airtight conditions, should maintain moisture levels for long periods. -
Page 75: Web Server
WEB SERVER ® An optional Web Server can be purchased for the MAX 5000XL. MS Internet Explorer Version 6 or higher (IE) is used to view a calibration report, view the LCD screen, save/load memory starts, and save test results. Memory starts can be retrieved from one instrument and saved to another. -
Page 76: Lcd View
LCD View 9.2. The LCD screen is viewed by selecting LCD VIEW in the left bar. This may help to remotely monitor the instrument. Memory Starts 9.3. Memory starts can be viewed by selecting MEMORY STARTS in the left bar. Memory starts can be downloaded from the instrument or can be uploaded to the instrument. -
Page 77: Test Results
Graph data contains only the data points that are used by the instrument to generate the graph, so the actual visual graph is not downloaded. For more information regarding the Web Server option, please contact Arizona Instrument Sales or customer service representative. 800-528-7411 or 602-470-1414... -
Page 78: 10. Routine Maintenance
10. ROUTINE MAINTENANCE The MAX 5000XL requires routine cleaning to keep the test chamber free of excess sample material. Failure to keep the instrument interior clean reduces its accuracy and repeatability. Sample material collecting in the test chamber prevents free movement of the pan support. -
Page 79: Shroud Gasket
Shroud Gasket 10.2. The shroud gasket creates a seal between the heater shroud and ceramic plate. Over time, this gasket will require replacement. Check the shroud gasket (AZI P/N 300-0446) regularly for cracks or deterioration. Perform a Kimwipe test to verify the seal’s integrity. -
Page 80: Oven Chamber Cleaning
Oven Chamber Cleaning 10.4. This selection is the start of an oven cleaning process that burns off most residue build up in the oven. Similar to the self-cleaning mode in a home oven, the process turns the heating elements on to reach an oven temperature of 550º C in less than 22 minutes. The oven cleaning cycle lasts a total of 45 minutes. -
Page 81: Oven Vent Cleaning
Oven Vent Cleaning 10.5. The oven vent should be inspected regularly for debris build-up. To clean debris from the vent: Switch the main power switch OFF. Remove the three (3) screws securing the vent cover. Remove the vent cover. ... -
Page 82: Sample Pan Support
Sample Pan Support 10.7. The sample pan support may need to be cleaned if high volatile material condenses on it. Turn the unit OFF. Use the supplied tweezers to carefully remove the pan support up out of the test chamber. -
Page 83: 11. Trouble Diagnosis
11. TROUBLE DIAGNOSIS SYMPTOM DIAGNOSIS Final result is always Temperature too low zero or near zero No heat Sample too small Final results vary too Test temperature incorrect much Ending criteria incorrect Sample size too small Samples not uniform Sample particles too large Blank display or very Contrast controls not set hard to see... - Page 84 Moistures too high or Temperature set too high solids too low Bent sample pan Dirty sample pan Debris in balance gaps Dirty heater assembly Ending criteria incorrect Moistures too low or Temperature too low solids too high Sample size too small or too large Sample needs spreading Ending criteria incorrect...
- Page 85 No heat (cont.) Door sensor failure Temperature setpoint too low No power to Power switch off instrument Power cord disconnected Fuse blown Outlet not powered No weight reading Balance not initialized Erratic results Poor AC ground Dirt in chamber Dirt in pan support Display erratic Unit cold (near freezing) THE BALANCE...
-
Page 86: 12. Accessories & Maintenance Parts
12. ACCESSORIES & MAINTENANCE PARTS CONSUMABLES 800-0037 Sodium Tartrate (500 gram bottle) 800-0067 Ultrapure Water (1L) 800-0068 Clear Polypropylene 990-0003 Filter Paper (100 PCS) 990-0008 Waffle Bottom Sample Pans (100 PCS) 990-0010 Flat Bottom Sample Pans (100 PCS) 990-0196 Thick Sample Pan (5 PCS) SPARE PARTS 170-0014 190-1001... -
Page 87: 13. Max 5000Xl Specifications
13. MAX 5000XL SPECIFICATIONS Feature Specification 18.5” length x 12.7”width x 9.5” height Size 470 mm length x 323 mm width x 240 mm height (Height varies slightly with adjustable feet for leveling purposes.) Weight 31 lbs. (14 kg) Casework Textured aluminum castings Power Requirements 100-130 VAC, 50/60 Hz @ 8 Amps... - Page 88 Balance Calibration Menu driven calibration and verification in the field Annual factory servicing recommended Programmable calibration prompt Sample size 200 milligrams to 100 grams Resolution 0.0001 grams 0.001 % moisture Display ¼ VGA, 320 x 240 pixel color with adjustable contrast via Test Display Current and calculated moisture, solids, dry weight, ash, and Current and programmed chamber temperature...
- Page 89 Moisture Level Repeatability Ashing Moisture Level Inter-unit Correlation Ashing Certification UL (pending), CE (pending), FCC Part 15, Class A Tested to standards EN55022, EN 90101-1 Temperature Calibration Interface certified for use with the MAX 5000XL Self-diagnostics Built in Hardware and Software diagnostics software Options Temperature calibration interface kit Printer kit...
-
Page 90: 14. Changes
14. CHANGES Firmware Rev 3.0X, Manual Rev A 1. Initial release of MAX-5000XL. a. Added TempRate to memory start record. b. Added high temperature lift calibration. c. Added polynomial calculation for high temperature lift compensation to adjust for different test temperatures. -
Page 91: 15. Warranty
15. WARRANTY Arizona Instrument LLC warrants the Computrac MAX 5000XL to be free from defects in materials or workmanship for two (2) years from the date of purchase for those units sold in the USA. All other sales normally carry a one (1) year warranty. AZI will repair or replace, at its option, products that AZI determines to be defective during the warranty period. - Page 92 TRADEMARK AND COPYRIGHT PROTECTION Computrac, Arizona Instrument and the stylized AZI are all registered trademarks of Arizona Instrument LLC. MAX 5000XL is a trademark of Arizona Instrument LLC. Instrument firmware is copyright protected. The MAX 5000XL uses the Graphics Interchange Format interface.
Need help?
Do you have a question about the Computrac MAX-5000XL and is the answer not in the manual?
Questions and answers