SATO MB400i Operator's Manual
Direct thermal printer
Hide thumbs
Also See for MB400i:
- Operator's manual (86 pages) ,
- Quick manual (52 pages) ,
- Specifications (2 pages)
Table of Contents
Advertisement
Advertisement
Table of Contents

Related Manuals for SATO MB400i


Summary of Contents for SATO MB400i
- Page 1 MB400i/410i Direct Thermal Printer Operator’s Manual...
- Page 2 SATO International. The materials in this document is provided for general information and is subject to change without notice. SATO International assumes no responsibilities for any errors that may appear.
-
Page 3: Safety Precautions
Safety Precautions As a preventive measure to ensure safe usage of this machine so as to safeguard against damage to yourself, other people or property, there are many display diagrams used in this instruction manual and on this machine. The displays and their meanings are illustrated in the following pages. - Page 4 Safety Precautions Explanation of hazard symbols The triangle sign means ‘Be careful’. The content within the triangle Example illustrates specific hazards. In this case, the sign on the left means ‘beware of electric shock’. The circular sign means ‘prohibited’. The content within the circle illustrates a Example specific prohibition.
- Page 5 Warning Warnings Liquids Do not place any liquids or small metallic objects near the printer. Should any of these fall into the printer, immediately turn off the power and contact your nearest dealer or service center. Continued use increases the risk of fire or electric shocks. Foreign Matter Do not insert or drop metallic or flammable objects into the openings of the printer (such as outlets for...
- Page 6 Warning Warnings Abnormal Conditions Continued use of the printer while it is emitting smoke or strange odors increases the risk of fire or electric shocks. Immediately turn off the power and contact your nearest dealer or service center. Do not try to service the printer by yourself.
- Page 7 Warning Warnings Power Supply Precautions • Use only the specified voltage and use only the specified battery charger. • Never use the battery charger with any other battery pack except for the specified type. Doing so can rupture the battery, or cause leakage, fire or electric shocks.
- Page 8 Cautions Location Do not locate the printer in the area subjected to high humidity or dew. If dew forms inside the printer, immediately turn off the printer and do not use it until all moisture has dried up. Continued use creates the danger of electric shock or the printer damage.
-
Page 9: Warnings
Warnings Replacing the Battery Pack • Use only specified replacement battery packs. • Make sure to install the pack in the correct direction to avoid the danger of injury or damage to surrounding areas. • To replace small-size rechargeable (Lithium ion) batteries, seal the old battery pack with tape and ask our sales representative or service center about disposal methods. -
Page 10: Other Precautions
Other Precautions Avoid placement in extreme temperatures Do not place the printer in highly humid areas or at outside the -15°C to 50°C temperature range. When the printer is being transported... The normal vibration encountered during transportation is acceptable, but avoid dropping the printer or exposing it to extreme vibrations. -
Page 11: Table Of Contents
TABLE OF CONTENTS Safety Precautions ..........iii Explanation of hazard symbols ......iv Warnings ............. v Cautions .............. viii Replacing the Battery Pack ........ ix Other Precautions ..........x 1. Overview Notes on Bluetooth/Wireless Communication ..1-2 Safety Precautions ..........1-3 2. - Page 12 Adjusting printing for linerless labels ....3-10 Choosing the Label Dispensing mode ....3-11 Configuring Dispense mode ....... 3-12 Other Printer Modes ........... 3-13 Offset Configuration via Programming....3-17 4. Special Settings 5. Cleaning and Maintenance Cleaning the Print Head ........5-1 Cleaning the Platen and Peel Roller....
-
Page 13: Overview
Overview OVERVIEW This manual is intended to familiarize you with the basic features and operation of the MB400i/410i barcode printer in a short time. Key features: • High speed CPU and 103 mm/sec print speed (max) • Available in 203 dpi and 305 dpi resolutions •... -
Page 14: Notes On Bluetooth/Wireless Communication
Overview Notes on Bluetooth/Wireless Communication Compliance Statement This product has been certified for compliance with the relevant radio interference regulations of your country or region. To ensure continued compliance, do not: • Disassemble or modify this product • Remove the certificate label (serial number seal) af- fixed to this product Use of this product near microwave and/or other wire- less LAN equipment, or where static electricity or radio... -
Page 15: Safety Precautions
Overview Safety Precautions This section outlines the safety precautions needed for safe operation of the printer. Make sure to read the precautions carefully before using the printer. Symbols used in this Manual: The following symbols or markings are used in this manual and on the printer so that you can properly use the printer, and to prevent any damage to property, harm or injury to yourself and others. - Page 16 Overview Usage Safety • Do not place the printer in a hot or cold place The operation temperature range is -15°C to 50°C (for wireless LAN: 0 to 50°C) where humidity does not cause condensation. Do not place the printer in an area with high humidity or at a temperature outside the specified range.
- Page 17 Overview Usage Warnings Liquids Do not place any container with water or chemicals, such as flower vase or cup, as well as small metallic objects, near the printer. If any of these should drop into the printer, immediately turn off the power and contact your nearest dealer or service center.
- Page 18 Overview Battery • Never try to take apart the battery pack or modify it Pack in any way such as with a solder iron. • Never expose the battery to fire, or take any actions that may lead to shorting. •...
-
Page 19: Usage Precautions
Overview Usage Precautions Location Do not locate the printer in areas with high humidity or dew. If dew forms inside the printer, immediately it off, and do not use it until the dew has dried up. Otherwise, continued use creates the danger of electric shocks or the printer damage. - Page 20 Overview Battery • When replacing the Battery Pack use only the Pack specified design. • Make sure to install the pack in the correct orienta- tion. Incorrectly replacing the battery creates the danger of injury or damage to surrounding areas, if an explosion is caused.
-
Page 21: Setup
Setup SETUP Unpacking the printer If any component shown here is missing, contact your nearest dealer or service center. Notes: The printer is shipped with an integrated belt holder. Cushioning material may vary for different regions. An external battery charger is available separately. -
Page 22: Part Names
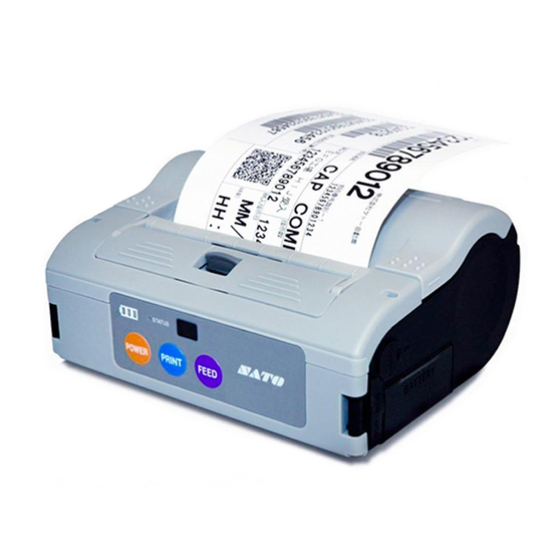
Setup Part Names Only the WLAN model comes with an LCD screen... - Page 23 Setup Part Names (cont’d)
-
Page 24: Functions Of Various Parts
Setup Functions of various parts RS-232C Allows connection to a computer Label Set to meet the size Interface or handy terminal guide of the label used RS-232C Protects the RS-232C connector Label Allows adjustment of the label cover from dust and damage guide guide to fit the width of an adjust dial... -
Page 25: Charging The Battery Pack With A Charger
Setup Charging the battery pack with a charger If your printer comes with the optional battery charger, you can use it to charge the supplied battery pack. Follow the steps below: 1. Connect the charger to the wall outlet and turn on the power. -
Page 26: Charging Time
Setup • If the CHARGE lamp does not light at the start of charging, make sure the battery pack is firmly mounted into the charger. Poor mounting of the battery pack may result in faulty charging. • When the fully charged battery pack is placed into the battery charger, the CHARGE lamp turns on and then off. -
Page 27: Charging The Battery Pack With The Printer
When the battery pack is fully charged, the battery indicator goes off. In the case of the MB400i/410i Wireless LAN interface model, the Battery Strength segments (See page 3-7) on the LCD screen will appear when charging starts, and go off when charging is complete. -
Page 28: Using The Battery Pack
Setup Using the battery pack Turn the printer off before removing or replacing the battery. Insertion 1. Unlatch the battery compartment cover. 2. Align the battery pack so that its metal terminals are facing forward. Insert the battery pack while pressing and holding the gray hook. -
Page 29: Using The Shoulder Belt
Setup Using the battery pack (cont’d) Notes Remove the battery pack only when the STATUS LED is OFF. When the printer is turned off, the STATUS LED goes off. Do not remove the battery while the STATUS LED is on. Otherwise, the information stored in the printer may not be updated. -
Page 30: Using The Optional Ac Adapter For Power
Setup Using the optional AC Adapter for power If your printer comes with the optional AC adapter, the printer can be operated on AC power instead of the supplied battery pack. Follow the steps below: 1. Remove the cover of the printer’s DC input jack and connect the AC adapter’s DC output... - Page 31 Setup Loading the label roll (Continuous mode) The method of installing label media varies with your choice of the two possible print modes— ’continuous’ or ‘dispense’ mode. 1. Make sure you can see Dispenser unit the red platen roller. If not, slide the dispenser unit down, by lifting its top edge upwards at the...
- Page 32 Setup 3. Place the label roll into the printer. Make sure the label roll is placed with the first label feeding from the bottom of the roll and not from the top (see picture). 4. Turn the label roll lightly by hand and confirm that it rotates smoothly.
- Page 33 Setup Loading the label roll (Dispense mode) For operating in the Dispense mode, the following label loading procedures apply. 1. Make sure you can see Dispenser unit the red platen roller. If not, slide the dispenser unit down, by lifting its top edge upwards at the two arrow marks.
- Page 34 Setup Installing the label roll (Dispense mode) 3. Insert the label roll into the printer. Make sure the first label emerges from the bottom (not top) of the roll. 4. Adjust the label guides by hand to ensure that the label roll can be rotated smoothly.
- Page 35 Setup Installing the label roll (cont’d) 3. Close the cover after confirming that the leading edge of the label is outside the printer by at least 10mm. * Note: When using linerless labels, press the FEED button to feed a piece of label and pull the label upward to cut it along the perforation.
- Page 36 Setup This page is left blank intentionally 2-16...
-
Page 37: Operation And Configuration
Operation and Configuration OPERATION AND CONFIGURATION After setting up the printer and label roll in Section 2, you can now operate the printer properly. Turning the printer ON Press and hold the POWER button. When the STATUS LED lights green, release the button Turning the printer OFF... -
Page 38: Performing A Test Print
Make sure the printer is running on AC or on a full battery during a test print. Notes: If any fault is detected, contact your SATO dealer or service center. Before asking for a repair, please read the Troubleshooting section of this manual. -
Page 39: Printing Via The Rs-232C Interface
Operation and Configuration Printing via the RS-232C Interface Use the following procedure to print by connecting to a computer or a handy terminal through an RS-232C cable option. 1. Locate the RS-232C interface port cover and lift it up to expose the port. 2. -
Page 40: Printing Via The Irda Interface
Operation and Configuration Printing via the IrDA Interface Use the following procedure to print through IrDA interface. 1. Place the printer 20 cm away from the IrDA port of the computer or handy terminal. Adjust the printer position so that the center of its IrDA filter projects a 30°... -
Page 41: Printing Via The Wireless Lan Interface
Printing via the Wireless LAN Interface To print using the Wireless LAN MB400i/410i, you need to have a properly configured wireless LAN set up. The next step is to configure the MB400i/410i to share the same network settings in order to establish communication. -
Page 42: Printing Via The Bluetooth Interface
Refer to the instruction manual of the computing device for details on how to set these parameters. For the MB400i/410i, these parameters can be set by a SATO-certified System Integrator/dealer, or by using Bluetooth communication software available from your SATO dealer or service center. -
Page 43: Optional Lcd Screen
Operation and Configuration Optional LCD screen The Wireless LAN version of the printer is factory- fitted with a Liquid Crystal Display (LCD). The screen can display the following information: Dispense Mode Manual/Auto status Test Print mode Battery Signal MANU strength strength ONLINE Two-line... - Page 44 Operation and Configuration Optional LCD screen (cont’d) Two-line text display: Displays the following: 1) Various status messages: Firmware version, Online mode, Offline mode, labels remaining in print queue, Test Print status, Default Setting, Complete, Factory Clear, Press Feed Key, Press Print Key, Hex Dump Mode, Set up Display, Adjust LCD, Exit, Contrast, Back Light On 2) Warning messages: Cover Open, Paper End,...
-
Page 45: Printing Procedure
Operation and Configuration Printing Procedure After the proper setup and basic configuration procedures, you are ready to print to the MB400i/410i. 1. Make sure the host computer is ready to transmit data, and ensure that the STATUS LED is lit. -
Page 46: Adjusting Printing For Linerless Labels
Operation and Configuration Adjusting printing for linerless labels When printing on a continuous label roll (linerless or “non-separate”), if you tear off a label at the wrong place, proceed as follows. 1. Interrupt printing on the computer, or by pressing the PRINT key in the ONLINE state to take the printer OFFLINE. -
Page 47: Choosing The Label Dispensing Mode
Operation and Configuration Choosing the Label Dispensing mode You can choose to dispense labels in Continuous Mode and Dispense Mode. In either mode, test printing and online printing are available. You can select Dispense mode for linerless labels by using the printer setting tool. 3-11... -
Page 48: Configuring Dispense Mode
Operation and Configuration Configuring Dispense mode Dispense Mode can be set to Auto Print or Manual Print, as described below. Type Operation Prints one label after receiving data and waits for peeling. Auto Print After peeling a label, automatically prints next label. Manual Prints one label after receiving data and enters offline Print (this... -
Page 49: Other Printer Modes
Operation and Configuration Other Printer Modes Available printer modes include Normal, Test Print, Head Check Setting and Online Command Setting mode. Normal mode STATUS LED behaviour in Normal Mode Operational State STATUS LED LED Action START OF PRINTING Orange Steady ONLINE Green Steady... -
Page 50: Test Print Mode
Operation and Configuration Printer modes (cont’d) Test Print Mode Enter Test Print mode as shown, by using the FEED and POWER buttons. STATUS LED behaviour in Test Print Mode Operational State STATUS LED LED Action ENTERING TEST PRINT MODE Orange Steady START OF TEST PRINT Green... -
Page 51: Head Check Setting Mode
Operation and Configuration Printer modes (cont’d) Head Check Setting Mode Head checking can be applied to one of two areas: the normal print area and the barcode print area. To specify the area subjected to a head check, follow the settings in the table below: Setting Head Check Area (cover must be left open) H.Check setting... - Page 52 Operation and Configuration Printer modes (cont’d) Online Command Compatibility Mode The printer can be set for compatibility with SBPL commands or with the older MB400-compatible commands. Setting Online Command compatibility (cover must be left open) Compatibility DSW-1 DSW-2 DSW-3 DSW-4 Other keys MB400-compatible hold down PRINT...
-
Page 53: Offset Configuration Via Programming
Operation and Configuration Offset Configuration via Programming The following offset adjustments for the MB400i/410i printer are usually unnecessary. Almost all adjustments are electrical in nature due to the printer’s advanced self aligning and balancing design features. However, if you need to perform the adjustments, they can be sent as commands to the printer. - Page 54 Operation and Configuration POSITION ADJUSTMENTS Pitch Offset Use the <PO3> Takes effect programming instantly; the command. value is cleared once the power is turned off. Dispense Offset Use the <PO1> Takes effect programming instantly; the command. value is cleared once the power is turned off.
-
Page 55: Special Settings
Special Settings SPECIAL SETTINGS Through a combination of DIP switch settings and turning the printer ON with certain buttons held down, you can enable or disable special functions/features. - Page 56 Special Settings Notes: 1. A small label may produce a large amount of data when printing a Hex Dump. 2. When the onboard buzzer is enabled, it will sound when the printer is turned ON during DIP switch setting. Release the FEED button to stop the buzzer. 3.
- Page 57 Special Settings WARNING: Never connect or disconnect interface cables (or use a switch box) with power applied to either the host or the printer. This may cause damage to the interface circuitry in the printer/host and is not covered by warranty. Note: Some hosts monitor the Request-To-Send (RTS) signal (pin 4 of 25) to determine if the printer is ready to receive data.
- Page 58 Special Settings This page is left blank intentionally...
-
Page 59: Cleaning And Maintenance
Cleaning and Maintenance CLEANING AND MAINTENANCE By cleaning and maintaining the printer regularly, you will prolong its durability and reliability, and also reduce the inconvenience of unnecessary malfunctions. Perform the following procedures regularly after turning the printer OFF and removing the battery pack. -
Page 60: Cleaning The Platen And Peel Roller
Cleaning and Maintenance Cleaning the Platen and Peel Roller Users can perform test prints to evaluate the print quality and also diagnose problems. Slide the Cover Open/ Close lever downwards to release the cover. If the lever cannot be pushed downards, first slide the dispenser unit downwards (see the red arrows), so that it returns... -
Page 61: Troubleshooting
1. Paper guide is posi- 1. Retry with different label paper. Use acters tioned incorrectly only SATO-certified media for best print quality and minimal problems 2. Roller is dirty 2. Clean the platen and peel roller (See Section 5: “Cleaning and Mainte- nance”) -
Page 62: Error Indicators
When print head is hotter Cleared when the (Green->off- modes heat than 70°C the print head head temperature >Red->off) protection overheat protection feature drops to 50°C every 1s feature is activated. Not in error. * Contact your nearest dealer or SATO representative for support... - Page 63 Troubleshooting WARNING: NEVER CONNECT OR DISCONNECT INTER- FACE CABLES (OR USE A SWITCH BOX) WITH POWER APPLIED TO EITHER THE PRINTER OR THE HOST. THIS MAY CAUSE DAMAGE TO THE INTERFACE CIRCUITRY AND THE DAMAGE IS NOT COVERED BY WARRANTY.
- Page 64 Troubleshooting LCD Error Messages (WLAN model only) STATUS (LED) Description Remedy Illegal Program No display on the LCD Check Status LED for detail Error/ Flash ROM Error Low Battery Battery Error (Font 14x24 Dot) • Shows low battery and battery Icon BATTERY blinks.
- Page 65 Troubleshooting LCD Error Messages (WLAN model only) Buffer Near Full Near Full error (Font 14x24 Dot) NEAR • The buffer memory is nearly full. FULL • Cancel the status to return to previ- ous display. Head Protect Head Protect error (due to overheat) (Font 14x24 Dot) •...
- Page 66 Troubleshooting This page is left blank intentionally...
-
Page 67: Basic Specifications & Optional Accessories Basic Specifications
Basic Specifications Attribute Description Printing system Direct Thermal printing system Head density MB400i: 8 dots/mm (203 dpi) MB410i: 12 dots/mm (305 dpi) Maximum print area 104 mm (width) x 297 mm (pitch) Print speed 103 mm/s max in normal mode... - Page 68 Basic Specifications & Optional Accessories Paper thickness 0.064 ~ 0.190 mm (Ultra sensitive Thermal C, Techno Thermal A, Synthetic Thermal C, Dual Color Thermal) 0.064 mm (Non-adhesive Thermal media) Shape of paper Roll paper: Wound with surface out Maximum diameter: 67 mm Media Types •...
- Page 69 Basic Specifications & Optional Accessories Power saving Auto power off after non operation features for 5 minutes. With Bluetooth or wireless LAN specifications, default is no auto power off. Auto power off time can be changed via the printer operation register com- mand <PG>.
- Page 70 Basic Specifications & Optional Accessories Font types SBPL 4.0 XU, XS, XM, XB, XL, OCR-A, OCR -B, POP character Kanji: 16 x 16, 22 x 22, 24 x 24 Square Gothic (JIS Level 1, Level 2), Compatibility Mode XS, XM, XB, PO Barcode JAN8/13, UPC-E/UPC-A, NW-7, (POSTNET not sup-...
- Page 71 Basic Specifications & Optional Accessories Indicators STATUS LED: One (Lights in three colors: Green, Red and Orange) Battery LED: Three Built-in buzzer for audible alerts Backlit 112 x 72 dot LCD screen on WLAN model Application FCC 15 ClassB, EN55022, standards EN55024, UL60950-1, CSA C22.2 No.60950-1-03, GB9243, GB9254,...
- Page 72 Basic Specifications & Optional Accessories Safety Compliance FCC15B, EN55022, EN55024, EN61000-3-2, EN61000-3-3, GB4943, GB9254, GB17625.1 Physical Withstands drops from 1.5m height Robustness (Breakage and damage to the case acceptable) Vibration tolerance: withstands bump testing (scrapes on the cover acceptable) RoHS Compliance <...
- Page 73 Basic Specifications & Optional Accessories Options • Battery pack • Spare battery • AC adapter • Battery charger (Single-socket) • Shoulder bag with raintight cover • Belt bag • Optional IrOBEX (Infrared com- munication protocol) feature is factory installed and cannot be retrofitted Notes: 1.
- Page 74 Basic Specifications & Optional Accessories MB400i/410i Radio Frequency characteristics 2.4FH1 Freq band 2.4 GHz used Modulation Frequency Hopped - system Spread Spectrum system Assumed 10 mm max. distance of interference Availability All area is used and exclu- of fre- sion of the band for equip-...
-
Page 75: Optional Accessories
Basic Specifications & Optional Accessories Optional Accessories The MB400i/410i direct thermal printer is supported by many accessories to increase its flexibility. Power Items Spare battery pack—having a spare pack reduces interruption during extended periods of printer operation. AC Adapter—allows the printer... - Page 76 Wireless LAN Interface (with LCD)—allows printing via a WLAN network. The interface comes with an LCD on the front panel to display the status of wireless communication. Bluetooth Interface—allows printing via a Bluetooth connection. For more details about the optional accessories, consult your authorized SATO representative. 7-10...
- Page 77 Basic Specifications & Optional Accessories This page is left blank intentionally 7-11...
Need help?
Do you have a question about the MB400i and is the answer not in the manual?
Questions and answers