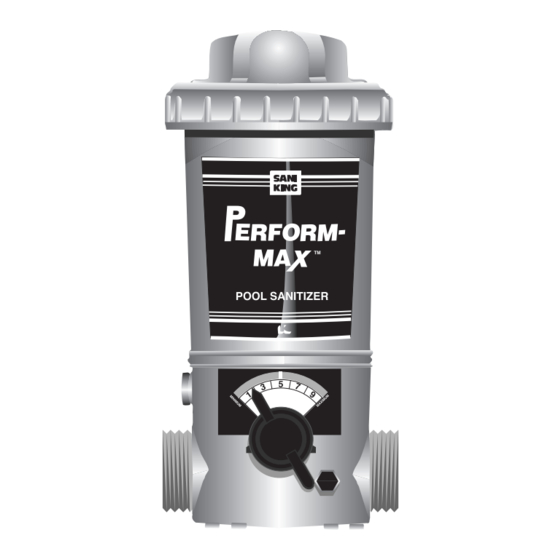
Summary of Contents for Sani king PERFORM-MAX 910
- Page 1 INSTRUCTION GUIDE Models 910, 940 & 980 (Inline) Models 930 & 960 (Off-line) PERFORM-MAX POOL SANITIZER Model 910 Model 940...
-
Page 2: Table Of Contents
TABLE OF CONTENTS Page No. Introducing Perform-Max Pool Balancing Installation Introduction Above Ground Base Installation Above Ground Filter Installation Inground Inline Installation Off-line Installation 8 & 9 Special Installations Refilling Chemicals Changing Chemicals 11 & 12 Setting Control Dial Parts List Replacing Control Dial O'rings Replacing Cap O'ring Winterizing... -
Page 3: Introducing Perform-Max
Benefits Thank you for • Sanitizes with choosing the Chlorine or Bromine. Perform-Max • Large capacity with a wide Pool Sanitizer for mouth for easier refilling. your pool. • Bi-flow design means unit Perform-Max can be installed in either precisely meters direction. -
Page 4: Installation Introduction
ABOVE GROUND POOLS Perform-Max Installation The Perform-Max comes in several 1/4" different models. Please review this list, determine which model you " i.d. have and follow Model #930 " the appropriate 3/16 Off-line for hard plumbed Model #910 installation above ground pools Inline for above ground pools (Sanitizes up (Sanitizes up to 15,000 gallons to 20,000 gallons using chlorine and up to... -
Page 5: Above Ground Base Installation
Above Ground, Base Installation – Model 910 TOOLS NEEDED Screwdriver PUMP FILTER The Perform-Max should always be Wrench installed between the filter and pool (or between heater and pool if TO POOL applicable). MATERIALS NEEDED: Teflon Tape Two Hose Adapters 1 1/2"... -
Page 6: Above Ground Filter Installation
Above Ground, Filter Installation - Model 910 TOOLS NEEDED Screwdriver Wrench Screw one end of nipple into the filter return. MATERIALS NEEDED: Apply teflon tape to each Screw either side of threaded end of nipple. Teflon Tape Tighten turning Perform-Max on to open nipple end until upright 1 to 2 revolutions with and secure. -
Page 7: Inground Inline Installation
Inground, Inline Installation – Model 940 TOOLS NEEDED COPPER PIPE Wrench Do NOT install in copper pipe as chemical corrosion occurs. Install after all equipment and as far as possible from heater. Hacksaw 12" to 15" Leave 12" to 15" above and MATERIALS NEEDED: around Perform-Max... -
Page 8: Off-Line Installation 8
Off-line Installation – Model 960 or 930 TOOLS NEEDED Wrench Install off-line when insufficient room for an inline application. Install as Screwdriver far from heater as possible. Battery Operated Drill with 5/8" or 19/32" Bit. MATERIALS NEEDED: MATERIALS NEEDED: Pipe Thread Pipe Thread Sealant Sealant... - Page 9 When pipe is totally dry, Cut tubing drill two 19/32" to size for or 5/8" holes each 12" apart on the Perform- PO O L S ANI TIZ return line. Be careful not to go PO O L PO O L S ANI TIZ S ANI TIZ connection...
-
Page 10: Special Installations
Special Perform-Max Installations PERFORM-MAX TO POOL Special installations should A. With High GPMS be considered when: Install T- fittings as shown only 1. Water flow is higher than 80 gpm. 2. In-floor cleaner is included with pool. 3. Pool and spa combination with common equipment. -
Page 11: Refilling Chemicals
Refilling Chemicals CAUTION Read Carefully DO NOT USE ... When using slow dissolving tion per refill. When using Bro- USE ONLY ... CALCIUM HYPOCHLORITE, FAST Trichlor, the Perform-Max should mine, the Perform-Max should DISSOLVING TRICHLOR OR ANY Slow dissolving Trichloro-s- be operated based on its normal be operated as a soaking feeder GRANULAR OR LIQUID MATERIAL... -
Page 12: Setting Control Dial
Changing Chemicals continued... Make sure all small particles have dissolved and been Make sure cap knob is Replace side knob on Remove cap. Follow safety flushed out of screwed down before Models 910 and 930. precautions outlined in #5 of feeder. -
Page 13: Parts List
Parts List E R F O R M- 8 & 9 P O O L S A N ITIZER P O O L S AN ITI ZER OTHER COPY? SILICONE LUBRICANT OTHER COPY? SILICONE LUBRICANT COPY COPY COPY COPY COPY COPY PERFORM-MAX DIAGRAM/PARTS LIST •... -
Page 14: Replacing Control Dial O'rings
Perform-Max Maintenance Replacing the Control Dial O'Rings for Above Ground Perform-Max Locking Pin (Back of Perform-Max) OTHER COPY? E R F SILICONE O R M- LUBRICANT O L S A NI TIZER COPY COPY COPY Control 4. Replace both o'rings. Dial PORT Please note: the back o'ring... -
Page 15: Replacing Cap O'ring
Replacing Cap O'Ring OTHER COPY? SILICONE LU BRICANT COPY COPY COPY 1. Hold cap in front of you 2. Take hold of the far end of as you stretch the o'ring into 3. Lubricate o'ring by upside down with the o'ring the o'ring with the thumb and the remainder of the cap squeezing a little silicone... -
Page 16: Warranty
Limited One-Year Warranty distributor for further information concerning shock King Technology will warrant this unit with a complete treatments. replacement for the original purchaser should it prove B. Control dial settings in excess of the recom- defective by reason of improper workmanship and/or mended setting levels for trichlor or bromine can material, for a period of one (1) year from the date of result in excess sanitizers being discharged into our...


Need help?
Do you have a question about the PERFORM-MAX 910 and is the answer not in the manual?
Questions and answers