Table of Contents
Advertisement
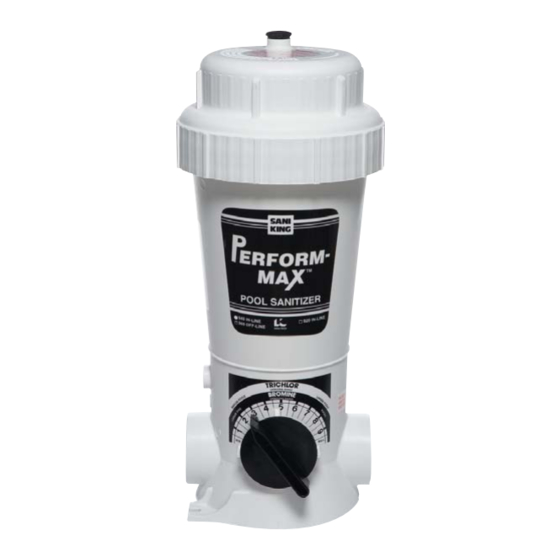
Perform-Max
Pool Sanitizer
Instruction Manual
CHLORINE/BROMINE FEEDER
for Pools up to 50,000 Gallons
WARNING
To minimize the risk of serious injury, death or
damage, before installing or first using this
equipment, read Instruction Manual and all safety
labels and follow all safety instructions and
precautions. Save manual for future reference.
Ver la versión en español de este manual en kingtechnology.com/brands/sani-king
Model 940
for pools up to
50,000 gallons
Customer Service 800-222-0169
Model 920
for pools up to
25,000 gallons
kingtechnology.com
1
Advertisement
Table of Contents

Subscribe to Our Youtube Channel
Related Manuals for Sani king Perform-Max 920

Summary of Contents for Sani king Perform-Max 920
- Page 1 Perform-Max Pool Sanitizer Instruction Manual CHLORINE/BROMINE FEEDER for Pools up to 50,000 Gallons Model 940 Model 920 for pools up to for pools up to 50,000 gallons 25,000 gallons WARNING To minimize the risk of serious injury, death or damage, before installing or first using this Customer Service 800-222-0169 equipment, read Instruction Manual and all safety labels and follow all safety instructions and...
-
Page 2: Table Of Contents
TABLE OF CONTENTS Perform-Max Introduction Notes and Safety Information Safety Labels on Feeder Installation Tips to Ensure Proper Performance Filter Flex-Hose Installation Model 920 Base Flex-Hose Installation Model 920 Hard-Plumbed Installation Model 920 In-Line Installation Model 940 In-line Installation Model 980 for 1½” Plumbing Off-Line Installation Model 960 11-12 Step 1: Preparing the Pool... -
Page 3: Perform-Max Introduction
Thank you for choosing the Perform-Max Pool Sanitizer for your pool. Perform-Max precisely meters chlorine at a consistent rate so you are ensured of a properly sanitized pool with less work and more time to enjoy. There are four models to choose from: 17"... -
Page 4: Notes And Safety Information
Notes and Safety Information General Notes These instructions contain information for the safe and proper These instructions do not provide for every possible contingency operation of this Perform-Max Feeder. Observe the following that might be encountered in connection with installation, opera- principles: tion or maintenance of this equipment. -
Page 5: Safety Labels On Feeder
Safety Label on Perform-Max Feeder Review this label before installing or operating this Feeder. Contact King Technology at 800-222-0169 if this label is missing from your Perform-Max. Fire, explosion and high pressure hazards To minimize the risk of serious injury, death or property damage while using the Perform-Max Feeder: a Read, understand and follow all instructions and safety precautions in the manual, and on this Perform-Max Feeder and on any label for chemicals used with this Perform-Max Feeder. -
Page 6: Installation Tips To Ensure Proper Performance
Installation Tips to Ensure Proper Performance Before installing, read all directions carefully and contact your dealer for installation support. A. With High Flow Rate (greater than 80 gpm) WARNING • Do not exceed maximum operating pressure of 50 psi. Install T-fi ttings exactly as shown. Perform-Max •... -
Page 7: Filter Flex-Hose Installation Model 920
TOOLS NEEDED Filter Flex-Hose Installation - Model 920 Screwdriver Pipe Wrench MATERIALS NEEDED Screw one end of nipple Pipe Thread Tape into the fi lter return. or Sealant Apply pipe thread tape or sealant Screw either side of to each threaded end of nipple. Perform-Max Feeder on Hand tighten. -
Page 8: Base Flex-Hose Installation Model 920
TOOLS NEEDED Base Flex-Hose Installation - Model 920 Screwdriver PUMP The Perform-Max Feeder should always Pipe Wrench be installed between the fi lter and pool (or between heater and pool if applicable). Never FILTER install Perform-Max Feeder before the heater or damage to the heater could occur. -
Page 9: Hard-Plumbed Installation Model 920
Hard-Plumbed Installation - Model 920 TOOLS NEEDED Pipe Wrench Hacksaw The Perform-Max Feeder should always be installed between Do NOT install in copper pipe as the fi lter and pool (or between heater and pool if applicable). chemical corrosion may lead to pipe Tape Never install Perform-Max Feeder before the heater or Measure... -
Page 10: In-Line Installation Model 940
In-line Installation - Model 940 TOOLS NEEDED Pipe Wrench Hacksaw Do NOT install in copper pipe The Perform-Max Feeder should always be installed between the fi lter as chemical corrosion may and pool (or between heater and pool if applicable). Never install lead to pipe failure. -
Page 11: Off-Line Installation Model 960
TOOLS NEEDED Off-line Installation - Model 960 Screwdriver The Perform-Max Feeder SCOOPS should always be installed 2” – 36” APART between the fi lter and pool Pipe Wrench (or between heater and pool if applicable). Never install Perform-Max Feeder before Battery the heater or damage to the Operated Drill... - Page 12 When pipe is Cut tubing totally dry, drill two to size 19/32” or 5/8” for each holes, between Perform- 2” - 36” apart, on Max Feeder the return line. Be connection careful not to go and attach through other side one to each of pipe.
-
Page 13: Step 1: Preparing The Pool
Step 1: Preparing the Pool Make sure the pool has adequate Check for metals in the pool such circulation. The total volume of pool as iron or copper. Before attempting water must completely circulate Metal water balance, these should be through the pump and fi lter at least removed. - Page 14 Continue... Step 1: Preparing the Pool Initially shock the pool with For best results in achieving water balance, follow a chlorine shock only to rid steps 5a through 5e in order. the water of contaminants and establish a chlorine residual. Always follow the manufacturer’s directions Take a water sample carefully.
-
Page 15: Step 2: Putting The Feeder To Work
Step 2: Putting the Feeder to Work Replace cap by hand only. DO NOT OVER TIGHTEN. DANGER Never use fast dissolving chlorine tablets, liquid bleach, or calcium hypochlorite in the Perform-Max Feeder. WARNING Model 920 Avoid sparks, smoking, or any open fl ame near Models 940, 960, 980 Perform-Max Feeder or chemicals. -
Page 16: Step 3: Setting The Control Dial
Step 3 - Setting Control Dial When using slow dissolving trichlor, the Perform-Max Feeder should be operated based on its normal erosion design where only the bottom layer of tablets are wetted. This provides better controllability and longer lasting sanitation per refi ll. When using bromine, the Perform-Max Feeder should be operated as a soaking feeder as this chemical works best when all tablets are wetted. -
Page 17: Step 4: Routine Pool Care
Step 4: Routine Pool Care Shock the pool every week or as Run fi ltration system enough hours to circulate all water 1 to 2 times per needed with a non-chlorine or chlorine shock. day. More than that could result in over chlorination. -
Page 18: Winterizing
Winterizing Unscrew knob in front of Model 920 and in back of Models 940, 960, and 980. Allow all water to drain. Operate Perform-Max Feeder until empty of all chemical. When empty, set control dial to maximum or 10 and let Models 940, 960, 980 Model 920 run empty for 24 hours. -
Page 19: Troubleshooting
Troubleshooting For help troubleshooting, call King Technology at 800-222-0169. Problem Remedy 1. Make sure your fi ltration time if not. free chlorine reading of What do I do system is working properly (i.e. 1.0 to 3.0 ppm. if the water looks 3. -
Page 20: Parts List 920
Parts List • Model 920 SILICONE LUB RICANT Optional part- not included Included with Model 920 Replacement Parts for Model 920 REF. # DESCRIPTION QTY. INCLUDED REF. # PART NO. DESCRIPTION 1 & 2 Cap w/O-Ring 1 & 2 01-22-1418 Cap w/O-Ring Body 01-22-1926... -
Page 21: Parts List 940, 960 And 980
Parts List Models 940, 960, 980 INCLUDED WITH • Models 940, 960 and 980 REF. # DESCRIPTION QTY. INCLUDED 1 & 2 Cap w/O-Ring SILICONE LUBRICANT Body Pressure Relief Valve 5, 6, 7 Control Dial with O-Rings 8 & 9 Knob with O-Ring Screen Cap/Control Dial Tool... -
Page 22: Maintenance - Replacing Control Dial O-Rings
Maintenance Replacing the Control Dial O-Rings Model 920 Models 940/960/980 Center of locking pin In the back of the Perform- Using a needle nose pliers, Max Feeder depress center of fi nd the snap ring tail located locking pin with a fi nger and at approximately the 5 o’clock pull pin out of dial. -
Page 23: Maintenance - Replacing Cap O-Rings And Knobs
Maintenance continued... Replacing the Cap O-Ring Model 920 Models 940, 960 & 980 Remove old O-ring. Remove old O-ring. Top half of groove. Top half of groove Place new O-ring in bottom Place new O-ring in bottom half of groove. half of groove. -
Page 24: Warranty
Limited One-Year Warranty King Technology, Inc. will warrant this unit with a complete replace- 3. Any express warranty not provided for herein, and any remedy for ment for the original purchaser, should it prove defective by reason breach of warranty or breach of contract which, but for this provision, of improper workmanship and/or material for a period of one (1) might arise by implication or operation of law, is hereby expressly years from the date of original purchase/installation.
Need help?
Do you have a question about the Perform-Max 920 and is the answer not in the manual?
Questions and answers
The control dial will not turn at all