Table of Contents
Advertisement
Quick Links
RETURN TO MAIN MENU
SVM156-A
October, 2001
TM
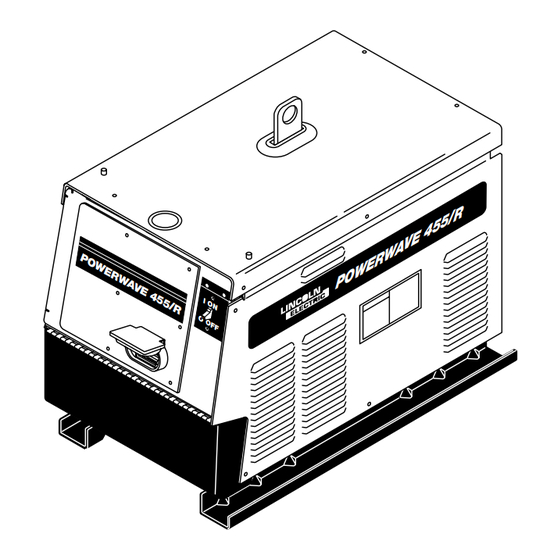
POWER WAVE 455/R
For use with machines having Code Numbers: 10675
10676
Safety Depends on You
Lincoln arc welding and cutting
equipment is designed and built
with safety in mind. However,
your overall safety can be in-
creased by proper installation . . .
and thoughtful operation on
your part. DO NOT INSTALL,
OPERATE OR REPAIR THIS
EQUIPMENT WITHOUT
READING THIS MANUAL AND
THE SAFETY PRECAUTIONS
CONTAINED THROUGHOUT.
And, most importantly, think
before you act and be careful.
IEC 60974-1
SERVICE MANUAL
Copyright © 2001 Lincoln Global Inc.
• World's Leader in Welding and Cutting Products •
• Sales and Service through Subsidiaries and Distributors Worldwide •
Cleveland, Ohio 44117-1199 U.S.A. TEL: 216.481.8100 FAX: 216.486.1751 WEB SITE: www.lincolnelectric.com
Advertisement
Chapters
Table of Contents
Troubleshooting

Subscribe to Our Youtube Channel
Related Manuals for Lincoln Electric POWER WAVE SVM156-A


Summary of Contents for Lincoln Electric POWER WAVE SVM156-A
- Page 1 RETURN TO MAIN MENU SVM156-A October, 2001 POWER WAVE 455/R For use with machines having Code Numbers: 10675 10676 Safety Depends on You Lincoln arc welding and cutting equipment is designed and built with safety in mind. However, your overall safety can be in- creased by proper installation .
-
Page 2: Safety
Miami, Florida 33135 or CSA Standard W117.2-1974. A Free copy of “Arc Welding Safety” booklet E205 is available from the Lincoln Electric Company, 22801 St. Clair Avenue, Cleveland, Ohio 44117-1199. BE SURE THAT ALL INSTALLATION, OPERATION, MAINTENANCE AND REPAIR PROCEDURES ARE PERFORMED ONLY BY QUALIFIED INDIVIDUALS. -
Page 3: Electric Shock Can Kill
ELECTRIC SHOCK can kill. 3.a. The electrode and work (or ground) circuits are electrically “hot” when the welder is on. Do not touch these “hot” parts with your bare skin or wet clothing. Wear dry, hole-free gloves to insulate hands. - Page 4 WELDING SPARKS can cause fire or explosion. 6.a. Remove fire hazards from the welding area. If this is not possible, cover them to prevent the welding sparks from starting a fire. Remember that welding sparks and hot materials from welding can easily go through small cracks and openings to adjacent areas.
- Page 5 PRÉCAUTIONS DE SÛRETÉ Pour votre propre protection lire et observer toutes les instructions et les précautions de sûreté specifiques qui parraissent dans ce manuel aussi bien que les précautions de sûreté générales suiv- antes: Sûreté Pour Soudage A L’Arc 1. Protegez-vous contre la secousse électrique: a.
-
Page 6: Table Of Contents
- MASTER TABLE OF CONTENTS FOR ALL SECTIONS - RETURN TO MAIN MENU Page Safety ...i-iv Installation...Section A Operation...Section B Accessories ...Section C Maintenance ...Section D Theory of Operation ...Section E Troubleshooting and Repair ...Section F Electrical Diagrams ...Section G Parts Manual ...P-377 POWER WAVE 455/R... - Page 7 Section A - INSTALLATION SECTION - Installation...Section A Technical Specifications ...A-2 Safety Precautions ...A-4 Select Suitable Location...A-4 Lifting ...A-4 Stacking ...A-4 Machine Grounding...A-4 High Frequency Protection...A-4 Input Connection ...A-5 Input Fuse and Supply Wire Considerations ...A-5 Input Voltage Change Over (For Multiple Input Voltage Machines Only)...A-6 Welding with Multiple Power Waves ...A-6 Electrode and Work Cable Connections ...A-7 Negative Electrode Polarity...A-7...
-
Page 8: Installation
TECHNICAL SPECIFICATIONS - POWER WAVE 455/R (K1761-1), (K1761-2) INPUT AT RATED OUTPUT - THREE PHASE ONLY INPUT OUTPUT VOLTS CONDITIONS (K1761-1) 450A@38V 100% 208/230/460V - 60HZ 570A@43V 60% 400A@36V 100% 200/220/440V - 50HZ 500A@40V 60% (K1761-2) 450@38V 100% 570@43V 60% 208/230/460/575V-60HZ 400@36V 100% 500A@40V 60%... - Page 9 TECHNICAL SPECIFICATIONS - POWER WAVE 455/R (K1761-1), (K1761-2) HEIGHT 26.10 in 663 mm OPERATING TEMPERATURE RANGE -20°C to +40°C INSTALLATION (continued) PHYSICAL DIMENSIONS WIDTH DEPTH 19.86 in 32.88 in 505 mm 835 mm TEMPERATURE RANGES STORAGE TEMPERATURE RANGE POWER WAVE 455/R WEIGHT (K1761-1) 247 lbs.
-
Page 10: Safety Precautions
Dirt, dust, or any foreign mate- rial that can be drawn into the welder should be kept at a minimum. Do not use air filters on the air intake, because the air flow will be restricted. -
Page 11: Input Connection
Choose an input and grounding wire size according to local or national electrical codes. Using fuses or circuit breakers smaller than recommended may result in “nuisance” shut-offs from welder inrush currents, even if the machine is not being used at high currents. POWER WAVE 455/R... -
Page 12: Input Voltage Change Over (For Multiple Input Voltage Machines Only
If the lead is placed in a position higher than the applied line voltage, the welder may not come on at all. If the auxiliary (A) lead is placed in a position lower than the applied line volt- age, the welder will not come on, and the two circuit breakers in the reconnect area will open. -
Page 13: Electrode And Work Cable Connections
When these parameters are identical, the pulsing fre- quency will be the same, helping to stabilize the arcs. Every welding gun requires a separate shielding gas regulator for proper flow rate and shielding gas cover- age. Do not attempt to supply shielding gas for two or more guns from only one regulator. -
Page 14: Voltage Sensing
Depending upon the process, inductance within the electrode and work lead cables can influence the volt- age apparent at the terminals of the welder. Voltage sense leads improve the accuracy of the arc conditions and can have a dramatic effect on performance. -
Page 15: Work Voltage Sensing
WORK VOLTAGE SENSING The Power Wave is shipped from the factory with the work sense lead enabled. For processes requiring work voltage sensing, connect the (21) work voltage sense lead from the Power Wave to the work. Attach the sense lead to the work as close to the weld as practical. -
Page 16: Dip Switch Settings And Locations
A-10 DIP SWITCH SETTINGS AND LOCATIONS DIP switches on the PC boards allow for custom con- figuration of the Power Wave. Access the DIP switch- es as follows: WARNING ELECTRIC SHOCK CAN KILL. • Do not touch electrically live parts or electrodes with your skin or wet cloth- ing. -
Page 17: Devicenet/Gateway Board Dip Switch, Bank (S2
A-11 DEVICENET/GATEWAY BOARD DIP SWITCH, BANK (S2): switch 1,2 = configure the baud rate for DeviceNET Prior to S24958-6 software switch 1 switch 2 S24958-6 and later software switch 1 switch 2 Programmable value. Consult local Lincoln Technical representative. switch 5 = reserved for future use switch 6 = reserved for future use switch 7 = reserved for future use switch 8 = reserved for future use... - Page 18 A-12 A-12 NOTES POWER WAVE 455/R...
-
Page 19: Operation Section
Section B-1 - OPERATION SECTION - Operation...Section B Safety Precautions ...B-2 Graphic Symbols...B-3 General Description ...B-4 Design Features and Advantages ...B-4 Recommended Processes and Equipment...B-5 Recommended Processes...B-5 Recommended Equipment ...B-5 Required Equipment ...B-5 Limitations...B-5 Duty Cycle and Time Period...B-5 Case Front Controls ...B-6 Welding Mode Descriptions ...B-7 Constant Voltage Welding ...B-7 Pulse Welding...B-8... -
Page 20: Operation
SAFETY PRECAUTIONS Read this entire section of operating instructions before operating the machine. • Do not touch electrically live parts or electrodes with your skin or wet clothing. • Insulate yourself from the work and ground. • Always wear dry insulating gloves. Observe additional guidelines detailed in the beginning of this manual. -
Page 21: Operation
GRAPHIC SYMBOLS THAT APPEAR ON THIS MACHINE OR IN THIS MANUAL INPUT POWER HIGH TEMPERATURE MACHINE STATUS CIRCUIT BREAKER WIRE FEEDER POSITIVE OUTPUT NEGATIVE OUTPUT 3 PHASE INVERTER INPUT POWER THREE PHASE DIRECT CURRENT OPERATION SMAW GMAW FCAW GTAW OPEN CIRCUIT VOLT- INPUT VOLTAGE OUTPUT VOLTAGE INPUT CURRENT... -
Page 22: General Description
GENERAL DESCRIPTION The Power Wave power source is designed to be a part modular, multi-process welding Depending on configuration, it can support constant current, constant voltage, Surface Tension Transfer and pulse welding modes. The Power Wave power source is designed to be used with the family of Power Feed wire feeders, operating as a system. -
Page 23: Recommended Processes And Equipment
RECOMMENDED PROCESSES AND EQUIPMENT RECOMMENDED PROCESSES The Power Wave 455/R can be set up in a number of configurations, some requiring optional equipment or welding programs. Each machine is factory prepro- grammed with multiple welding procedures, typically including GMAW, GMAW-P, FCAW, GTAW and STT for a variety of materials, including mild steel, stainless steel, cored wires, and aluminum. -
Page 24: Case Front Controls
CASE FRONT CONTROLS All operator controls and adjustments are located on the case front of the Power Wave. (See Figure B.1) 1. POWER SWITCH: Controls input power to the Power Wave. 2. STATUS LIGHT: A two color light that indicates sys- tem errors. -
Page 25: Wave Control
WELDING MODE DESCRIPTIONS CONSTANT VOLTAGE WELDING For each wire feed speed, a corresponding voltage is preprogrammed into the machine through special soft- ware at the factory. The preprogrammed voltage is the best average voltage for a given wire feed speed. With synergic programs, when the wire feed speed changes, the Power Wave will automatically adjust the corre- sponding voltage. -
Page 26: Pulse Welding
PULSE WELDING Pulse welding procedures are set by controlling an overall “arc length” variable. When pulse welding, the arc voltage is highly dependent upon the waveform. The peak current, background current, rise time, fall time and pulse frequency all affect the voltage. The exact voltage for a given wire feed speed can only be predicted when all the pulsing waveform parameters are known. -
Page 27: Stt Welding
STT WELDING The pictures illustrate the waveshape of current for the process. They are not drawn to scale, and are intend- ed only for the purpose of showing how the variables affect the waveform. FIGURE B.4 – STT TRIM CONTROL CHARACTERISTICS Current Time For most programs, peak current is adjusted by wave... - Page 28 B-10 B-10 NOTES POWER WAVE 455/R...
-
Page 29: Accessories Section
Section C-1 - ACCESSORIES SECTION - Accessories ...Section C Optional Equipment ...C-2 Factory Installed ...C-2 Field Installed ...C-2 TABLE OF CONTENTS POWER WAVE 455/R Section C-1... -
Page 30: Optional Equipment
OPTIONAL EQUIPMENT FACTORY INSTALLED There are no factory installed options available for the Power Wave 455R. FIELD INSTALLED • Gas Guard Regulator (K659-1) The Gas Guard regulator is available as an option- al accessory for the Power Feed Robotic wire drive unit. -
Page 31: Maintenance Section
Section D-1 - MAINTENANCE SECTION - Maintenance ...Section D Safety Precautions...D-2 Routine and Periodic Maintenance...D-2 Main Assembly (Exploded View) ...D-3 TABLE OF CONTENTS POWER WAVE 455/R Section D-1... -
Page 32: Routine And Periodic Maintenance
SAFETY PRECAUTIONS WARNING ELECTRIC SHOCK can kill. • Only Qualified personnel should perform this maintenance. • Turn the input power OFF at the disconnect switch or fuse box before working on this equipment. • Do not touch electrically hot parts. ROUTINE AND PERIODIC MAINTENANCE 1. -
Page 33: Maintenance
FIGURE D.1 – MAIN ASSEMBLY (EXPLODED VIEW) 1. CASE FRONT ASSEMBLY 2. TRANSFORMER AND OUTPUT RECTIFIER ASSEMBLY 3. INPUT ASSEMBLY 4. CONTROL BOX AND VERTICAL DIVIDER ASSEMBLY 5. BASE, LIFT BAIL AND FAN ASSEMBLY 6. SWITCH BOARD HEATSINK ASSEMBLY 7. CASE PARTS MAINTENANCE POWER WAVE 455/R... - Page 34 NOTES POWER WAVE 455/R...
-
Page 35: Theory Of Operation Section
Section E-1 - THEORY OF OPERATION SECTION - Theory of Operation ...Section E General Description ...E-2 Input Voltage and Precharge ...E-3 Switch Boards and Main Transformer...E-4 DC Bus Board, Power Board, Feed Head Board, Gateway Board and Voltage Sense Board ...E-5 Control Board ...E-7 Output Rectifier, Output Choke and STT Chopper Board ...E-8 Thermal Protection, Protective Circuits, Over Current Protection... -
Page 36: Theory Of Operation
THEORY OF OPERATION FIGURE E.2 – INPUT VOLTAGE AND PRECHARGE POWER WAVE 455/R INPUT RECTIFIER RECONNECT INPUT BOARD CONTACTOR AND PRECHARGE CONTROL SIGNALS FROM CONTROL BOARD FROM CONTROL BOARD RECONNECT 115 VAC RELAY 115 VAC 65 VDC 52 VAC BUS BOARD RECTIFIER 230 VAC WATER... -
Page 37: Input Voltage And Precharge
THEORY OF OPERATION INPUT VOLTAGE AND PRECHARGE The Power Wave 455/R can be connected for a variety of three-phase input voltages. Refer to Figure E.2. The initial input power is applied to the Power Wave 455/R through a line switch located on the front of the machine. -
Page 38: Switch Boards And Main Transformer
THEORY OF OPERATION FIGURE E.3 - SWITCH BOARDS AND MAIN TRANSFORMER POWER WAVE 455/R INPUT RECTIFIER INPUT BOARD CONTACTOR AND PRECHARGE CONTROL SIGNALS FROM CONTROL BOARD FROM CONTROL BOARD RECONNECT 115 VAC RELAY 115 VAC 65 VDC 52 VAC BUS BOARD RECTIFIER 230 VAC WATER... -
Page 39: Dc Bus Board, Power Board, Feed Head Board, Gateway Board And Voltage Sense Board
THEORY OF OPERATION FIGURE E-4 – DC BUS BOARD, POWER BOARD, FEED HEAD BOARD, GATEWAY BOARD AND VOLTAGE SENSE BOARD POWER WAVE 455/R INPUT RECTIFIER INPUT BOARD CONTACTOR AND PRECHARGE CONTROL SIGNALS FROM CONTROL BOARD FROM CONTROL BOARD RECONNECT 115 VAC RELAY 115 VAC 65 VDC... - Page 40 THEORY OF OPERATION FIGURE E.5 – POWER WAVE 455/R COMMUNICATIONS A A r r c c L L i i n n k k Arc Link G G a a t t e e w w a a y y F F e e e e d d C C o o n n t t r r o o l l B B o o a a r r d d...
-
Page 41: Control Board
THEORY OF OPERATION POWER WAVE 455/R INPUT RECTIFIER INPUT BOARD CONTACTOR AND PRECHARGE CONTROL SIGNALS FROM CONTROL BOARD FROM CONTROL BOARD RECONNECT 115 VAC RELAY 115 VAC 65 VDC 52 VAC BUS BOARD RECTIFIER 230 VAC WATER COOLER 115 VAC RECP. -
Page 42: Output Rectifier, Output Choke And Stt Chopper Board
THEORY OF OPERATION FIGURE E.7 – OUTPUT RECTIFIER, OUTPUT CHOKE AND STT CHOPPER BOARD POWER WAVE 455/R INPUT RECTIFIER INPUT BOARD CONTACTOR AND PRECHARGE CONTROL SIGNALS FROM CONTROL BOARD FROM CONTROL BOARD RECONNECT 115 VAC RELAY 115 VAC 65 VDC 52 VAC BUS BOARD RECTIFIER... -
Page 43: Thermal Protection
THEORY OF OPERATION THERMAL PROTECTION Three normally closed (NC) thermostats protect the machine from excessive operating temperatures. These thermostats are wired in series and are con- nected to the control board. One of the thermostats is located on the heat sink of the output rectifier, one on the DC bus, and one on the output choke. - Page 44 E-10 THEORY OF OPERATION Current Time Current Time GENERAL DESCRIPTION OF THE STT (SURFACE TENSION TRANSFER) PROCESS The STT process cannot be classified as either a con- stant current (CC) or a constant voltage (CV) applica- tion. The STT function produces current of a desired waveform to reduce spatter and fumes.
-
Page 45: Insulated Gate Bipolar Transistor (Igbt) Operation
E-11 THEORY OF OPERATION SOURCE DRAIN A. PASSIVE INSULATED GATE BIPOLAR TRANSISTOR (IGBT) OPERATION An IGBT is a type of transistor. IGBTs are semicon- ductors well suited for high frequency switching and high current applications. Drawing A shows an IGBT in a passive mode. There is no gate signal, zero volts relative to the source, and therefore, no current flow. -
Page 46: Pulse Width Modulation
E-12 THEORY OF OPERATION FIGURE E.10 – TYPICAL IGBT OUTPUTS 25 sec 24 sec PULSE WIDTH MODULATION The term PULSE WIDTH MODULATION (PWM) is used to describe how much time is devoted to conduc- tion in the positive and negative portions of the cycle. Changing the pulse width is known as MODULATION. - Page 47 Section F-1 - TROUBLESHOOTING & REPAIR SECTION - Troubleshooting & Repair ...Section F How to Use Troubleshooting Guide ...F-2 PC Board Troubleshooting Procedures...F-3 Troubleshooting Guide ...F-4 Test Procedures ...F-9 Input Filter Capacitor Discharge Procedure ...F-9 Switch Board Test ...F-11 Input Rectifier Test ...F-14 Input Contactor Test...F-17 DC Bus Power Supply PC Board Test...F-20 Power Board Test ...F-23...
-
Page 48: Troubleshooting & Repair
TROUBLESHOOTING & REPAIR HOW TO USE TROUBLESHOOTING GUIDE Service and repair should be performed by only Lincoln Electric Factory Trained Personnel. Unauthorized repairs performed on this equipment may result in danger to the technician and machine operator and will invalidate your factory warranty. For your safety and to avoid Electrical Shock, please observe all safety notes and precautions detailed throughout this manual. -
Page 49: Pc Board Troubleshooting Procedures
• If the PC Board uses protective shorting jumpers, don’t remove them until installation is complete. • If you return a PC Board to The Lincoln Electric Company for credit, it must be in the static-shielding bag. This will prevent further damage and allow prop- er failure analysis. -
Page 50: Troubleshooting Guide
If for any reason you do not understand the test procedures or are unable to perform the test/repairs safely, contact the Lincoln Electric Service Department for electrical troubleshooting assistance before you proceed. Call 1-800-833-9353. POSSIBLE AREAS OF... - Page 51 If for any reason you do not understand the test procedures or are unable to perform the test/repairs safely, contact the Lincoln Electric Service Department for electrical troubleshooting assistance before you proceed. Call 1-800-833-9353. detailed in the beginning of this manual.
- Page 52 "overheats." If for any reason you do not understand the test procedures or are unable to perform the test/repairs safely, contact the Lincoln Electric Service Department for electrical troubleshooting assistance before you proceed. Call 1-800-833-9353. POSSIBLE AREAS OF...
- Page 53 If for any reason you do not understand the test procedures or are unable to perform the test/repairs safely, contact the Lincoln Electric Service Department for electrical troubleshooting assistance before you proceed. Call 1-800-833-9353. detailed in the beginning of this manual.
- Page 54 If for any reason you do not understand the test procedures or are unable to perform the test/repairs safely, contact the Lincoln Electric Service Department for electrical troubleshooting assistance before you proceed. Call 1-800-833-9353. POSSIBLE AREAS OF...
-
Page 55: Input Filter Capacitor Discharge Procedure
TROUBLESHOOTING & REPAIR INPUT FILTER CAPACITOR DISCHARGE PROCEDURE Service and repair should be performed by only Lincoln Electric factory trained personnel. Unauthorized repairs performed on this equipment may result in danger to the technician or machine operator and will invalidate your factory warranty. For your safety and to avoid electrical shock, please observe all safety notes and precautions detailed throughout this manual. -
Page 56: Test Procedure
F-10 TROUBLESHOOTING & REPAIR INPUT FILTER CAPACITOR DISCHARGE PROCEDURE (CONTINUED) FIGURE F.1 – CAPACITOR DISCHARGE PROCEDURE TEST PROCEDURE 1. Remove input power to the Power Wave 455/R. 2. Using the 3/8” nut driver, remove the left and right case sides. 3. -
Page 57: Switch Board Test
F-11 TROUBLESHOOTING & REPAIR Service and repair should be performed by only Lincoln Electric factory trained personnel. Unauthorized repairs performed on this equipment may result in danger to the technician or machine operator and will invalidate your factory warranty. For your safety and to avoid electrical shock, please observe all safety notes and precautions detailed throughout this manual. - Page 58 F-12 TROUBLESHOOTING & REPAIR SWITCH BOARD TEST (CONTINUED) TEST PROCEDURE 1. Remove input power to the Power Wave 455/R. 2. Using the 3/8” nut driver, remove the case top and sides. 3. Perform Capacitor Procedure. 4. Locate label and remove leads 19C and 19D from the reconnect switches with the 3/8”...
- Page 59 F-13 TROUBLESHOOTING & REPAIR SWITCH BOARD TEST (CONTINUED) FIGURE F.3 – SWITCH BOARD TEST POINTS 8. Reconnect leads 19C and 19D to the recon- nect switches. Ensure that the leads are installed in the same location they were removed from. APPLY POSITIVE TEST PROBE TO TERMINAL 11/12 OR 15/16...
-
Page 60: Test Description
F-14 TROUBLESHOOTING & REPAIR Service and repair should be performed by only Lincoln Electric factory trained personnel. Unauthorized repairs performed on this equipment may result in danger to the technician or machine operator and will invalidate your factory warranty. For your safety and to avoid electrical shock, please observe all safety notes and precautions detailed throughout this manual. - Page 61 F-15 TROUBLESHOOTING & REPAIR INPUT RECTIFIER TEST (CONTINUED) TEST PROCEDURE 1. Remove input power to the Power Wave 455/R. 2. Using the 3/8” nut driver, remove the case top. 3. Perform Capacitor Procedure. 4. Locate the Input Rectifier and lead locations. Refer to Figure F.4.
- Page 62 F-16 TROUBLESHOOTING & REPAIR INPUT RECTIFIER TEST (CONTINUED) 6. Use the analog ohmmeter to perform the tests detailed in Table F.2. 7. If the input rectifier does not meet the acceptable readings outlined in the table, the component may be faulty. Replace. NOTE: Before replacing the input rectifier, per- form the Switch Board Test and the Input Contactor Test.
-
Page 63: Input Contactor Test
F-17 TROUBLESHOOTING & REPAIR Service and repair should be performed by only Lincoln Electric factory trained personnel. Unauthorized repairs performed on this equipment may result in danger to the technician or machine operator and will invalidate your factory warranty. For your safety and to avoid electrical shock, please observe all safety notes and precautions detailed throughout this manual. -
Page 64: Input Contactor
F-18 TROUBLESHOOTING & REPAIR INPUT CONTACTOR TEST (CONTINUED) TEST PROCEDURE 1. Remove input power to the Power Wave 455/R. 2. Using the 3/8” nut driver, remove the input access panel and case top. 3. Locate, mark, and remove the two leads (601, X4) that are connected to the input contactor coil. - Page 65 F-19 TROUBLESHOOTING & REPAIR INPUT CONTACTOR TEST (CONTINUED) FIGURE F.6 – INPUT CONTACTOR TEST POINTS 5. With the input contactor activated, check the continuity across the three sets of contacts. (Zero ohms or very low resistance is nor- mal.) Refer to Figure F.6. If the resistance is high, the input contactor is faulty.
-
Page 66: Dc Bus Power Supply Pc Board Test
TROUBLESHOOTING & REPAIR DC BUS POWER SUPPLY PC BOARD TEST Service and repair should be performed by only Lincoln Electric factory trained personnel. Unauthorized repairs performed on this equipment may result in danger to the technician or machine operator and will invalidate your factory warranty. For your safety and to avoid electrical shock, please observe all safety notes and precautions detailed throughout this manual. - Page 67 F-21 TROUBLESHOOTING & REPAIR DC BUS POWER SUPPLY PC BOARD TEST (CONTINUED) FIGURE F.7 – DC BUS POWER SUPPLY POWER SUPPLY PC BOARD DC BUS POWER SUPPLY PC BOARD CAPACITOR CAUTION! TEST PROCEDURE 1. Remove input power to the machine. 2.
-
Page 68: Electric Shock Can Kill
F-22 TROUBLESHOOTING & REPAIR DC BUS POWER SUPPLY PC BOARD TEST(CONTINUED) 6. Check the DC Bus Power Supply PC Board input and output voltages according to Table F.3. See Figure F.7 and the Wiring Diagram. WARNING ELECTRIC SHOCK can kill. High voltage is present at the terminals of Capacitor C3 near where testing is to be done. -
Page 69: Power Board Test
F-23 TROUBLESHOOTING & REPAIR Service and repair should be performed by only Lincoln Electric factory trained personnel. Unauthorized repairs performed on this equipment may result in danger to the technician or machine operator and will invalidate your factory warranty. For your safety and to avoid electrical shock, please observe all safety notes and precautions detailed throughout this manual. - Page 70 F-24 TROUBLESHOOTING & REPAIR POWER BOARD TEST (CONTINUED) TEST PROCEDURE 1. Remove input power to the Power Wave 455/R. 2. Using the 3/8” nut driver, remove the case top. 3. Perform Capacitor Procedure. 4. Locate the Power Board and plugs J42 and J43.
- Page 71 F-25 TROUBLESHOOTING & REPAIR POWER BOARD TEST (CONTINUED) TABLE F.4 – POWER BOARD VOLTAGE CHECKS CHECK POINT TEST LOCATION DESCRIPTION POWER BOARD CHECK 40 VDC CONNECTOR INPUT FROM PLUG J41 DC BUS BOARD POWER BOARD CHECK +15 CONNECTOR VDC SUPPLY FROM PLUG J42 POWER BOARD POWER BOARD...
-
Page 72: Input Board Test
F-26 TROUBLESHOOTING & REPAIR Service and repair should be performed by only Lincoln Electric factory trained personnel. Unauthorized repairs performed on this equipment may result in danger to the technician or machine operator and will invalidate your factory warranty. For your safety and to avoid electrical shock, please observe all safety notes and precautions detailed throughout this manual. - Page 73 F-27 TROUBLESHOOTING & REPAIR INPUT BOARD TEST (CONTINUED) TEST PROCEDURE 1. Remove input power to the Power Wave 455/R. 2. Using the 3/8” nut driver, remove the case top. 3. Remove lead X4 from the coil terminal of main input contactor CR1. Insulate lead X4. Refer to Figure F.9.
- Page 74 F-28 TROUBLESHOOTING & REPAIR INPUT BOARD TEST(CONTINUED) 6. Remove input power to the Power Wave 455/R. If any of the voltages are low or not present, perform the Input Contactor Test. If that checks out, the Input Board may by faulty.
- Page 75 F-29 TROUBLESHOOTING & REPAIR INPUT BOARD TEST(CONTINUED) TABLE F.5 – INPUT BOARD VOLTAGE CHECKS TEST POINTS NUMBERS PLUG J61 PIN 8 (H1D) PLUG J61 PIN 2 (612) #612 PLUG J61 PIN 10 (T3) PLUG J61 PIN 2 (T1) PLUG J60 PIN 3 (238) PLUG J60 PIN 4 (604) PLUG J60 PIN 3 (238) PLUG J60 PIN 5 (232)
-
Page 76: Stt Chopper Board Test
TROUBLESHOOTING & REPAIR STT CHOPPER BOARD TEST Service and repair should be performed by only Lincoln Electric factory trained personnel. Unauthorized repairs performed on this equipment may result in danger to the technician or machine operator and will invalidate your factory warranty. For your safety and to avoid electrical shock, please observe all safety notes and precautions detailed throughout this manual. -
Page 77: Control Pc Board
F-31 TROUBLESHOOTING & REPAIR STT CHOPPER BOARD TEST (CONTINUED) FIGURE F.10 – STT CHOPPER BOARD TEST DETAILS CONTROL PC BOARD 9 10 11 12 13 14 15 16 4W 4R TEST PROCEDURE 1. Remove input power to the Power Wave 455/R. - Page 78 F-32 TROUBLESHOOTING & REPAIR STT CHOPPER BOARD TEST (CONTINUED) 4. Carefully apply input power to the Power Wave 455/R. WARNING ELECTRIC SHOCK can kill. High voltage is present when input power is applied to the machine. For steps 5 and 6, see Figure F.10. 5.
-
Page 79: Power Wave Current Transducer Test
TROUBLESHOOTING & REPAIR POWER WAVE CURRENT TRANSDUCER TEST Service and repair should be performed by only Lincoln Electric factory trained personnel. Unauthorized repairs performed on this equipment may result in danger to the technician or machine operator and will invalidate your factory warranty. For your safety and to avoid electrical shock, please observe all safety notes and precautions detailed throughout this manual. -
Page 80: Control Board
F-34 TROUBLESHOOTING & REPAIR POWER WAVE CURRENT TRANSDUCER TEST (CONTINUED) FIGURE F.11 – POWER WAVE CURRENT TRANSDUCER TEST 211 212 213 CURRENT TRANSDUCER TEST PROCEDURE 1. Remove input power to the Power Wave 455/R. 2. Using the 3/8” nut driver, remove the case top and the control box cover. - Page 81 F-35 TROUBLESHOOTING & REPAIR POWER WAVE CURRENT TRANSDUCER TEST (CONTINUED) FIGURE F.12 – RECEPTACLE S7 TRIGGERED 5. Turn on the Power Wave 455/R. Check for the correct DC supply voltage to the current transducer at plug J8. See Figure F.11. A.
- Page 82 F-36 TROUBLESHOOTING & REPAIR POWER WAVE CURRENT TRANSDUCER TEST (CONTINUED) 8. If for any reason the machine cannot be loaded to 250 amps, Table F.6 shows what feedback voltage is produced at various cur- rent loads. 9. If the correct supply voltages are applied to the current transducer, and with the machine loaded, the feedback voltage is missing or TABLE F.6 - CURRENT FEEDBACK AT VARIOUS OUTPUT LOADS...
-
Page 83: Stt Current Transducer Test
TROUBLESHOOTING & REPAIR STT CURRENT TRANSDUCER TEST Service and repair should be performed by only Lincoln Electric factory trained personnel. Unauthorized repairs performed on this equipment may result in danger to the technician or machine operator and will invalidate your factory warranty. For your safety and to avoid electrical shock, please observe all safety notes and precautions detailed throughout this manual. - Page 84 F-38 TROUBLESHOOTING & REPAIR STT CURRENT TRANSDUCER TEST (CONTINUED) FIGURE F.13 – STT CURRENT TRANSDUCER TEST TEST PROCEDURE 1. Remove input power to the Power Wave 455/R. 2. Using the 3/8” nut driver, remove the case top and the control box cover. 3.
- Page 85 F-39 TROUBLESHOOTING & REPAIR STT CURRENT TRANSDUCER TEST (CONTINUED) FIGURE F.14 – RECEPTACLE S7 TRIGGERED 5. Turn on the Power Wave 455/R. Check for the correct DC supply voltage to the current transducer at plug J8. A. Pin 8 (lead 812+) to pin 7 (lead 816-) should read +15 VDC.
- Page 86 F-40 TROUBLESHOOTING & REPAIR STT CURRENT TRANSDUCER TEST (CONTINUED) 8. If for any reason the machine cannot be loaded to 50 amps, Table F.6 shows what feedback voltage is produced at various cur- rent loads. 9. If the correct supply voltages are applied to the current transducer, and with the machine loaded, the feedback voltage is missing or not correct, the current transducer may be...
-
Page 87: Output Rectifier Test
F-41 TROUBLESHOOTING & REPAIR Service and repair should be performed by only Lincoln Electric factory trained personnel. Unauthorized repairs performed on this equipment may result in danger to the technician or machine operator and will invalidate your factory warranty. For your safety and to avoid electrical shock, please observe all safety notes and precautions detailed throughout this manual. - Page 88 F-42 TROUBLESHOOTING & REPAIR OUTPUT RECTIFIER TEST (CONTINUED) NEGATIVE (-) OUTPUT TERMINAL TEST PROCEDURE 1. Remove main input supply power to the Power Wave 455/R. 2. Remove the case top and sides and perform the Input Filter Capacitor Discharge pro- cedure.
-
Page 89: Auxiliary Transformer No. 1 Test
TROUBLESHOOTING & REPAIR AUXILIARY TRANSFORMER NO. 1 TEST Service and repair should be performed by only Lincoln Electric factory trained personnel. Unauthorized repairs performed on this equipment may result in danger to the technician or machine operator and will invalidate your factory warranty. For your safety and to avoid electrical shock, please observe all safety notes and precautions detailed throughout this manual. - Page 90 F-44 TROUBLESHOOTING & REPAIR AUXILIARY TRANSFORMER NO. 1 TEST (CONTINUED) FIGURE F.16 – AUXILIARY TRANSFORMER NO. 1 TEST FAN MOTOR LEADS POWER BOARD RECTIFIER BRIDGE TEST PROCEDURE 1. Remove the main input power to the Power Wave 455/R machine. 2. Using the 3/8” nut driver, remove the case top and sides.
-
Page 91: Electric Shock Can Kill
F-45 TROUBLESHOOTING & REPAIR AUXILIARY TRANSFORMER NO. 1 TEST (CONTINUED) LEAD IDENTIFICATION X1 to X2 X3 to X5 X3 to X4 7. Carefully apply the correct input voltage to the Power Wave 455/R. WARNING ELECTRIC SHOCK can kill. High voltage is present at prima- ry of the Auxiliary Transformer. -
Page 92: Auxiliary Transformer No. 2 Test
TROUBLESHOOTING & REPAIR AUXILIARY TRANSFORMER NO. 2 TEST Service and repair should be performed by only Lincoln Electric factory trained personnel. Unauthorized repairs performed on this equipment may result in danger to the technician or machine operator and will invalidate your factory warranty. For your safety and to avoid electrical shock, please observe all safety notes and precautions detailed throughout this manual. - Page 93 F-47 TROUBLESHOOTING & REPAIR AUXILIARY TRANSFORMER NO. 2 TEST (CONTINUED) FIGURE F.17 – AUXILIARY TRANSFORMER NO. 2 TEST TEST PROCEDURE 1. Remove the main input power to the Power Wave 455/R machine. 2. Remove any load that may be connected to the 115 VAC receptacle.
-
Page 94: Input Rectifier Removal And Replacement
TROUBLESHOOTING & REPAIR INPUT RECTIFIER REMOVAL AND REPLACEMENT Service and repair should be performed by only Lincoln Electric factory trained personnel. Unauthorized repairs performed on this equipment may result in danger to the technician or machine operator and will invalidate your factory warranty. For your safety and to avoid electrical shock, please observe all safety notes and precautions detailed throughout this manual. -
Page 95: Removal Procedure
F-49 TROUBLESHOOTING & REPAIR INPUT RECTIFIER REMOVAL AND REPLACEMENT (CONTINUED) FIGURE F.18 – INPUT RECTIFIER REMOVAL AND REPLACEMENT REMOVAL PROCEDURE 1. Remove input power to the Power Wave 455/R. 2. Using the 3/8” nut driver, remove the case top, sides, and input access panel. 3. -
Page 96: Input Contactor Removal And Replacement
TROUBLESHOOTING & REPAIR INPUT CONTACTOR REMOVAL AND REPLACEMENT Service and repair should be performed by only Lincoln Electric factory trained personnel. Unauthorized repairs performed on this equipment may result in danger to the technician or machine operator and will invalidate your factory warranty. For your safety and to avoid electrical shock, please observe all safety notes and precautions detailed throughout this manual. - Page 97 F-51 TROUBLESHOOTING & REPAIR INPUT CONTACTOR REMOVAL AND REPLACEMENT (CONTINUED) FIGURE F.19 – INPUT CONTACTOR REMOVAL AND REPLACEMENT REMOVAL PROCEDURE 1. Remove input power to the Power Wave 455/R. 2. Using the 3/8” nut driver, remove the case top, sides, and input access panel. 3.
-
Page 98: Auxiliary Transformer No. 1 Removal And Replacement Procedure
AUXILIARY TRANSFORMER NO. 1 REMOVAL AND REPLACEMENT PROCEDURE Service and repair should be performed by only Lincoln Electric factory trained personnel. Unauthorized repairs performed on this equipment may result in danger to the technician or machine operator and will invalidate your factory warranty. For your safety and to avoid electrical shock, please observe all safety notes and precautions detailed throughout this manual. - Page 99 F-53 TROUBLESHOOTING & REPAIR AUXILIARY TRANSFORMER NO. 1 REMOVAL AND REPLACEMENT PROCEDURE (CONTINUED) FIGURE F.20 – AUXILIARY TRANSFORMER NO. 1 REMOVAL AND REPLACEMENT FAN MOTOR LEADS POWER BOARD RECTIFIER BRIDGE REMOVAL PROCEDURE 1. Remove input power to the Power Wave 455/R.
- Page 100 F-54 TROUBLESHOOTING & REPAIR AUXILIARY TRANSFORMER NO. 1 REMOVAL AND REPLACEMENT PROCEDURE (CONTINUED) 6. Remove leads X1 and X2 from the power board rectifier bridge. F.20. 7. Cut X3 and X5 from the fan motor leads. Leave enough lead length to splice in the new transformer leads.
-
Page 101: Auxiliary Transformer No. 2 Removal And Replacement Procedure
AUXILIARY TRANSFORMER NO. 2 REMOVAL AND REPLACEMENT PROCEDURE Service and repair should be performed by only Lincoln Electric factory trained personnel. Unauthorized repairs performed on this equipment may result in danger to the technician or machine operator and will invalidate your factory warranty. For your safety and to avoid electrical shock, please observe all safety notes and precautions detailed throughout this manual. - Page 102 F-56 TROUBLESHOOTING & REPAIR AUXILIARY TRANSFORMER NO. 2 REMOVAL AND REPLACEMENT PROCEDURE (CONTINUED) FIGURE F.21 – AUXILIARY TRANSFORMER NO. 2 REMOVAL AND REPLACEMENT CB4 CIRCUIT BREAKER & 115V RECEPTACLE LEADS 33/32 REMOVAL PROCEDURE 1. Remove input power to the Power Wave 455/R.
- Page 103 F-57 TROUBLESHOOTING & REPAIR AUXILIARY TRANSFORMER NO. 2 REMOVAL AND REPLACEMENT PROCEDURE (CONTINUED) REPLACEMENT PROCEDURE 1. Carefully place the transformer into the Power Wave 455/R. 2. Install the two mounting screws that hold the transformer to the machine base using the 3/8”...
-
Page 104: Control, Feed Head, Or Voltage Sense Pc Board Removal And Replacement
CONTROL, FEED HEAD, OR VOLTAGE SENSE PC BOARD REMOVAL AND REPLACEMENT Service and repair should be performed by only Lincoln Electric factory trained personnel. Unauthorized repairs performed on this equipment may result in danger to the technician or machine operator and will invalidate your factory warranty. For your safety and to avoid electrical shock, please observe all safety notes and precautions detailed throughout this manual. - Page 105 F-59 TROUBLESHOOTING & REPAIR CONTROL, FEED HEAD, OR VOLTAGE SENSE PC BOARD REMOVAL AND REPLACEMENT (CONTINUED) FIGURE F.22 – CONTROL OR FEED HEAD BOARD REMOVAL AND REPLACEMENT CONTROL BOARD REMOVAL PROCEDURE 1. Remove input power to the Power Wave 455/R. 2.
- Page 106 F-60 TROUBLESHOOTING & REPAIR CONTROL, FEED HEAD, OR VOLTAGE SENSE PC BOARD REMOVAL AND REPLACEMENT (CONTINUED) FIGURE F.23 – VOLTAGE SENSE BOARD REMOVAL AND REPLACEMENT VOLTAGE SENSE BOARD 9. Tilt back the rear of the control box to access the PC board mounting nuts. Using the 3/8”...
- Page 107 F-61 TROUBLESHOOTING & REPAIR CONTROL, FEED HEAD, OR VOLTAGE SENSE PC BOARD REMOVAL AND REPLACEMENT (CONTINUED) 3. Secure the rear of the control box in place using two screws and the 3/8” nut driver. 4. Press the Voltage Sense Board onto its standoffs.
-
Page 108: Gateway Pc Board Removal And Replacement
TROUBLESHOOTING & REPAIR GATEWAY PC BOARD REMOVAL AND REPLACEMENT Service and repair should be performed by only Lincoln Electric factory trained personnel. Unauthorized repairs performed on this equipment may result in danger to the technician or machine operator and will invalidate your factory warranty. For your safety and to avoid electrical shock, please observe all safety notes and precautions detailed throughout this manual. - Page 109 F-63 TROUBLESHOOTING & REPAIR GATEWAY PC BOARD REMOVAL AND REPLACEMENT (CONTINUED) FIGURE F.24 – GATEWAY BOARD REMOVAL AND REPLACEMENT DEVICENET/ GATEWAY BOARD (LOCATED BEHIND FRONT COVER) REMOVAL PROCEDURE 1. Remove input power to the Power Wave 455/R. 2. Using the phillips head screw driver, remove the six screws from the case front cover.
-
Page 110: Stt Current Transducer Removal And Replacement
STT CURRENT TRANSDUCER REMOVAL AND REPLACEMENT Service and repair should be performed by only Lincoln Electric factory trained personnel. Unauthorized repairs performed on this equipment may result in danger to the technician or machine operator and will invalidate your factory warranty. For your safety and to avoid electrical shock, please observe all safety notes and precautions detailed throughout this manual. - Page 111 F-65 TROUBLESHOOTING & REPAIR STT CURRENT TRANSDUCER REMOVAL AND PLACEMENT (CONTINUED) FIGURE F.25 – STT CURRENT TRANSDUCER REMOVAL AND REPLACEMENT PROCEDURE STT OUTPUT TERMINAL (TOP RIGHT) REMOVAL PROCEDURE 1. Remove input power to the Power Wave 455/R. 2. Using the 3/8” nut driver, remove the case top and right side.
- Page 112 F-66 TROUBLESHOOTING & REPAIR STT CURRENT TRANSDUCER REMOVAL AND REPLACEMENT (CONTINUED) 6. With the 5/16” open end wrench, remove the small screw from the STT output termi- nal. Label and remove the small leads. See the Wiring Diagram. 7. Using the 3/4” wrench, remove the bolt, lock washer and flat washer from the STT output terminal.
-
Page 113: Power Wave Current Transducer Removal And Replacement
POWER WAVE CURRENT TRANSDUCER REMOVAL AND REPLACEMENT Service and repair should be performed by only Lincoln Electric factory trained personnel. Unauthorized repairs performed on this equipment may result in danger to the technician or machine operator and will invalidate your factory warranty. For your safety and to avoid electrical shock, please observe all safety notes and precautions detailed throughout this manual. - Page 114 F-68 TROUBLESHOOTING & REPAIR POWER WAVE CURRENT TRANSDUCER REMOVAL AND REPLACEMENT (CONTINUED) FIGURE F.26 – POWER WAVE CURRENT TRANSDUCER REMOVAL AND REPLACEMENT PROCEDURE CURRENT TRANSDUCER HEAVY LEAD BOLTED CONNECTION (BEHIND CASE FRONT) REMOVAL PROCEDURE 1. Remove input power to the Power Wave 455/R.
- Page 115 F-69 TROUBLESHOOTING & REPAIR POWER WAVE CURRENT TRANSDUCER REMOVAL AND REPLACEMENT (CONTINUED) 9. Using the phillips head screw driver, remove the screws and lock washers that hold the transducer to the front panel. 10. Remove the Power Wave current trans- ducer.
-
Page 116: Output Rectifier, Stt Chopper Board And Rectifier Module Removal And Replacement
OUTPUT RECTIFIER, STT CHOPPER BOARD AND RECTIFIER MODULE REMOVAL AND REPLACEMENT Service and repair should be performed by only Lincoln Electric factory trained personnel. Unauthorized repairs performed on this equipment may result in danger to the technician or machine operator and will invalidate your factory warranty. For your safety and to avoid electrical shock, please observe all safety notes and precautions detailed throughout this manual. - Page 117 F-71 TROUBLESHOOTING & REPAIR OUTPUT RECTIFIER, STT CHOPPER BOARD AND RECTIFIER MODULE REMOVAL AND REPLACEMENT (CONTINUED) FIGURE F.27 – OUTPUT RECTIFIER, STT CHOPPER BOARD AND RECTIFIER MODULE RECTIFIER ASSEMBLY REMOVAL PROCEDURE 1. Remove input power to the Power Wave 455/R. 2.
- Page 118 F-72 TROUBLESHOOTING & REPAIR OUTPUT RECTIFIER, STT CHOPPER BOARD AND RECTIFIER MODULE REMOVAL AND REPLACEMENT (CONTINUED) 7. Using the needle-nose pliers, remove leads #292 and #291 from the rectifier ther- mostat. 8. Disconnect plug J10 from the STT Chopper Board. 9.
- Page 119 F-73 TROUBLESHOOTING & REPAIR OUTPUT RECTIFIER, STT CHOPPER BOARD AND RECTIFIER MODULE REMOVAL AND REPLACEMENT (CONTINUED) RECTIFIER MODULE REMOVAL AND REPLACEMENT PROCEDURE 1. Using the 9/64” allen wrench, remove the cap screw from the center of the rectifier module that is to be replaced. 2.
-
Page 120: Switch Board And Filter Capacitor Removal And Replacement
SWITCH BOARD AND FILTER CAPACITOR REMOVAL AND REPLACEMENT Service and repair should be performed by only Lincoln Electric factory trained personnel. Unauthorized repairs performed on this equipment may result in danger to the technician or machine operator and will invalidate your factory warranty. For your safety and to avoid electrical shock, please observe all safety notes and precautions detailed throughout this manual. - Page 121 F-75 TROUBLESHOOTING & REPAIR SWITCH BOARD AND FILTER CAPACITOR REMOVAL AND REPLACEMENT (CONTINUED) FIGURE F.28 – SWITCH BOARD AND FILTER CAPACITOR REMOVAL AND REPLACEMENT REMOVAL PROCEDURE NOTE: Observe all static electricity precautions. Lead and plug references below use a slash (/) to indicate machine right side/left side wire number differences.
- Page 122 F-76 TROUBLESHOOTING & REPAIR SWITCH BOARD AND FILTER CAPACITOR REMOVAL AND REPLACEMENT (CONTINUED) 7. Using the 7/16” wrench, remove leads 13/14 or 17/18 from the switch board. 8. Using the 7/16” wrench, remove leads 11/12 or 15/16 from the switch board. 9.
-
Page 123: Retest After Repair
F-77 TROUBLESHOOTING & REPAIR Retest a machine: If it is rejected under test for any reason that requires you to remove any part which could affect the machine’s electrical characteristics. If you repair or replace any electrical components. Input Volts/Hertz 208/60 230/60 400/60... - Page 124 F-78 F-78 NOTES POWER WAVE 455/R...
- Page 125 Section G-1 - ELECTRICAL DIAGRAMS SECTION - Electrical Diagrams ...Section G Wiring Diagram (Code 10675)...G-2 Wiring Diagram (Code 10676)...G-3 Schematic - Complete Machine (Code 10675) ...G-4 Schematic - Complete Machine (Code 10676) ...G-5 Schematic - Chopper PC Board ...G-6 PC Board Assembly - Chopper PC Board ...G-7 Schematic - DeviceNet/Gateway PC Board ...G-8 PC Board Assembly - DeviceNet/Gateway PC Board ...G-9 Schematic - Control PC Board ...G-10...
-
Page 126: Wiring Diagram (Code 10675
WIRING DIAGRAM - POWER WAVE 455/R CODE 10675 TO TP6 TO J9 DEVICE NET TO TP3 GATEWAY BOARD 202A TO R1 WORK .05/600V DEVICENET CONNECTOR +24V WIRE J2VS +24V GND FEEDER CAN_H CAN_L RECEPTACLE ROBOTIC/ WIREDRIVE INTERFACE RECEPTACLE VOLTAGE SENSE RECEPTACLE 3 CONDUCTOR TWISTED/SHIELDED... - Page 127 WIRING DIAGRAM- POWER WAVE 455/R CODE 10676 TO TP6 TO J9 DEVICE NET TO TP3 GATEWAY BOARD 202A TO R1 WORK .05/600V DEVICENET CONNECTOR +24V WIRE J2VS +24V GND FEEDER CAN_H CAN_L RECEPTACLE ROBOTIC/ WIREDRIVE INTERFACE RECEPTACLE VOLTAGE SENSE RECEPTACLE 3 CONDUCTOR TWISTED/SHIELDED SHIELD GROUND TO CASE...
-
Page 128: Schematic - Complete Machine (Code 10675
4J41 +40V THIS SHEET CONTAINS PROPRIETARY INFORMATION OWNED BY THE LINCOLN ELECTRIC COMPANY AND IS NOT TO BE REPRODUCED, DISCLOSED OR USED WITHOUT THE EXPRESS WRITTEN PERMISSION OF THE LINCOLN ELECTRIC COMPANY, CLEVELAND, OHIO U.S.A. UNLESS OTHERWISE SPECIFIED TOLERANCE "X" INFO. -
Page 129: Schematic-Complete Machine Code 10676
4J41 +40V THIS SHEET CONTAINS PROPRIETARY INFORMATION OWNED BY THE LINCOLN ELECTRIC COMPANY AND IS NOT TO BE REPRODUCED, DISCLOSED OR USED WITHOUT THE EXPRESS WRITTEN PERMISSION OF THE LINCOLN ELECTRIC COMPANY, CLEVELAND, OHIO U.S.A. UNLESS OTHERWISE SPECIFIED TOLERANCE "X" INFO. -
Page 130: Schematic - Chopper Pc Board
SCHEMATIC - CHOPPER PC BOARD 14 to 22 Vac 3.32K INPUT 3.32K OCI1 .0047 CNY17-3 820p 150p 221K ELECTRICAL DIAGRAMS MC14538B 1.0A MIC4451BN 1.0A .0047 3.32K 100p 100p 820p 100p 100V 100V 100V NOTE: This diagram is for reference only. It may not be accurate for all machines covered by this manual. 4093B MIC4451BN From Bridge... - Page 131 Lincoln Electric discourages board level troubleshooting and repair since it may compromise the quality of the design and may result in danger to the Machine Operator or Technician.
-
Page 132: Schematic-Devicenet/Gateway Pc Board
ELECTRICAL DIAGRAMS SCHEMATIC-DEVICENET/GATEWAY PC BOARD NOTE: This diagram is for reference only. It may not be accurate for all machines covered by this manual. POWER WAVE 455/R... - Page 133 Lincoln Electric discourages board level troubleshooting and repair since it may compromise the quality of the design and may result in danger to the Machine Operator or Technician.
-
Page 134: Schematic - Control Pc Board
/CS1 BANK1 THIS SHEET CONTAINS PROPRIETARY INFORMATION OWNED BY THE LINCOLN ELECTRIC COMPANY AND IS NOT TO BE REPRODUCED, DISCLOSED OR USED WITHOUT THE EXPRESS WRITTEN PERMISSION OF THE LINCOLN ELECTRIC COMPANY, CLEVELAND, OHIO U.S.A. UNLESS OTHERWISE SPECIFIED TOLERANCE "X" INFO. - Page 135 Lincoln Electric discourages board level troubleshooting and repair since it may compromise the quality of the design and may result in danger to the Machine Operator or Technician.
-
Page 136: Schematic - Digital Power Supply Pc Board
(UNLESS OTHERWISE SPECIFIED) THIS SHEET CONTAINS PROPRIETARY INFORMATION OWNED BY THE LINCOLN ELECTRIC COMPANY AND IS NOT TO BE REPRODUCED, DISCLOSED OR USED WITHOUT THE EXPRESS WRITTEN PERMISSION OF THE LINCOLN ELECTRIC COMPANY, CLEVELAND, OHIO U.S.A. UNLESS OTHERWISE SPECIFIED TOLERANCE "X"... - Page 137 Lincoln Electric discourages board level troubleshooting and repair since it may compromise the quality of the design and may result in danger to the Machine Operator or Technician.
-
Page 138: Schematic - Feedhead Pc Board #1
G-14 SCHEMATIC - FEEDHEAD PC BOARD #1 ELECTRICAL DIAGRAMS NOTE: This diagram is for reference only. It may not be accurate for all machines covered by this manual. G-14 COMMON DIGITAL CONTROLS FEEDHEAD PC BOARD SCHEMATIC 11-3-2000A 1 OF 3 07/17/2000 3823-1C1/1 POWER WAVE 455/R... -
Page 139: Schematic- Feedhead Pc Board #2
G-15 SCHEMATIC- FEEDHEAD PC BOARD #2 ELECTRICAL DIAGRAMS NOTE: This diagram is for reference only. It may not be accurate for all machines covered by this manual. G-15 COMMON DIGITAL CONTROLS FEEDHEAD PC BOARD SCHEMATIC 11-3-2000A 2 OF 3 07/17/2000 3823-1C1/2 POWER WAVE 455/R... -
Page 140: Schematic- Feedhead Pc Board #3
G-16 G-16 ELECTRICAL DIAGRAMS SCHEMATIC- FEEDHEAD PC BOARD #3 COMMON DIGITAL CONTROLS FEEDHEAD PC BOARD SCHEMATIC 3 OF 3 11-3-2000A 07/17/2000 3823-1C1/3 NOTE: This diagram is for reference only. It may not be accurate for all machines covered by this manual. POWER WAVE 455/R... - Page 141 Lincoln Electric discourages board level troubleshooting and repair since it may compromise the quality of the design and may result in danger to the Machine Operator or Technician.
-
Page 142: Schematic - Input Pc Board
WITHOUT AFFECTING THE INTERCHANGEABILITY OF A COMPLETE BOARD, THIS DIAGRAM MAY NOT SHOW THE EXACT COMPONENTS OR CIRCUITRY OF CONTROLS HAVING A COMMON CODE NUMBER. THE LINCOLN ELECTRIC CO. THIS SHEET CONTAINS PROPRIETARY INFORMATION OWNED BY THE LINCOLN ELECTRIC CO. - Page 143 Lincoln Electric discourages board level troubleshooting and repair since it may compromise the quality of the design and may result in danger to the Machine Operator or Technician.
-
Page 144: Schematic -Switch Pc Board
G-20 G-20 ELECTRICAL DIAGRAMS SCHEMATIC -SWITCH PC BOARD NOTE: This diagram is for reference only. It may not be accurate for all machines covered by this manual. - Page 145 Lincoln Electric discourages board level troubleshooting and repair since it may compromise the quality of the design and may result in danger to the Machine Operator or Technician.
-
Page 146: Schematic - Voltage Sense Pc Board
G-22 G-22 ELECTRICAL DIAGRAMS SCHEMATIC - VOLTAGE SENSE PC BOARD NOTE: This diagram is for reference only. It may not be accurate for all machines covered by this manual. POWER WAVE 455/R... - Page 147 Lincoln Electric discourages board level troubleshooting and repair since it may compromise the quality of the design and may result in danger to the Machine Operator or Technician.
-
Page 148: Schematic - 40 Vdc Bus Pc Board
G-24 G-24 ELECTRICAL DIAGRAMS SCHEMATIC - 40 VDC BUS PC BOARD NOTE: This diagram is for reference only. It may not be accurate for all machines covered by this manual. POWER WAVE 455/R... - Page 149 Lincoln Electric discourages board level troubleshooting and repair since it may compromise the quality of the design and may result in danger to the Machine Operator or Technician.
- Page 150 Your Company__________________________ Your Name_____________________________ Please give detailed description below: ___________________________________________________________________________ ___________________________________________________________________________ ___________________________________________________________________________ ___________________________________________________________________________ ___________________________________________________________________________ ___________________________________________________________________________ ___________________________________________________________________________ ___________________________________________________________________________ ___________________________________________________________________________ ___________________________________________________________________________ ___________________________________________________________________________ ___________________________________________________________________________ ___________________________________________________________________________ SD287 01/99 Thank You, Technical Services Group Lincoln Electric Co. 22801 St. Clair Ave. Cleveland, Ohio 44117-1199 FAX 216-481-2309...
Need help?
Do you have a question about the POWER WAVE SVM156-A and is the answer not in the manual?
Questions and answers