Table of Contents
Advertisement
RETURN TO MAIN MENU
SVM161-A
January, 2011
INVERTEC
®
V205-T AC/DC
10860
For use with machine code number:
Safety Depends on You
Lincoln arc welding and cutting
equipment is designed and built
with safety in mind.
However,
your
overall
safety
can
be
increased by proper installation
. . . and thoughtful operation on
your part.
DO NOT INSTALL,
OPERATE OR REPAIR THIS
EQUIPMENT WITHOUT READ-
ING THIS MANUAL AND THE
SAFETY PRECAUTIONS CON-
TAINED THROUGHOUT.
And,
most importantly, think before you
act and be careful.
SERVICE MANUAL
Copyright © Lincoln Global Inc.
• World's Leader in Welding and Cutting Products •
• Sales and Service through Subsidiaries and Distributors Worldwide •
Cleveland, Ohio 44117-1199 U.S.A. TEL: 216.481.8100 FAX: 216.486.1751 WEB SITE: www.lincolnelectric.com
Advertisement
Chapters
Table of Contents
Troubleshooting

Related Manuals for Lincoln Electric INVERTEC SVM161-A


Summary of Contents for Lincoln Electric INVERTEC SVM161-A
-
Page 1: Service Manual
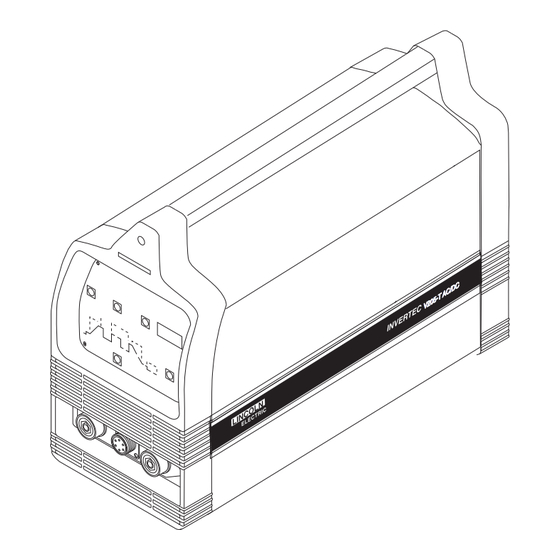
RETURN TO MAIN MENU SVM161-A January, 2011 INVERTEC ® V205-T AC/DC 10860 For use with machine code number: Safety Depends on You Lincoln arc welding and cutting equipment is designed and built with safety in mind. However, your overall safety increased by proper installation . -
Page 2: California Proposition 65 Warnings
Miami, Florida 33135 or CSA Standard W117.2-1974. A Free copy of “Arc Welding Safety” booklet E205 is available from the Lincoln Electric Company, 22801 St. Clair Avenue, Cleveland, Ohio 44117-1199. BE SURE THAT ALL INSTALLATION, OPERATION, MAINTENANCE AND REPAIR PROCEDURES ARE PERFORMED ONLY BY QUALIFIED INDIVIDUALS. -
Page 3: Electric Shock Can Kill
ELECTRIC SHOCK can kill. 3.a. The electrode and work (or ground) circuits are electrically “hot” when the welder is on. Do not touch these “hot” parts with your bare skin or wet clothing. Wear dry, hole-free gloves to insulate hands. 3.b. - Page 4 WELDING and CUTTING SPARKS can cause fire or explosion. 6.a. Remove fire hazards from the welding area.If this is not possible, cover them to prevent the welding sparks from starting a fire. Remember that welding sparks and hot materials from welding can easily go through small cracks and openings to adjacent areas.
- Page 5 PRÉCAUTIONS DE SÛRETÉ Pour votre propre protection lire et observer toutes les instructions et les précautions de sûreté specifiques qui parraissent dans ce manuel aussi bien que les précautions de sûreté générales suiv- antes: Sûreté Pour Soudage A L’Arc 1. Protegez-vous contre la secousse électrique: a.
- Page 6 SAFETY Electromagnetic Compatibility (EMC) Conformance Introduction Installation and Use Assessment of Area INVERTEC® V205-T AC/DC™...
-
Page 7: Safety
SAFETY Electromagnetic Compatibility (EMC) Methods of Reducing Emissions Mains Supply Maintenance of the Welding Equipment Welding Cables Equipotential Bonding Earthing of the Workpiece Screening and Shielding INVERTEC® V205-T AC/DC™... -
Page 8: Table Of Contents
- MASTER TABLE OF CONTENTS FOR ALL SECTIONS - RETURN TO MAIN MENU Page Safety ................i-vi Installation . - Page 9 TABLE OF CONTENTS - INSTALLATION SECTION Installation ................A-1 Technical Specifications .
-
Page 10: Technical Specifications
TECHNICAL SPECIFICATIONS - V205-T AC/DC™ TIG K1855-1 (Code Number 10860) Input Voltages / 50 /60 Hz. Duty Cycle (115V) 35% 100% (115V) 40% 100% (230V) 35% 100% (230V) 40% 100% Output Current Range 6-200 Amps RECOMMENDED INPUT WIRE AND FUSE SIZES FOR MAXIMUM RATED OUTPUT INPUT VOLTAGE / HARD USAGE INPUT CORD AWG... -
Page 11: Safety Precautions
Read entire installation section before starting installation. Safety Precautions WARNING ELECTRIC SHOCK can kill. • Only qualified personnel should perform this installation. • Turn the input power OFF and unplug the machine from the recep- tacle before working on this equip- ment. -
Page 12: Reconnect Procedures
3. Be sure the torch and work cable rubber coverings are free of cuts and cracks that allow high fre- quency leakage. Cables with high natural rubber content, such as Lincoln Stable-Arc high frequency leakage than neoprene and other synthetic rubber insulated cables. 4. -
Page 13: Engine Driven Generator
230V INPUT The equipment is provided with a 230/115V cable, 6.6ft.(2m) in length with a 230V 6-50P attachment plug. The Invertec® V205-T AC/DC™ performs best when connected to 230VAC inputs. This input allows full out- put of the machine (200 amps). 115V INPUT A suitable 115V attachment plug must be installed on the power cord to use the V205-T AC/DC™... -
Page 14: Output Connections
This unit does not include a TIG torch, but one may be purchased separately. The accessories section of this manual lists a number of Lincoln Electric TIG torches, and TIG Torch Starter Packs that are recommended for use with this machine; however, any similar TIG torch can be used. -
Page 15: Quick Disconnect Plug (For Stick Electrode Cable And Work Cable)
QUICK DISCONNECT PLUG (FOR STICK ELECTRODE CABLE and WORK CABLE) A quick disconnect system is used for the welding cable connections. The stick electrode cable will need to have a plug attached. 1. Cut off welding cable lug, if present. 2. - Page 16 NOTES INVERTEC® V205-T AC/DC™...
- Page 17 TABLE OF CONTENTS - OPERATION SECTION Operation ................B-1 Safety Instructions .
-
Page 18: General Description
Read and understand this entire section before operating your machine. SAFETY INSTRUCTIONS WARNING ELECTRIC SHOCK can kill. • Do not touch electrically live parts such as output terminals, electrode or internal wiring. • Insulate yourself from the work and ground. •... -
Page 19: Rear Control Panel
REAR CONTROL PANEL • I1: Off/On switch turns on the electric power to the welder. It has two positions, "O" off, and "I" on. ------------------------------------------------------------------------ * With "l1" in the "I" (ON) position, the welding machine is operational and there is voltage between the posi- tive (+) and negative (-) Terminals in stick welding. -
Page 20: Controls And Settings
CONTROLS AND SETTINGS All operator controls and adjustments are located on the case front of the V205-T machine. Refer to Figure B.2 and the corresponding explanations. 1. Input Voltage warning light green LED - Indicates that the machine is on and input voltage is within acceptable range. - Page 21 5. Output / Parameter Adjust Knob- Allows you to continuously adjust the current both in TIG and in Stick welding. Allows you to change the value, shown on "Digital Display Item 6", of the parameter selected with "Setup/Parameter select button Item 4". 6.
- Page 22 3. Press and hold the TIG torch trigger when the main part of the weld is complete. The machine will now decrease the output current at a controlled rate, or downslope time, until the Finish current is reached. Both the Downslope Time and the Finish Current are presettable.
-
Page 23: Set Up Menu
SET UP MENU Many additional parameters can be modified via the Set Up Menu. To access the Set Up Menu: • Position the ON/OFF switch to OFF “0”. • Depress and hold the Parameter select Push Button. • Position the On/Off switch to on "I" at the back of the machine;... -
Page 24: Welding Polarity
OUTPUT LIMITATIONS The maximum output current as specified in the instal- lation section of this manual is derated in two situa- tions; alternate AC Wave Forms and elevated AC Frequencies. • Alternate AC Wave Forms (See Set Up Menu) Square 200 amps max. - Page 25 DC Electrode Positive Polarity. (Direct Current Reverse Polarity) (see Figure B.5) In this case, there is a continuous flow of electrons from the workpiece to the electrode. The reverse polar- ity is used for welding alloys covered with a layer of refractory oxide.
-
Page 26: Steel Tig Welding
B-10 STEEL TIG WELDING The TIG process is very effective for welding both car- bon steel and alloy steel, especially in applications requiring precision results. DC Electrode Negative Polarity is required. Since this process does not include the removal of impurities, proper cleaning and preparation of the edges is required. -
Page 27: Protective Gas
B-11 PROTECTIVE GAS Both argon and helium work when welding aluminum. Argon is preferred, due to its lower cost and consump- tion rate. This gas also tends to stabilize the arc, thus making it easy to operate. For some applications, how- ever, the use of helium, or argon-helium blends, is rec- ommended due to better weld penetration and faster travel speed. -
Page 28: Dc Tig Welding Quick Start Up
B-12 DC TIG WELDING QUICK START UP WARNING ELECTRIC SHOCK can kill. • Have an electrician install and service this equipment. • Turn the input power off at the fuse box, dis- connect or unplug supply lines and allow machine to sit for five minutes minimum to allow the power capacitors to discharge before working inside this equipment. - Page 29 TABLE OF CONTENTS - ACCESSORIES SECTION Accessories ................C-1 Options/Accessories .
-
Page 30: Optional Accessories And Compatible Equipment
OPTIONAL ACCESSORIES AND COMPATIBLE EQUIPMENT Factory Installed Twist-Mate Cable Connectors 1 – standard for Ground Clamp 1 – Gas Pass through for Tig Torch Strap Packet Instruction Manual Field Installed K857 - Remote Output Control - For Stick welding. When the V205-T’s Output Control is in the "REMOTE" position, this portable current control provides the same range as the current control on the welder. - Page 31 TABLE OF CONTENTS - MAINTENANCE SECTION Maintenance ................D-1 Input Filter Capacitor Discharge Procedure .
-
Page 32: Safety Precautions
SAFETY PRECAUTIONS WARNING ELECTRIC SHOCK can kill. • Have an electrician install and service this equipment. • Turn the input power off at the fuse box, disconnect or unplug supply lines and allow machine to sit for five minutes minimum to allow the power capacitors to discharge before working inside this equipment. - Page 33 MAINTENANCE FIGURE D.1 - MAJOR COMPONENT LOCATIONS 1. Cradle Tube Assembly and Roof 2. Control Panel Assembly 3. Stator & Rotor Assembly and Battery 4. Rear Control Panel, Fuel Tank Assembly, and Engine INVERTEC® V205-T AC/DC™...
- Page 34 NOTES INVERTEC® V205-T AC/DC™...
- Page 35 TABLE OF CONTENTS-THEORY OF OPERATION SECTION Theory of Operation ..............E-1 General Description .
-
Page 36: Theory Of Operation
THEORY OF OPERATION FIGURE E.2 - GENERAL DESCRIPTION, INPUT BOARD & BUS BOARD Superimposition board 24 VDC Bus board Input board IGBT Thermostats Main IGBT & Power board IGBT's Input Choke HF control signal +48, +24 Control board 48 VDC Solenoid GENERAL DESCRIPTION The Invertec®... - Page 37 THEORY OF OPERATION FIGURE E.3 - MAIN IGBT INVERTER BOARD Superimposition board 24 VDC Bus board Input board IGBT Thermostats Main IGBT & Power board IGBT's Input Choke HF control signal +48, +24 Control board 48 VDC Solenoid MAIN IGBT INVERTER BOARD The filtered input voltage, from the Input Board, is applied through an input choke to the Main IGBT Inverter Board.
-
Page 38: Main Transformer
THEORY OF OPERATION FIGURE E.4 - MAIN TRANSFORMER, OUTPUT DIODE MODULE & CLAMPING BOARD, OUTPUT TRANSISTOR MODULE & SUPERIMPOSITION BOARD Superimposition board 24 VDC Bus board Input board IGBT Thermostats Main IGBT & Power board IGBT's Input Choke HF control signal +48, +24 Control board 48 VDC... -
Page 39: Control/Display Board
THEORY OF OPERATION FIGURE E.5 - CONTROL/DISPLAY BOARD, HF BOARD & OUTPUT FILTER BOARD Superimposition board 24 VDC Bus board Input board IGBT Thermostats Main IGBT & Power board IGBT's Input Choke HF control signal +48, +24 Control board 48 VDC Solenoid CONTROL/DISPLAY BOARD The Control/Display Board assembly is actually two... -
Page 40: Insulated Gate Bipolar Transistor (Igbt) Operation
THEORY OF OPERATION SOURCE DRAIN A. PASSIVE INSULATED GATE BIPOLAR TRANSISTOR (IGBT) OPERATION An IGBT is a type of transistor. IGBT are semiconduc- tors well suited for high frequency switching and high current applications. Example A in Figure E.6 shows an IGBT in passive mode. - Page 41 TABLE OF CONTENTS - TROUBLESHOOTING AND REPAIR Troubleshooting and Repair ............. .F-1 How to Use Troubleshooting Guide .
-
Page 42: How To Use Troubleshooting Guide
TROUBLESHOOTING AND REPAIR HOW TO USE TROUBLESHOOTING GUIDE Service and Repair should only be performed by Lincoln Electric Factory Trained Personnel. Unauthorized repairs performed on this equipment may result in danger to the technician and machine operator and will invalidate your factory warranty. For your safety and to avoid Electrical Shock, please observe all safety notes and precautions detailed throughout this manual. -
Page 43: Pc Board Troubleshooting Procedures
- If the PC board uses protective shorting jumpers, don’t remove them until installation is complete. - If you return a PC board to The Lincoln Electric Company for credit, it must be in the static-shielding bag. This will prevent further damage and allow prop- er failure analysis. -
Page 44: Troubleshooting And Repair
The main input fuses or breakers repeatedly fail. If for any reason you do not understand the test procedures or are unable to perform the tests/repairs safely, contact the Lincoln Electric Service Department for technical troubleshooting assistance before you proceed. Call 1-888-935-3877. POSSIBLE AREAS OF... - Page 45 If for any reason you do not understand the test procedures or are unable to perform the tests/repairs safely, contact the Lincoln Electric Service Department for technical troubleshooting assistance before you proceed. Call 1-888-935-3877. POSSIBLE AREAS OF...
- Page 46 Error code “E14” is flashing of the digital display If for any reason you do not understand the test procedures or are unable to perform the tests/repairs safely, contact the Lincoln Electric Service Department for technical troubleshooting assistance before you proceed. Call 1-888-935-3877. POSSIBLE AREAS OF...
- Page 47 If for any reason you do not understand the test procedures or are unable to perform the tests/repairs safely, contact the Lincoln Electric Service Department for technical troubleshooting assistance before you proceed. Call 1-888-935-3877. POSSIBLE AREAS OF...
- Page 48 TIG mode does not function prop- erly. If for any reason you do not understand the test procedures or are unable to perform the tests/repairs safely, contact the Lincoln Electric Service Department for technical troubleshooting assistance before you proceed. Call 1-888-935-3877. POSSIBLE AREAS OF...
-
Page 49: Power Supply
TROUBLESHOOTING AND REPAIR EXTERNAL DIAGNOSTICS Figure F.1 External Diagnostics MODE Power Supply Alarm The front panel controls the status of the equipment and shows it to the operator via the LED’s and the display. Immediately after switch-on of the equipment, the front panel executes an autotest operation, all LED’s will light up and the display shows”200”... -
Page 50: Internal Diagnostics
TROUBLESHOOTING AND REPAIR F-10 INTERNAL DIAGNOSTICS Under Small FIGURE F.2 INVERTEC® V205-T AC/DC™ F-10 Under Small... - Page 51 TROUBLESHOOTING AND REPAIR F-11 INTERNAL DIAGNOSTICS (Continued) -15VDC supply by 15.14.316 for 15.14.316 logic part +15VDC supply by 15.14.316 for 15.14.316 logic part +5VDC supply by 15.14.316 for 15.14.316 logic part +24VDC supply by 15.14.316 for power front panel +48VDC supply by 15.14.316 for power front panel -15VDC supply by 15.14.316 for 15.14.316 UPFR part +15VDC supply by 15.14.316 for 15.14.316 UPFR...
- Page 52 NOTES F-12 F-12 INVERTEC® V205-T AC/DC™...
-
Page 53: Input Filter Capacitor Discharge Procedure
F-13 INPUT FILTER CAPACITOR DISCHARGE PROCEDURE Service and repair should be performed only by Lincoln Electric factory trained personnel. Unauthorized repairs performed on this equipment may result in danger to the technician or machine operator and will invalidate your factory warranty. For your safety and to avoid electrical shock, please observe all safety notes and precautions detailed throughout this manual. -
Page 54: Electric Shock
TROUBLESHOOTING AND REPAIR F-14 INPUT FILTER CAPACITOR DISCHARGE PROCEDURE (continued) FIGURE F.3 – LOCATION OF INPUT FILTER CAPACITOR TERMINALS ON MAIN IGBT INVERTER BOARD Resistor ELECTRIC SHOCK • Have an electrician install and ser- vice this equipment. • Turn the input power off at the fuse box before working on equipment. -
Page 55: Input Filter Board Test
F-15 INPUT FILTER BOARD TEST Service and repair should be performed only by Lincoln Electric factory trained personnel. Unauthorized repairs performed on this equipment may result in danger to the technician or machine operator and will invalidate your factory warranty. For your safety and to avoid electrical shock, please observe all safety notes and precautions detailed throughout this manual. - Page 56 TROUBLESHOOTING AND REPAIR F-16 INPUT FILTER BOARD TEST (continued) FIGURE F.4 – INPUT FILTER BOARD LOCATION PROCEDURE 1. Remove input power to the V205-T. 2. Using a phillips head screwdriver, remove the case wraparound. 3. Perform the Input Filter Capacitor Discharge Procedure detailed earlier in this section.
- Page 57 TROUBLESHOOTING AND REPAIR F-17 INPUT FILTER BOARD TEST (continued) INPUT FILTER BOARD “PE” EARTH CONNECTION CN 1/1-2 CN 1/3-4 VAC 2.3V (1.2V) Checks the correct voltages as indicated on the above drawing NOTE 1: A varistor ZN1 is placed between the two power supply phases, so if an instanta- neous voltage in excess of 275VAC appears on terminals RV1 &...
- Page 58 NOTES F-18 F-18 INVERTEC® V205-T AC/DC™...
-
Page 59: Main Igbt Inverter Board Low Voltage Test
F-19 MAIN IGBT INVERTER BOARD LOW VOLTAGE TEST Service and repair should be performed only by Lincoln Electric factory trained personnel. Unauthorized repairs performed on this equipment may result in danger to the technician or machine operator and will invalidate your factory warranty. For your safety and to avoid electrical shock, please observe all safety notes and precautions detailed throughout this manual. - Page 60 TROUBLESHOOTING AND REPAIR F-20 MAIN IGBT INVERTER BOARD LOW VOLTAGE TEST (continued) FIGURE F.6 – MAIN IGBT INVERTER BOARD LOCATION PROCEDURE 1. Remove input power to the V205-T machine. 2. Using a phillips head screwdriver, remove case wraparound cover. 3. Perform the Capacitor Discharge Procedure detailed earlier in this section.
- Page 61 TROUBLESHOOTING AND REPAIR F-21 MAIN IGBT INVERTER BOARD LOW VOLTAGE TEST (continued) Test Point Machine Mode TP13-TP14 TP11-TP14 TP12-TP14 TP17-TP18 TP21-TP18 TP2[+],TP18[-] Table F.1 Test Points TP3-TP5 TP4-TP5 INVERTEC® V205-T AC/DC™ F-21 Value +15 VDC +5 VDC +15 VDC +24 VDC +48 VDC +15 VDC +15 VDC...
- Page 62 TROUBLESHOOTING AND REPAIR F-22 MAIN IGBT INVERTER BOARD LOW VOLTAGE TEST (continued) FIGURE F.7 – MAIN IGBT INVERTER BOARD LOCATION This is an illustration of the upper right corner of the P.C. board INVERTEC® V205-T AC/DC™ F-22 TP14 TP12 TP13 TP11 TP17 TP18...
-
Page 63: Control/Display Board Test
F-23 CONTROL/DISPLAY BOARD TEST Service and repair should be performed only by Lincoln Electric factory trained personnel. Unauthorized repairs performed on this equipment may result in danger to the technician or machine operator and will invalidate your factory warranty. For your safety and to avoid electrical shock, please observe all safety notes and precautions detailed throughout this manual. - Page 64 TROUBLESHOOTING AND REPAIR F-24 CONTROL/DISPLAY BOARD TEST (continued) FIGURE F.8 – CONTROL/DISPLAY BOARD LOCATION Control/Display Board PROCEDURE 1. Remove input power to the V205-T machine. 2. Using a phillips head screwdriver, remove the case wraparound cover. 3. Perform the Capacitor Discharge Procedure detailed earlier in this section.
- Page 65 TROUBLESHOOTING AND REPAIR F-25 F-25 CONTROL/DISPLAY BOARD TEST (continued) FIGURE F.9 – CONTROL/DISPLAY BOARD LOCATION INVERTEC® V205-T AC/DC™...
- Page 66 TROUBLESHOOTING AND REPAIR F-26 CONTROL/DISPLAY BOARD TEST (continued) Wire # Wire # Wire # FIGURE F.10 – PLUGS CN1, CN2 & CN7 Table F.2 Plug CN1 Test Points Description Solenoid Valve Ground Trigger Trigger Start High Frequency High Frequency Ground Start Solenoid Valve Table F.3 Plug CN2 Test Points Description...
-
Page 67: Bus Board Test
TROUBLESHOOTING AND REPAIR F-27 Service and repair should be performed only by Lincoln Electric factory trained personnel. Unauthorized repairs performed on this equipment may result in danger to the technician or machine operator and will invalidate your factory warranty. For your safety and to avoid electrical shock, please observe all safety notes and precautions detailed throughout this manual. -
Page 68: Bus Board
TROUBLESHOOTING AND REPAIR F-28 BUS BOARD TEST (continued) FIGURE F.11 – BUS BOARD LOCATION PROCEDURE 1. Remove input power to the V205-T machine. 2. Using a phillips head screwdriver, remove the case wraparound cover. 3. Perform the Capacitor Discharge Procedure detailed earlier in this section. - Page 69 TROUBLESHOOTING AND REPAIR F-29 BUS BOARD TEST (continued) Wire # Wire # 64[-], 66[+] In TIG mode only when Remote is pushed, comes on for two sec. then goes to zero. In STICK mode is present all the time. Wire # Wire # Earth Cable Earth Cable...
- Page 70 TROUBLESHOOTING AND REPAIR F-30 BUS BOARD TEST (continued) FIGURE F.12 – BUS BOARD PLUG LOCATIONS 41 42 FIGURE F.13 – PLUGS CN2, CN3, CN4 22 23 11 12 INVERTEC® V205-T AC/DC™ F-30...
-
Page 71: Main Inverter Board Power Factor Test
F-31 MAIN INVERTER BOARD POWER FACTOR SECTION TEST Service and repair should be performed only by Lincoln Electric factory trained personnel. Unauthorized repairs performed on this equipment may result in danger to the technician or machine operator and will invalidate your factory warranty. For your safety and to avoid electrical shock, please observe all safety notes and precautions detailed throughout this manual. - Page 72 TROUBLESHOOTING AND REPAIR F-32 MAIN INVERTER BOARD POWER FACTOR SECTION TEST (continued) FIGURE F.14 – LOCATION ON MAIN BOARD PROCEDURE 1. Remove input power to the V205-T machine. 2. Using a phillips head screwdriver, remove the case wraparound cover. 3. Perform the Capacitor Discharge Procedure detailed earlier in this section.
-
Page 73: Power Input
TROUBLESHOOTING AND REPAIR F-33 MAIN INVERTER BOARD POWER FACTOR SECTION TEST (continued) FIGURE F.15 – POWER FACTOR AREA ON MAIN BOARD NOTE: Power Factor Section is located at the upper left section of main board TP9 GNDPWR TP20 POWER INPUT 230 VAC (115) INVERTEC®... - Page 74 NOTES F-34 F-34 INVERTEC® V205-T AC/DC™...
-
Page 75: Output Filter Board Test
F-35 OUTPUT FILTER BOARD TEST Service and repair should be performed only by Lincoln Electric factory trained personnel. Unauthorized repairs performed on this equipment may result in danger to the technician or machine operator and will invalidate your factory warranty. For your safety and to avoid electrical shock, please observe all safety notes and precautions detailed throughout this manual. - Page 76 TROUBLESHOOTING AND REPAIR F-36 OUTPUT FILTER BOARD TEST (continued) FIGURE F.16 – OUTPUT FILTER BOARD LOCATION PROCEDURE 1. Remove input power to the V205-T machine. 2. Using a phillips head screwdriver, remove the case wraparound cover. 3. Perform the Capacitor Discharge Procedure detailed earlier in this section.
- Page 77 TROUBLESHOOTING AND REPAIR F-37 OUTPUT FILTER BOARD TEST (continued) FIGURE F.17 – OUTPUT FILTER BOARD PLUG LOCATION TABLE F.12 – PLUG CN1 TEST POINTS Wire # 64[-],66[+] FIGURE F.18 – OUTPUT FILTER BOARD PLUG CN1 Description Trigger Trigger Output Voltage Superimposition Common INVERTEC®...
- Page 78 NOTES F-38 F-38 INVERTEC® V205-T AC/DC™...
-
Page 79: Secondary Output Board Assembly Test
F-39 SECONDARY OUTPUT BOARD ASSEMBLY TEST Service and repair should be performed only by Lincoln Electric factory trained personnel. Unauthorized repairs performed on this equipment may result in danger to the technician or machine operator and will invalidate your factory warranty. For your safety and to avoid electrical shock, please observe all safety notes and precautions detailed throughout this manual. - Page 80 TROUBLESHOOTING AND REPAIR F-40 SECONDARY OUTPUT BOARD ASSEMBLY TEST (continued) FIGURE F.19 – SECONDARY POWER BOARD LOCATION PROCEDURE 1. Remove input power to the V205-T machine. 2. Using a phillips head screwdriver, remove the case wraparound cover. 3. Perform the Capacitor Discharge Procedure detailed earlier in this section.
- Page 81 TROUBLESHOOTING AND REPAIR F-41 SECONDARY OUTPUT BOARD ASSEMBLY TEST (continued) FIGURE F.20 – SECONDARY POWER BOARD TEST POINT LOCATIONS TABLE F.13 – VOLTAGE CHECKS WITH 115 VAC APPLIED TO MACHINE Generator/Mode ON/STICK ON/STICK ON/STICK ON/STICK ON/STICK OFF/- OFF/- 10K Ohms GA SA Test Point GA[+],SA[-]...
- Page 82 TROUBLESHOOTING AND REPAIR F-42 SECONDARY OUTPUT BOARD ASSEMBLY TEST (continued) TABLE F.14 – OUTPUT DIODE RESISTANCE CHECK MODE POSITIVE METER PROBE MACHINE OFF TEST POINT A MACHINE OFF TEST POINT 3 MACHINE OFF TEST POINT B MACHINE OFF TEST POINT 3 MACHINE OFF TEST POINT 2 MACHINE OFF...
- Page 83 F-43 “WELDING LOGIC AND INVERTER” SECTION TEST Service and repair should be performed only by Lincoln Electric factory trained personnel. Unauthorized repairs performed on this equipment may result in danger to the technician or machine operator and will invalidate your factory warranty. For your safety and to avoid electrical shock, please observe all safety notes and precautions detailed throughout this manual.
- Page 84 TROUBLESHOOTING AND REPAIR F-44 “WELDING LOGIC AND INVERTER” SECTION TEST (continued) FIGURE F.21 – MAIN BOARD LOCATION PROCEDURE 1. Remove input power to the V205-T machine. 2. Using a phillips head screwdriver, remove the case wraparound cover. 3. Perform the Capacitor Discharge Procedure detailed earlier in this section.
- Page 85 TROUBLESHOOTING AND REPAIR F-45 “WELDING LOGIC AND INVERTER” SECTION TEST (continued) Machine/Mode Component ON/STICK TP31-TP9 TABLE F.16 – FEEDBACK VOLTAGE SIGNALS Machine/Mode ON/TIG ON/STICK ON/TIG TABLE F.17 – VOLTAGE CHECKS WITH 115 VAC APPLIED TO MACHINE Generator/Mode ON/STICK ON/STICK ON/STICK ON/STICK TABLE F.18 –...
- Page 86 TROUBLESHOOTING AND REPAIR F-46 “WELDING LOGIC AND INVERTER” SECTION TEST (continued) FIGURE F.22 – MAIN BOARD (INVERTER SECTION) MAIN INVERTER BOARD INVERTEC® V205-T AC/DC™ F-46 TP14 TP15 TP16 TP19 TP31 CN4/1-2 Short Circuit 0.3 Ohms CN5/1-2 Short Circuit 0.3 Ohms...
- Page 87 TROUBLESHOOTING AND REPAIR F-47 “WELDING LOGIC AND INVERTER” SECTION TEST (continued) FIGURE F.23 – MAIN BOARD (LOWER LEFT) TP9 GROUND POWER MF11 MAIN INVERTER BOARD MF15 MF16 MF12 INVERTEC® V205-T AC/DC™ F-47...
- Page 88 NOTES F-48 F-48 INVERTEC® V205-T AC/DC™...
-
Page 89: Input Filter Board Removal And Replacement
F-49 INPUT FILTER BOARD REMOVAL AND REPLACEMENT Service and repair should be performed only by Lincoln Electric factory trained personnel. Unauthorized repairs performed on this equipment may result in danger to the technician or machine operator and will invalidate your factory warranty. For your safety and to avoid electrical shock, please observe all safety notes and precautions detailed throughout this manual. - Page 90 TROUBLESHOOTING AND REPAIR F-50 INPUT FILTER BOARD REMOVAL AND REPLACEMENT (continued) FIGURE F.24 – INPUT FILTER BOARD LOCATION PROCEDURE 1. Remove input power to the V205-T. 2. Using a phillips head screwdriver remove the case wraparound cover. 3. Perform the Input Filter Capacitor Discharge Procedure detailed earlier in this section.
- Page 91 TROUBLESHOOTING AND REPAIR F-51 INPUT FILTER BOARD REMOVAL AND REPLACEMENT (continued) FIGURE F.26 – MAIN IGBT BOARD LEAD REMOVAL CAUTION Observe static precautions detailed in PC Board Troubleshooting Procedures at the beginning of this section. 7. Clean RTV off of the top of the input filter board mounting slides.
- Page 92 NOTES F-52 F-52 INVERTEC® V205-T AC/DC™...
-
Page 93: Main Igbt Board Removal And Replacement
F-53 MAIN IGBT BOARD REMOVAL AND REPLACEMENT Service and repair should be performed only by Lincoln Electric factory trained personnel. Unauthorized repairs performed on this equipment may result in danger to the technician or machine operator and will invalidate your factory warranty. For your safety and to avoid electrical shock, please observe all safety notes and precautions detailed throughout this manual. - Page 94 TROUBLESHOOTING AND REPAIR F-54 MAIN IGBT BOARD REMOVAL AND REPLACEMENT (continued) FIGURE F.27 – MAIN IGBT BOARD LOCATION PROCEDURE 1. Remove input power to the V205-T. 2. Using a phillips head screwdriver remove the case wraparound cover. 3. Perform the Input Filter Capacitor Discharge Procedure detailed earlier in this section.
- Page 95 TROUBLESHOOTING AND REPAIR F-55 MAIN IGBT BOARD REMOVAL AND REPLACEMENT (continued) FIGURE F.28 – MAIN BOARD PLUG AND MOUNTING SCREW LOCATION 10. Reconnect previously removed leads RV1 thru RV7 to the P.C. board. See Wiring Diagram if necessary. 11. Reconnect previously removed plugs CN1 thru CN5 to the P.C.
- Page 96 NOTES F-56 F-56 INVERTEC® V205-T AC/DC™...
-
Page 97: Control/Display Board Removal And Replacement
F-57 CONTROL/DISPLAY BOARD REMOVAL AND REPLACEMENT Service and repair should be performed only by Lincoln Electric factory trained personnel. Unauthorized repairs performed on this equipment may result in danger to the technician or machine operator and will invalidate your factory warranty. For your safety and to avoid electrical shock, please observe all safety notes and precautions detailed throughout this manual. - Page 98 TROUBLESHOOTING AND REPAIR F-58 CONTROL/DISPLAY BOARD REMOVAL AND REPLACEMENT (continued) FIGURE F.29 – CONTROL/DISPLAY BOARD LOCATION Control/Display Board PROCEDURE 1. Remove the input power to the V205-T. 2. Using a phillips head screwdriver remove the four screws from the corners of the name- plate/keypad on the front of the machine.
- Page 99 TROUBLESHOOTING AND REPAIR F-59 CONTROL/DISPLAY BOARD REMOVAL AND REPLACEMENT (continued) FIGURE F.30 – METAL DISPLAY PLATE FIGURE F.31 – PLUG AND MOUNTING NUT LOCATION 4 Phillips Head Screws WARNING STICK 4-STEP LOCAL DC TIG 2-STEP REMOTE MODE AC TIG TRIGGER WELD PULSE FREQUENCY CURRENT...
- Page 100 NOTES F-60 F-60 INVERTEC® V205-T AC/DC™...
-
Page 101: Output Filter Board Removal And Replacement
F-61 REMOVAL AND REPLACEMENT Service and repair should be performed only by Lincoln Electric factory trained personnel. Unauthorized repairs performed on this equipment may result in danger to the technician or machine operator and will invalidate your factory warranty. For your safety and to avoid electrical shock, please observe all safety notes and precautions detailed throughout this manual. - Page 102 TROUBLESHOOTING AND REPAIR F-62 REMOVAL AND REPLACEMENT (continued) FIGURE F.32 – OUTPUT FILTER BOARD LOCATION PROCEDURE 1. Remove input power to the V205-T. 2. Using a phillips head screwdriver, remove the case wraparound cover. 3. Perform the Input Filter Capacitor Discharge Procedure detailed earlier in this section.
- Page 103 TROUBLESHOOTING AND REPAIR F-63 REMOVAL AND REPLACEMENT (continued) FIGURE F.33 – CASE FRONT SCREW REMOVAL 9. Using a 17mm wrench, remove the heavy lead from the positive output terminal. 10. Using a 13mm wrench, remove the heavy lead from the high frequency transformer. 11.
- Page 104 TROUBLESHOOTING AND REPAIR F-64 REMOVAL AND REPLACEMENT (continued) FIGURE F.34 – OUTPUT FILTER BOARD 18. Reconnect lead CN7 previously removed from the control/display board assembly. 19. Replace the large nut previously removed from around the positive output terminal. 20. Replace the two output filter board mounting screws previously removed.
-
Page 105: Output Diodes Removal And Replacement
F-65 OUTPUT DIODES REMOVAL AND REPLACEMENT Service and repair should be performed only by Lincoln Electric factory trained personnel. Unauthorized repairs performed on this equipment may result in danger to the technician or machine operator and will invalidate your factory warranty. For your safety and to avoid electrical shock, please observe all safety notes and precautions detailed throughout this manual. - Page 106 TROUBLESHOOTING AND REPAIR F-66 OUTPUT DIODES REMOVAL AND REPLACEMENT (continued) FIGURE F.35 – OUTPUT DIODE LOCATION TO REPLACE ANY OF THE OUTPUT DIODES (D1, D2, D3 OR D4) 1. Remove input power to the V205-T. 2. Using a phillips head screwdriver, remove the case wraparound cover.
-
Page 107: Output Transistor Removal And Replacement
F-67 OUTPUT TRANSISTOR REMOVAL AND REPLACEMENT Service and repair should be performed only by Lincoln Electric factory trained personnel. Unauthorized repairs performed on this equipment may result in danger to the technician or machine operator and will invalidate your factory warranty. For your safety and to avoid electrical shock, please observe all safety notes and precautions detailed throughout this manual. - Page 108 TROUBLESHOOTING AND REPAIR F-68 OUTPUT TRANSISTOR REMOVAL AND REPLACEMENT (continued) FIGURE F.36 – OUTPUT TRANSISTOR LOCATION PROCEDURE 1. Remove input power to the V205-T. 2. Using a phillips head screwdriver, remove the case wraparound cover. 3. Perform the Input Filter Capacitor Discharge Procedure detailed earlier in this section.
- Page 109 TROUBLESHOOTING AND REPAIR F-69 F-69 OUTPUT TRANSISTOR REMOVAL AND REPLACEMENT (continued) FIGURE F.37 – OUTPUT TRANSISTOR LEAD LOCATION Plug CN1 Allen Bolts INVERTEC® V205-T AC/DC™...
- Page 110 NOTES F-70 F-70 INVERTEC® V205-T AC/DC™...
-
Page 111: Electrical Diagrams Section
TABLE OF CONTENTS - DIAGRAM SECTION TABLE OF CONTENTS -ELECTRICAL DIAGRAMS SECTION- ELECTRICAL DIAGRAMS ............SECTION G WIRING DIAGRAM (CODE 10860 ONLY) . -
Page 112: Electrical Diagrams
ELECTriCaL DiaGramS WiriNG DiaGram - V205-T aC/DC STaNDarD DiaGram *To Ground according to National Electrical Code NOTE: This diagram is for reference only. It may not be accurate for all machines covered by this manual. The wiring diagram specific to your code is pasted inside one of the enclosure panels of your machine. iNVErTEC®...
Need help?
Do you have a question about the INVERTEC SVM161-A and is the answer not in the manual?
Questions and answers