Table of Contents
Advertisement
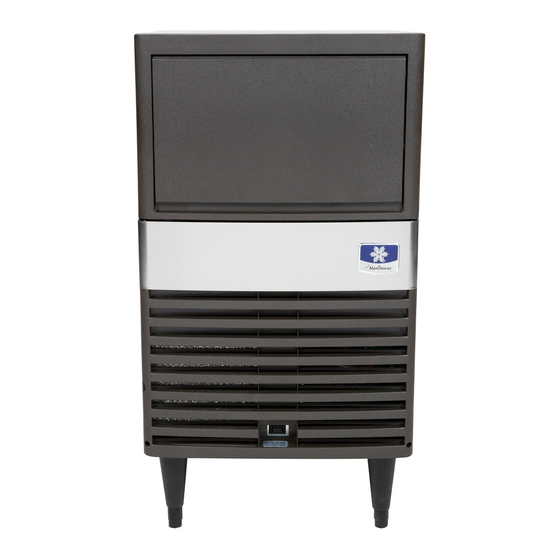
QM30 Series
Ice Machines
Installation,
Use and Care,
and Service Manual
Thank you for selecting a Manitowoc Ice Machine, the dependability leader in ice making equipment and related
products. With proper care and maintenance, your new Manitowoc Ice Machine will provide you with many
years of reliable and economical performance.
We reserve the right to make product improvements at any time.
Specifications and design are subject to change without notice.
Part Number 80-1121-3
Rev. C 01/01
Advertisement
Table of Contents

Related Manuals for Manitowoc QM30A


Summary of Contents for Manitowoc QM30A
- Page 1 Use and Care, and Service Manual Thank you for selecting a Manitowoc Ice Machine, the dependability leader in ice making equipment and related products. With proper care and maintenance, your new Manitowoc Ice Machine will provide you with many years of reliable and economical performance.
-
Page 2: Safety Notices
Manitowoc Ice Machine. Read and understand this manual. It contains valuable care and maintenance information. If you encounter problems not covered by this manual, feel free to contact Manitowoc Ice, Inc. We will be happy to provide assistance. Warning PERSONAL INJURY POTENTIAL... - Page 3 MANITOWOC ICE, INC. 2110 South 26th Street P.O. Box 1720 Manitowoc, WI 54221-1720 USA Phone: (920) 682-0161 Service Fax: (920) 683-7585 Web Site - www.manitowocice.com We reserve the right to make product ã2000 Manitowoc Ice, Inc. improvements at any time.
-
Page 4: Table Of Contents
Table of Contents Table of Contents Section 1 - General Information Model/Serial Number Location........................1-1 Owner Warranty Registration Card ......................1-2 Warranty Coverage............................1-2 Section 2 - Installation Instructions Dimensions ................................2-1 Location of Ice Machine ..........................2-2 Leveling the Ice Machine..........................2-2 Electrical Service ..............................2-3 Water Service/Drains............................2-5 Section 3 - Ice Machine Operation Sequence of Operation .............................3-1... - Page 5 Table of Contents Section 6 - Service Wiring Diagrams 230/50/1..............................6-1 115/60/1..............................6-2 Component Specifications and Diagnostics Control Board Fuse/Relays .........................6-3 Toggle Switch............................6-3 Bin Thermostat.............................6-4 Thermistor ............................6-5 Compressor (Electrical Diagnostics Only) ...................6-6 Hot Gas Valve ............................6-7 Ice Machine Will Not Run ..........................6-8 Refrigeration Tubing Schematic........................6-9 Cycle Times/24-Hour Production Charts/Ice Production Check ..............6-10 Ice Production Check............................6-11...
-
Page 6: Section 1 - General Information
These numbers OWNER WARRANTY REGISTRATION CARD. are required when requesting information from your They are also listed on the MODEL/SERIAL Manitowoc distributor, service representative, or the NUMBER DECAL affixed to the ice machine. factory. MODEL AND... -
Page 7: Owner Warranty Registration Card
3. Damage caused by improper installation of the REGISTRATION CARD, Manitowoc will use the ice machine, electrical supply, water supply or date of sale to the Manitowoc Distributor as the first drainage, or damage caused by floods, storms, day of warranty coverage for your new ice machine. -
Page 8: Section 2 - Installation Instructions
Section 2 Installation Instructions Section 2 Installation Instructions Legs 7.32 cm 15.24 cm (2.88”) (6.00”) 15.09 cm (5.94”) sv1679b 9.53 cm (3.75”) 15.73 cm (6.19”) 8.51 cm 7.24 cm (3.35”) (2.85”) sv1678b Levelers 20.80 cm (8.19”) 3.33 cm (1.31”) International ONLY Ice Making Ice Making... -
Page 9: Location Of Ice Machine
Installation Instructions Section 2 Location of Ice Machine Leveling the Ice Machine The location selected for the ice machine must meet After moving the ice machine into the installation the following criteria. If any of these criteria are not location, it must be leveled for proper operation. met, select another location. -
Page 10: Electrical Service
Section 2 Installation Instructions Electrical Service WARNING WARNING All wiring must conform to local, state and national Never use an extension cord. If an outlet is not codes. within reach of the ice machine’s power cord, have a proper amperage outlet wired closer to the ice Ice Machine Voltage Phase Air-Cooled... - Page 11 Installation Instructions Section 2 THIS PAGE INTENTIONALLY LEFT BLANK...
-
Page 12: Water Service/Drains
DRAIN CONNECTIONS Important Follow these guidelines when installing drain lines to If you are installing a Manitowoc water filter prevent drain water from flowing back into the ice system, refer to the Installation Instructions machine and storage bin: supplied with the filter system for ice making water •... -
Page 13: Typical Water Supply/Drain Line Sizing/Connections
Installation Instructions Section 2 Typical Water Supply and Drain Line Sizing and Connections OVERFLOW TUBE DRAIN HOLE Important Over flow tube must be securely installed during initial set up. ICE MAKING WATER INLET TUBING 0.95 cm (3/8”) MINIMUM INSIDE DIAMETER sv1680b WATER SHUT OFF VALVES ICE MAKING/BIN WATER DRAIN TUBING... -
Page 14: Section 3 - Ice Machine Operation
Section 3 Ice Machine Operation Section 3 Ice Machine Operation Sequence of Operation Control Board Relays Ice Making Length of Sequence of Hot Gas Valve Water Pump Compressor “ON” Time Operation Water Fill Valve Fan Motor Start-Up 2.9 Minutes 1. Water Purge (175 Seconds) 2. -
Page 15: Ice Thickness Adjustment
200 - 270g slab weight is not within this range or you desire (7 - 9-oz) contact the Manitowoc Service a slightly thicker or thinner cube, continue to Department for further assistance. -
Page 16: Section 4 - Maintenance
If you do not understand the procedures or the safety precautions that must be followed, call your Do not put anything (boxes, etc.) in front of the ice local Manitowoc service representative to perform machine. There must be adequate airflow through the maintenance procedures for you. -
Page 17: Cleaning The Condenser
Maintenance Section 4 Cleaning the Condenser GENERAL 2. Clean the outside of the condenser with a soft brush or a vacuum with a brush attachment. Clean WARNING from top to bottom not side to side. Be careful not to bend the condenser fins. Disconnect electric power to the ice machine before 3. -
Page 18: Interior Cleaning And Sanitizing
Clean and sanitize the ice machine every six months SANITIZING TECHNOLOGY for efficient operation. If the ice machine requires Manitowoc ice machines include technology that more frequent cleaning and sanitizing, consult a allows the initiation and completion of a cleaning or qualified service company to test the water quality sanitizing cycle at the flip of a switch. - Page 19 Step 4 Wait about three minutes or until water starts Step 5 Add 45 ml (1.5 oz.) of Manitowoc Ice to flow over the evaporator. Machine Sanitizer to the water trough. Step 5 Add 45ml (1.5 oz.) of Manitowoc Ice Step 6 The ice machine will automatically time out a Machine Cleaner to the water trough.
-
Page 20: Removal Of Parts
Section 4 Maintenance Removal of Parts OVERFLOW TUBE WARNING To remove the tube, lift it up while using a slight Before removing any parts, unplug or disconnect back and forth motion to loosen it from the drain the electric power to the ice machine at the electric hole. - Page 21 Maintenance Section 4 WATER PUMP WATER INLET VALVE 1. Disconnect the water pump power cord. WARNING 2. Disconnect the water hose from the pump outlet. 3. Loosen the screws that hold the water pump in Before removing any parts, unplug or disconnect place.
-
Page 22: Overview Of Parts Removal
Section 4 Maintenance Overview of Parts Removal WATER DISTRIBUTION TUBE WATER PUMP AND BRACKET ASSEMBLY WATER PUMP OUTLET HOSE OVERFLOW TUBE EVAPORATOR ASSEMBLY (REMAINS IN PLACE) WATER TROUGH sv1716... -
Page 23: Removal From Service/Winterization
Maintenance Section 4 Removal from Service/Winterization GENERAL Special precautions must be taken if the ice machine is to be removed from service for an extended period of time or exposed to ambient temperatures of 0°C (32°F) or below. CAUTION If water is allowed to remain in the ice machine in freezing temperatures, severe damage to some components could result. -
Page 24: Section 5 - Before Calling For Service
Section 5 Before Calling for Service Section 5 Before Calling for Service Checklist If a problem arises during operation of your ice machine, follow the checklist below before calling for service. Problem Possible Cause To Correct Ice machine does not No electrical power to the ice Replace the fuse/reset the operate. - Page 25 Before Calling for Service Section 5 Problem Possible Cause To Correct Ice machine produces Water level is low. Be sure the overflow tube is fully shallow or incomplete cubes, seated to prevent water leakage. or the ice fill pattern on the See page 4-5.
-
Page 26: Toggle Switch
Section 6 Service Section 6 Service Wiring Diagram QM30 230/50/1 CAUTION: DISCONNECT POWER BEFORE WORKING ON ELECTRICAL CIRCUITRY. NOTE: DIAGRAM SHOWN DURING THE FREEZE CYCLE OVERLOAD (24) PROTECTOR THERMISTOR STARTING DEVICE COMPRESSOR (23) ICE THICKNESS ADJUSTMENT DIAL FAN MOTOR CONTROL BOARD JUMPER WIRE LIGHT... -
Page 27: Thermistor
Service Section 6 Wiring Diagram QM30 115/60/1 CAUTION: DISCONNECT POWER BEFORE WORKING ON ELECTRICAL CIRCUITRY. NOTE: DIAGRAM SHOWN DURING THE FREEZE CYCLE OVERLOAD (24) PROTECTOR THERMISTOR STARTING DEVICE COMPRESSOR (23) ICE THICKNESS ADJUSTMENT DIAL FAN MOTOR CONTROL BOARD JUMPER WIRE LIGHT (22) WATER PUMP... -
Page 28: Compressor (Electrical Diagnostics Only)
Section 6 Service Component Specifications and Diagnostics WARNING An ice machine contains high voltage electricity and refrigerant charge. Repairs are to be performed by properly trained refrigeration technicians aware of the dangers of dealing with high voltage electricity and refrigerant under pressure. MAIN FUSE ON/OFF/WASH TOGGLE SWITCH Function... - Page 29 Service Section 6 BIN THERMOSTAT Check Procedure Function WARNING The bin thermostat stops the ice machine when the High (line) voltage is applied to the control board bin is full. (terminals #8 and #2) at all times. Removing the The level of ice in the ice storage bin controls the control board fuse or moving the toggle switch to ice machine shut-off.
- Page 30 If the ohmmeter reads “OL,” check the scale setting Thermistors generally fail because of moisture or on the meter before assuming the thermistor is bad. physical damage. Manitowoc liquid line thermistors Temperature of Thermistor Resistance are encased in a specially designed, moisture-sealed °...
- Page 31 Service Section 6 COMPRESSOR ELECTRICAL Determine if the Compressor is Seized DIAGNOSTICS Check the amp draw while the compressor is trying The compressor will not start or will trip repeatedly to start. on overload. Compressor Drawing Locked Rotor Check Resistance (Ohm) Values The two likely causes of this are: NOTE: Compressor windings can have very low •...
-
Page 32: Hot Gas Valve
If replacement is compressor during harvest, should be cool necessary, Use only “original” Manitowoc discharge line is enough to touch after 5 minutes replacement parts. hot. into the freeze cycle. -
Page 33: Diagnosing An Ice Machine That Will Not Run
Service Section 6 Diagnosing an Ice Machine That Will Not Run WARNING High (line) voltage is applied to the control board (terminals #8 and #2) at all times. Removing control board fuse or moving the toggle switch to OFF will not remove the power supplied to the control board. -
Page 34: Refrigeration Tubing Schematic
Section 6 Service Refrigeration Tubing Schematic EVAPORATOR HEAT EXCHANGER CAP TUBE HOT GAS SOLENOID VALVE COMPRESSOR CONDENSER DRIER sv1598... - Page 35 Service Section 6 Cycle Times/24-Hour Ice Production Chart These characteristics may vary depending on operating conditions. Cycle Times Chart (Times are listed in minutes) Freeze Time + Harvest Time = Total Cycle Time The first cycle, at any temperature, will take up to three minutes longer Air Temp.
-
Page 36: Ice Production Check
Mineral build-up on the evaporator assembly can cause water combined weight of all cubes from one harvest cycle). To tracking and an erratic ice fill pattern. Clean with Manitowoc determine proper slab weight, follow the instructions listed Ice Machine cleaner to remove any mineral build-up before below. -
Page 37: Refrigerant Recovery/Evacuation And Recharging
Do not purge refrigerant to the atmosphere. Capture recovery unit or two-stage vacuum pump. refrigerant using recovery equipment. Follow the manufacturer’s recommendations. MANIFOLD SET Important Manitowoc Ice, Inc. assumes no responsibility for OPEN OPEN the use of contaminated refrigerant. Damage LOW SIDE HIGH SIDE... -
Page 38: Refrigerant Charge
Important 3. Open the high side manifold gauge valve. The charge is critical on all Manitowoc ice 4. Using a digital scale add the proper refrigerant machines. Use a scale to ensure the proper charge charge (shown on nameplate) through the high is installed.
Need help?
Do you have a question about the QM30A and is the answer not in the manual?
Questions and answers
Ice machine not cooling
The Manitowoc QM30A ice machine is not cooling due to multiple potential issues. The user initially suspected a blockage and replaced the suction line cap tube assembly and the harvest valve assembly, but the problem persisted. Then, tech support suggested that the compressor was weak, so the compressor was replaced. However, the machine still did not produce ice, and the temperature readings remained incorrect. Other possible causes could include inadequate airflow around the machine, leaks in water fittings or refrigeration tubing, or improper maintenance of the condenser.
This answer is automatically generated