Table of Contents
Advertisement
Advertisement
Table of Contents

Subscribe to Our Youtube Channel
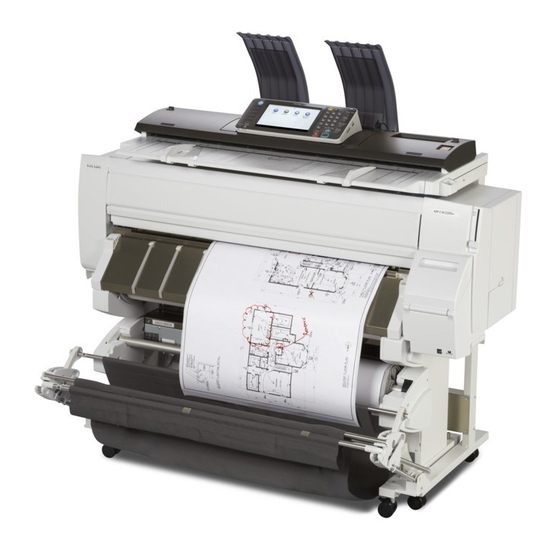
Related Manuals for Ricoh MP CW2200SP


Summary of Contents for Ricoh MP CW2200SP
- Page 1 MP CW2200SP User Guide MFD User Guide Please visit www.ricoh.co.nz/support for further information For useful playlist of how-to videos, search 'ricoh wiki' on YouTube Connect with us on Linkedin Visit online www.ricoh.co.nz Follow us on twitter-@RicohNZ Ver 1...
-
Page 2: Table Of Contents
CONTENTS CONTROL PANEL Page 3 An overview of the function buttons. LOADING PAPER Page 5 How to load paper rolls correctly into the machine. FEEDING ORIGINALS Page 10 How to feed original documents. How to stop the machine feeding. MFD BASICS Page 11 Explains some of the most commonly used hard buttons. -
Page 3: Control Panel
CONTROL PANEL 1. [Home] key Press to display the [Home] screen. . 2. Function keys No functions are registered to the function keys as a factory default. You can register often used functions, programs, and Web pages. 3. Display panel Displays keys for each function, operation status, or messages 4. - Page 4 CONTROL PANEL 6. Main power indicator The main power indicator goes on when you turn on the main power switch. 7. [Energy Saver] key Press to switch to and from Low Power mode or Sleep mode. When the machine is in Low Power mode, the [Energy Saver] key is lit.
-
Page 5: Loading Paper
LOADING PAPER ❶ Left flange Spool Paper Roll Adjustment levers Right flange Lock lever PART NAMES ❷ Press the [Home] key and then select ‘Copier’ on the screen. Ensure the “Ready” message appears on screen. ❸ Lift up the paper input location cover until it clicks. - Page 6 LOADING PAPER ❺ Pull the bar in front of Paper Input Location 2 forward. ❻ If there is paper loaded, press down the rewind button to the right of Paper Input Location 1 for a couple of seconds. Once you release, the paper is auto- matically rewound.
- Page 7 LOADING PAPER ❾ Remove the left flange from the spool. ❿ Remove both the right flange and spool from the paper roll. ⓫ Adjust the paper roll adjustment levers on both flanges according to the core (size) of the paper roll you want to load.
- Page 8 LOADING PAPER ⓭ Insert the spool into the left flange. Holding the right flange, insert the left flange until it touches the end of the paper. ⓮ Lower the lock lever on the left flange. ⓯ Place the paper roll on the flat place in front of the bearing.
- Page 9 LOADING PAPER ⓱ Feed the paper roll (1) so that the paper goes over the guides (2) behind the paper roll and under the rollers of the paper feeding slit. ⓲ Keep rotating the paper slowly until the paper is automatically pulled inside the machine and the beeper sounds.
-
Page 10: Feeding Originals
FEEDING ORIGINALS ❶ Adjust the original guides so they are flush against the original. They should be the same distance from the centre. Documents should be ❷ inserted FACE DOWN between the original guides. Support with both hands until it feeds ❸... -
Page 11: Mfd Basics
MFD BASICS ❶ Press the ‘Energy Saver’ button to turn the machine on from standby. ❷ To clear any selections you have made, press ‘Reset’.’ ❸ To stop a job, press ‘Stop’. ❹ Press the ‘Start’ button to begin copying/ scanning. -
Page 12: Copier Basics
COPIER BASICS ❶ ❶ [High Speed Copy] Print quality is reduced, but speed is improved. ❷ [Synchro Cut ] Cuts the paper at the same length as the original. ❸ [Variable Cut ] Brings up a menu with an option to manually enter a size to cut to. -
Page 13: Reduce & Enlarge
REDUCE & ENLARGE Either use ‘Auto Reduce/ Enlarge’ and then select the paper roll you wish to use..OR, if you wish to choose a different size, select the ‘Reduce/ Enlarge’ tab. Use the ‘-/+’ adjuster to set a percentage. -
Page 14: Storing A Document
STORING A DOCUMENT ❶ Choose any settings. Then select ‘Store File’ ❷ Select ‘File Name’ ❸ Select ‘Delete All’... - Page 15 STORING A DOCUMENT ❹ Use the key- pad to type in the name of the document, then select ‘OK’ ❺ Press the ‘Start’ Key to store the document...
-
Page 16: Retrieving Documents
RETRIEVING DOCUMENTS ❶ Select the file you wish to print ❷ Use the number keys to change quantity. (Prints one copy by de- fault). Press the ‘Start’ button to print... -
Page 17: Print Settings Overview
PRINT SETTINGS OVERVIEW ❹ ❶ [Drawing ] Uses the ’Speed’ print quality setting for faster printing at reduced resolution (600X300 dpi) ❷ [Poster ] Uses the ‘Quality’ print quality setting (1200X1200 dpi) but increases print time ❸ [Image ] Uses the ’Standard’ print quality setting (600X600 dpi) ❹... -
Page 18: Creating One-Click Presets
CREATING ONE-CLICK PRESETS If you change any ❶ settings, an ‘Unregistered’ icon will appear in the presets field. This means you can save those settings as a one- click preset. ❷ First, choose any settings you wish to use. To save those settings, select ‘Register Current Settings’... -
Page 19: Locked Print
LOCKED PRINT ❶ At the PC select ‘File’, ‘Print’ and then ‘Print Properties’ ❷ Under Job Type select ‘Locked Print’ from the drop down box, and then select ‘Details’ ❸ Create your own ‘User ID’. (e.g. JSmith) Create your own ‘Password’... - Page 20 LOCKED PRINT ❹ At the MFD, select ‘Printer’ and ‘Print Jobs’ ❺ Select your User ID (in this example ‘Nick’ ❻ Select the job (s) you wish to print and then select ‘Print’.
- Page 21 LOCKED PRINT ❼ Use the number keys to enter your ‘Password’ ❽ Select ‘OK’ ❾ (Use number keys to change quantity) Select ‘Print’ to print your job(s)
-
Page 22: Scan To Email
SCAN TO EMAIL ❶ Select your destination ❷ If no other settings are required, press ‘Start’... -
Page 23: Saving Email Shortcuts
SAVING EMAIL SHORTCUTS ❶ To save an email address as a shortcut, select ‘Manual Entry’ ❷ Use the key- board to type in the email address, then select ‘OK’ ❸ Select ‘Prog Dest’... - Page 24 SAVING EMAIL SHORTCUTS ❹ Check the email address and select ‘OK’ ❺ Type in the name you want to use for your shortcut, then select ‘OK’ ❻ Select an alphabet button.
- Page 25 SAVING EMAIL SHORTCUTS ❼ Select ‘OK’ ❽ The shortcut is now saved and ready to use. Destinations can also be accessed by using the al- phabet title...
-
Page 26: Scan To Folder
SCAN TO FOLDER ❶ Select the ‘Folder’ tab ❷ Select the Folder destination you require ❸ If no other settings are required, press ‘Start’... -
Page 27: Naming A File
NAMING A FILE ❶ If you want to name your file, select ‘Send File Type/Name’ ❷ Select ‘File Name’ ❸ Type in the name of your document and select ‘OK’... - Page 28 RICOH NZ LTD 60 Stanley Street, Parnell, Auckland Tel: 0800 807676...
Need help?
Do you have a question about the MP CW2200SP and is the answer not in the manual?
Questions and answers