Table of Contents
Advertisement
Quick Links
Download this manual
See also:
User Manual
Advertisement
Table of Contents

Subscribe to Our Youtube Channel
Related Manuals for Air Live AirMax5


Summary of Contents for Air Live AirMax5
- Page 1 AirMax5 802.11a 108Mbps Outdoor CPE User’s Manual Version 2.0...
-
Page 2: Regulatory Information
IMPORTANT NOTE FCC Radiation Exposure Statement: This equipment complies with FCC radiation exposure limits set forth for an uncontrolled environment. This equipment should be installed and operated with minimum distance 20cm between the radiator & your body. AirLive AirMax5 User’s Manual... - Page 3 OvisLink Corp. has made the best effort to ensure the accuracy of the information in this user’s guide. However, we are not liable for the inaccuracies or errors in this guide. Please use with caution. All information is subject to change without notice All Trademarks are properties of their respective holders. AirLive AirMax5 User’s Manual...
-
Page 4: Table Of Contents
1.5.3 Client Infrastructure Mode ................5 1.5.4 Client Ad Hoc Mode ..................5 1.5.5 Client Router Mode..................6 1.5.6 AP Router Mode ..................6 2. Installing the AirMax5 ................7 2.1 Before You Start ...................7 2.2 Package Content .................8 2.3 Optional Accessories ................8 2.4 Knowing your AirMax5 .................9 2.5 Hardware Installation .................10... - Page 5 3.5.2 Set the Time and Date ................26 3.5.3 Change System Management ..............27 3.5.4 Change Password ..................28 4. Web Management: Wireless and WAN Settings ........29 4.1 About AirMax5’s Menu Structure............29 4.2 Operation Modes (Wireless and WAN Settings) ........30 4.2.1 Network SSID ....................31 4.2.2 Site Survey ....................31 4.2.3 Signal Survey ....................32...
- Page 6 6.3 Show Commands................81 6.4 Set Commands ..................86 6.5 Enable/Disable Commands ...............93 6.6 Add/Delete Commands ..............94 7. Antenna Alignment ..................98 7.1 About AirMax5’s Antenna ..............98 7.1.1 Polarization....................99 7.1.2 Mounting Adjustment ................100 7.2 About RSSI Signal Level..............101 7.3 Preparation before Installation ............101 7.4 Antenna Alignment using RSSI LED ..........102...
- Page 7 11.1.3 Power Supply..................122 11.1.4 Dimension and Weight ................123 11.2 Radio Specifications...............123 11.2.5 Rate and Modulation................123 11.2.6 Receiver Sensitivity................123 11.2.7 Supported WLAN Mode .................123 11.3 Software Feature................123 11.3.5 Management Interface ................123 11.3.6 Advance Functions.................124 12. Wireless Network Glossary..............125 AirLive AIRMAX5 User’s Manual...
-
Page 8: Introduction
POE to simplify the installation. 1.2 How to Use This Guide AirMax5 is an advanced wireless CPE with many functions. It is recommended that you read through the entire user’s guide whenever possible. The user guide is divided into different chapters. - Page 9 A step-by-step instruction on how to build a multipoint WDS network is provided. Chapter 9: Emergency Firmware Recovery It your AirMax5 can no longer be access due to firmware crash. You might be able to recover it following the procedure on this chapter.
-
Page 10: Tech Support
1. Introduction Chapter 10: Frequent Asked Questions If you have a question about AirMax5 that is not found on other part of this guide, you might find your answer here. Including how to make connection with Mikrotik AP, how to save password settings on the browser...etc. -
Page 11: Wireless Operation Modes
The AirMax5 can be configured to operate in the following wireless operation modes: 1.5.1 Access Point Mode When operating in the Access Point mode, the AIRMAX5 becomes the center hub of the wireless network. All wireless cards and clients connect and communicate through AirMax5. -
Page 12: Client Infrastructure Mode
Access Point. Users can attach a computer or a router to the LAN port of AirMax5 to get network access. This mode is often used by WISP on the subscriber’s side. -
Page 13: Client Router Mode
In AP Router Mode, the AirMax5 behaves like a wireless router. The LAN port of the AirMax5 will become WAN port. The wireless network of AirMax5 becomes the LAN side. Please note when this mode is used, the only way to manage the AirMax5 is through the wireless side unless remote management is opened. -
Page 14: Installing The Airmax5
PoE Ethernet Cable. You can use a good quality CAT-5E outdoor graded Ethernet cable (shielded with anti-UV) according to the length you need. The AirMax5 must be installed in the upright position if the unit is located in outdoor or wet environments. -
Page 15: Package Content
The AirMax5 have the following optional accessories which you can purchase from AirLive Tilting Metal Wall/Pole Mount (Model: WMK-AIRMAX): This kit allows your AirMax5 to tilt in pole mount, it also allow you to install the AirMax5 to the wall. 25 meter PoE cable (Model: OD-25M): high quality outdoor graded anti-UI PoE Ethernet Cable. -
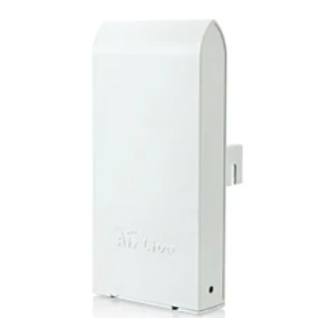
Page 16: Knowing Your Airmax5
2. Install the AirMax5 2.4 Knowing your AirMax5 Below are descriptions and diagrams of the product: AirLive AirMax5 User’s Manual... -
Page 17: Hardware Installation
2. Install the AirMax5 2.5 Hardware Installation Please prepare a screw driver and an outdoor graded PoE Ethernet cable with adequate length according to your need. 1. Remove the screws from the sides of the 2. Hold the sides of the bottom cases and pull case. - Page 18 2. Install the AirMax5 . 5. Put the case screws back. 6. Install the PoE Cable and the Power Adapter to the DC Injector. Please make sure to read the markings on the DC Injector carefully and connect the cables correctly. You can connect your PC directly to the “LAN”...
-
Page 19: Standard Pole Mount
2. Install the AirMax5 2.5.1 Standard Pole Mount Your AirMax5 comes standard with 2 plastic straps for pole mounting. Please follow the procedure below to install: 1. Put the plastic strap through the holes on the 2. Thread the thinner end of the strap into the Pole Mount holders. -
Page 20: Optional Tilting Metal Pole/ Wall Mount
The optional WMK-AIRMAX metal pole/wall mount kit allows your AirMax5 to be mounted on the wall and pole. It enables you to tilt the AirMax5 to the desire vertical angle. If you have purchased such kit, please follow the instruction below to mount your AirMax Wall Mount Installation using WMK-AIRMAX 1. - Page 21 Tighten the screw on the ring until the ring is very tight around the pole. 4. Now, install the AirMax 5 into the metal bracket and tighten the screws on the bracket 5. By adjusting the bracket screws, you can adjust the tilting angle of the AirMax5 Bracket Screw...
-
Page 22: Led Table
2. Install the AirMax5 2.6 LED Table This section describes the LED behavior of AirMax5. For more information on how to use the LED for antenna alignment, please refer to Chapter 5: How to make Antenna Alignment for details. You can find the LED on the left side of the AirMax5. -
Page 23: Configuring The Airmax5
Failure to do so can result in poor performance. 3.2 Prepare your PC The AIRMAX5 can be managed remotely by a PC through either the wired or wireless network. The default IP address of the AIRMAX5 is 192.168.1.1 with a subnet mask of 255.255.255.0. -
Page 24: Management Interface
To prepare your PC for management with the AirMax5, please do the following: Connect your PC directly to the LAN port on the DC Injector of AirMax5 Set your PC’s IP address manually to 192.168.1.100 (or other address in the same subnet) You are ready now to configure the AirMax5 using your PC. -
Page 25: Secured Web Management (Https)
But all the data transactions are securely encrypted using SSL encryption. Therefore, it is a safe and easy way to manage your AirMax5. We highly recommend WISP and service provider to use HTTPS for management. To begin, simply enter https://192.168.1.1... -
Page 26: Secure Shell (Ssh, Ssh2)
Putty. Please follow the figure below to make a connection with AirMax5: 1. Choose “SSH” as indicated in the diagram 2. Enter the IP address of AirMax5 3. Click on “Open” to start the SSH session. AirLive AirMax5 User’s Manual... - Page 27 3. Configuring the AirMax5 When the following screen appear, click on “Yes” to continue When the following screen appears, enter “root” for login. Then press Enter when password for root is requested, do not enter any password AirLive AirMax5 User’s Manual...
-
Page 28: Snmp Management
For more information about Telnet and SSH configuration, please go to Chapter 7 Command Line Interface. SNMP Management: The AirMax5 support SNMPv1/v2 management. If you have a SNMP management software, it can manage the AirMax5. The AirMax5’s SNMP support is as followed: SNMP v1/v2 support... -
Page 29: Introduction To Web Management
The only difference is HTTPS are encrypted for extra security. Therefore, we will discuss them together as “Web Management” on this guide. If you are placing the AirMax5 behind router or firewall, you might need to open virtual server ports to AirMax5 on your firewall/router... - Page 30 3. Configuring the AirMax5 Firefox: Select “or you can add an exception” Click on “Add Exception” AirLive AirMax5 User’s Manual...
-
Page 31: Welcome Screen And Login
Point and AP Router mode. Therefore, the function will only appear in these 2 modes. For this reason, the first step to configure the AirMax5 is to select the wireless mode. The router mode specific functions are also in this menu category. - Page 32 You can choose any menu categories to begin; you can switch to other menu later When you choose one of the menu categories, the AirMax5 will require you to enter the username and password. Please enter “airlive” (all lower cases) for both username and password.
-
Page 33: Initial Configurations
Settings”. After entering the IP information, click on “Apply” to finish. 3.5.2 Set the Time and Date It is important that you set the date and time for your AirMax5 so that the system log will record the correct date and time information. Please go to “System Configuration”... -
Page 34: Change System Management
3. Configuring the AirMax5 3.5.3 Change System Management It is recommended that you change the system management settings first. Please go to “System Configuration”-> “System Management”. The default web management time out is 10 minutes, you can set to longer period if needed. For WISP administrators, you can consider turning off HTTP and Telnet for security purpose. -
Page 35: Change Password
3. Configuring the AirMax5 3.5.4 Change Password You should change the password for AirMax5 at the first login. To change password, please go to “System Configuration” -> “Password Settings” menu. AirLive AirMax5 User’s Manual... -
Page 36: Web Management: Wireless And Wan Settings
Chapter 5. 4.1 About AirMax5’s Menu Structure The AirMax5’s web management menu is divided into 3 main menus: Operation Modes, System Configurations, and Device Status. The main menus are displayed in “Top Menu Bar”. -
Page 37: Operation Modes (Wireless And Wan Settings)
Logout: Please make sure to Logout after you finish all settings. 4.2 Operation Modes (Wireless and WAN Settings) The wireless settings of AirMax5 are dependant on the wireless operation mode you choose. Therefore, the first step is to choose the operation mode. For explanation on when to use what operation mode, please refer to Chapter 1. -
Page 38: Network Ssid
The SSID is the network name used to identify a wireless network. The SSID must be the same for all devices in the same wireless network. In AirMax5; it is possible to create more than one SSID in AP and AP Router mode, please check the “Multiple SSID & VLAN”... -
Page 39: Signal Survey
AirMax5 will attempt to make a connection with the selected ESSID. If there is encryption needed, the AirMax5 will prompt you to enter the encryption key. Please make sure you enter the correct encryption key, the Airmax5 will not check whether the encryption key is correct. -
Page 40: Lock-To-Ap
This function is applicable only to Client mode, Bridge Infrastructure, and WISP Router mode. When this function is enables, the AirMax5 will put priority to associate with AP on the list. If “Force connect with AP added below” is selected, the AirMax5 will only connect with AP on the list. -
Page 41: Security Settings
Security settings allow you to use encryption to secure your data from eavesdropping. You can select different security policy to provide association authentication and/or data encryption. The AirMax5 features various security policies including WEP, 802.1x, WPA, WPA-PSK, WPA2, WPA2-PSK, WPA-Auto, and WPA-PSK-Auto. - Page 42 WEP Key 1. The length of key is dependant on the Key Length and Key type you choose. Key Length: The AirMax5 offers 64bit, 128 bit, and 152 bit for WEP key length. The longer the Key Length, the more secure the encryption is.
- Page 43 CCMP (AES Encryption). The WPA-AUTO tries to authenticate wireless clients using WPA or WPA2. All 3 requires a RADIUS server available in order to do authentication (same as 802.1x), thus there is no shared key required. AirLive AirMax5 User’s Manual...
- Page 44 The encryption key is generated automatically and dynamically. WPA2-PSK adds CCMP and AES encryption for even better security. WPA-PSK-AUTO tries to authenticate wireless clients using WPA-PSK or WPA2-PSK. AirLive AirMax5 User’s Manual...
-
Page 45: Distance
4.2.7 Distance Operation Mode -> Setup -> Distance Please enter the distance to the remote wireless device here. The AirMax5 will then calculate the appropriate ACK Timeout value autom atically. It is very important that you enter the correct distance for long distance connection. -
Page 46: Advance Settings (Wireless)
4.2.9 Advance Settings (Wireless) Operation Mode -> Setup -> Advance Settings This page includes all the wireless settings that change the RF behaviors of AirMax5. It is important to read through this section before attempting to make changes. Beacon Interval: Beacon Interval: The device broadcasts beacon frames regularly to announce its existence. - Page 47 256-2346 bytes, with a default of 2346. If you experience a high packet error rate, you should slightly decrease the Fragmentation Threshold. DTIM Interval: The AIRMAX5 buffers packets for stations that operate in the power-saving mode. The Delivery Traffic Indication Message (DTIM) informs such power-conserving stations that there are packets waiting to be received by them.
-
Page 48: Access Control (Acl)
4.2.10 Access Control (ACL) Operation Mode -> Setup -> Access Control The AIRMAX5 allows you to define a list of MAC addresses that are allowed or denied to access the wireless network. This function is available only for Access Point and AP Router modes. -
Page 49: Multiple Ssid
This function is available only for Access Point and AP Router modes. Multiple SSID allows AirMax5 to create up to 4 different wireless networks (SSID). It is also known as “Virtual AP” function. Each SSID can have its Encryption type, VLAN Tag, and TOS... - Page 50 “DiffServe Marking” This is the default SSID Click here to apply changes on adding or deleting SSID How to add a SSID You can add up to 4 SSID in AirMax5. Please follow the procedure below: AirLive AirMax5 User’s Manual...
- Page 51 Select the SSID you want to modify or delete The SSID’s settings will be displayed in the box area. Modify any settings. Click on “APPLY” to complete the modification Or click on “Delete Selected” to delete the SSID AirLive AirMax5 User’s Manual...
- Page 52 4. Web Management-Wireless and WAN Settings Configure the VLAN and DiffServ Markings When you check the Enable VLAN for All SSIDs and/or Enable DiffServ Marking, the following screen will appear: AirLive AirMax5 User’s Manual...
- Page 53 VLAN IP: Each SSID can be given with different VLAN IP group. Please notice that the management IP in the VLAN will also be changed. For example, if you define the VLAN IP to be 192.168.2.X subnet, then the AIrMax5’s management IP in the group will change to 192.168.2.1.
-
Page 54: Wmm Qos
WMM Settings is to specify parameters on multiple data queue for better performance of differentiated wireless traffic like Voice-over-IP (VoIP), other types of audio, video, and streaming media as well as traditional IP data over the AP. AirLive AirMax5 User’s Manual... - Page 55 Each access point waits some random period of time between retries. The wait time (initially a random value within a range specified as the Minimum Contention Window increases exponentially up to a specified limit Maximum AirLive AirMax5 User’s Manual...
- Page 56 The value specified in the Maximum Contention Window is the upper limit for this doubling of the random backoff. This doubling continues until either the data frame is sent or the Maximum Contention Window size is reached. AirLive AirMax5 User’s Manual...
-
Page 57: Radius Settings
RADIUS servers can be defined: one acts as a primary, and the other acts as a secondary backup. If you choose to use 802.1x, WPA, or WPA2 as security policy, you might need to set the RADIUS server settings. AirLive AirMax5 User’s Manual... -
Page 58: Bandwidth Control
Bandwidth Control can limit the maximum speed of entire wireless interface or individual device. It is also known as Traffic Shaping. The AirMax5 provides both Total Bandwidth and Per-User Bandwidth Control for both uplink and downlink speed. It controls the speed of both wireless and wired interface. - Page 59 Mode, and WISP Router Mode. For WISP operator who use AirMax5 as the client side device; setting the Total Bandwidth control on the AirMax5 will easy the loading on the AP for bandwidth management. To begin, please enable the Bandwidth Management first.
- Page 60 Uplink Max: Enter the speed you wish to limit the upload traffic in kbps units Example 1: Total Bandwidth Control In this example, the AirMax5 is in Client Infrastructure mode connecting to a remote AP. We want to limit the Bandwidth of the link to 2048Kbps download and 512kbps Upload.
- Page 61 Speed. Click “Apply” to finish Example 2: Per User Bandwidth Control In this example, the AirMax5 is Access Point mode. There is a wireless client connecting to AirMax5 with MAC address of 00:04:6F:11:11:11. We want to limit the bandwidth of the wireless client to 1024 downstream and 512K upstream using AirMax5’s Per-User Bandwidth Control.
-
Page 62: Rssi Led Threshold
Operation Mode -> Setup -> RSSI LED Threshold The AirMax5 is equipped with 2 LEDs to indicate the signal strength of current connection. It is very useful in helping you to align the antenna. The signal level are classified into 4 levels, you can change the Thresholds (dividing line) between levels in this setting. - Page 63 Full Signal: When signal strength is greater or equal than the “Full Signal Threshold” (i.e. -45dB). Both Green and Blue LEDs are on The RSSI LEDs are working only when the connection is established. Therefore, please make sure all wireless settings are correct and the connection is established. AirLive AirMax5 User’s Manual...
-
Page 64: Wds Settings
All devices on the network must have the same sets of keys, but each link can have use different key. We recommend using WEP-152 whenever possible for better security. Adding a new WDS link AirLive AirMax5 User’s Manual... - Page 65 It is necessary to enter the same set of keys in the same WDS network. When you select WEP, the AirMax5 will ask you to select from one of the 4 keys. Please be sure to select the same key on both side of the link.
-
Page 66: Router Mode Settings
4.4.2 AP Router Mode In AP Router mode, the POE port of the AirMax5 will turn into the WAN port. The wireless interface will become the LAN side. It will turn AirMax5 into a wireless router. Since the Ethernet interface becomes WAN;... -
Page 67: Wan Port Settings
4.4.3 WAN Port Settings Operation Mode -> Setup -> WAN Port Settings The AirMax5 support different authentication and IP assignment standards for the WAN port. It includes fixed IP, DHCP, PPPoE and PPTP protocols. Please consult with your ISP about what authentication type is used for the WAN port conection. -
Page 68: Dynamic Dns Settings
4. Web Management-Wireless and WAN Settings Clone MAC Address: Some service provider (Cable Modem provider) lock to certain MAC address. In this situation, the WAN port of AirMax5 need to clone the MAC address. Please check the “Clone MAC address” box and enter the address that need to be cloned. -
Page 69: Ip Routing Settings
4. Web Management-Wireless and WAN Settings HTTPS Web server Access: You can enable or disable HTTPS Web Server Access from WAN side Response to WAN ping: You can disable or enable whether AirMax5 will response to PING command. 4.4.6 IP Routing Settings Operation Mode ->... -
Page 70: Dhcp Server
Operation Mode -> Setup -> IP Routing Settings DHCP Server Settings is to assign private IP address to the devices in your local area network (LAN). The default LAN IP address of AirMax5 is 192.168.1.1, changing AirMax5’s IP address will also change the DHCP server’s IP subnet. -
Page 71: Multiple Dmz
Advanced Settings >> Multiple DMZ Multiple DMZ opens all TCP/UDP ports to particular IP address on the LAN side. It allows setting up servers behind the AirMax5. Select a DMZ type and then enter the local DMZ IP address. A DMZ server is a common term used to describe the default virtual server. If the DMZ server is selected, Internet traffic not destined for a valid virtual server is redirected to this privately addressed LAN client. -
Page 72: Special Applications
Note: You can use up to 3 sets of opened ports for a specific application. The opened ports can be separated by a comma and no spaces are allowed (e.g. 2300-2305, 4300-4305, 5300-5305). AirLive AirMax5 User’s Manual... -
Page 73: Ip Filtering Settings
You can also define IP filtering rule, such as: Name; IP Protocol; Apply to either Outbound to the Internet or Inbound from the Internet; Source IP Address and Dest. (Destination) IP Address. To grant or deny IP address, select ADD or Delete Selected. AirLive AirMax5 User’s Manual... -
Page 74: Web Management 2: System Configuration And Status
The Device IP Settings screen allows you to configure the IP address and subnet of the device. Although you can rely on a DHCP server to assign an IP address to the AIRMAX5 automatically, it is recommended that you configure a static IP address manually in most applications. - Page 75 Click APPLY to go to the next screen. Use DHCP Client Protocol to Get IP automatically If you choose to use a DHCP Server to acquire an IP address for the AIRMAX5 automatically, enable the checkbox “Use the DHCP client protocol to automatically get the IP address for this device”.
-
Page 76: Time Settings
5.1.2 Time Settings System Configuration ->Time Settings It is important that you set the date and time for your AirMax5 so that the system log will record the correct date and time information. We recommend you choose “Enable NTP” so the time will be keep even after reboot. If your AirMax5 is not connected to Internet, please enter the time manually. -
Page 77: System Management
HTTP Port No: The default port for HTTP is Port 80, you can change the value here Timeout: The default management timeout is 10 minutes. After timeout, the AirMax5 will ask you to login again. You can change the timeout value here. HTTP Web Server Access: You can enable or disable HTTP service from WAN side... -
Page 78: Snmp Settings
System Location: Enter a system location. System Contact: Contact information for the system administrator responsible for managing the AirMax5. It is an alphanumeric string of up to 60 characters. Community String For Read: If you intend the router to be managed from a remote SNMP management station, you need to configure a read-only “community string”... -
Page 79: Ping Watchdog
For example "2" means the CPE will reconnect if the PING doesn't respond for 2 times. When you set the Ping Frequency to every "2" minutes and Fail Tries to "2". It means the CPE will ping every 2 minutes, after the second failure, it will reconnect. AirLive AirMax5 User’s Manual... -
Page 80: Firmware Upgrade
Upgrade Firmware: To update the AIRMAX5 firmware, first download the firmware from AirLive web site to your local disk, and then from the above screen enter the path and filename of the firmware file (or click Browse to locate the firmware file). -
Page 81: Configuration Save And Restore
5.1.9 Factory Default System Configuration -> Factory Default You can reset the configuration of your AIRMAX5 to the factory default settings. Step 1 Select Factory Default from the System Configuration menu. Step 2 Click YES to go ahead and restore the configuration to the factory default. -
Page 82: Device Status
Wireless MAC: This is the wireless MAC address (BSSID) of this AiMax5. This is the address to enter on the remote WDS Bridge for the WDS link. Uptime: This is the time that the AirMax5 has been running since last power up. ARP Table Display the corresponding IP and MAC address Table. -
Page 83: Internet Information
5. Web Management2: System Configuration and Status 5.2.3 Internet Information This page shows the information about WAN port of the AirMax5. It includes the type of WAN port authentication used and the IP address information about the WAN port. 5.2.4 Wireless Client Table This function is available in AP mode and AP Router mode only. -
Page 84: System Log
5.2.5 System Log The System Log displays the system activities, login, and system error report. If you need to report a problem to Air Live, please be sure to send us the System Log information also. AirLive AirMax5 User’s Manual... -
Page 85: Command Line Interface
We will provide descriptions for the commands, example settings and the AirMax5’s response. The purpose for this chapter is to introduce available CLI commands only. For detail descriptions on the concept and application of the settings, please refer to chapter 4 and chapter 5. - Page 86 Rebooting... webservice <lan | wan> <enable | disable> Purpose: Enable or Disable Web management interface on LAN or WAN Example: Command> webservice lan e nable ebservice from lan enable site survey Purpose: Site Survey display Example: AirLive AirMax5 User’s Manual...
-
Page 87: Debugging Commands
<ssidname> broadcast (enable/disable) to add a new SSID set s sid <ssidname> to replace the current ssid name with a new one Example: Command> z_debug add ssid air1 z_debug reboot Purpose: reboot your AirMax5 Example: Command> z _debug reboot Rebooting... AirLive AirMax5 User’s Manual... -
Page 88: Show Commands
<ssid> : to set the ssid name Example: Command> z_debug set port radio1 11a air2 64 6.3 Show Commands Show Commands are command that show the settings and status of AirMax5 show arp table Purpose: Show ARP Table Example: Command>... - Page 89 6. Command Line Interface change to show the wireless MAC address of AirMax5 in future firmware release Example: Command> show mac Filter Name MAC address ------------------------------------------------------ ailrive -4f-62-24-12-34 show mac filter Purpose: show mac addres s table in the Access Control List Example: Command>...
- Page 90 Primary Disabled 0.0.0.0/1812 Secondary Disabled 0.0.0.0/1812 RADIUS Server reattempt: 60 seconds show radius server <prim ary | second ary> Purpose: Show s ettings of primary or secondary radius server Example: Command> show rad ius server primary AirLive AirMax5 User’s Manual...
- Page 91 00-4F-79-90-00-16 Wireless MAC: 00-4F-79-90-00-15 WMAC-0: 00-4F-79-90-00-15 show snmp statistics Purpose: Show SNMP satistics Example: Command> show snmp statistics Timeout: No Response from 192.168. Received Transmitted ---------------------------------------------------------------------------- Total Packets Request Variables SET Var iables GET Req uests AirLive AirMax5 User’s Manual...
- Page 92 Purpose: Show wireless settings Example: Command> show wireless setting Radio[1] operation mode: access point ssid name air2 wireless state : enable ssid broadcast : enable radio[1] mo : 11a AirLive AirMax5 User’s Manual...
-
Page 93: Set Commands
Noise immunity is enable 6.4 Se t Commands The Set Commands are to make changes to the AirMax5’s settings set http timeout <timeout value in minutes, 1-999> Purpose: Set the timeout value for HTTP management Example: AirLive AirMax5 User’s Manual... - Page 94 Purpose: set radius server reattempt interval in minutes Example: Command> set radius server reattempt 20 /etc/wlan/ap_service: 17: uname: not found killall: wpa_supplicant: no process killed /etc/wlan/ap_service: 17: uname: not found Using /lib/modules/2.4.25-LSDK-5.1.0.42/wlan/ath_ha AirLive AirMax5 User’s Manual...
- Page 95 | disable> Purpose: Enable or Disab le WMM QoS Example: Command> set wmm qos disable set wmm qos disable succe ssful! set log level <1-7> Purpose: Set the log level Example: Command> set log level 7 AirLive AirMax5 User’s Manual...
- Page 96 Purpose: set LAN IP address such as IP, Subnet mask, gateway , and DNS server Example: Command> set lan ip 19 2.168.1.1 sm 255.255.255.0 gw 192.168.1.254 dns 168.95.1.1 killall: dnsmasq: no process killed LAN IP add ress : 192.168.1.1 AirLive AirMax5 User’s Manual...
- Page 97 Radio1 enabled set ssid < ssidname> Purpose: Replace current main SSID name with a new one Example: Command> set ssid airmax5 set ssid re motessid <remote ssidname> Repeater Mode Only Purpose: Set the remote SSID name for repeater m Example: Command>...
- Page 98 <best | 6~54> Purpose: To set the date rate. For example, 54mbps, 36mbps….etc Example: Command> set data rate 54 Radio1 data rate: 54 set acktimeout <1 1A> Purpose: To set the ACK timeout valu Example: AirLive AirMax5 User’s Manual...
- Page 99 <defaultkey> Purpose: To set the WEP security policy Example: Command> set security airmax5 wep 1 64 hex 1234567890 Radio1 authentication type : wep ! set securi ty <ssid> <wpa|wpa2> <tkip|aes|both> interval <0~300> Purpose: to set the WPA or WPA2 security policy Example: Command>...
-
Page 100: Enable/Disable Commands
6. Command Line Interface Example: Command> set security airmax5 wpa2-psk aes interval 300 12345678 Radio1 authentication type : wpa 2-psk ! set ratemode <full | half | quarter > Purpose: Example: Command> set ratemode full Rate mode is Full(20Mhz) set noise immunity <on | off>... -
Page 101: Add/Delete Commands
Invalid con figuration specified. 6.6 Add/D elete Commands Commands to add or delete settings add/delete ): add mac filter < Mnemonics N ame> <MAC address, X-XX-XX-XX-X-XX> Purpose: to add an entry to the MAC address filter Example: AirLive AirMax5 User’s Manual... - Page 102 0x8BE0-17> <mapping sub-ioctl authmode to cmd 0x8BE0-3> <mapping sub-ioctl cwmin to cmd 0x8BE3-1> <mapping sub-ioctl cwmax to cmd 0x8BE3-2> RTNETLINK answers: No suc h file or directory RTNETLINK answers: No such file or dire ctory AirLive AirMax5 User’s Manual...
- Page 103 ETLINK answers: No such file or directory RTNETLINK answers : No such file or directory add r adius server primary successfully add radius server <primary | secondary> Purpose: to add a primary or secondary ra dius server Example: AirLive AirMax5 User’s Manual...
- Page 104 <ssid name> broadcast <enable | disable> Purpose: to add a new ssid (AP and AP Router mode) to the multiple SSID list. Example: Command> add ssid air03 broadcast enable Add R1 ssid <air03> broadcast enable successful! AirLive AirMax5 User’s Manual...
-
Page 105: Antenna Alignment
Then we will talk about 2 different ways for antenna alignment: Using the LED Indicators: The AirMax5 has 2 LED indicators to show the current signal strength of the connection. By having the 2 LED displayed in 4 different states, you can easily know the signal strength of your antenna without the need to use a PC. -
Page 106: Polarization
7. Antenna Alignment 7.1.1 Polarization The AirMax5 is equipped with dual diversity antenna; one in horizontal polarization and one in vertical polarization. For 2 wireless devices to connect, their antennas must use the same polarization. Vertical: The polarization of the antenna is vertical, in the same direction as the AirMax5. -
Page 107: Mounting Adjustment
7. Antenna Alignment 7.1.2 Mounting Adjustment The degree you can adjust the AirMax5’s antenna depends on what mounting kit you use: Standard Mounting: The standard strap mount allows you to rotate the CPE in the horizontal plane only. As long as 2 wireless devices are at about the same elevation, this adjustment is already enough. -
Page 108: About Rssi Signal Level
The correct way is to use a satellite map program like “Google Map” to find the locations of the installation site and the nearest AP/Bridge. Then measure the approximate direction and angle. It will also help to bring a pair of hi power binocular for sight survey. AirLive AirMax5 User’s Manual... -
Page 109: Antenna Alignment Using Rssi Led
7.4 Antenna Alignment using RSSI LED There are 2 LED indicators on the side of the AirMax5 that is dedicated to display the RSSI signal strength. They are in bright blue and green color so you can see the difference in signal far away from the CPE. - Page 110 Full Signal When signal strength is greater -50dB -45dB or equal than the “Full Signal Threshold” (i.e. -45dB). Both Green and Blue LEDs are on Antena Alignment Procedures using RSSI LED SSID: airlive3 Encryption: WPA-PSK 3 km AirLive AirMax5 User’s Manual...
- Page 111 Step 3 Enter the Networks SSID and distance information on the page. Click on “Apply” button, and then press “Setup” button on Security Setting. Step 4 Enter the security policy key information, then click on “Apply” button AirLive AirMax5 User’s Manual...
- Page 112 Because the link is 3km, adjust the RSSI values as below then click “apply” Step 6 Now, you can take the AirMax5 to the installation site and adjust the antenna by looking at the LED indicator. You might never get the full signal, but you can find the best position where the signal is strongest.
-
Page 113: Antenna Alignment Using Signal Survey
Configure the AirMax 5 to Client Infrastructure Mode Step 2 Press “Setup” to enter the wireless setting page Step 3 Enter the “Distance” information and then click on Apply button. Then select “Site Survey” to scan for available Access Point in the area. AirLive AirMax5 User’s Manual... - Page 114 If the network you selected needs encryption, the following page will pop-up. Please enter the correct encryption key and press “Apply” to finish Step 8 The system will pop up a message telling you configuration is successful. AirLive AirMax5 User’s Manual...
-
Page 115: Application Example: Bridge Network
There are hi-powered offering that can work over distance of 5km or more. Communication is absolutely necessary on both sides during installation. You need a clear Line of sight More than 60% of First Fresnel Zone must be cleared for acceptable performance. AirLive AirMax5 User’s Manual... - Page 116 In the diagram below, the AirMax5 at point A is the center hub. While wireless clients at B, C,and D can set correct ACKtimeout values to point A, the center AP can set only one Acktimeout value.
-
Page 117: Wds Bridge Network Example
MAC address: you should enter the MAC address of WDS Bridge 3: 00-4f-79-90-00-23 Select Security Policy: Select “WEP” encryption. The AirMax5 will ask you to select which key to use. You can select same key or different key for different WDS link (however, both side of the same link must use the same key). - Page 118 MAC address: please enter the MAC address of WDS Bridge2: 00-4f-79-90-00-14 Select Security Policy: Select “WEP” encryption. The AirMax5 will ask you to select which key to use. The Link between Bridge 1 and 3 is using Key2. Click on “Add” to add the WDS Link.
- Page 119 8. Application Example: Bridge Network The following table will be displayed to show the added WDS links: Setup the PING watchdog. Ping watchdog will reboot or reconnect the AirMax5 when the remote device does not respond to PING command. It helps maintain the WDS Link.
- Page 120 8. Application Example: Bridge Network case, the Link between Bridge 1 and 2 is using Key2. Click on “Add” to add the WDS Link. Setup the PING watchdog. Please setup the PING watchdog according to graphic below: AirLive AirMax5 User’s Manual...
- Page 121 MAC address: you should enter the MAC address of WDS Bridge 1: 00-4f-79-90-00-0b Select Security Policy: Select “WEP” encryption. The AirMax5 will ask you to select which key to use. You can select same key or different key for different WDS link (however, both side of the same link must use the same key).
- Page 122 8. Application Example: Bridge Network Setup the PING watchdog. Please setup the PING watchdog according to graphic below: After the above settings, the 3 WDS bridges should connect properly. Be sure to set the Distance parameter for long distance connection. AirLive AirMax5 User’s Manual...
-
Page 123: Emergency Firmware Recovery
Recovery The AirMax5 features an Emergency Recovery function in the bootloader to recovery the AP in case of a firmware crashed. When you can’t access the AirMax5, please first try to repower the CPE or restore the settings to default. - Page 124 To check if the file is available in the tftpd32 folder, please click in tftpd32 main page “Show Dir”. Fig. “Show Dir” to check available files in tftp server folder AirLive AirMax5 User’s Manual...
- Page 125 LED will be on. The device can then be accessed again at 192.168.1.1. If the AIRMAX5’s not accessible after 5 minutes, please power reboot the AIRMAX5. 12. Open your web browser and type “192.168.1.1” to confirm the AIRMAX5 is restored. AirLive AirMax5 User’s Manual...
-
Page 126: Frequent Asked Questions
The part number for the mounting kit is “WMK-AIRMAX”. Please ask your authorized AirLive distributor for availability. ==================================================================== Question: When I plug in the POE cable and power adapter, the AirMax5’s power LED is not on? Answer: Please make sure you have connected the PoE cable to the correct port on the DC injector. - Page 127 10. Frequent Asked Questions ==================================================================== Question: When I use an external antenna, how much distance can the AirMax5 reach? Answer: The distance of a wireless connection depends on many factors such as cable loss and weather conditions. There is an online distance calculator at the AirLive website.
- Page 128 When I use “Site Survey”, why does the RSSI LED goes off? Answer: When you click on the Site Survey, the AirMax5 thinks you are trying to choose a new network to associate. Therefore, it will disconnect from current connection and wait until you establish a new connection. If you require seeing the wireless link quality after connection is established, please go to “...
-
Page 129: Specifications
11. Specifications Specifications specification of AirMax5 is subject to change without notice. Please use the information with caution. 11.1 Hardware Features 11.1.1 General Hardware Feature Atheros AR-2313 + AR-5112 chipset 802.11a/Super A/Turbo-A mode support (Atheros Proprietary) 8MB Flash, 32MB SDRAM... -
Page 130: Dimension And Weight
24Mbps @ -82 dBm 36Mbps @ -79 dBm 48Mbps @ -73dBm 54Mbps @ -71dBm 11.2.7 Supported WLAN Mode 11a mode 11.3 Software Feature 11.3.5 Management Interface Web HTTP Secured Web (HTTPS) Telnet (CLI) SSH/SSH2 (Secured Shell) AirLive AirMax5 User’s Manual... -
Page 131: Advance Functions
QoS (802.11e WMM) Wi-Fi, WPA compatible interoperability WPA with PSK/TKIP/AES support ,WPA2 support 152-bit WEP support (Atheros Proprietary) ACK Timeout Adjustment Bootloader Protection and Emergency Firmware Upload Code Radius Supported Firmware upgrade and configuration backup via We AirLive AirMax5 User’s Manual... -
Page 132: Wireless Network Glossary
Spanning Tree Protocol. It is an algorithm to prevent network from forming. The STP protocol allows net work to provide a redundant link in the event of a link failure. It is advise to turn on this option for multi-link bridge network. AirLive AirMax5 User’s Manual... - Page 133 When a supplicants request a service, the authenticator will pass the request and wait for the authentication server to grant access and register accounting. The 802.1x is the most widely used method of authentication by WISP. AirLive AirMax5 User’s Manual...
- Page 134 This is especially true for 802.11a and 802.11g networks. Setting the correct ACK timeout value need to consider 3 factors: distance, AP response time, and interference. The AirMax5 provide ACK adjustment capability in form of either distance or direct input. When you enter the distance parameter, the AirMax5 will automatically calculate the correct ACK timeout value.
- Page 135 WISP. The opposite of CPE is CO. Clear To Send. A signal sent by a device to indicate that it is ready to receive data. DDNS Dynamic Domain Name System. An algorithm that allows the use of dynamic IP address AirLive AirMax5 User’s Manual...
- Page 136 Many DoS attacks, such as the Ping of Death and Teardrop attacks, exploit limitations in the TCP/IP protocols. Encryption Encoding data to prevent it from being read by unauthorized people. The common wireless encryption schemes are WEP, WPA, and WPA2. AirLive AirMax5 User’s Manual...
- Page 137 IP subnet together. In a LAN environment with an IP sharing router, the gateway is the router. In an office environment, gateway typically is a multi-function device that integrates NAT, firewall, bandwidth management, and other security functions. AirLive AirMax5 User’s Manual...
- Page 138 IPSec-compliant device decrypts each packet. LACP (802.3ad) Trunking The 802.3ad Link Aggregation standard defines how to combine the several Ethernet ports into one high-bandwidth port to increase the transmission speed. It is also known as port AirLive AirMax5 User’s Manual...
- Page 139 ISP side is called Real IP, the IP assigned to PC under the NAT environment is called Private IP. Node A network connection end point, typically a computer. Packet A unit of data sent over a network. AirLive AirMax5 User’s Manual...
- Page 140 MPPE (Microsoft Point-To-Point Encryption Protocol) encryption. PPTP is also used by some ISP for user authentication, particularly when pairing with legacy Alcatel / Thomson ADSL modem. Preamble Type Preamble are sent with each wireless packet transmit for transmission status. Use the AirLive AirMax5 User’s Manual...
- Page 141 An IP sharing router is a device that allows multiple PCs to share one single broadband connection using NAT technology. A wireless router is a device that combines the functions of wireless Access Point and the IP sharing router. AirLive AirMax5 User’s Manual...
- Page 142 The browser then sends a randomly generated secret key back to the server in order to have a secret key exchange for that session. SSL VPN is also known as Web VPN. The HTTPS and SSH management AirLive AirMax5 User’s Manual...
- Page 143 In Static Turbo, the channel binding is always on. This protocol may be combined with Super-A model to increase the performance even more. The used of channel binding might be prohibited in EU countries. TX Output Power AirLive AirMax5 User’s Manual...
- Page 144 Wide Area Network. A communication system of connecting PCs and other computing devices across a large local, regional, national or international geographic area. A WAN port on the network device means the port (or wireless connection) that is connected to the Internet side of the network topology. AirLive AirMax5 User’s Manual...
- Page 145 WLAN is the 802.11 standards. Wi-Fi Multimedia (WMM) is a standard to prioritize traffic for multimedia applications. The WMM prioritize traffic\ on Voice-over-IP (VoIP), audio, video, and streaming media as well as traditional IP data over the AP. AirLive AirMax5 User’s Manual...
- Page 146 The WPA-PSK utilizes pre-share key for encryption/authentication. WPA2 Wi-Fi Protected Access 2. WPA2 is also known as 802.11i. It improves on the WPA security with CCMP and AES encryption. The WPA2 is backward compatible with WPA. WPA2-PSK utilizes pre-share key for encryption/authentication. AirLive AirMax5 User’s Manual...
Need help?
Do you have a question about the AirMax5 and is the answer not in the manual?
Questions and answers