Snooper 6 Series User Manual
Portable satellite navigation system
Hide thumbs
Also See for 6 Series:
- User manual (477 pages) ,
- User manual (83 pages) ,
- User manual (83 pages)
Table of Contents
Advertisement
Quick Links
Advertisement
Table of Contents

Related Manuals for Snooper 6 Series


Summary of Contents for Snooper 6 Series
- Page 1 6 SerieS Portable Satellite Navigation System User manual...
- Page 2 ‘System requirements & Downloading’ later in this manual. Once the database has been downloaded your Snooper compares your position using its built-in GPS antenna, with the position of every known ‘fixed’ speed monitoring system and accident ‘hotspot’ alerting you both audibly and visually with voice alerts and full colour graphics on the units LCD screen ensuring your highest concentration at all times.
-
Page 3: Table Of Contents
12 Installing Snooper Auto Scale 13 Power Connection & Charging My Speed 14 Charging the internal battery 66 My Speed XL (Syrius ONLY) Powering Snooper using the built-in battery Sharp Curve Alert 16 Satelite Navigation 67 Telematics Easy Setup GPS Status... -
Page 4: What's Included
1 x CD rOM 1 x Mounting disk for dash mounting the bracket This user guide explains the functionality of all 4 models (6 Series) of the Snooper, these symbols will illustrate if the feature is relevant to your device... -
Page 5: Overview
7. USB Socket 3. Touch screen LCD ** Video In The 6 Series has a video-in connection. This is for connecting a rear view or reversing camera (not supplied) to the unit. The socket on the device is a 2.5mm jack. - Page 6 Rear and side view 4. earphone jack (earphones not included) 8. Speaker 5. Micro-SD Card Slot 9. reset button 10. Serial number 6. Video in socket ** 7. USB Socket Return to contents 6 series V110.14 EN 6 • EN...
-
Page 7: Registering
** Prices subject to change. Units can also be registered for warranty purposes only at: www.snooperneo.co.uk PLEASE NOTE Due to our desire to continually improve our products, the specification may change without notice. Return to contents 6 series V110.14 EN 7 • EN... -
Page 8: Quick Start Guide To Navigation
Quick Start Guide to Navigation 1. Take the Snooper outside so that the GPS receiver can locate your position. This may take between 15 - 30 minutes the first time. When satellite lock is achieved, the screen will display your current position on its map in a ‘3D’ navigation view. - Page 9 The navigation view will now be displayed, but with the route now highlighted for you. As you approach a specific turn in the calculated route, Snooper will advise you what to do. For example, “After 200 yards, turn left”, followed by “Now turn left”.
-
Page 10: Start Up
To launch the CD manually: Click on ‘Start’ and then ‘Run’ . in the dialogue box that opens click on ‘Browse’ – another dialogue box will open. Locate your CD rOM or DVD drive (drive letter is normally D) using the ‘Look in’ option and select ‘Snooper’ from the lower portion of the dialogue box. -
Page 11: Downloading The Aura™ Camera Database
The download process is as follows: The software will display the serial number of the Snooper and a green progress bar will start to progress across the screen. ●... -
Page 12: Installing Snooper
Snooper and plug the larger plug into the cigarette lighter socket of your vehicle. Please Note: Only use the cigarette lighter power cable provided with Snooper. Snooper operates on 5V and using any other cigarette lighter power cable will damage your device and void the warranty. -
Page 13: Power Connection & Charging
Replacing the Fuse if Snooper stops operating, the fuse in the cigarette lighter plug may have blown . if it has blown, follow these steps and replace it with a 2 amp, 5mm x 20mm fast acting fuse. -
Page 14: Charging The Internal Battery
Powering Snooper using the built-in battery Once Snooper is fully charged, it is ready for use. Press and hold the power switch on the top of the unit for 2 seconds to switch on the device. - Page 15 USB power source. WARNING: PLEASE DO NOT USE OR LEAVE SNOOPER IN EITHER WET OR HUMID CONDITIONS, OR IN EXTREME TEMPERATURES, AS THIS COULD PERMANENTLY DAMAGE THE UNIT AND THE BATTERY. WHEN NOT IN USE DO NOT LEAVE THE UNIT ATTACHED TO THE WINDSCREEN, ESPECIALLY WHEN THE WEATHER IS WARM, TO AVOID DAMAGE TO THE UNIT AND ALSO REDUCE THE RISK OF THEFT.
-
Page 16: Satelite Navigation
Snooper needs to acquire a minimum of four satellites in order to work. Once this has been achieved Snooper will ascertain your position and this will be indicated by a green arrow icon on the on-screen map and the GPS signal strength will be shown in the bottom right hand corner of the display. - Page 17 My Speed The speed limit of nearly every road across europe can now be clearly displayed on your Snooper at all times. Choose between speed limits for cars and advisory speed limits for trucks, motor homes and caravans from 3.5t and over.
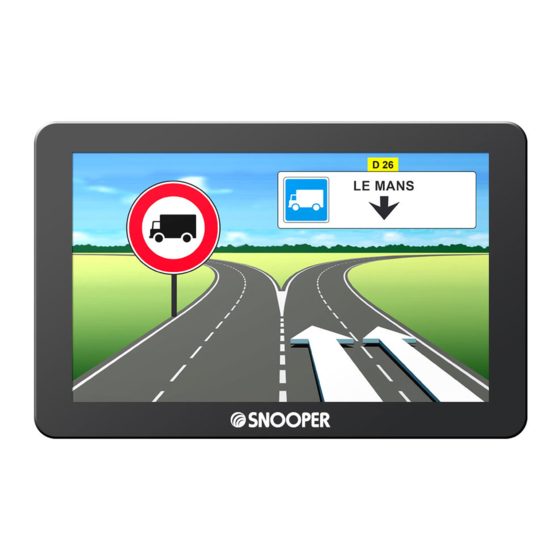
- Page 18 These junction view images will be displayed on the screen for approximately 5 seconds Examples of Junction view. Return to contents 6 series V110.14 EN 18 • EN...
-
Page 19: Volume
Your chosen settings will now be saved and will appear on the screen each time you use Snooper. if you want to switch between your Current Speed and the Atomic Clock or the estimated Time of Arrival and Time to Destination during your journey simply touch the screen where either piece of information is displayed and the unit will display the alternate setting and vice versa. -
Page 20: Setting Vehicle Parameters Ventura
Setting up vehicle parameters To enter the emission settings of your vehicle in car mode press the and enter the details as shown in the environmental setting section page: 21. Return to contents 6 series V110.14 EN 20 • EN... - Page 21 Retrofit - switch between yes (Y) and No(N) by pressing the Retrofit button press OK to save Enter vehicle Select Euro rating production date in YYYY-MM format Return to contents 6 series V110.14 EN 21 • EN...
- Page 22 Passage forbidden through tunnels of category D and e Tank carriage: Passage forbidden through tunnels of category B, C, D and e; Other carriage: Passage forbidden through tunnels of category e Return to contents 6 series V110.14 EN 22 • EN...
- Page 23 Weight: enter the weight of the vehicle here. Width: enter the width of the vehicle here. Weight per axle: enter the weight per axle of the vehicle here Num of axles: enter the number of axles here. Return to contents 6 series V110.14 EN 23 • EN...
-
Page 24: Planning A Route
● Press the ‘Find by post code’ icon. ● ● if you have the european version of Snooper, you will need to select ● ● the ‘Country’ first BeFOre typing the postcode. (if the correct country is already displayed, go to the next step). Use the arrow keys on the right of the display to scroll up and down the country options. -
Page 25: Find By City
● ● As you begin to input the city name, Snooper will automatically prompt you with a list of possible matches. if you can see the name of the destination you are searching for in the lower window, you can select it easily by pressing that name with your finger. if you wish... -
Page 26: Home
● Press the ‘Home’ icon. ● ● Snooper will display details of the destination and offer a ‘Go’ button and a ‘Route Option’ button. Press ‘Go’ to begin your journey. Return to contents 6 series V110.14 EN 26 • EN... -
Page 27: Office
3.5 Recent Route or Clear route Snooper automatically stores the last route that has been calculated, so that if you wish to return to that address you do not have to re-input all the details again. To use this function: ●... -
Page 28: Multi-Route
Multi route With Snooper you have the facility to enter more than one destination at a time (for instance if you wish to visit other locations before reaching your ultimate destination). You can store up to seven multi-routes, with up to sixteen destinations within each multi- route. - Page 29 Note: These functions only apply to the stage that you have selected. To edit the other stages in the list press the ‘Return Arrow’ in the bottom right hand corner of the screen and select the new stage. Once you have made your desired changes press ‘Save’. Return to contents 6 series V110.14 EN 29 • EN...
- Page 30 ‘OK’ and the unit will calculate your route to the next stage in the multi-route from your current position. Note: If Snooper is turned ‘OFF’ and then ‘ON’ during a multi-route journey the device will retain the current route and ask you if you wish to continue with the current destination or with the next stage of the destination or to cancel the multi-route.
- Page 31 3.6.4 Auto arrange Multi-route Once you create a multi-route Snooper can arrange the multi-route into a logical order by pressing the icon Before After 1. Add an additional destination to Multi-route 2. Save the Multi-route without making any further changes.
-
Page 32: Find By Favourites
Recent destination Snooper is capable of storing the last 40 routes that have been calculated, so that if you wish to return to an address you do not have to re-input the details again. -
Page 33: Find By Points Of Interest (Poi)
Find by POI (points of interest) if you would like to calculate a route to a hotel, airport, restaurant or even a golf course Snooper can calculate a route using its extensive database of POi’s (Points of interest). To navigate using this database: Press the centre of the screen to access the ‘Navigate to’... -
Page 34: Find By Nearest Poi
Please note: The summary screen is only displayed for approximately 10 seconds before the unit automatically begins to provide you with turn-by-turn instructions. Return to contents 6 series V110.14 EN 34 • EN... - Page 35 ● ● As you begin to input the city name, Snooper will automatically prompt you with a list of possible matches. if you can see the name of the destination you are searching for in the lower window, you can select it easily by selecting that name. if you wish to view the list of possible destinations in full, press the down arrow to the top right hand corner of the display and a list of cities will be displayed then select your destination.
-
Page 36: User Poi
The instructions to use this facility are the same as above (see Section 3.10.2) but select ‘Along Route’ to open the search. 3.11 User POI The Snooper comes pre loaded with a number of ‘User POi’s’ . You can add additional POi (Points Of interest) by downloading them to the device via a PC. The User POi Updater program can be downloaded from: https://www.snooperneo.co.uk/Software.cfm. - Page 37 The ‘Summary Screen’ will tell you the distance to your destination, estimated time of arrival and the estimated time it will take to complete your journey. Please note: The summary screen is only displayed for approximately 10 seconds before the unit automatically begins to provide you with turn-by-turn instructions. Return to contents 6 series V110.14 EN 37 • EN...
- Page 38 ● ● As you begin to input the city name, Snooper will automatically prompt you with a list of possible matches. if you can see the name of the destination you are searching for in the lower window, you can select it easily by selecting that name. if you wish to view the list of possible destinations in full press the down arrow to the top right hand corner of the display and a list of cities will be displayed then select your destination.
- Page 39 ● ● on page 76 for specific instructions). To return to the previous page press the return arrow located on the bottom ● ● right hand corner of the display. Return to contents 6 series V110.14 EN 39 • EN...
-
Page 40: Find By Map
The ‘Summary Screen’ will tell you the distance to your destination, estimated time of arrival and the estimated time it will take to complete your journey. Please note: The summary screen is only displayed for approximately 10 seconds before the unit automatically begins to provide you with turn-by-turn instructions. Return to contents 6 series V110.14 EN 40 • EN... -
Page 41: Find By Coordinate
‘Quick menu’ and then ‘Continue’ and follow the on screen instructions to calculate a route. easting and northing are geographic Cartesian coordinates. Press the eN button to enter easting and Northing co-ordinates Return to contents 6 series V110.14 EN 41 • EN... -
Page 42: Re-Route
Avoid by Range if you wish to avoid several roads from the selected route calculated by Snooper, then this function allows you to re-calculate a route over a user defined distance, ranging from 1 mile up to a maximum of 100 miles. -
Page 43: Avoid By Tmc
3.14.4 Clear Avoided Road if you do not wish to use the alternative routes offered by Snooper and you wish to return to the original calculated route, press the ‘Clear Avoided Road’ button and the original route plotted by Snooper will be restored. -
Page 44: Your Route
‘Calculate’ or if you need to change the vehicle press ‘Change’. 6. Continue adding roads to ‘Your route’ until you have constructed your desired routing. For accurate routing select small ‘links’. Return to contents 6 series V110.14 EN 44 • EN... -
Page 45: Route Description
● ● In order to use this function on Snooper you will need to have entered and calculated a route. If the ‘Route description’ icon is greyed out a route has NOT been entered. From the summary display you can either press ‘Go’ to start navigation, ‘Simulation’ to see the actual route that will be taken, ‘Route Option’... -
Page 46: Tmc
To separate the cables gently pull the two cable apart, stopping approach 10mm from the USB plug. Windscreen Windscreen Windscreen Windscreen The antenna is connected to Snooper via the USB socket on the left hand side of the unit, the antenna should be attached to the windscreen using the suckers provided. Navi Navi Navi... - Page 47 To show TMC events which are NOT on your route press To see a more detailed description press the TMC warning: To avoid the incident press Snooper will now calculate an alternative route. To view the incident press To return to the previous screen press...
-
Page 48: Campsite Search (Ventura Only)
3.18.2 Find around current position Ventura can search for a suitable location based on the following: Distance from your current position - selectable. ● ● Campsite facilities. ● ● Return to contents 6 series V110.14 EN 48 • EN... - Page 49 Press ‘City’ to enter the city details or press ‘All’ to search all cities. ● ● Press ‘Map’ to search using the map or press ‘Set’ to continue. ● ● Return to contents 6 series V110.14 EN 49 • EN...
-
Page 50: Favourites
Press the centre of the screen to access the ‘Navigate to’ menu. ● ● Press the ‘Find by favourites’ icon. ● ● Select the favourite destination you wish to use. ● ● Return to contents 6 series V110.14 EN 50 • EN... -
Page 51: Recent Destination
● Recent destination This function can be used to delete any or all of the recent destinations that are stored on Snooper. Snooper can store up to a maximum of 40 recent destinations. 4.2.1 To delete individually stored recent destinations Press the centre of the screen to access the ‘Navigate to’... -
Page 52: Home
Press the ‘Delete’ button – an information box will be displayed with ● ● ‘Delete home?’ and the options of ‘OK’ and ‘Cancel’. Press the ‘OK’ button and the ‘Home’ location will be deleted. ● ● Return to contents 6 series V110.14 EN 52 • EN... -
Page 53: Office
A map will displayed with a road highlighted in red closest to your current position. The name of the road selected will be displayed at the bottom of the display. if this is not correct, select the correct road with your finger. Return to contents 6 series V110.14 EN 53 • EN... -
Page 54: Configure Menu
● ● Press ‘OK’ ● ● Snooper will automatically save this location as your ‘Home’ or ‘Office’ destination. Configure The ‘Configure’ menu is used to customise the operation and appearance of your unit. To access the ‘Configure’ menu: Press the centre of the screen to enter the ‘Navigate to’ menu. -
Page 55: Caravan/Motorhome
Setting up vehicle parameters To enter the emission settings of your vehicle in car mode press the and enter the details as shown in the environmental setting section page: 56. Return to contents 6 series V110.14 EN 55 • EN... - Page 56 Retrofit - switch between yes (Y) and No(N) by pressing the Retrofit button press OK to save Enter vehicle Select Euro rating production date in YYYY-MM format Return to contents 6 series V110.14 EN 56 • EN...
-
Page 57: Truck
Carriage where the total net explosive mass per transport unit exceeds 1000 kg: Passage forbidden through tunnels of category B, C, D and e; does not exceed 1000 kg: Passage forbidden through tunnels of category C, D and e Return to contents 6 series V110.14 EN 57 • EN... -
Page 58: Bus & Coach
Weight: enter the weight of the vehicle here. Width: enter the width of the vehicle here. Weight per axle: enter the weight per axle of the vehicle here Num of axles: enter the number of axles here. Return to contents 6 series V110.14 EN 58 • EN... -
Page 59: Brightness Control
Brightness Control Snooper brightness can be adjusted using this function within the ‘Configure’ menu. To adjust the volume: Press the centre of the screen to enter the ‘Navigate to’ menu. ● ● Press ‘Configure’. ● ● Press the ‘Brightness Control’ icon. -
Page 60: Volume Control
Volume Control Snooper volume can be adjusted using this function within the ‘Configure’ menu. To adjust the volume: Press the centre of the screen to enter the ‘Navigate to’ menu. ● ● Press ‘Configure’. ● ● Press the ‘Volume Control’ icon. -
Page 61: Speed/Time
Your new settings will now be saved and will appear on the screen each time you use Snooper. Return to contents 6 series V110.14 EN... -
Page 62: Map Text Size
Select the text size then press OK to save and exit. 5.6.6 Car Icon This option allows you to choose the icon which appears on the navigation screen. Press the required icon then press OK to save. Truck Default Motorhome Return to contents 6 series V110.14 EN 62 • EN... -
Page 63: Lane Guidance
Junction Numbers Off Camera alert In order for these features to operate you will need to subscribe to and download the AURA™ Camera Database onto Snooper. See ‘Registering Snooper’ (Page 7) and ‘System Requirements & Downloading’ (page 10) for further details. -
Page 64: Alert Sound
Snooper display by the icon. *Please note: Snooper will only provide alerts to Primary Schools at the following specified times: 08:30 – 09:30; 12:00 – 13:00 and 15:30 – 16:30. To make your selection, touch the relevant radio button. -
Page 65: Route Alert
5.6.13 Route Alert if you deviate from the calculated route, Snooper will automatically recalculate a route without any user intervention. To indicate rerouting is in progress Snooper will emit an audible tone. You can choose between the following options: Yes: The re-route tone will be emitted during recalculation. -
Page 66: My Speed Xl (Syrius Only)
*In order for these features to operate you will need to subscribe to and download the AURA™ Camera Database onto Snooper. See ‘Registering Snooper’ (Page 7) and ‘System Requirements & Downloading’ (page 10) for further details. -
Page 67: Telematics
Change Map Colour This function allows you to choose between the alternative colour schemes that are available for the maps used in the Snooper system (several of which are most suitable for use at night). To access this facility: Press the centre of the screen to enter the ‘Navigate to’... -
Page 68: Qwerty Keyboard
If you wish to keep the settings unchanged, you can exit the ‘Qwerty keyboard’ menu by pressing the return arrow located in the bottom right hand corner of the display. Return to contents 6 series V110.14 EN 68 • EN... -
Page 69: Tmc
TMC aerial is not plugged in or has not been detected. If you wish to exit the TMC function without saving any changes press the return arrow located in the bottom right hand corner of the display. Return to contents 6 series V110.14 EN 69 • EN... -
Page 70: System Security Code
*if the button displays ‘Change Code’ then a security code has already been set. Press ‘Change Code’ to edit the system security code. Once this setting has been activated you will need to enter this code each time you power on your Snooper or you will not be able to operate the device. -
Page 71: Fm Transmitter
108.00Mhz or 87.5MHz are normally clear in the UK. 3. Press ‘+’ or ‘-’ FMT tune the 6 series to the same frequency. eG 108.00MHz 4. Press OK to save. -
Page 72: Version (Hardware & Software)
5.17 Show POI Snooper comes complete with a comprehensive list of POi’s (Point’s of interest). You can search for addresses using POi’s and save POi’s in your list of favourites. You can also choose which of the POi’s you would like to have indicated on your map. -
Page 73: Route Option
This option will calculate a route based on time using a combination of Motorways, ‘A roads’ and ‘B roads’ as necessary. The route is calculated by Snooper to navigate you to your destination in the shortest time possible whilst adhering to the national speed limits. -
Page 74: Navigate Avoiding Road
Avoid by Range if you wish to avoid several roads from the selected route calculated by Snooper, then this function allows you to re-calculate a route over a user defined distance, ranging from 1 mile up to a maximum of 100 miles. -
Page 75: Clear Avoided Road
6.2.4 Clear Avoided Road if you do not wish to use the alternative routes offered by Snooper and you wish to return to the original calculated route, press the ‘Clear Avoided Road’ button and the original route plotted by Snooper will be restored. -
Page 76: Change Start Position
6.5.1 Simulation Press the ‘Simulation’ button and Snooper will take you through the calculated journey step by step with full on screen and voice instructions. Simulation speed can be increased to a maximum of ten times ‘real time’... -
Page 77: Quick Access Menu
(Does not apply for the S2500 Model). Please note that this new setting is only temporary and if Snooper is switched off and then back on the audio level returns to either the factory default or your personalised setting. -
Page 78: Camera Alerts
To restore the camera alerts press the top of Snooper’s display to show the drop down menu and then press the camera icon. -
Page 79: Understanding The Mapping Screen
Distance to next junction or the route you will be instruction taking Whilst navigating a calculated route the Snooper display will Next motorway exit show an information box. This or road you are due to box will tell you the next road you... -
Page 80: Bluetooth
This screen (fig. 1) shows that there are no devices are currently paired with the 6 series. Press ‘Search Device’ then press ‘Search’ to start the pairing process. NOTE: Ensure that Bluetooth is active and that the telephone and/or Bluetooth device that the is in ‘discovery mode’... -
Page 81: Bluetooth Main Menu
, TPMS etc 9. 1 Bluetooth main menu Displays devices which are connected to the 6 series. Switch Bluetooth On and Off (see section above) Press to show, edit , connect or delete Bluetooth devices currently paired or connected to the 6 series (see section above) Press to access the dial pad, call features and call logs. -
Page 82: Call Record
Skin (currently only 1 skin is available) Keyboard Save We recommend that you do not change any of the device settings Call settings Adjust the ringing volume by moving volume control Press ‘Set’ to save Return to contents 6 series V110.14 EN 82 • EN... -
Page 83: Music
* if this information is not available or not being transmitted then no information will be shown. To play media via the 6 series the music player or music application (app) MUST be open and running on the mobile device. -
Page 84: Tyre Pressure Monitoring System (Tpms)
The basic starter kit you will need is either STP1800 or STP1600 (depending on the vehicle type), this kit includes a bluetooth interface which is necessary to connect the sensors to the 6 series. To connect the interface with the 6 series open the Bluetooth menu > Configure > Bluetooth Bluetooth Off... -
Page 85: Selecting Vehicle Type
10.2 Selecting vehicle type: Snooper Tyre Pilot has been designed to be used on a range of different vehicles, including cars, caravans, motorhomes, trucks,buses, coaches and trailers and it can also monitor your spare wheel. Tyre Pilot has been designed to monitor the following configurations: Single vehicle up to 4 wheels ●... -
Page 86: Pairing The Sensors
BeFOre installing the next sensor. The sensors will only transmit when they are fitted to the tyre valve and can they ‘sense’ air pressure from the tyre. Refer to section 10.4.3 for details on how to install the sensors to the wheel valves. Return to contents 6 series V110.14 EN 86 • EN... - Page 87 1. Use the hex wrench provided to remove the anti-theft screw and remove the sensor from the tyre valve. 2. Use the battery replacement tool to unscrew the sensor cap. screw Return to contents 6 series V110.14 EN 87 • EN...
- Page 88 1. remove the tyre valve cap and mount the corresponding sensor on the valve using the wrench provided. Please keep the wrench Do not over tighten the for future use. sensor cap to prevent possible damage. Return to contents 6 series V110.14 EN 88 • EN...
- Page 89 6. Check that the water-proof rubber seal is in the correct position. Screw the sensor cap back on and re-install the anti-theft housing. Follow the installation instructions above to re-install the sensor on the appropriate tyre valve. Water-proof rubber seal Return to contents 6 series V110.14 EN 89 • EN...
-
Page 90: Bluetooth Interface Installation
10.4.5 Bluetooth Interface Installation The Bluetooth interface should be mounted within 16 feet (5 meters) of the 6 series. it should be mounted securely with the screws provided. We would recommend that the unit is accessible for programming purposes. The Bluetooth interface should have 12V/24v DC power when the vehicle is moving. -
Page 91: Settings
Selecting your high pressure and low pressure limits Follow these instructions to select at which high or low pressure limits you would like your Snooper Tyre Pilot to alert. 1. Next to each axle write down what your tyre pressure is by axle and calculate what your alarm setting will be. -
Page 92: Minimise Tpms
TMPS icon on the mapping screen will turn red and the 6 series will emit a warning beep. To quickly access the TPMS menu press the icon on the mapping screen. -
Page 93: Low Battery
TPMS sensors is becoming discharged, the low battery warning will be displayed on the TPMS menu. For instructions on how to replace the battery refer to page 89 Return to contents 6 series V110.14 EN 93 • EN... -
Page 94: Combinations
Truck, van, motorhome with trailer The tyre pressures and temperatures shown in this user manual are for illustration purposes ONLY, users should consult the vehicle or tyre manufacture for the recommended settings Return to contents 6 series V110.14 EN 94 • EN... -
Page 95: Updating Maps
11. Updating Maps New mapping is periodically released by Snooper. To check if map updates are available please visit: https://www.snooperneo.co.uk/MapSerialCheck.cfm NOTE: Your device must be registered at https://www.snooperneo.co.uk/RegisterSatNav.cfm to receive map updates and map updates may be chargeable. 1. Once on the website you will be asked for information appertaining to your device. - Page 96 13. The update is complete, disconnect your device from the PC and close the program. IMPORTANT: FOR SUBSEQUENT MAP UPDATES YOU DO NOT NEED TO CARRY OUT STEPS 1 to 6 AND THE MAP DOWNLOADER IS ALREADY INSTALLED ON YOUR PC. Return to contents 6 series V110.14 EN 96 • EN...
-
Page 97: Troubleshooting Snooper Downloads
Snooper Downloads if you are having any difficulty in performing a download onto the Snooper unit it is advisable to refer to the checklist in Section A first before contacting us. if you are still unable to perform a download after following all of this checklist then please send an email to Support@snooper.eu... - Page 98 Snooper software. if you do have a Firewall on your computer the Snooper Updater software may appear to stop and it is at this point that your Firewall software will inform you that Snooper Updater software is trying to access the internet. Please make sure that you grant/allow/permit access through the Firewall.
- Page 99 USB cable is not damaged. 10. Can’t mount the cradle Please remove the dust from the place you want to mount. Please wash and dry the suction-cup in running water and try again. Return to contents 6 series V110.14 EN 99 • EN...
-
Page 100: Specification
1~2years (Cr1632) Weight 19 grams Weight 12 grams Size Diameter 21mm Height 21mm Size without anti theft housing Diameter 21mm Height 21mm Size with anti theft housing Diameter 28mm Height 24mm Return to contents 6 series V110.14 EN 100 • EN... - Page 101 Battery We recommend that you fully charge the battery before you use Snooper for the first time. A new battery or one that has not been used for a long time could have a reduced capacity the first few times it is used.
-
Page 102: Accessories
Accessories & Price list The following accessories are available from your local Snooper dealer. For further details please contact our sales department on 0333 240 1000 (Option 1). £149.99 replacement european Mapping Micro-SD Card in-car charger (24v/12v DC) adaptor £19.99 Straight hard wire lead with fuse (24v/12v) £19.99... -
Page 103: Service Under Warranty
9. The sole responsibility of Snooper under this Limited Warranty shall be limited to the repair of the product or the replacement of the product only (whichever is deemed appropriate and at the sole discretion of Snooper).
Need help?
Do you have a question about the 6 Series and is the answer not in the manual?
Questions and answers